如何使用 Azure DevOps 發佈 雲端服務(外延支援)
本文提供如何使用 Azure Resource Manager (ARM) 範本來建立或更新 Azure 雲端服務(外延支援)部署的指引。
Background
Azure 雲端服務(外延支援)是適用於 Azure 雲端服務 的新 ARM 型部署模型。 雲端服務 (延伸支援) 有提供區域復原的主要優點,以及使用 Azure Service Manager 部署的 Azure 雲端服務同等功能。 它也提供一些 ARM 功能,例如角色型訪問控制 (RBAC)、標籤、原則和支援部署範本。
針對傳統 雲端服務,Azure DevOps 內建管線工作AzureCloudPowerShellDeployment@1可協助輕鬆管理 CI/CD 進度。 但 雲端服務(外延支援)的工作尚未就緒。
發佈 雲端服務 的主要點(外延支援)
- 定義記憶體帳戶的一些變數,以準備 ARM 範本部署。
- 使用 VSBuild@1 - Visual Studio 組建 v1 工作來建置雲端服務專案,並輸出雲端服務套件檔案或組態檔。
- 使用內 建AzureFileCopy@5 - Azure 檔案複製 v5 工作 ,將組建目錄上傳至 Blob 記憶體。
- 使用記憶體參考,包括存取密鑰,以透過 AzurePowerShell@5 - Azure PowerShell v5 工作產生 SAS 令牌,並將令牌輸出至將在下一個工作中使用的變數。
- 使用上一個工作的輸出,以及 AzureResourceManagerTemplateDeployment@3 - ARM 範本部署 v3 工作的值。

發佈 雲端服務 的步驟(外延支援)
建立入門管線,並準備上傳至記憶體帳戶。 這些變數可協助進行下列進一步作業。
- <stg_account記憶體帳戶的名稱>
- <stg_key記憶體帳戶的存取金鑰>
- <stg_container記憶體帳戶的容器名稱>
- stg_prefix $[format('{0:yyyyMMddHHmm}', pipeline.startTime)]
- stg_url
https://$(stg_account).blob.core.windows.net/$(stg_container) - <cscfg_name組態檔的名稱>
- <cspkg_name封裝檔案的名稱>
- url_cscfg $(stg_url)/$(stg_prefix)/$(cscfg_name)
- url_cspkg $(stg_url)/$(stg_prefix)/$(cspkg_name)

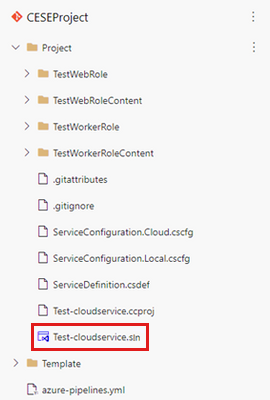
使用 Visual Studio 建置工作,根據雲端服務專案方案檔建置工作,並將它輸出至代理程式的本機路徑。 如需詳細資訊,請參閱 MSBuild。

以下是用來建置專案的 YAML 檔案:
# Build your project under your repository.
# 1. Restore the NuGet dependency.

- task: NuGetCommand@2
  inputs:
    command: 'restore'
    restoreSolution: '**/*.sln'
    feedsToUse: 'select'
    vstsFeed: xxx

# 2. Use MS build to output the cloud service project configuration and package to the temporary location of the local agent.

- task: VSBuild@1
  inputs:
    solution: '**\*.sln'
    msbuildArgs: '/t:Publish /p:DeployOnBuild=true /p:AutomatedBuild=True /p:configuration=release /p:TargetProfile=Cloud /p:PublishDir=%SYSTEM_DEFAULTWORKINGDIRECTORY%/Debug/publish'

# 3. Copy the configuration and package files to the local path on the agent where any artifacts locate.

- task: CopyFiles@2
  inputs:
    SourceFolder: 'Debug/publish'
    Contents: '**'
    TargetFolder: '$(Build.ArtifactStagingDirectory)'

# 4. Copy the definition file to the local path on the agent where any artifacts locate.

- task: CopyFiles@2
  inputs:
    SourceFolder: 'Project'
    Contents: '*.csdef'
    TargetFolder: '$(Build.ArtifactStagingDirectory)'
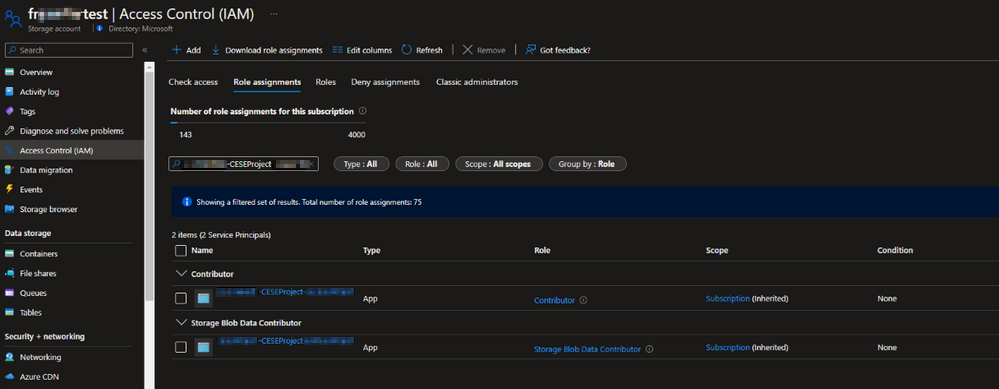
使用管線工作 AzureFileCopy@4 - Azure 檔案複製 v4 工作 來上傳雲端服務的組態、定義和套件檔案。 工作支持根據Microsoft Entra標識符進行驗證。 您可以使用服務主體和受控識別來完成驗證。 您可以指派許可權參與者和記憶體 Blob 資料參與者,以允許 存取服務連線。
在項目設定中尋找服務主體:
檔案複製的 YAML 版本:
# Upload the cloud service via Azure File Copy
- task: AzureFileCopy@5
  inputs:
    SourcePath: '$(Build.ArtifactsStagingDirectory) /*'        # you can set $(Build.ArtifactsStagingDirectory) as Build part for output of the MSBuild.
    azureSubscription: xxx                                     # the name of service connector
    Destination: 'AzureBlob'
    storage: $(stg_account)                                    # variable stg_account
    ContainerName: $(stg_container)                            # variable stg_container
    BlobPrefix: $(stg_prefix)                                  # variable stg prefix is $[format('{0:yyyyMMddHHmm}', pipeline.startTime)]
    AdditionalArgumentsForBlobCopy: '--recursive'              # recursively copy the files in this directory
複製檔案之後,您會看到記憶體中複製的雲端服務套件。
使用 Azure PowerShell 管線工作來產生暫存 SAS 令牌五分鐘。
# Generate temp SAS token for 5 mins
- task: AzurePowerShell@5                                                     # please make sure the Azure PowerShell contains the module of Az and AzureRm.
  name: GenerateSasToken
  inputs:
    azureSubscription: xxx                                                    # the name of service connector
    ScriptType: 'InlineScript'
    Inline: |
      $account_name = ${env:STG_ACCOUNT}
      $account_key = ${env:STG_KEY}
      $context = New-AzStorageContext -StorageAccountName $account_name -StorageAccountKey $account_key
      $sas = New-AzStorageAccountSASToken -Service Blob -ResourceType Service,Container,Object -Permission "rl" -ExpiryTime (Get-Date).AddMinutes(5) -Context $context
      $cspkg = ${env:URL_CSPKG} + $sas
      $cscfg = ${env:URL_CSCFG} + $sas
      Write-Host ("##vso[task.setvariable variable=cspkg]$cspkg")             # output $cspkg in PowerShell to global variable cspkg
      Write-Host ("##vso[task.setvariable variable=cscfg]$cscfg")             # output $cscfg in PowerShell to global variable cscfg
    azurePowerShellVersion: 'LatestVersion'
使用 ARM 範本管線工作來部署 雲端服務 (外延支援) 部署。 若要取得範例範本,請參閱 101-cses-multirole-rdp。
#Azure Resource Manager template deployment
- task: AzureResourceManagerTemplateDeployment@3
  inputs:
    deploymentScope: 'Resource Group'                                           # resource group level deployment
    azureResourceManagerConnection: xxx                                         # the name of service connector
    subscriptionId: xxx                                                         # subscription id of the service connector
    action: 'Create Or Update Resource Group'
    resourceGroupName: 'rg-002'
    location: 'Australia Central'
    templateLocation: 'Linked artifact'
    csmFile: 'Template/CSES.template.json'
    csmParametersFile: 'Template/CSES.parameter.json'
    overrideParameters: '-packageSasUri $(cspkg) -configurationSasUri $(cscfg) -cloudServiceName cses4test002 -deploymentLabel deploy$(stg_prefix)' # overwrite some parameters of template.
    deploymentMode: 'Incremental'
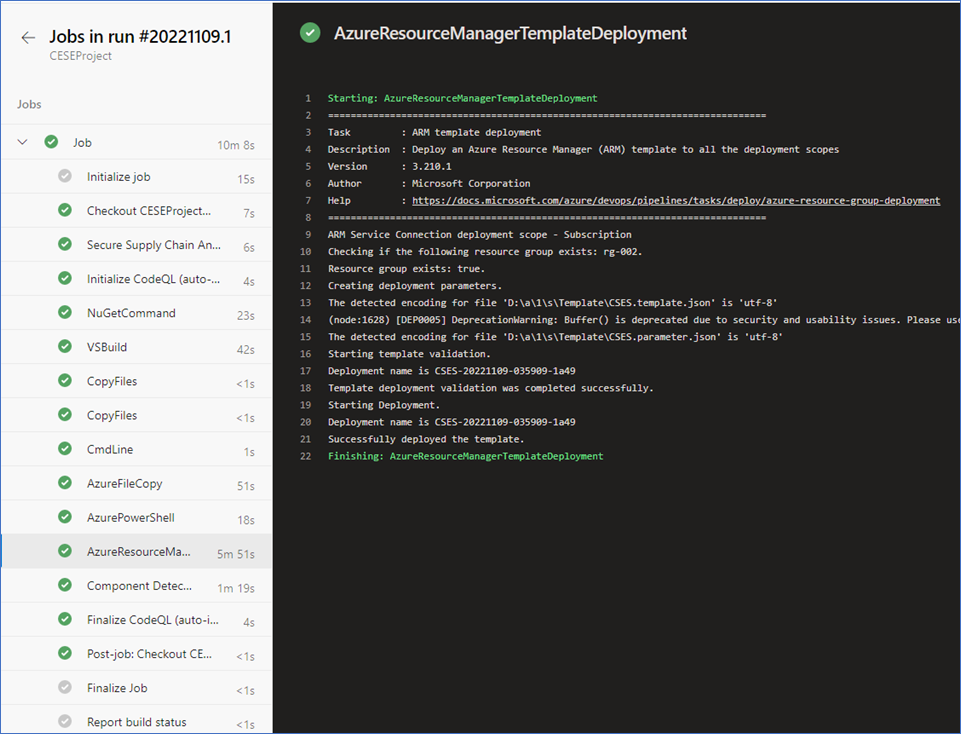
部署完成之後,您應該會看到下列工作結果和具有 標籤的雲端服務。 您可以變更程式代碼和設定,以更新目前的部署。
在 Azure 入口網站 中,您可以在雲端服務資源群組中找到部署結果。
部署標籤應該與您定義的時間戳相同。
與我們連絡,以取得說明
如果您有問題或需要相關協助,請建立支援要求,或詢問 Azure community 支援。 您也可以向 Azure 意見反應社群提交產品意見反應。


