練習 - 使用 @page 指示詞,變更 Blazor 應用程式中的導覽方式
Blazor 具有導覽狀態協助程式,可協助 C# 程式碼管理應用程式的 URI。 另外也有 NavLink 元件,是 <a> 元素的插入式取代。 NavLink 的其中一項功能是將作用中類別新增至應用程式功能表的 HTML 連結。
您的小組已經開始使用 Blazing Pizza 應用程式,並且已建置 Blazor 元件來代表披薩與訂單。 該應用程式現在需要新增結帳與其他訂單相關頁面。
在此練習中,您將新增結帳頁面、將上方瀏覽區新增至應用程式,然後使用 Blazor NavLink 元件來改善程式碼。
複製小組現有的應用程式
注意
本課程模組使用 .NET 命令列介面 (CLI) 和 Visual Studio Code 進行本機開發。 完成本課程模組之後,您可以使用 Visual Studio (Windows) 或 Visual Studio for Mac (macOS) 來套用概念。 若要繼續開發,請使用適用於 Windows、Linux 與 macOS 的 Visual Studio Code。
本課程模組使用 .NET 6.0 SDK。 確認您已在慣用終端中執行下列命令來安裝 .NET 6.0:
dotnet --list-sdks
您會看到類似以下的輸出:
3.1.100 [C:\program files\dotnet\sdk]
5.0.100 [C:\program files\dotnet\sdk]
6.0.100 [C:\program files\dotnet\sdk]
確定已列出開頭為 6 的版本。 如果未列出任何項目或找不到命令,則請安裝最新的 .NET 6.0 SDK。
若您之前尚未建立 Blazor 應用程式,請遵循 Blazor 的安裝指示來安裝正確的 .NET 版本,並檢查您的電腦是否已正確設定。 在 [建立您的應用程式] 步驟停止。
開啟 Visual Studio Code。
選取 [檢視],從 Visual Studio Code 開啟整合式終端。 然後在主功能表上,選取 [終端]。
在終端中,移至您想要建立專案的位置。
從 GitHub 複製應用程式。
git clone https://github.com/MicrosoftDocs/mslearn-blazor-navigation.git BlazingPizza選取 [檔案],然後選取 [開啟資料夾]。
在 [開啟] 對話方塊中,移至 [BlazingPizza] 資料夾,然後選擇 [選取資料夾]。
Visual Studio Code 可能會提示您相關的未解決相依性。 選取還原。
執行應用程式以確認一切正常運作。
在 Visual Studio Code 中,選取 F5。 或在 [執行] 功能表上,選取 [開始偵錯]。

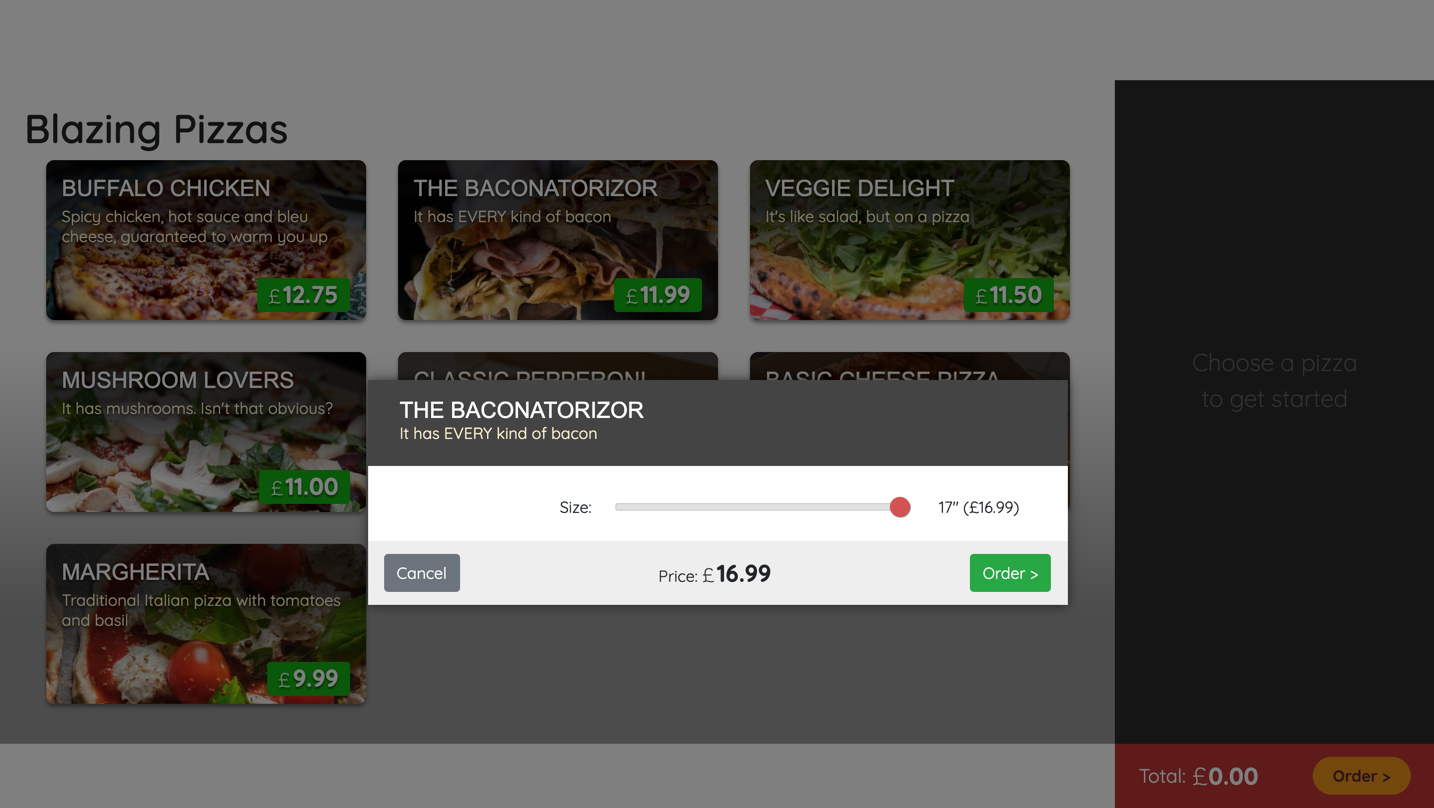
設定一些披薩,然後新增至訂單。 選取頁面底部的 [訂單>]。 預設的「404 找不到」訊息隨即出現,因為還沒有結帳頁面。
若要停止該應用程式,請選取 Shift + F5。
新增結帳頁面
在 Visual Studio Code 的檔案總管中,選取 [App.razor]。
<Router AppAssembly="@typeof(Program).Assembly" PreferExactMatches="@true"> <Found Context="routeData"> <RouteView RouteData="@routeData" /> </Found> <NotFound> <LayoutView> <p>Sorry, there's nothing at this address.</p> </LayoutView> </NotFound> </Router><NotFound>程式碼區塊是客戶嘗試前往不存在的頁面時會看到的訊息。在檔案總管中,展開 [頁面],以滑鼠右鍵按一下資料夾,然後選取 [新增檔案]。
將新檔案命名為 Checkout.razor。 在此檔案中,寫入下列程式碼:
@page "/checkout"
@inject OrderState OrderState
@inject HttpClient HttpClient
@inject NavigationManager NavigationManager

<div class="top-bar">
    <a class="logo" href="">
        <img src="img/logo.svg" />
    </a>

    <a href="" class="nav-tab">
        <img src="img/pizza-slice.svg" />
        <div>Get Pizza</div>
    </a>

</div>

<div class="main">
    <div class="checkout-cols">
        <div class="checkout-order-details">
            <h4>Review order</h4>
            @foreach (var pizza in Order.Pizzas)
            {
                <p>
                    <strong>
                        @(pizza.Size)"
                        @pizza.Special.Name
                        (£@pizza.GetFormattedTotalPrice())
                    </strong>
                </p>
            }

            <p>
                <strong>
                    Total price:
                    £@Order.GetFormattedTotalPrice()
                </strong>
            </p>
        </div>
    </div>

    <button class="checkout-button btn btn-warning">
        Place order
    </button>
</div>

@code {
    Order Order => OrderState.Order;
}
此頁面是以目前的應用程式為基礎所建置,並使用以
OrderState儲存的應用程式狀態。 第一個div是應用程式的新標頭導覽。 讓我們將其新增至索引頁面。在檔案總管中展開 [頁面],然後選取 [index.razor]。
在
<div class="main">類別上方,新增top-barHTML。<div class="top-bar"> <a class="logo" href=""> <img src="img/logo.svg" /> </a> <a href="" class="nav-tab" > <img src="img/pizza-slice.svg" /> <div>Get Pizza</div> </a> </div>當我們在此頁面時,藉由醒目提示連結來顯示客戶是個不錯的做法。 小組已建立
activecss 類別,因此請將active新增至已包含nav-tab樣式的class屬性。<div class="top-bar"> <a class="logo" href=""> <img src="img/logo.svg" /> </a> <a href="" class="nav-tab active" > <img src="img/pizza-slice.svg" /> <div>Get Pizza</div> </a> </div>在 Visual Studio Code 中,選取 F5。 或在 [執行] 功能表上,選取 [開始偵錯]。
應用程式的頂端現在有很不錯的功能表列,其中包含公司的標誌。 新增一些披薩,並將訂單進度推進到結帳頁面。 您會看到列出的披薩,以及功能表遺漏的作用中指標。

若要停止該應用程式,請選取 Shift + F5。
允許客戶下單
目前,結帳頁面不允許客戶下單。 應用程式的邏輯必須先儲存訂單,才能傳送至廚房。 傳送訂單之後,請將客戶重新導向回到首頁。
在檔案總管中展開 [頁面],然後選取 [Checkout.razor]。
呼叫
PlaceOrder方法來修改按鈕元素。 新增@onclick和disabled屬性,如下所示:<button class="checkout-button btn btn-warning" @onclick="PlaceOrder" disabled=@isSubmitting> Place order </button>我們不希望客戶重複下單,因此請在系統處理好訂單之前,停用 [下單] 按鈕。
在
@code區塊的Order Order => OrderState.Order;程式碼下方新增此程式碼。bool isSubmitting; async Task PlaceOrder() { isSubmitting = true; var response = await HttpClient.PostAsJsonAsync(NavigationManager.BaseUri + "orders", OrderState.Order); var newOrderId= await response.Content.ReadFromJsonAsync<int>(); OrderState.ResetOrder(); NavigationManager.NavigateTo("/"); }上述程式碼會停用 [下單] 按鈕、發佈 JSON 並將它新增至 pizza.db、清除訂單,以及使用
NavigationManager將客戶重新導向至首頁。您需要新增可處理訂單的程式碼。 為此工作新增 OrderController 類別。 若您查看 PizzaStoreContext.cs,則只會看到
PizzaSpecials的 Entity Framework 資料庫支援。 讓我們先修正此問題。
新增訂單與披薩的 Entity Framework 支援
在檔案總管中,選取 [PizzaStoreContext.cs]。
以此程式碼取代
PizzaStoreContext類別:public class PizzaStoreContext : DbContext { public PizzaStoreContext( DbContextOptions options) : base(options) { } public DbSet<Order> Orders { get; set; } public DbSet<Pizza> Pizzas { get; set; } public DbSet<PizzaSpecial> Specials { get; set; } public DbSet<Topping> Toppings { get; set; } protected override void OnModelCreating(ModelBuilder modelBuilder) { base.OnModelCreating(modelBuilder); // Configuring a many-to-many special -> topping relationship that is friendly for serialization modelBuilder.Entity<PizzaTopping>().HasKey(pst => new { pst.PizzaId, pst.ToppingId }); modelBuilder.Entity<PizzaTopping>().HasOne<Pizza>().WithMany(ps => ps.Toppings); modelBuilder.Entity<PizzaTopping>().HasOne(pst => pst.Topping).WithMany(); } }此程式碼會新增應用程式訂單與披薩類別的 Entity Framework 支援。
在 Visual Studio Code 的功能表中,依序選取 [檔案]> [新增文字檔]。
選取 C# 語言,然後輸入下列程式碼:
using Microsoft.AspNetCore.Mvc;
using Microsoft.EntityFrameworkCore;

namespace BlazingPizza;

[Route("orders")]
[ApiController]
public class OrdersController : Controller
{
    private readonly PizzaStoreContext _db;

    public OrdersController(PizzaStoreContext db)
    {
        _db = db;
    }

    [HttpGet]
    public async Task<ActionResult<List<OrderWithStatus>>> GetOrders()
    {
        var orders = await _db.Orders
        .Include(o => o.Pizzas).ThenInclude(p => p.Special)
        .Include(o => o.Pizzas).ThenInclude(p => p.Toppings).ThenInclude(t => t.Topping)
        .OrderByDescending(o => o.CreatedTime)
        .ToListAsync();

        return orders.Select(o => OrderWithStatus.FromOrder(o)).ToList();
    }

    [HttpPost]
    public async Task<ActionResult<int>> PlaceOrder(Order order)
    {
        order.CreatedTime = DateTime.Now;

        // Enforce existence of Pizza.SpecialId and Topping.ToppingId
        // in the database - prevent the submitter from making up
        // new specials and toppings
        foreach (var pizza in order.Pizzas)
        {
            pizza.SpecialId = pizza.Special.Id;
            pizza.Special = null;
        }

        _db.Orders.Attach(order);
        await _db.SaveChangesAsync();

        return order.OrderId;
    }
}
上述程式碼可讓應用程式取得目前的所有訂單,並且下單。
[Route("orders")]Blazor 屬性可讓此類別處理 /orders 與 /orders/{orderId} 的傳入 HTTP 要求。使用 Ctrl+S 儲存變更。
在檔案名稱部分,請使用 OrderController.cs。 請務必將檔案儲存在與 OrderState.cs 相同的目錄中。
在檔案總管中,選取 [OrderState.cs]。
在
RemoveConfiguredPizza方法下方的類別底部,修改ResetOrder()以重設訂單:public void ResetOrder() { Order = new Order(); }
測試結帳功能
在 Visual Studio Code 中,選取 F5。 或在 [執行] 功能表上,選取 [開始偵錯]。
應用程式應該會進行編譯,但如果您建立訂單並嘗試結帳,您會看到執行階段錯誤。 發生錯誤的原因是,我們的 pizza.db SQLLite 資料庫是在支援訂單與披薩之前所建立。 我們必須先刪除檔案,才能正確建立新的資料庫。
若要停止該應用程式,請選取 Shift + F5。
在檔案總管中,刪除 pizza.db 檔案。
選取 F5。 或在 [執行] 功能表上,選取 [開始偵錯]。
作為測試,請新增披薩、移至結帳,然後下單。 您會被重新導向至首頁,並看到現在的訂單為空白。
若要停止該應用程式,請選取 Shift + F5。
應用程式正在不斷改善。 我們有披薩設定與結帳。 我們想要讓客戶在下單後看到其披薩訂單的狀態。
新增訂單頁面
在檔案總管中,展開 [頁面],以滑鼠右鍵按一下資料夾,然後選取 [新增檔案]。
將新檔案命名為 MyOrders.razor。 在此檔案中,寫入下列程式碼:
@page "/myorders" @inject HttpClient HttpClient @inject NavigationManager NavigationManager <div class="top-bar"> <a class="logo" href=""> <img src="img/logo.svg" /> </a> <a href="" class="nav-tab"> <img src="img/pizza-slice.svg" /> <div>Get Pizza</div> </a> <a href="myorders" class="nav-tab active"> <img src="img/bike.svg" /> <div>My Orders</div> </a> </div> <div class="main"> @if (ordersWithStatus == null) { <text>Loading...</text> } else if (!ordersWithStatus.Any()) { <h2>No orders placed</h2> <a class="btn btn-success" href="">Order some pizza</a> } else { <div class="list-group orders-list"> @foreach (var item in ordersWithStatus) { <div class="list-group-item"> <div class="col"> <h5>@item.Order.CreatedTime.ToLongDateString()</h5> Items: <strong>@item.Order.Pizzas.Count()</strong>; Total price: <strong>£@item.Order.GetFormattedTotalPrice()</strong> </div> <div class="col"> Status: <strong>@item.StatusText</strong> </div> @if (@item.StatusText != "Delivered") { <div class="col flex-grow-0"> <a href="myorders/" class="btn btn-success"> Track > </a> </div> } </div> } </div> } </div> @code { List<OrderWithStatus> ordersWithStatus = new List<OrderWithStatus>(); protected override async Task OnParametersSetAsync() { ordersWithStatus = await HttpClient.GetFromJsonAsync<List<OrderWithStatus>>( $"{NavigationManager.BaseUri}orders"); } }必須在所有現有的頁面上變更導覽,以包括 [我的訂單] 新頁面的連結。 開啟 Checkout.razor 與 Index.razor,然後以下列程式碼取代導覽:
<div class="top-bar">
    <a class="logo" href="">
        <img src="img/logo.svg" />
    </a>

    <a href="" class="nav-tab active" >
        <img src="img/pizza-slice.svg" />
        <div>Get Pizza</div>
    </a>

    <a href="myorders" class="nav-tab" >
        <img src="img/bike.svg" />
        <div>My orders</div>
    </a>

</div>
使用
<a>元素,我們可以藉由新增activeCSS 類別,以手動方式管理哪一個是作用中頁面。 讓我們更新所有導覽以改用 NavLink 元件。在導覽 (Index.razor、Checkout.razor 和 MyOrders.razor) 的這三個頁面上,使用相同的 Blazor 程式碼進行瀏覽:
<div class="top-bar"> <a class="logo" href=""> <img src="img/logo.svg" /> </a> <NavLink href="" class="nav-tab" Match="NavLinkMatch.All"> <img src="img/pizza-slice.svg" /> <div>Get Pizza</div> </NavLink> <NavLink href="myorders" class="nav-tab"> <img src="img/bike.svg" /> <div>My Orders</div> </NavLink> </div>activeCSS 類別現在已由 NavLink 元件自動新增至頁面。 您不需要記住要在導覽所在的每個頁面上執行此動作。最後一個步驟是變更
NavigationManager,以在下單之後重新導向至myorders頁面。 在檔案總管中展開 [頁面],然後選取 [Checkout.razor]。透過將
/myorders傳遞至NavigationManager.NavigateTo(),以變更PlaceOrder方法來重新導向至正確的頁面:async Task PlaceOrder() { isSubmitting = true; var response = await HttpClient.PostAsJsonAsync($"{NavigationManager.BaseUri}orders", OrderState.Order); var newOrderId = await response.Content.ReadFromJsonAsync<int>(); OrderState.ResetOrder(); NavigationManager.NavigateTo("/myorders"); }在 Visual Studio Code 中,選取 F5。 或在 [執行] 功能表上,選取 [開始偵錯]。

您應該能夠訂購一些披薩,然後查看目前資料庫中的訂單。
選取 Shift + F5 以停止該應用程式。