Determine your solution and environment strategy
This unit provides an example of developing your solution and environment strategy from start to finish. The first task is to view your solutions. Then, you’ll outline what you want the solution segmentation to look like. This example uses vertical solution segmentation.
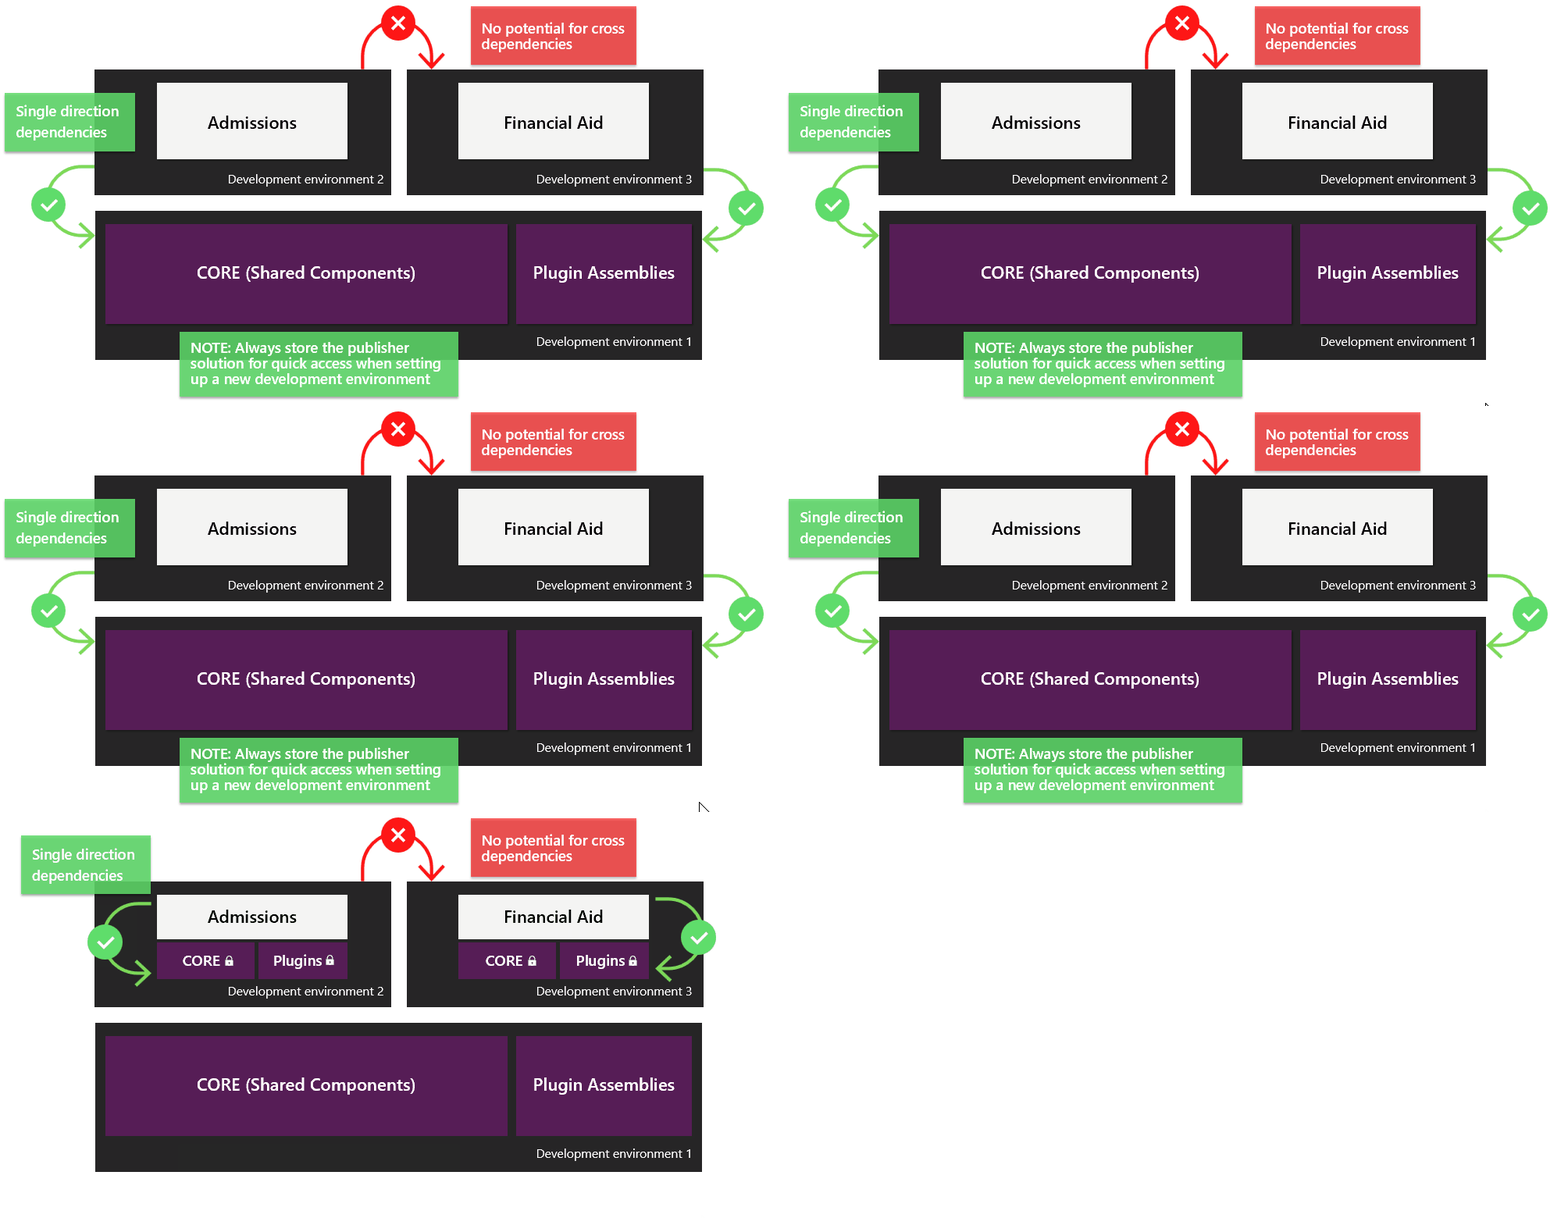
Additionally, this example applies an environment strategy that aligns with the solution architecture. Always ensure that the publisher solution is stored for quick access when you’re setting up a new development environment.
Consider the following parameters when storing publisher solutions:
Storing the publisher solution in source will allow us to share the publisher to new development environments as an unmanaged solution, ensuring accurate setup.
Using a single publisher for all work is recommended.
Solution layering
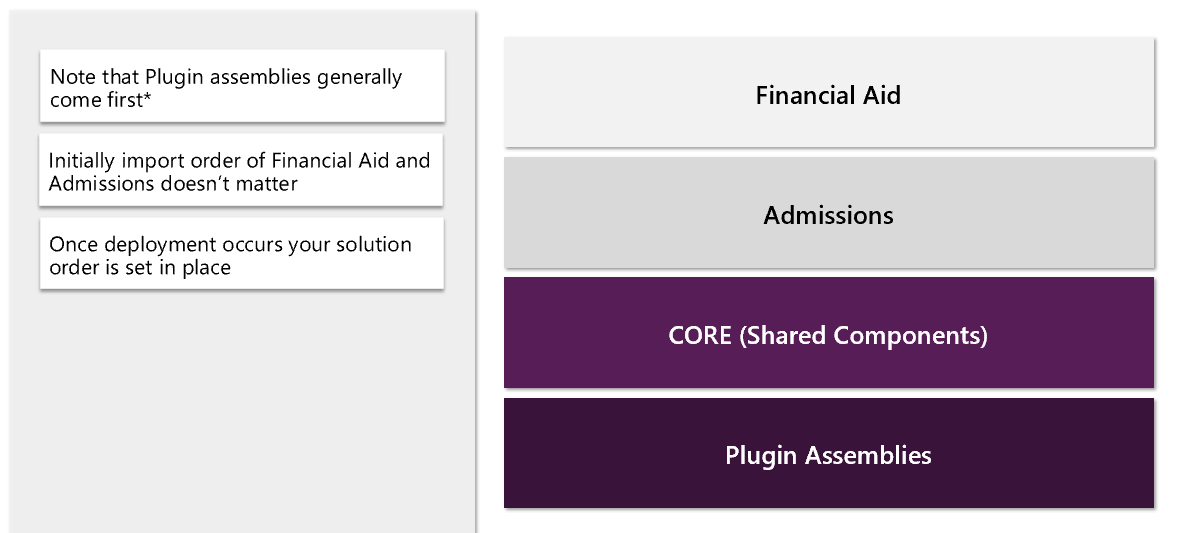
The following image shows layering, post-deployment for a managed solution.

For plug-ins, SDK Message processing creates dependencies that enforce an import order for solutions. Therefore, plug-in assemblies are generally imported first.
Solution and environment strategy in practice
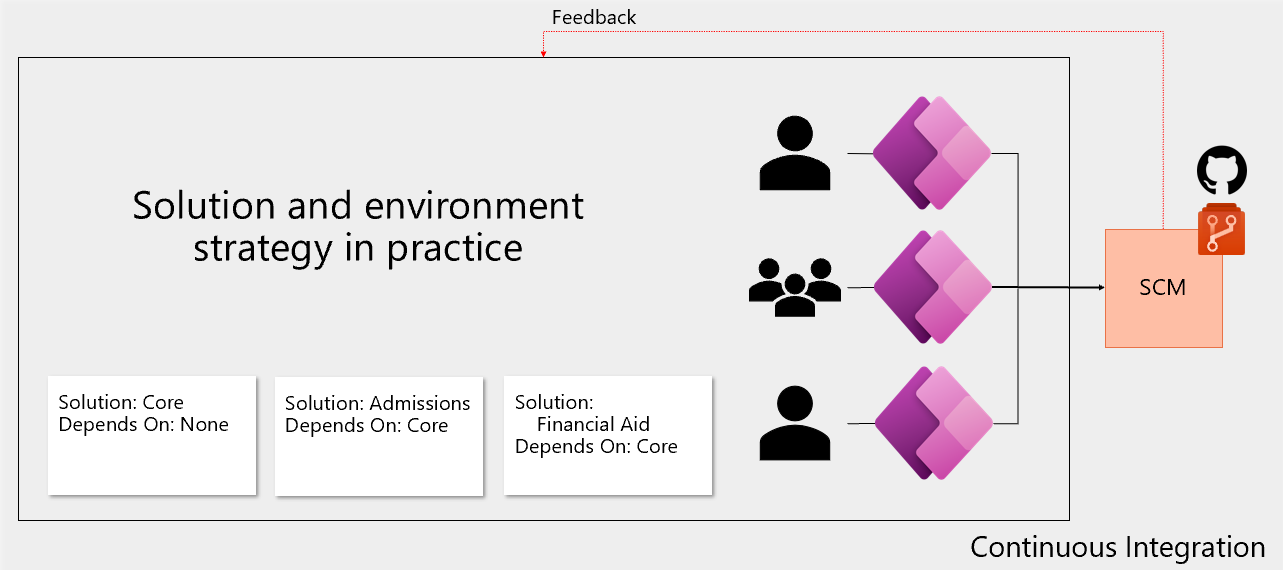
This example has three solutions segmented by an app with shared components that reside in a separate solution.
This strategy isn’t the definitive answer to solution architecture, but it’s a good starting point for you to develop an understanding of proper solution segmentation. The strategy contains the following solutions:
Core - This solution contains shared components.
Admissions - This solution contains all functionality that’s developed specifically for the Admissions department. This solution depends on the components in the Core solution.
Financial Aid - This solution contains all functionality that’s developed specifically for the Financial Aid department. This solution depends on components in the Core solution
Development process setup
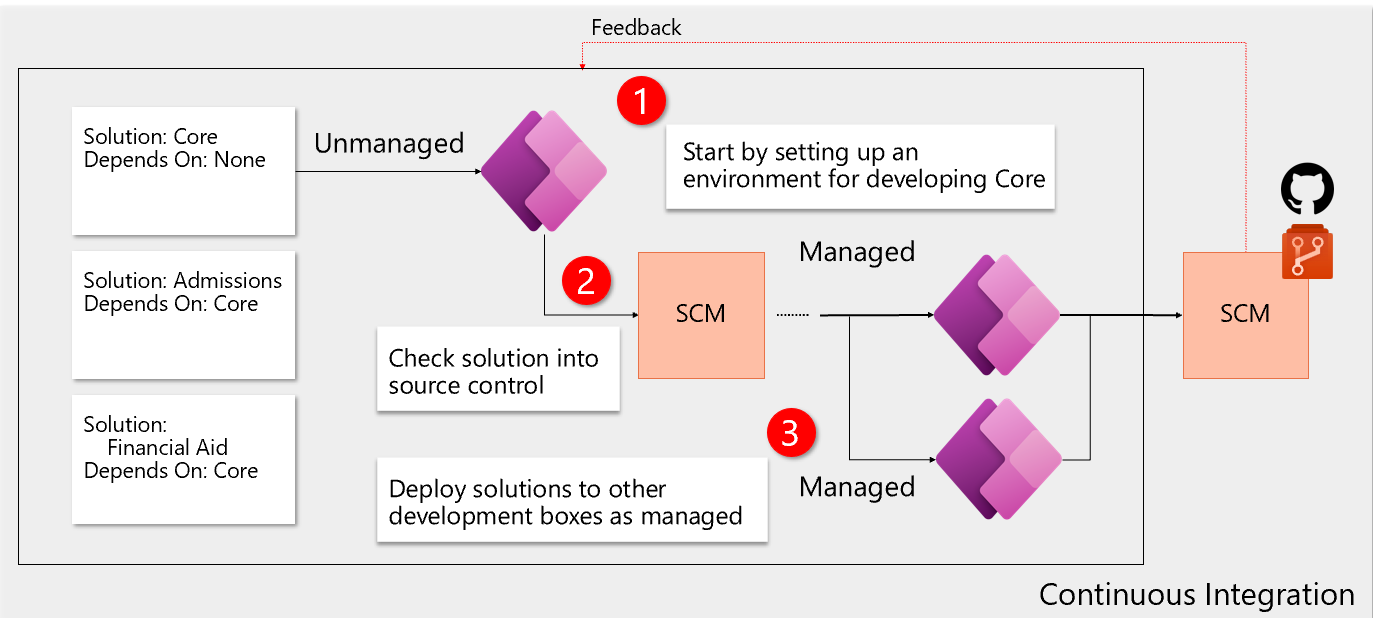
With an understanding of the three solutions that are needed, you’ll now be able to determine how to set up your development environments. You’ll start by setting up an environment for developing your core solution.
The top environment will be for developing the Core solution, which contains shared components. To get started, create the Core solution in the target development environment as an unmanaged solution. Remember, you can only change a solution from unmanaged to managed during the export process.
Following the pattern of including dependencies as managed solutions, you'll need to complete certain tasks before using the Core solution downstream. Before introducing the Core solution into the development environments for Admissions and Financial Aid, ensure you have a viable base of code to enable the development of layered apps.
Having a viable base of code doesn't prevent starting development on the layered apps because they might have unique components that have no dependencies. For simplicity, start by building the Core solution first.
Once you've finished your development sprint on the Core solution and have checked your changes into your repository, you’ll deploy the Core solution as managed in the Admissions and Financial Aid development environments.
Reasons for introducing one unmanaged solution for each environment
By introducing only one unmanaged solution for each environment, you’ll eliminate the potential for injecting unwanted dependencies.
Additionally, this approach allows you to effectively use segmentation and solution layering.
Get the managed solution
With the dependencies in place, we can now introduce our other solutions.
You'll create or import your Admissions and Financial Aid solutions in their respective environments.
You can have multiple unmanaged solutions in the same environment, but you should only do so when you are sure that these solutions won't create dependencies on each other. This concept might make more sense in certain cases. For example, if you have solutions that are completely indpendent of each other, it might make sense to manage them in the same environment.


