Exercise - Set up Microsoft Teams and Dataverse security
In this exercise, you'll set up Microsoft Dataverse security. In this exercise, you'll assume the role of Reed Smith, the System Administrator, and perform the following tasks:
Task: Create territories
You can use territories to group stores or business units in the same organizational hierarchy. In this task, you set up the territories for the Contoso Retail and Fabrikam Retail stores.
Go to Microsoft Power Apps (we recommend that you use an Incognito or InPrivate browsing session). Ensure that you're in the correct environment.
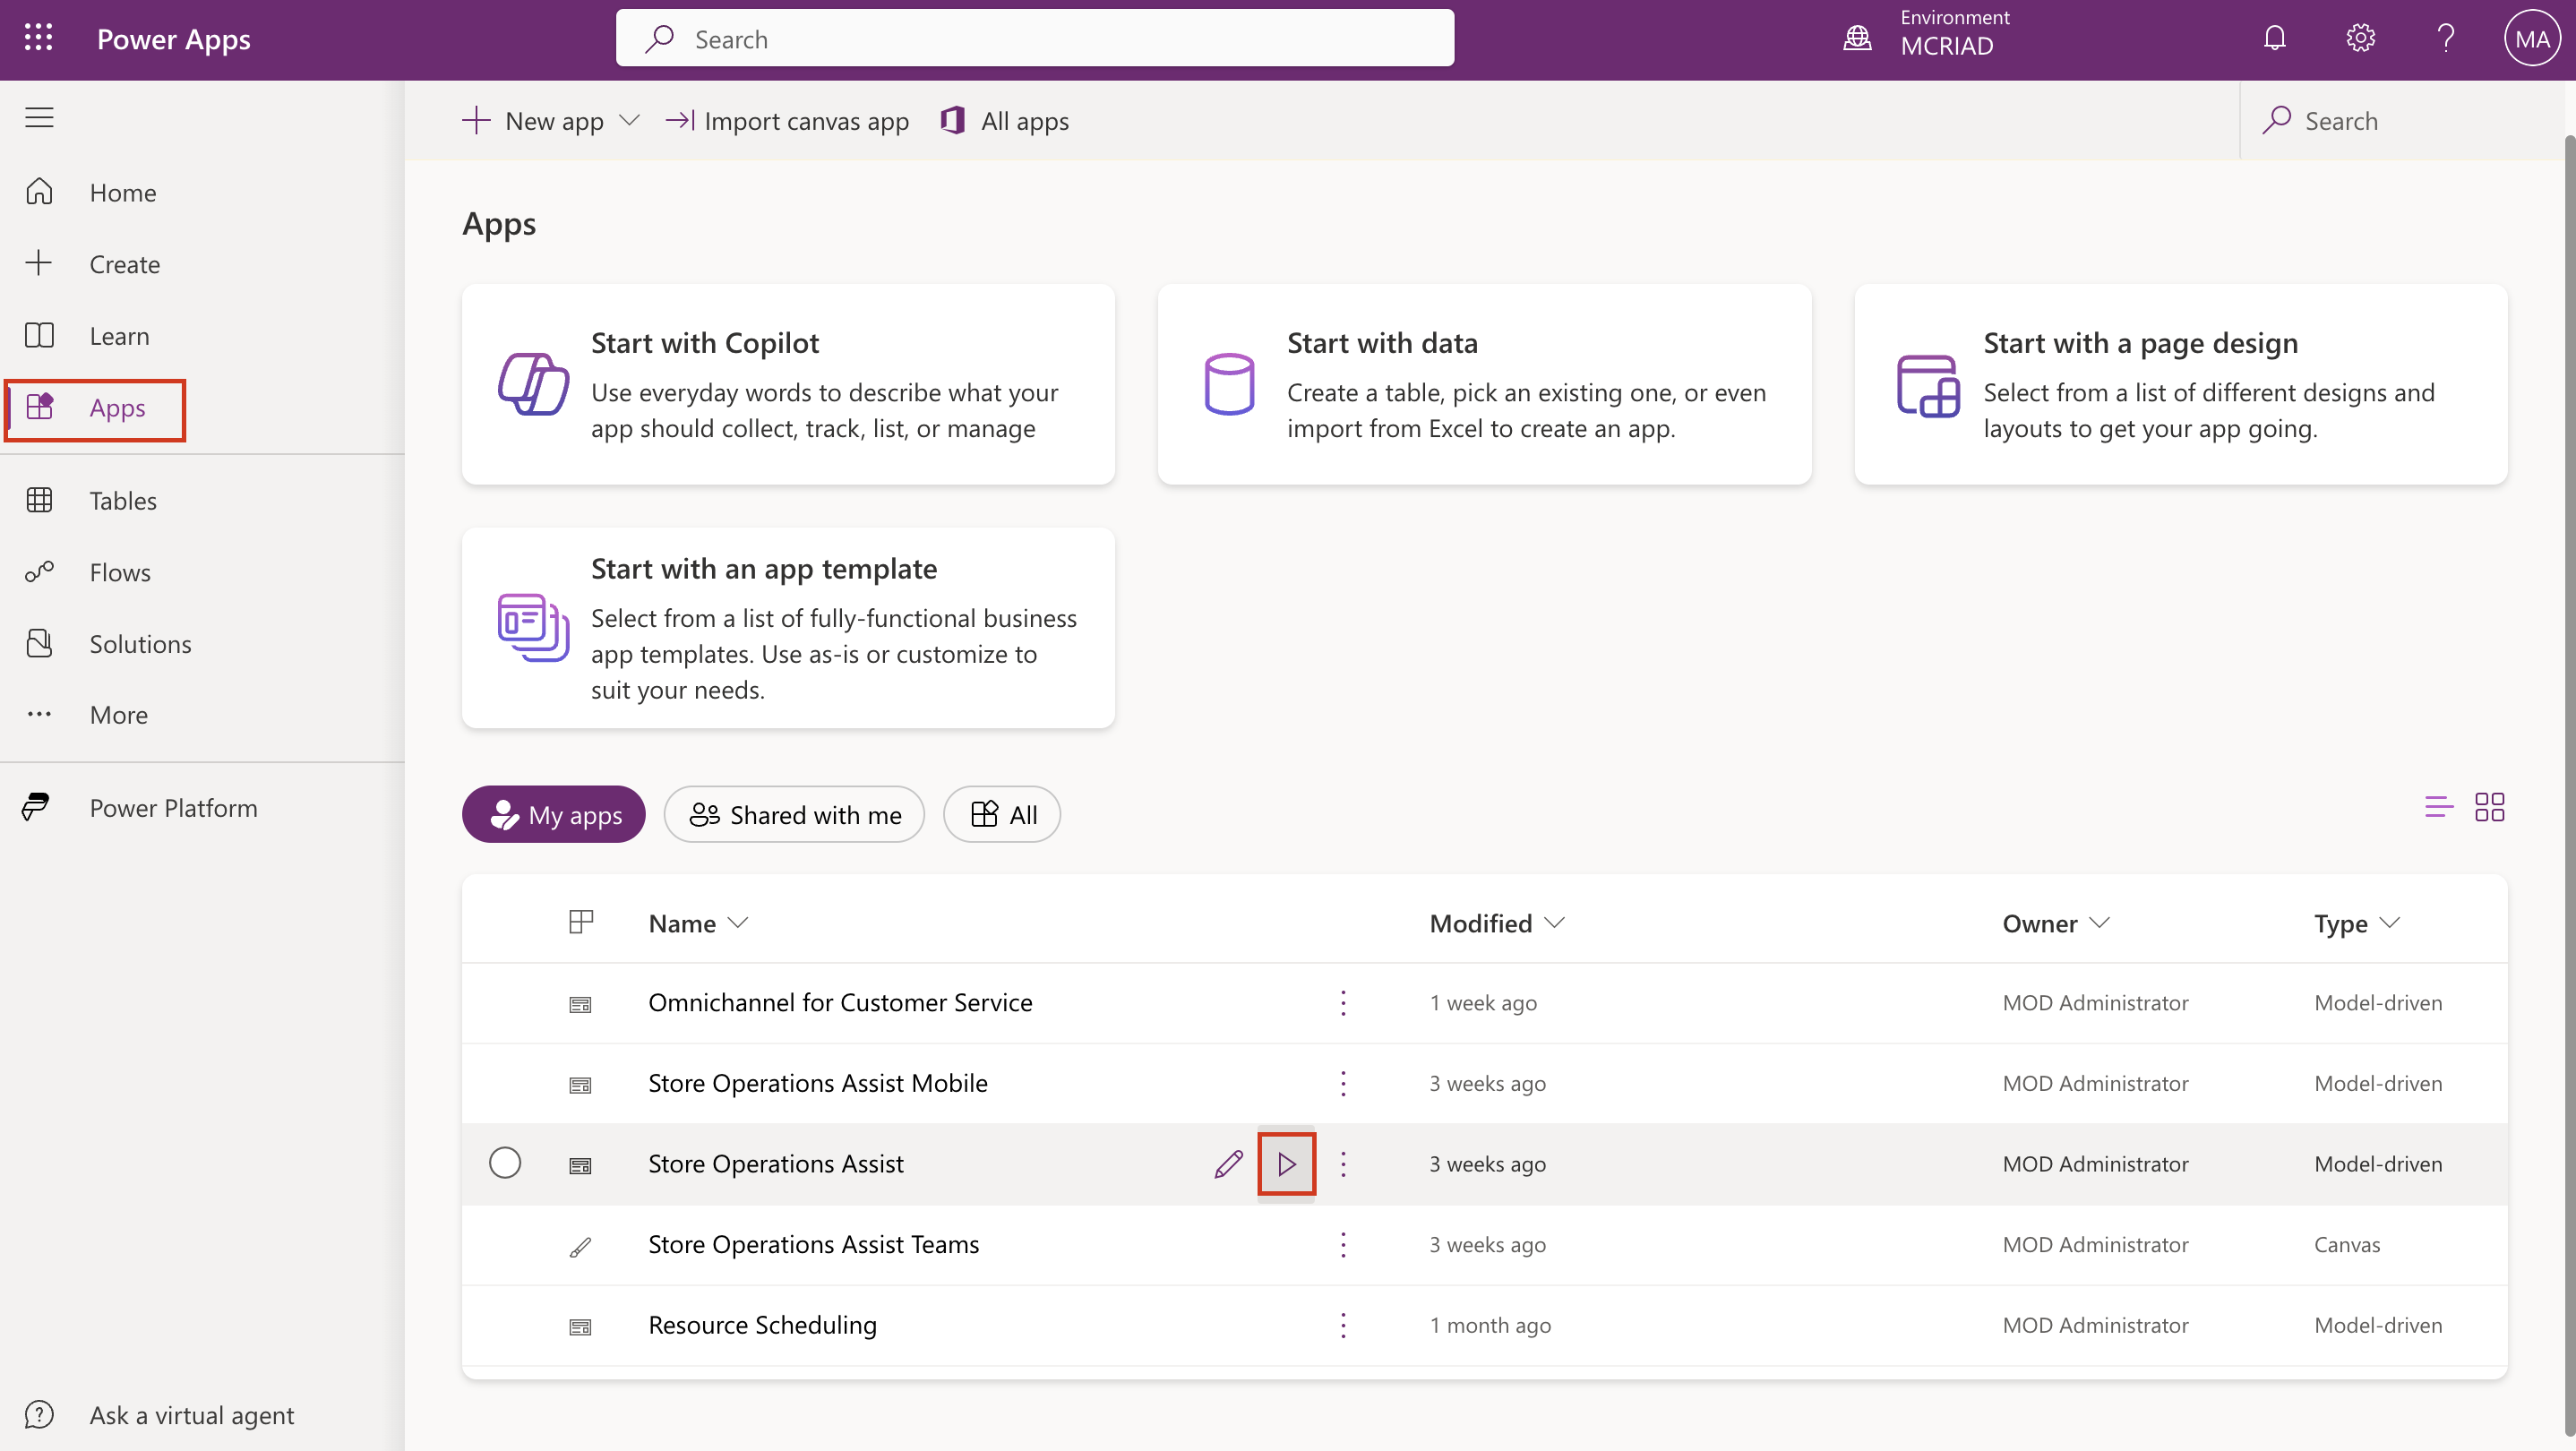
On the left navigation pane, select Apps. Select the play button that appears near Store operations.
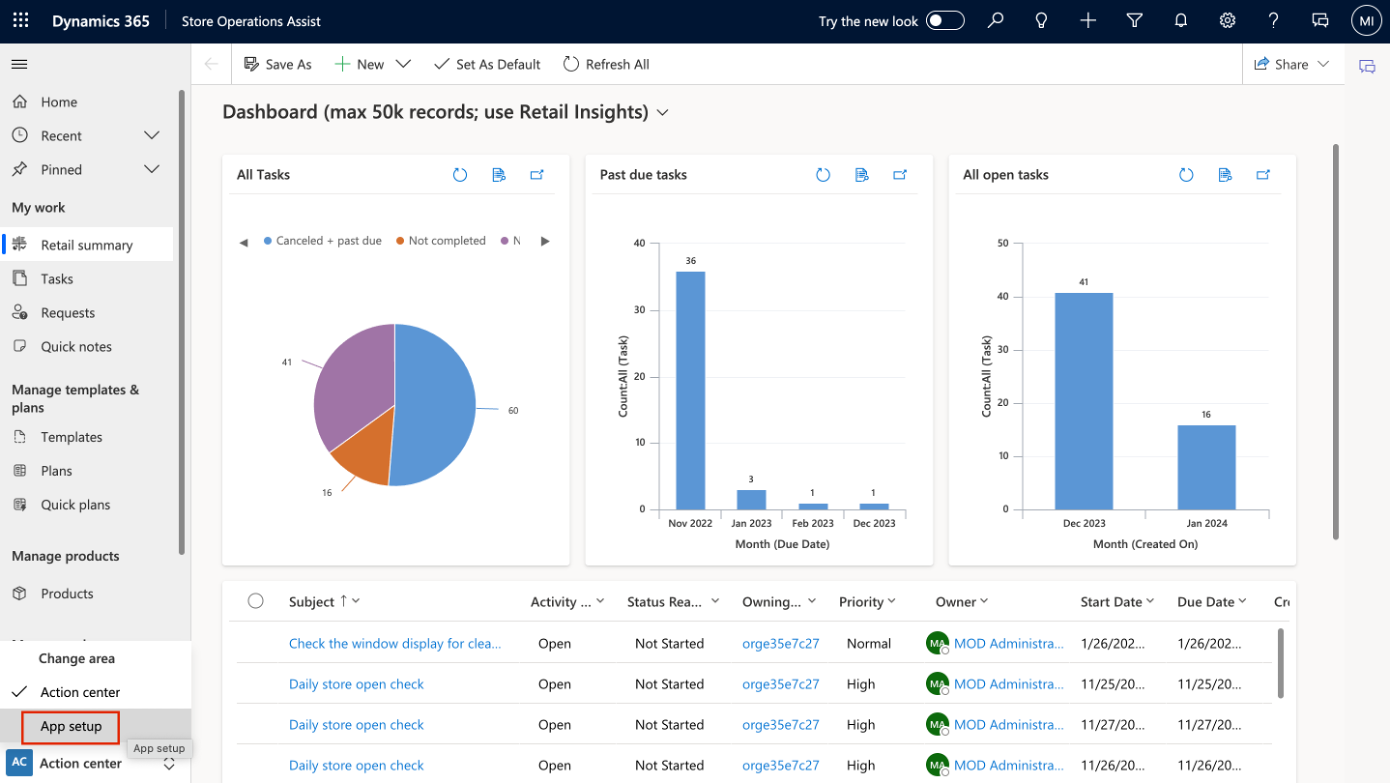
In Store operations, select App setup from the area list in the bottom left corner.
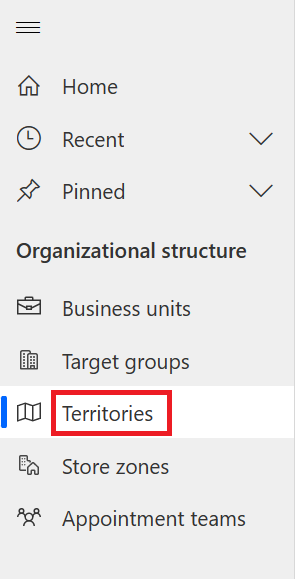
On the left navigation pane, select Territories.
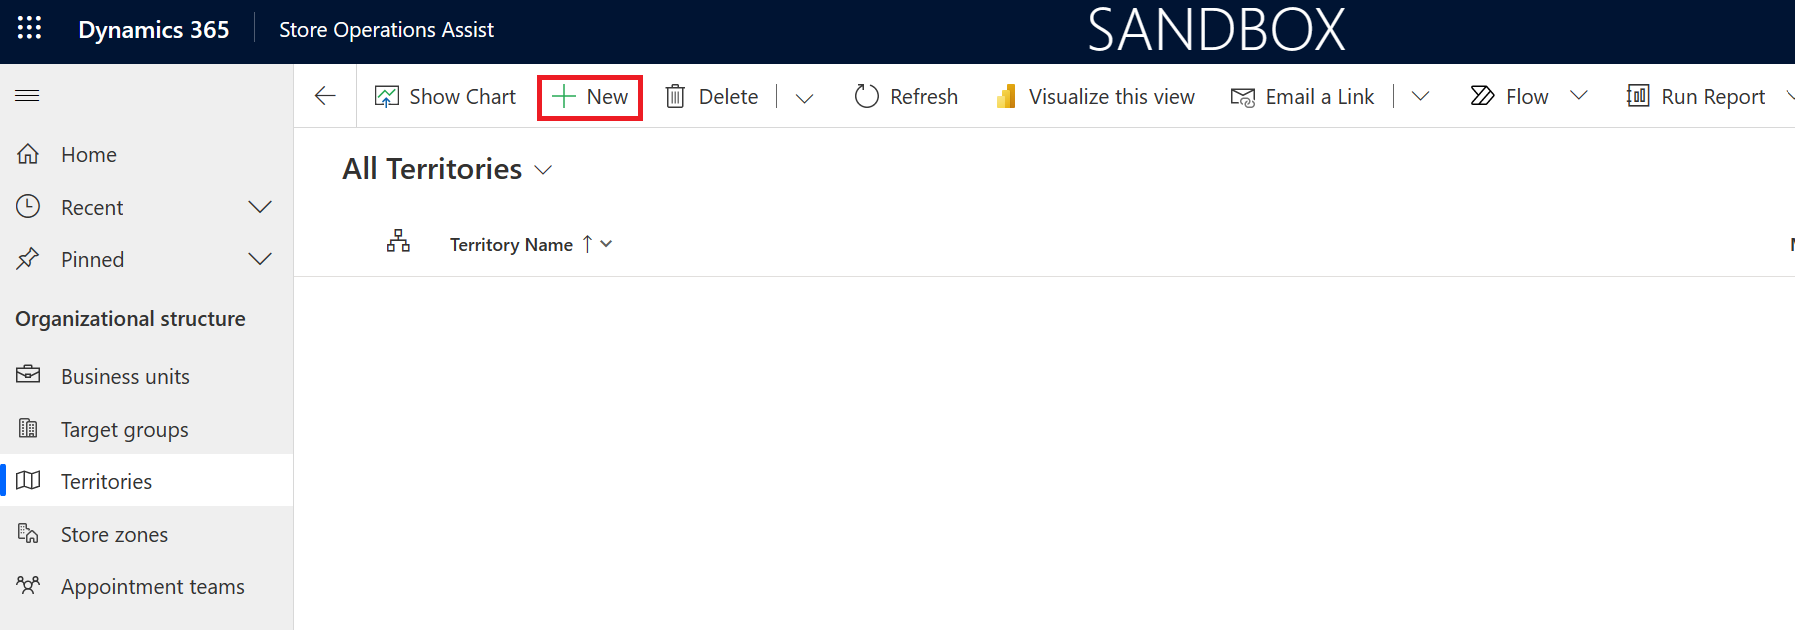
Select New on the upper command bar to create a new territory.
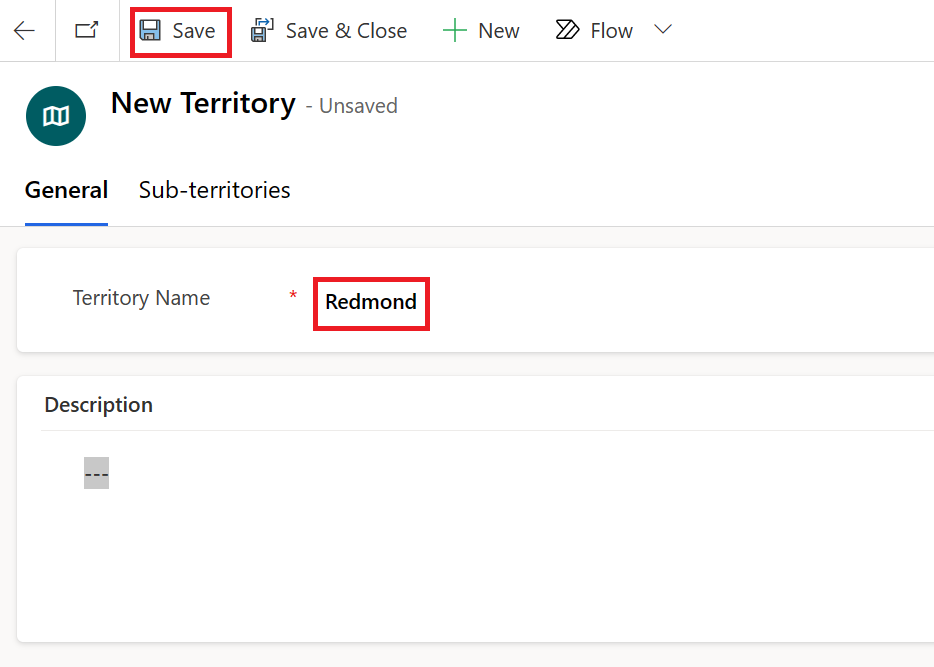
Enter Redmond in the Territory Name field and then select Save.
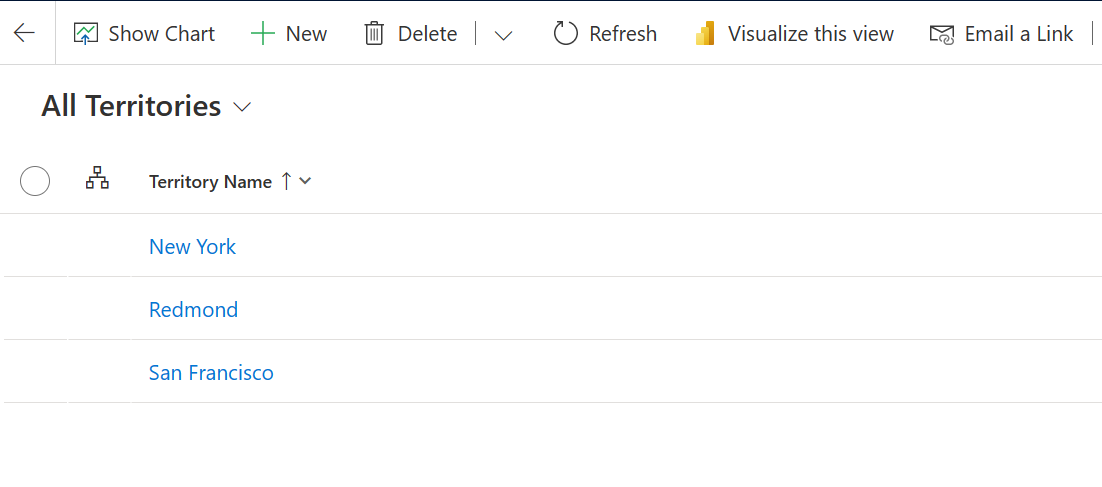
Repeat the previous steps to create the San Francisco and New York territories.
Task: Create business units
A business unit represents the hierarchy of a retail organization, from the headquarters down to the stores, such as Headquarters > District > Store > Department. With the Store operations solution, you can create any level of hierarchy that reflects your organizational structure.
In this task, you create and import business units for various stores and regions and then assign them to appropriate territories and store managers. The business units data from the CSV file illustrates the organizational structure depicted in the organizational hierarchy.
Typically, regional managers are assigned to the respective regional business units, such as Redmond, New York, and San Francisco, so that they can access the data from the stores within their purview. The store managers, customer assistants, and store associates have access to the respective stores so that they can access the data only from their stores.
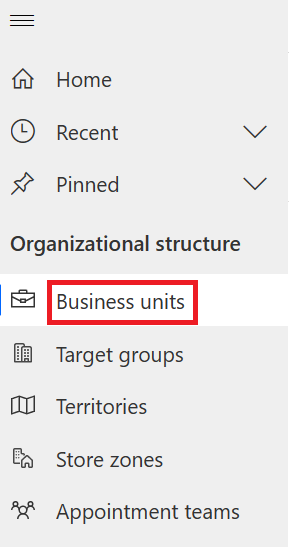
On the left navigation pane, select Business units.
Copy the default business unit value displayed on the screen.
Open the sample Business Unit.csv file. Download and extract the sample data from the Business unit zip file.
Change the Parent Business value of the highlighted cells in that column to the default business unit value in your environment. This value displays when you open the business units on the left navigation pane. Similarly, change the Manager value in the highlighted cells in that column with the MCR IAD Manager value that you're using.
On the left navigation pane, select Business units.
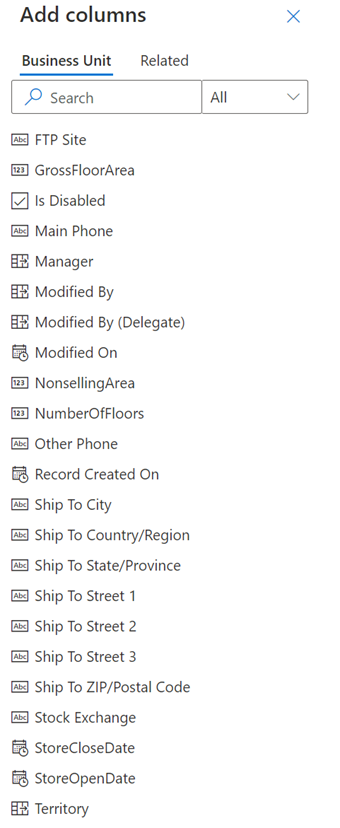
Select Edit columns > Add columns.
Select Territory > Manager.
Select Close on the Add columns screen and then select Apply on the Edit columns screen.
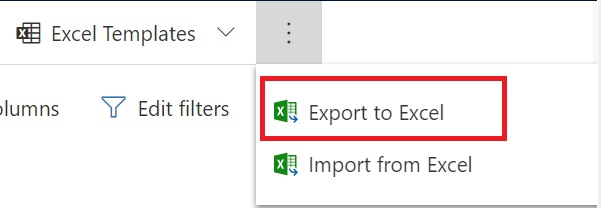
Select Export to Excel.
Open the downloaded Microsoft Excel file, copy all rows from the sample Business Unit.csv file into the new Excel sheet, and then save the Excel file.
On the Business units form, select the ellipsis (...) menu on the upper command bar and then select Import from Excel.
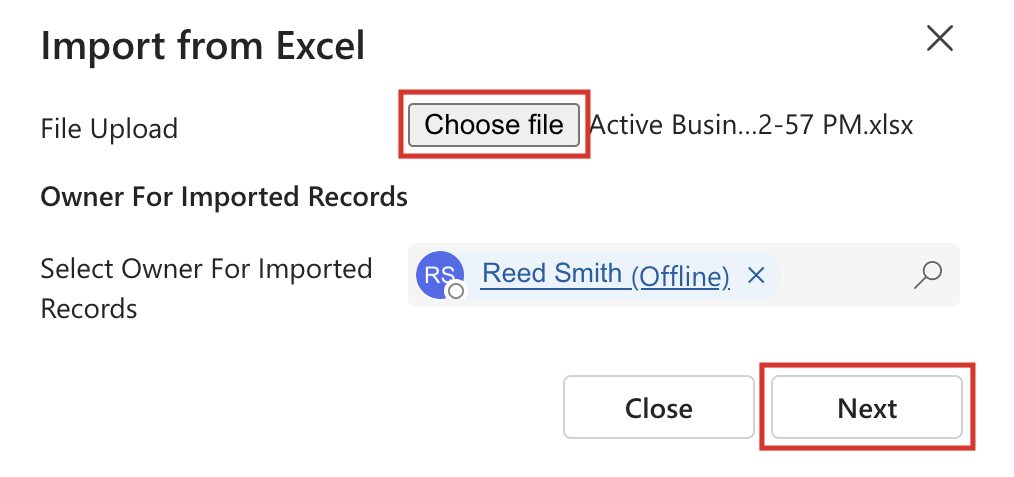
Upload the Excel file from the local directory and then select Next.
The Allow Duplicates option is set to No by default. Don't change this option.
Select Finish Import in the lower-right corner of the screen.
To track the progress of the import, go to Power Apps (we recommend that you use an Incognito or InPrivate browsing session).
Sign in with Reed Smith's credentials.
Note
For instructor-led training, use the credentials that your instructor has provided; for self-paced learning, use the credentials that have been generated in the Training Environment preparation module.
Select the correct environment from the Environment dropdown menu in the upper-right corner.
Select the Settings gear icon and then select Advanced Settings in the upper-right corner of the ribbon.
Select Settings > Data Management.
Select Imports.
If all records are successfully processed, then the Status Reason indicates Completed and the value in the Successes field is equal to Total Processed.
Task: Change the default business unit
In this task, you change the default business unit to Contoso Store 101.
Go to Power Platform admin center.
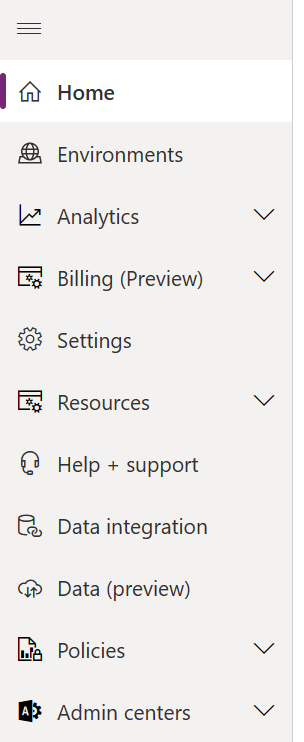
On the left pane, select Environments.
Select your environment and then select Settings on the command bar.
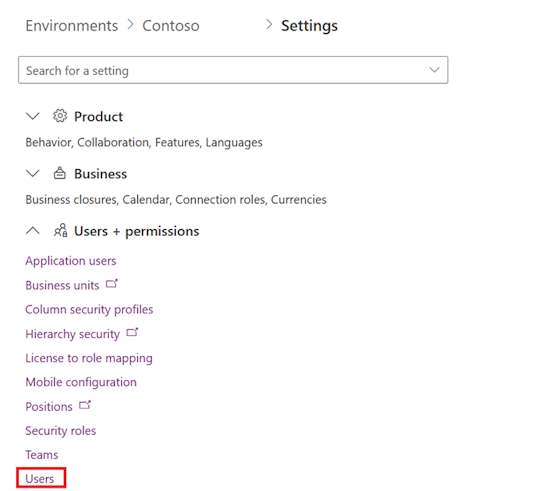
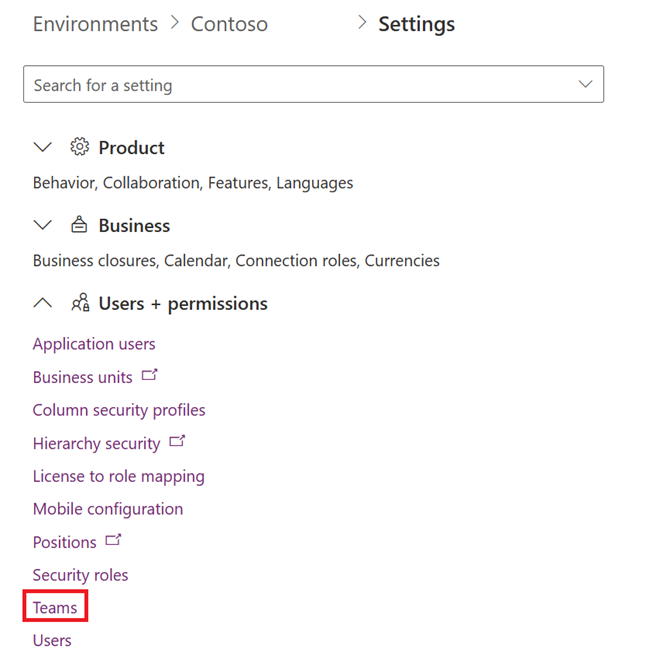
Select Users + permissions > Users.
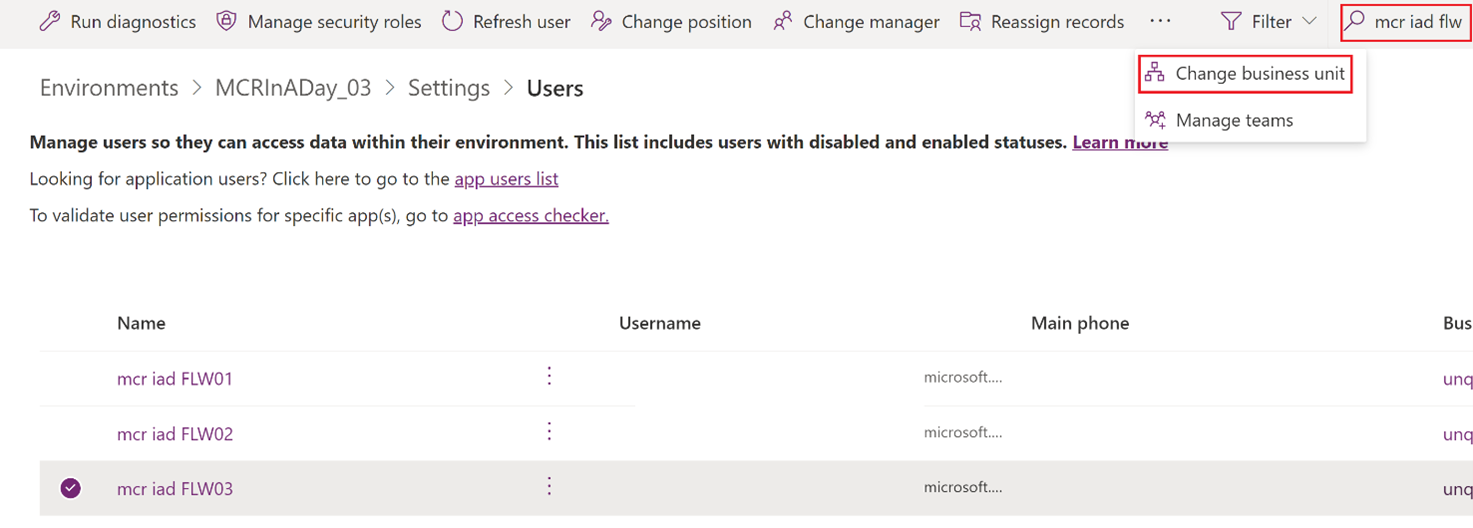
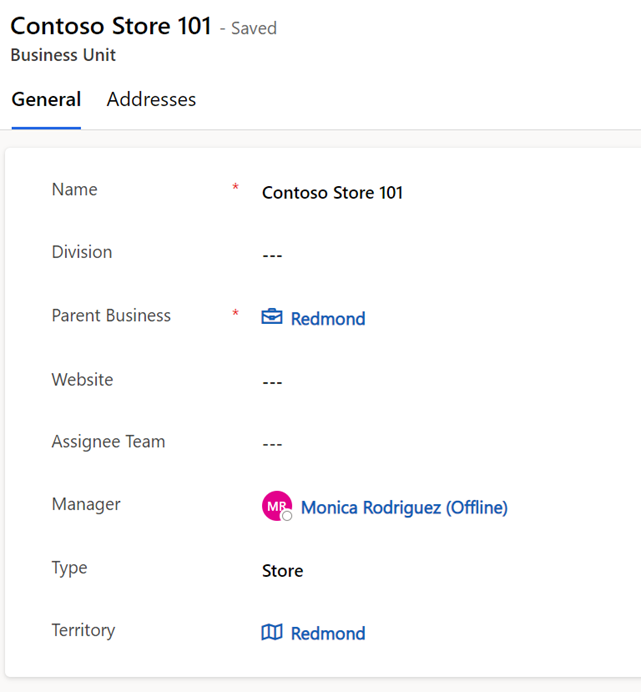
To change the default business unit for the store manager and store associate user ID to Contoso Store 101, search for Monica on the search bar and then select Change business unit. Select Contoso Store 101 from the business units list.
Note
If you're in an instructor-led training, use the store manager user ID that your instructor has provided. If you're in self-paced learning, use the store manager user ID that's created in the training environment section.
If you don't find Monica in the users list, sign in with Monica's credentials into Store operations so that Monica's record is auto created in the Users table in the environment.
Similarly for the store associate’s user name, search by entering the user name in the search bar and then select Change business unit. Select Contoso Store 101 from the business units list.
Go to Store operations, select Business units in the left navigation pane, and then select Contoso Store 101. Update the value in the Manager field to Monica Rodriguez.
You successfully changed the default business units for store manager and store associate in Contoso Store 101.
Task: Create teams in Microsoft Teams
In this task, you create three Microsoft Teams: Contoso Store 101 Managers, Contoso Store 101 Associates, and Contoso Retail Managers. Ideally, a system administrator sets up the team hierarchy before creating the teams in Microsoft Teams. However, in this task, you have to manually create the Microsoft Teams.
Note
If you're in instructor-led training, set your user number as a prefix in the team name to make it unique.
Go to Microsoft Teams in an InPrivate or Incognito browser session.
Note
If you're in instructor-led training, use the provided credentials for the store manager to sign in to Microsoft Teams.
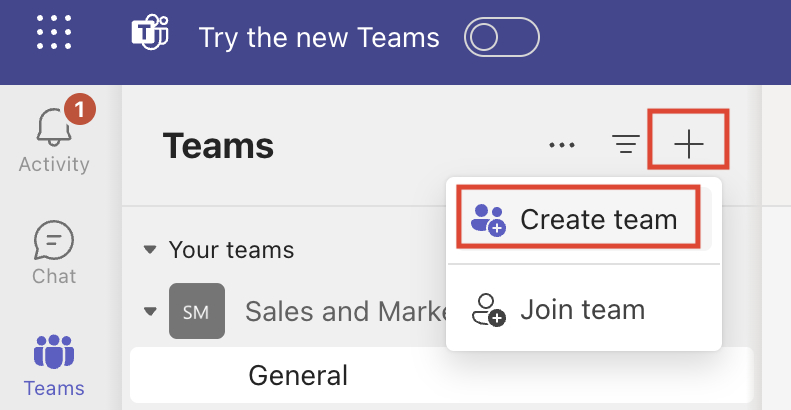
Select the + sign near the Teams and then select Create team.
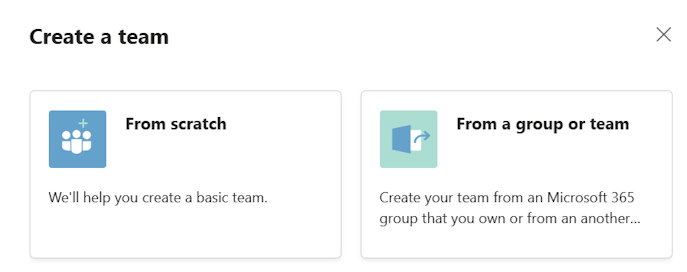
Select From scratch.
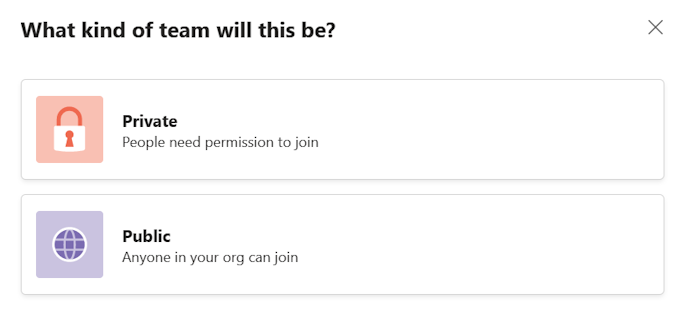
Select Public.
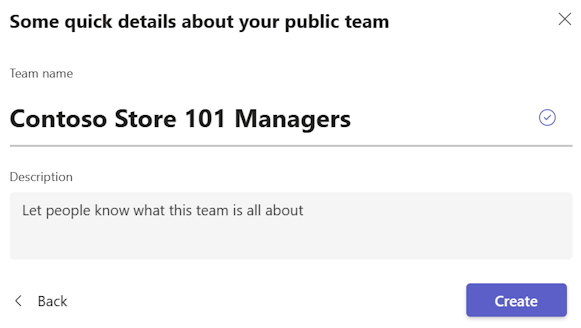
Enter Contoso Store 101 Managers as the Team name and then select Create.
Note
If you're in instructor-led training, set your user number as a prefix (for example: 001) in the team name to make it unique.
Search for store manager Monica Rodriguez and then select Add.
Repeat these steps to create the Contoso Store 101 Associates team and add Frontline worker user as a member in the team.
Note
If you're in instructor-led training, set your user number as a prefix (for example: 001) in the team name to make it unique and then add the user account of the front-line worker that your instructor has provided for you.
Repeat these steps to create the Contoso Retail Managers team and add Retail data manager as a member in the team.
Task: Create a Microsoft Power Platform team and link it to Microsoft Teams
In this task, you create three Microsoft Power Platform teams directly from Microsoft Teams to manage access rights for licensed Microsoft Dataverse users.
- Assign the Contoso Store 101 Managers user group to Retail Store Manager.
- Assign the Contoso Store 101 Associates user group to Retail Customer Assistant and Retail Operations Associate.
- Assign the Contoso Retail Managers user group to Retail Data Manager.
Go to Power Platform admin center in an InPrivate or Incognito browser session.
Note
If you're in instructor-led training, use the store manager user account.
On the left pane, select Environments.
Select your environment.
Select Settings on the command bar.
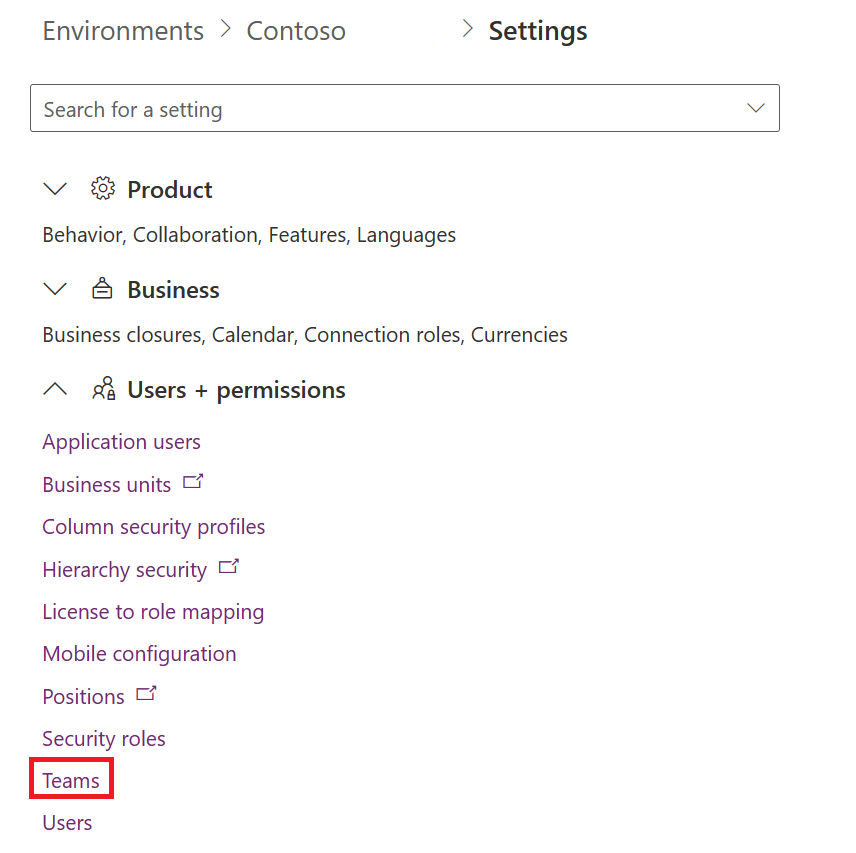
Select Users + permissions > Teams.
Select Create Team.
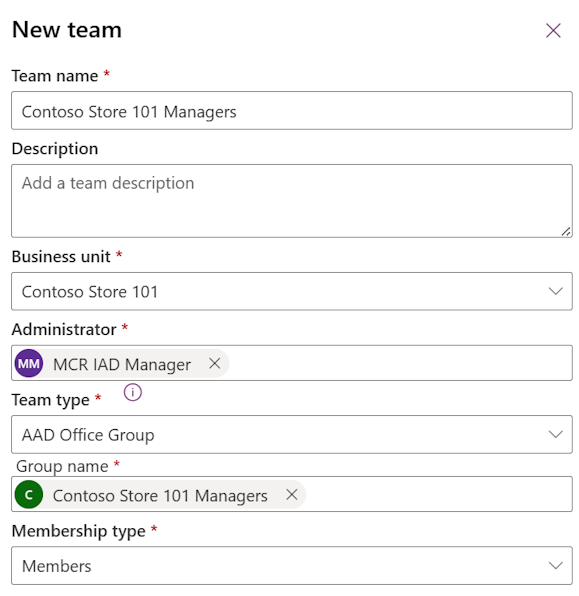
Enter the following details and then select Next.
Team name - XXX-Contoso Store 101 Manager
Note
If you're in instructor-led training, set your user number as a prefix for the team name to make it unique. Replace XXX in the team name with your user number.
Business unit - Select Contoso Store 101 from the dropdown menu
Administrator - Select your admin user ID from the dropdown menu
Team type - Microsoft Entra ID Office Group
Group name - XXX-Contoso Store 101 Managers (enter the Microsoft Teams name that you previously created; it should appear in the dropdown menu)
Note
If you're in instructor-led training, set your user number as a prefix in the team name to make it unique. Replace XXX in the group name with your user number.
Membership type - Members and guests; select this option so that all members and guests within the selected Microsoft team get access to Store operations
In the role assignment, select the Retail Store Manager, Retail Data Manager, and Retail District Ops Manager roles and then select Save.
Repeat steps 6 and 7 to create a Microsoft Power Platform team for Contoso Store 101 Associates.
In role assignment, select the Retail Customer Assistant and Retail Operations Associate roles and then select Save in the last step.
Sign in and then sign out of the Store operations environment (
environment prefix.crm.dynamics.com) by using the MCR IAD FLW and Monica Rodriguez user accounts. This step ensures that you can create users automatically in the Users entity.Repeat steps 6 and 7 to create a Microsoft Power Platform team for Contoso Retail Managers. For business unit, select your organization. Keep the rest of the information as the teams that you created earlier.
In role assignment, select the Retail Data Manager role and then select Save in the last step.
Sign in and then sign out of the Store operations environment (
environment prefix.crm.dynamics.com) by using the MCR IAD Manager account.
Task: Assign security roles to all Microsoft Dataverse teams
When the system automatically creates business units, a corresponding Dataverse team of the Owner team type is also created. The Plan publish process validates whether at least one security role is assigned to all teams in the environment.
In this task, you assign the Retail Operations Associate security role to the automatically created Dataverse team.
Go to Power Platform admin center in an InPrivate or Incognito browser session.
On the left pane, select Environments.
Select your environment and then select Settings on the command bar.
Select Users + Permissions > Teams.
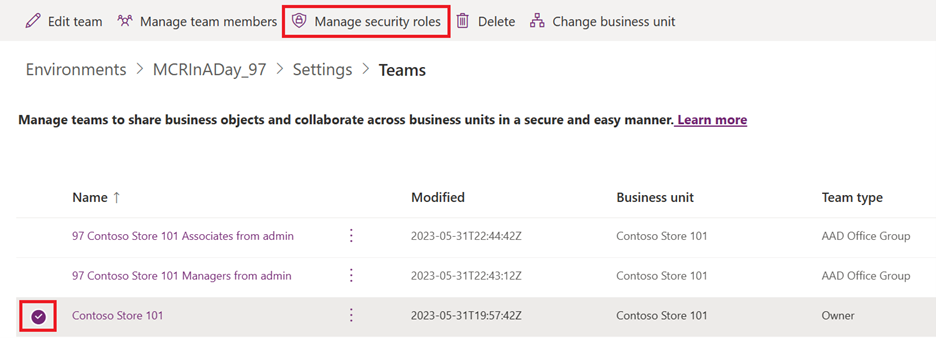
Select Contoso Store 101 and then select Manage security roles.
Select the Retail Operations Associate security role and then select Save.
Repeat the previous steps to update the security roles on the remaining store teams as listed for type Owner.
- Contoso Store 102
- Contoso Store 103
- Contoso Store 104
- Contoso Store 105
- Contoso Store 106
- Fabrikam Store 401
- Fabrikam Store 402
- Fabrikam Store 403
- Fabrikam Store 404
- Fabrikam Store 405
- Fabrikam Store 406
Task: Create and assign an app setup policy
To create an app setup policy to provide Store operations in Microsoft Teams to the retail data managers, follow these steps:
Go to Microsoft Power Apps (we recommend that you use an Incognito or InPrivate browsing session). Ensure that you're in the correct environment.
On the left navigation pane, select Apps.
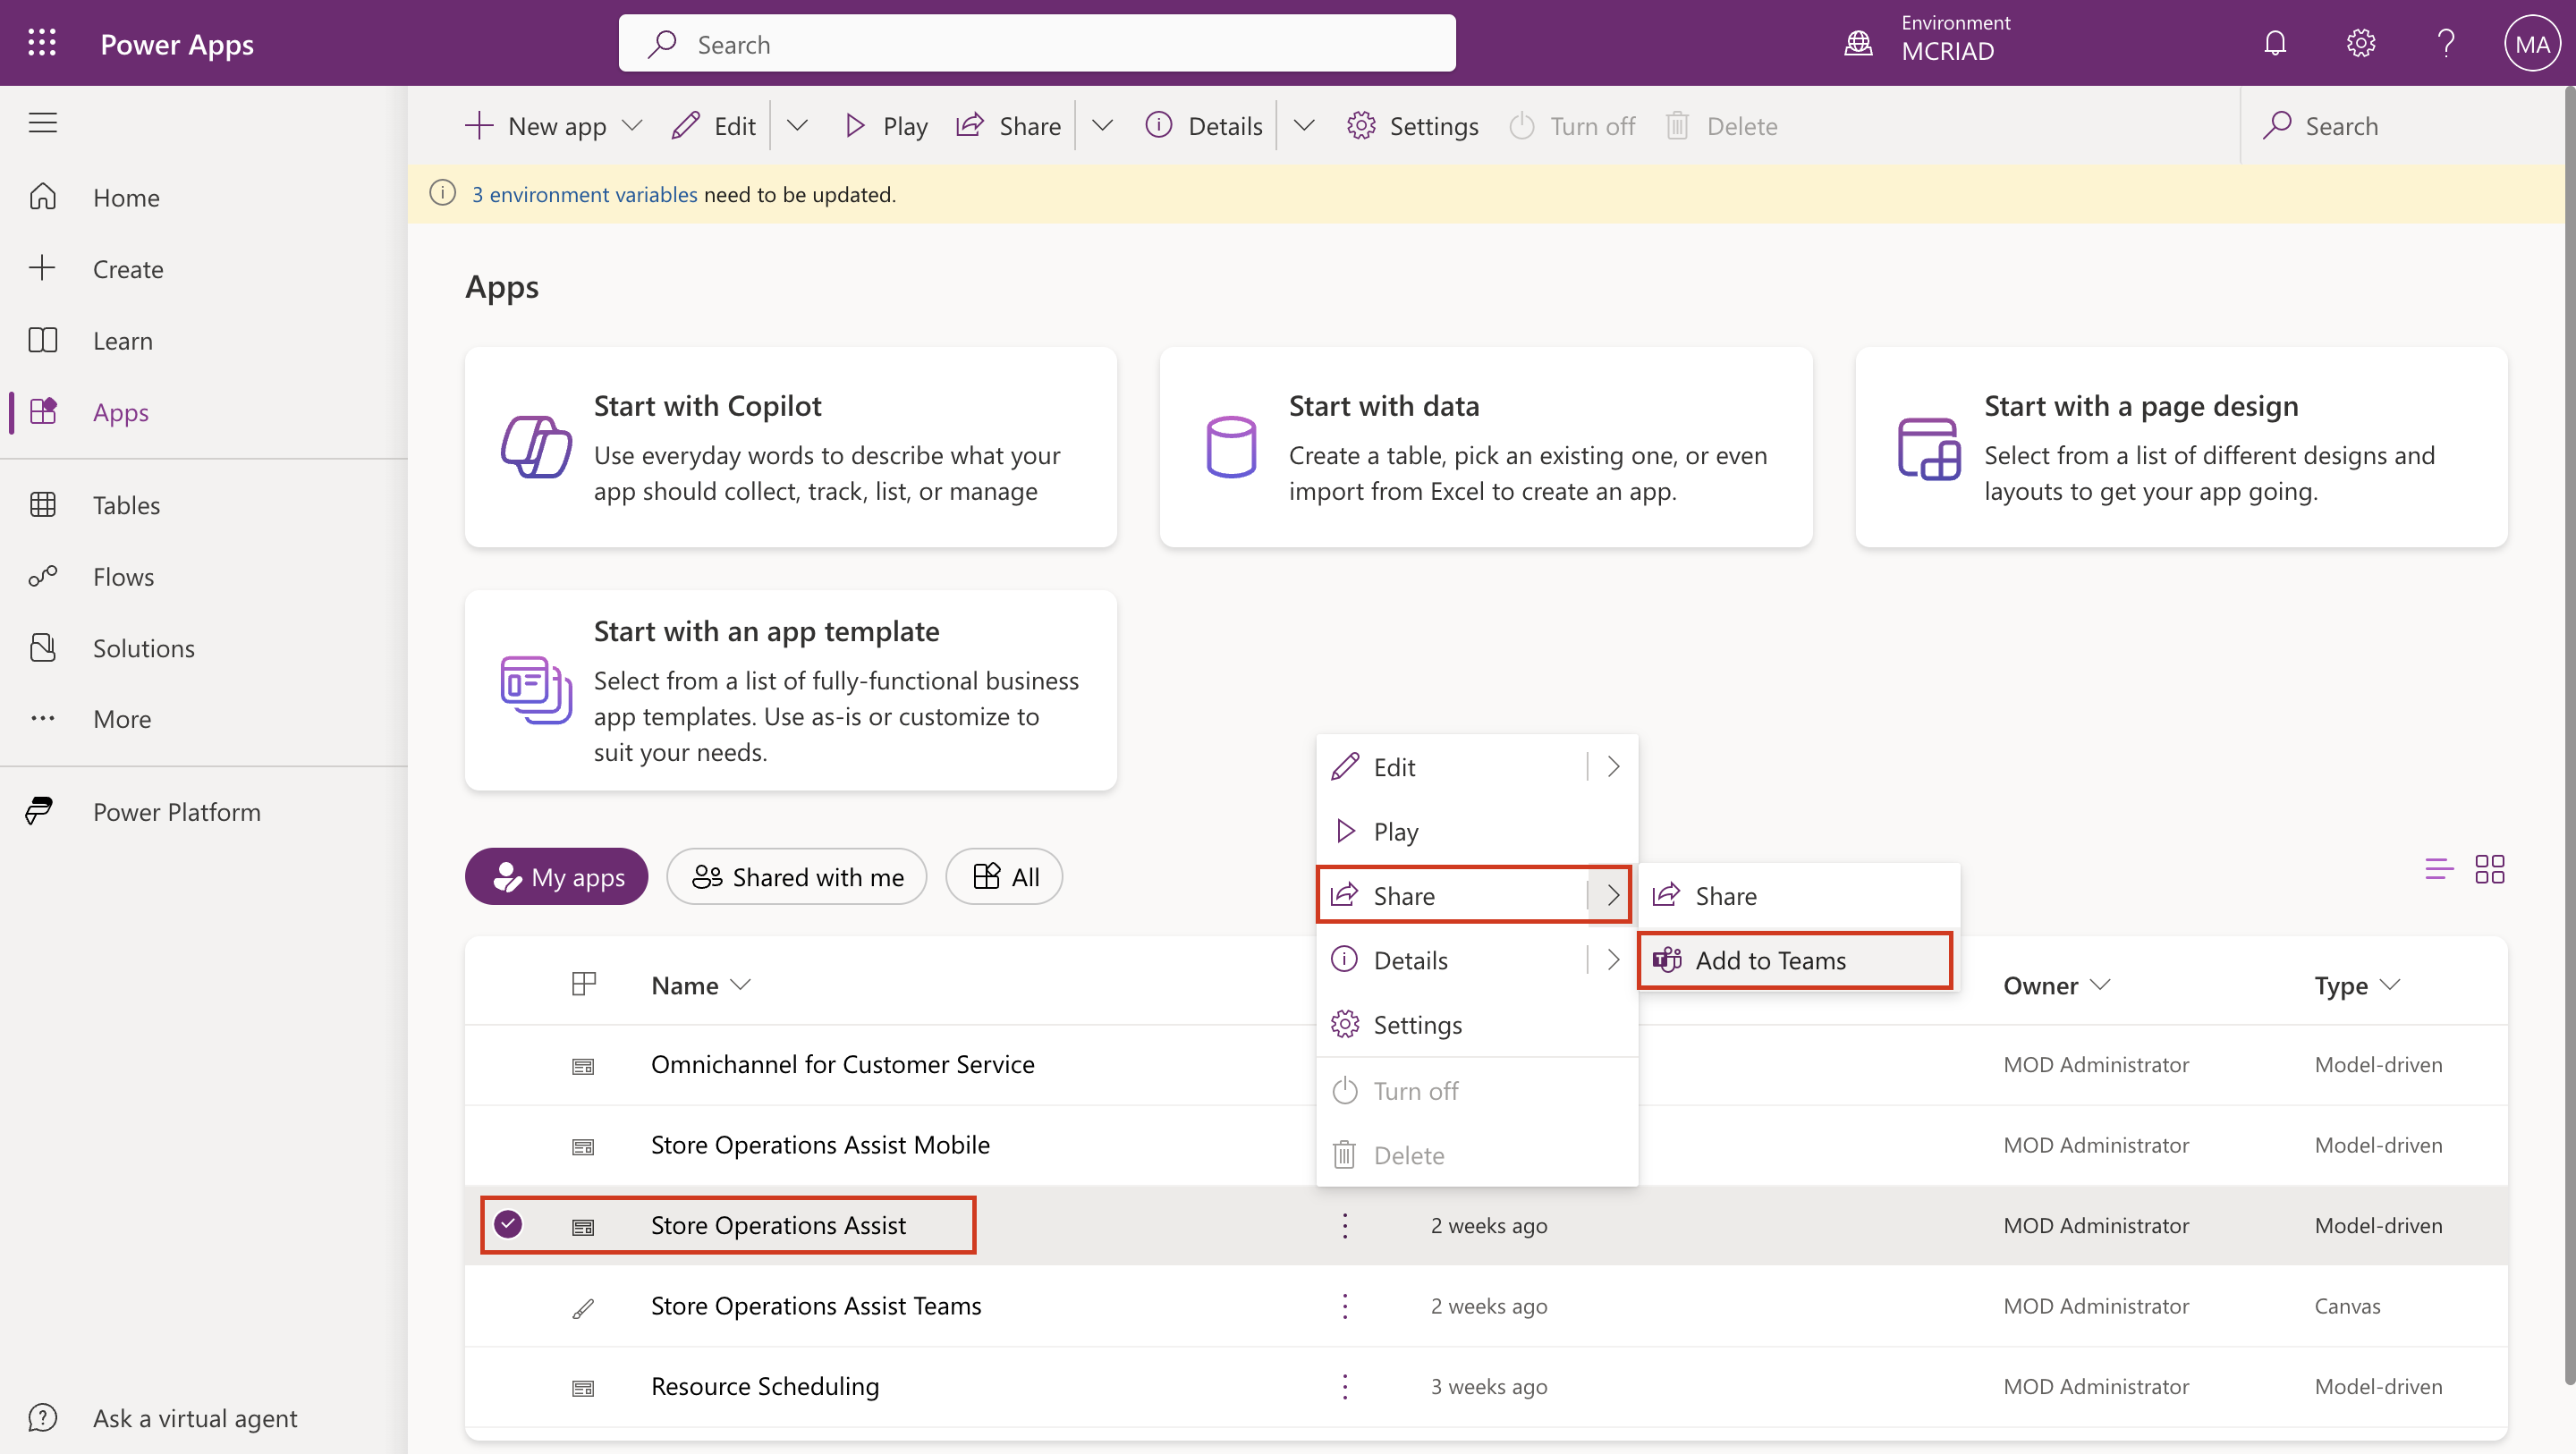
Select Store operations. Select More Commands (...), and then select Share > Add to Teams from the dropdown menu.
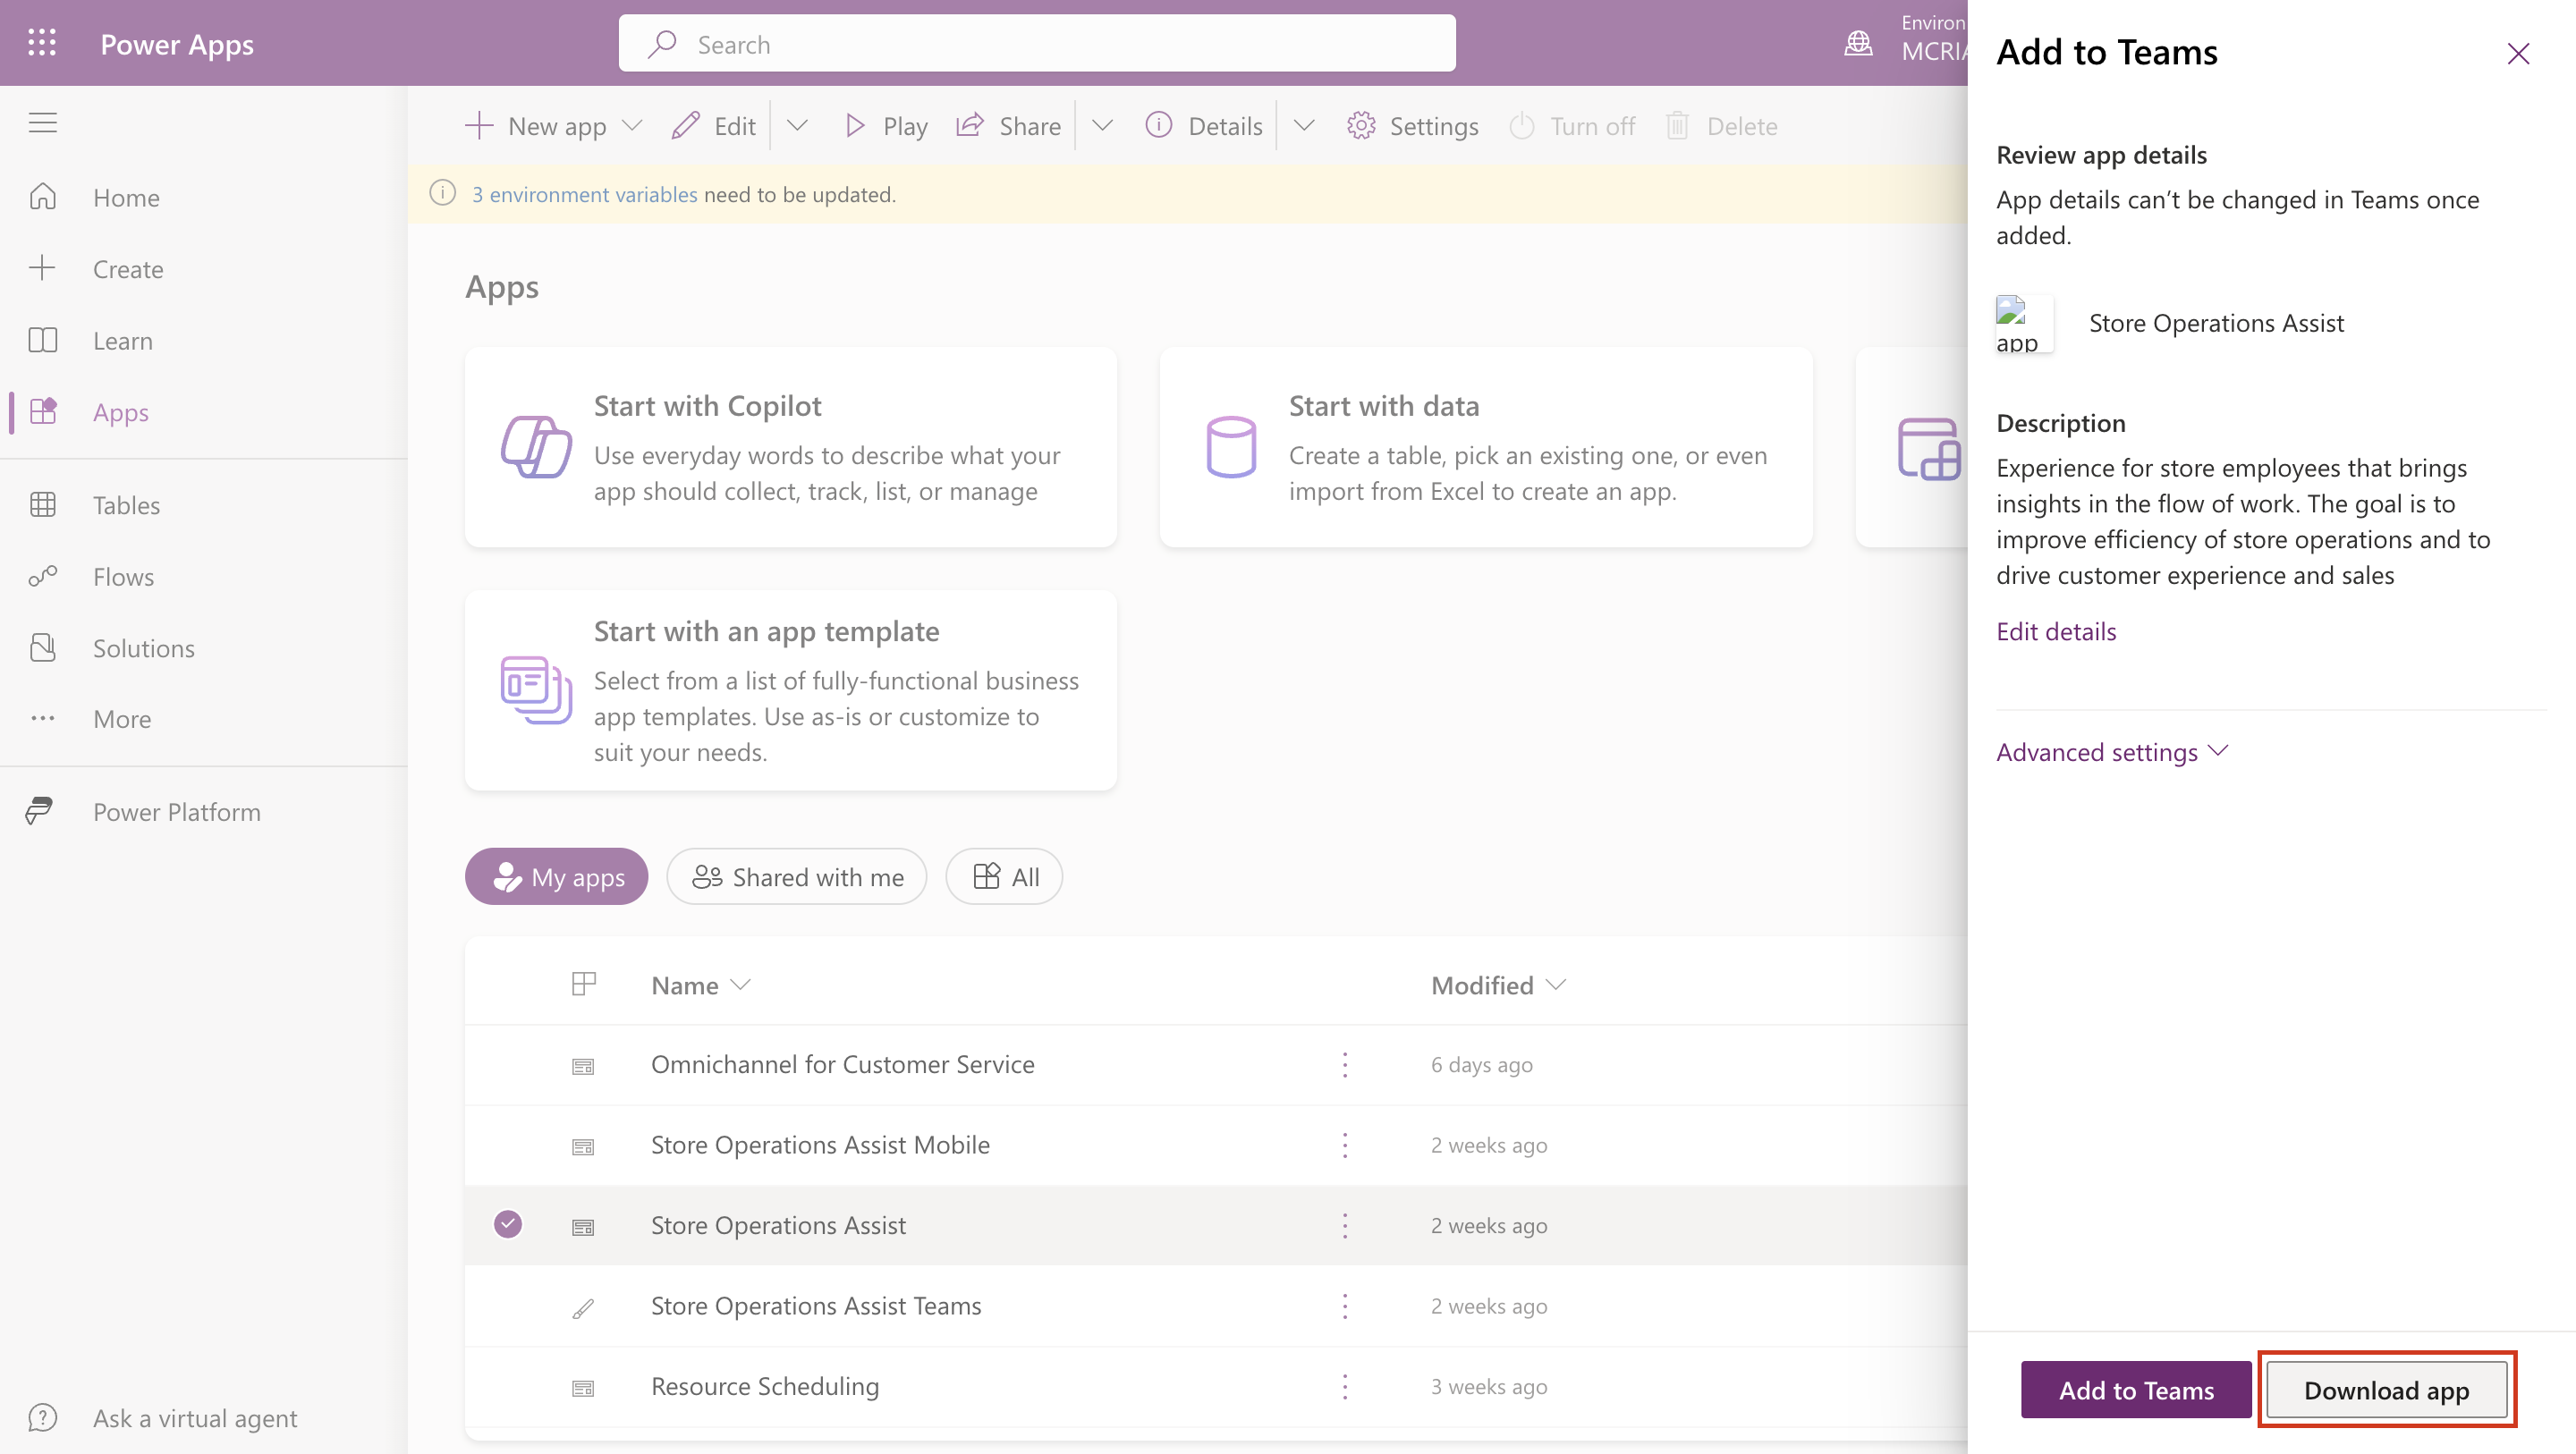
The Add to Teams panel opens on the right side of the screen. Select Download app.
The Store operations.zip file is downloaded. Note the path of the file because you need it later in this exercise.
Sign in to Microsoft Teams admin center in a new tab page in the same InPrivate or Incognito browser.
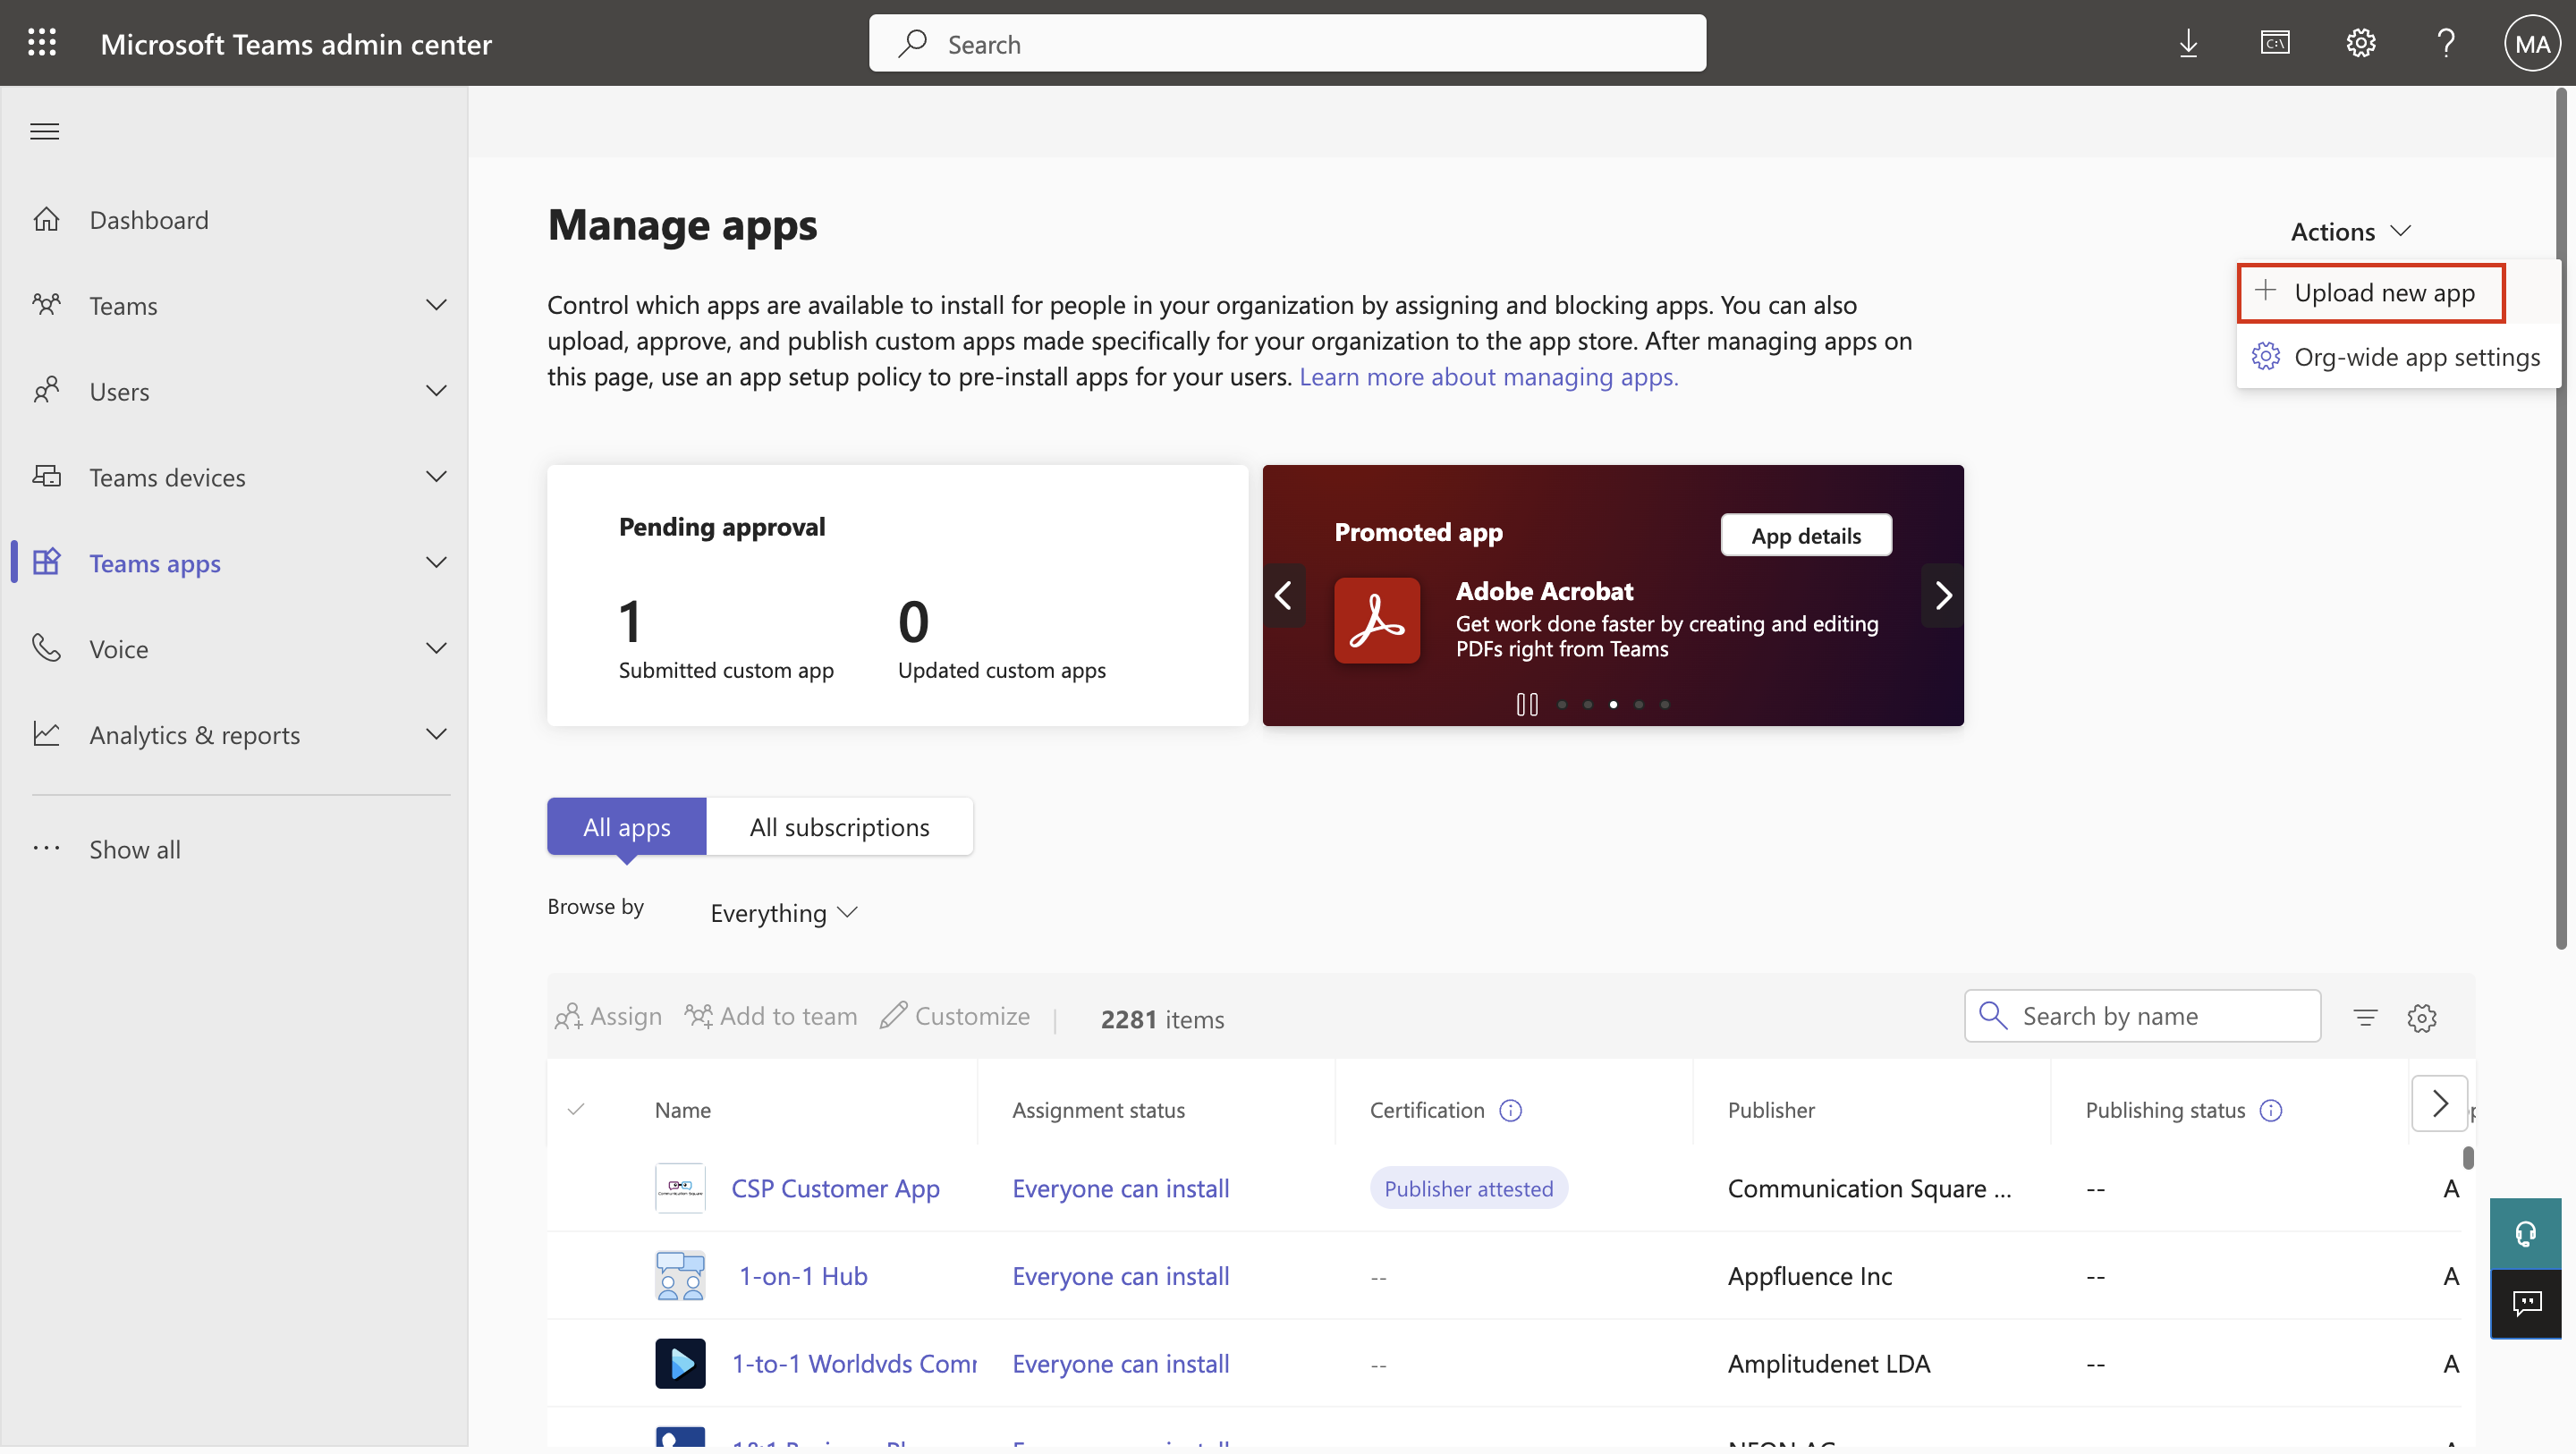
Expand Teams apps in the left navigation pane, select Manage apps, and then select Actions > Upload new app from the top right corner.
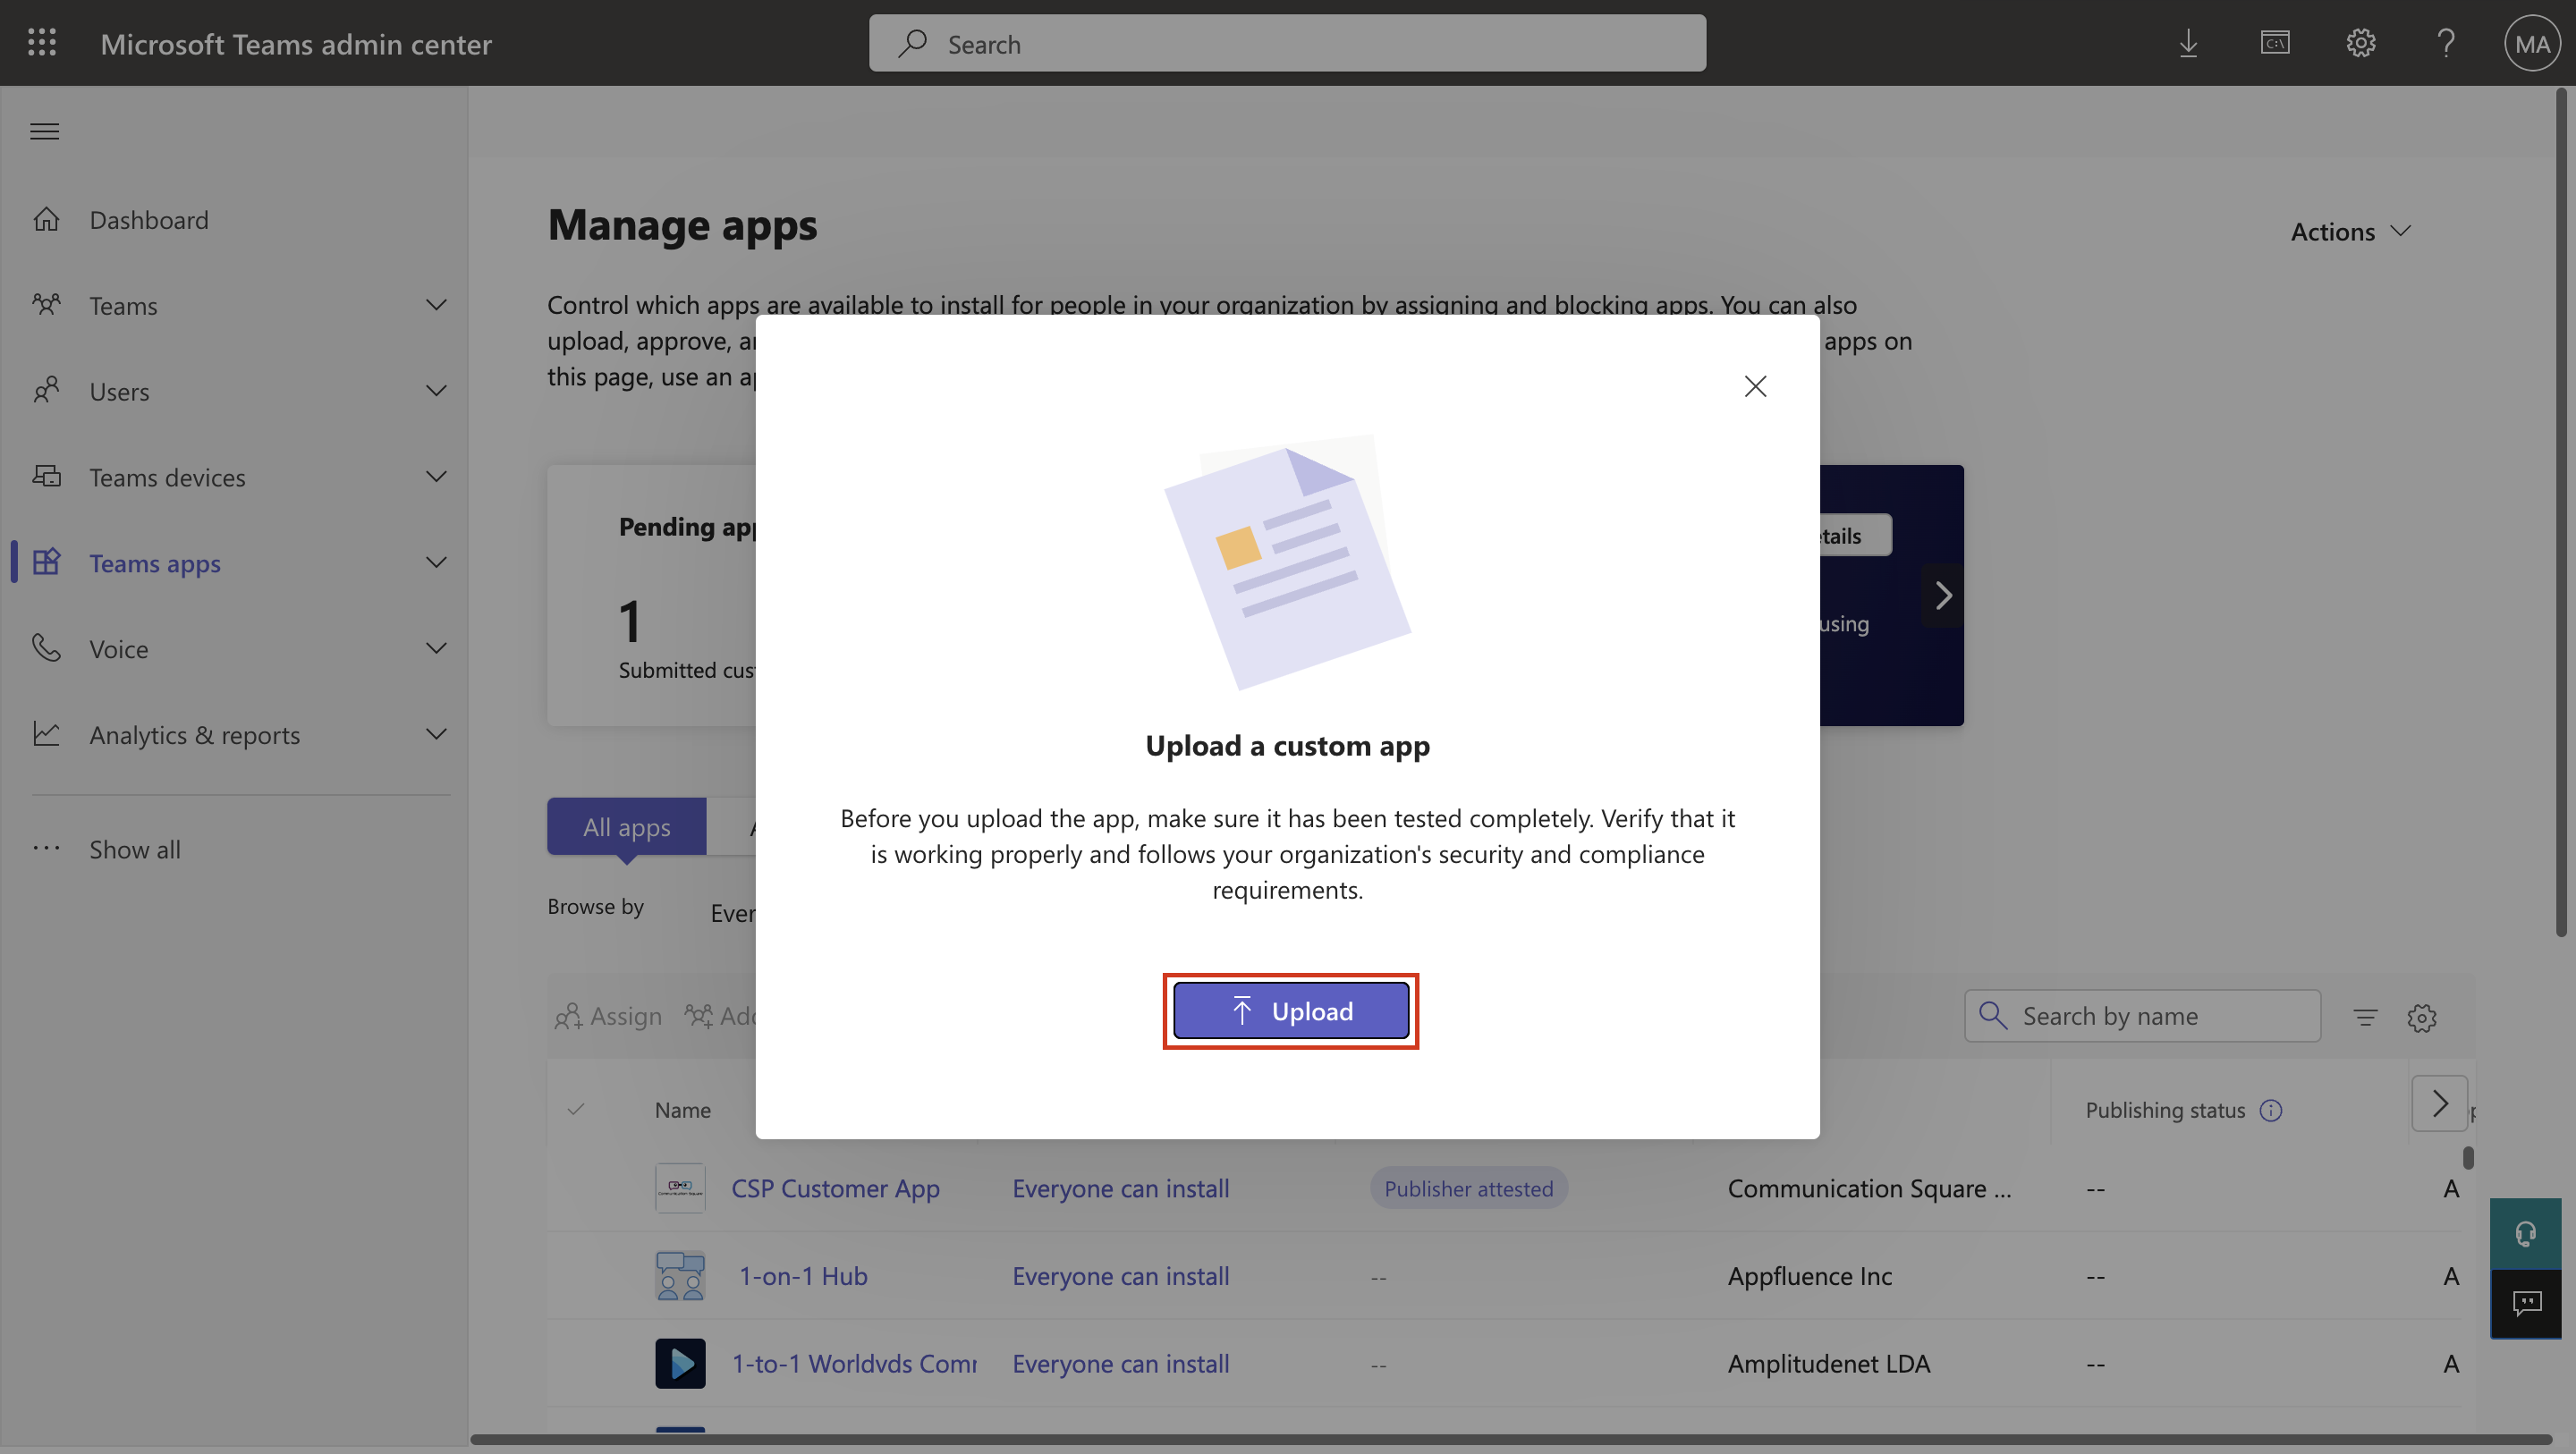
On the pop-up window, select Upload.
Select the Store operations.zip file that you downloaded in a previous step. After it's uploaded, you'll get a notification that the new app is added. Close that pop up.
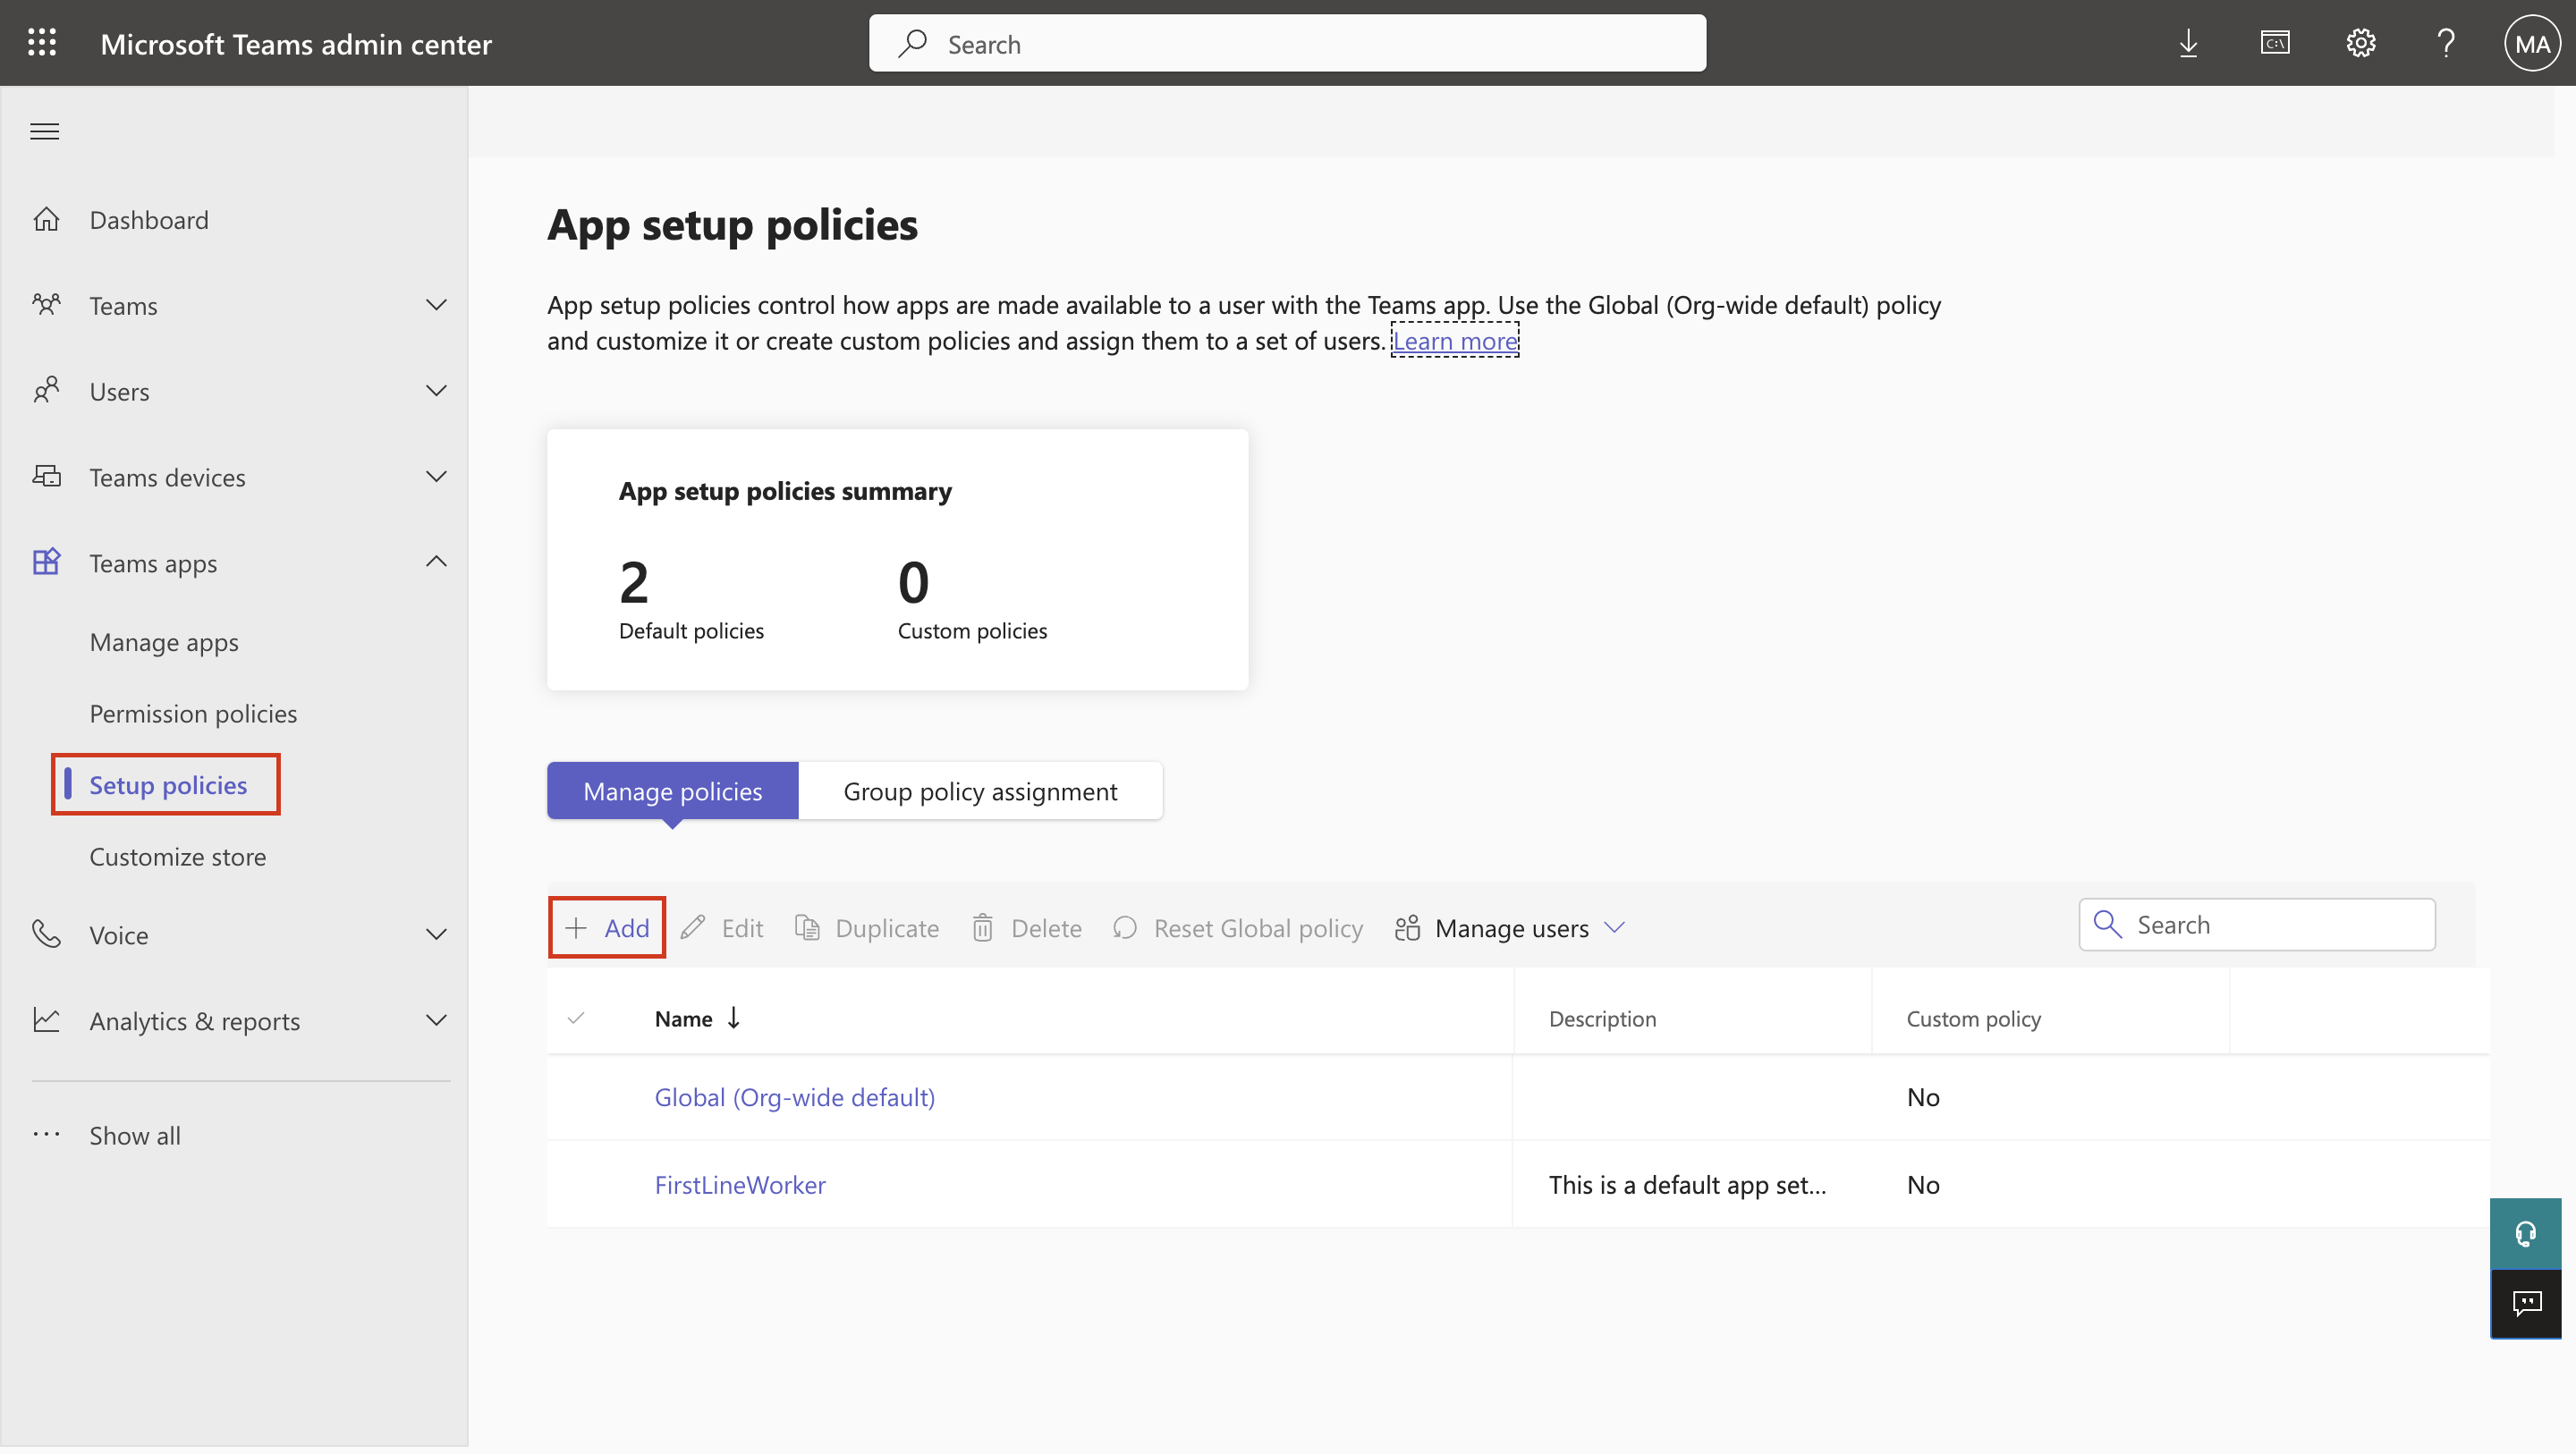
Expand Teams apps in the left navigation pane, select Setup policies, and then select Add.
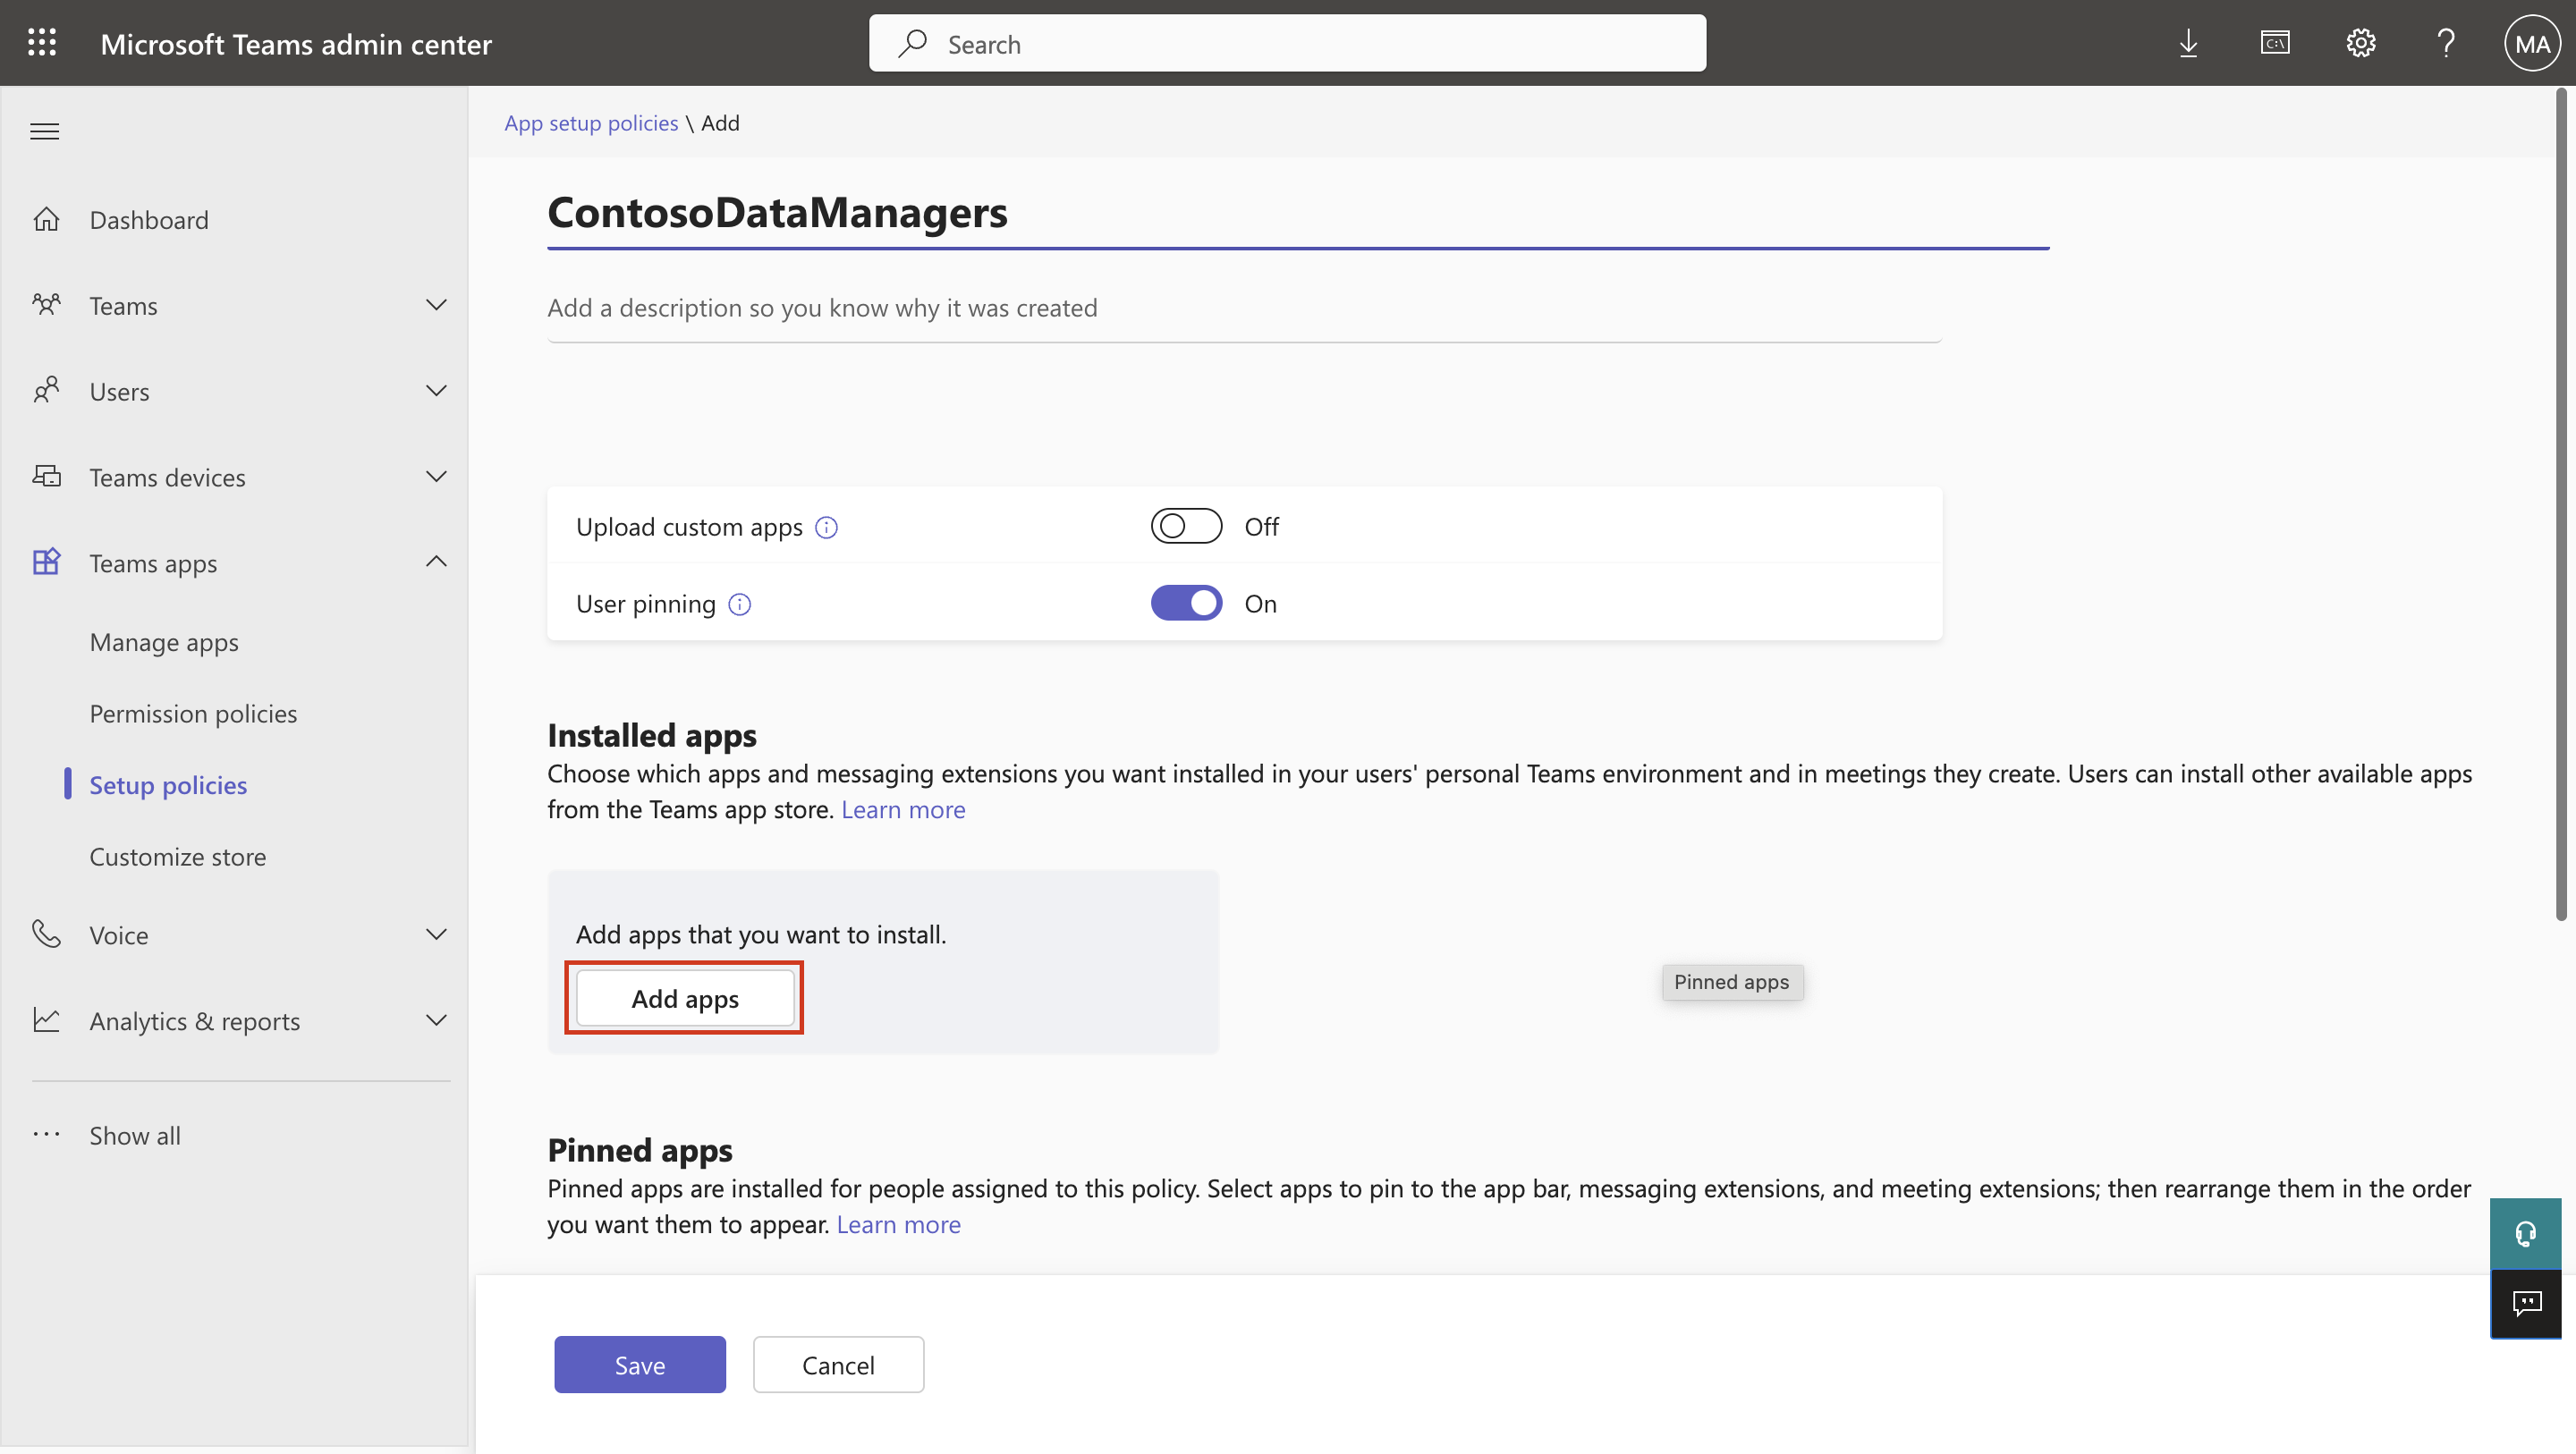
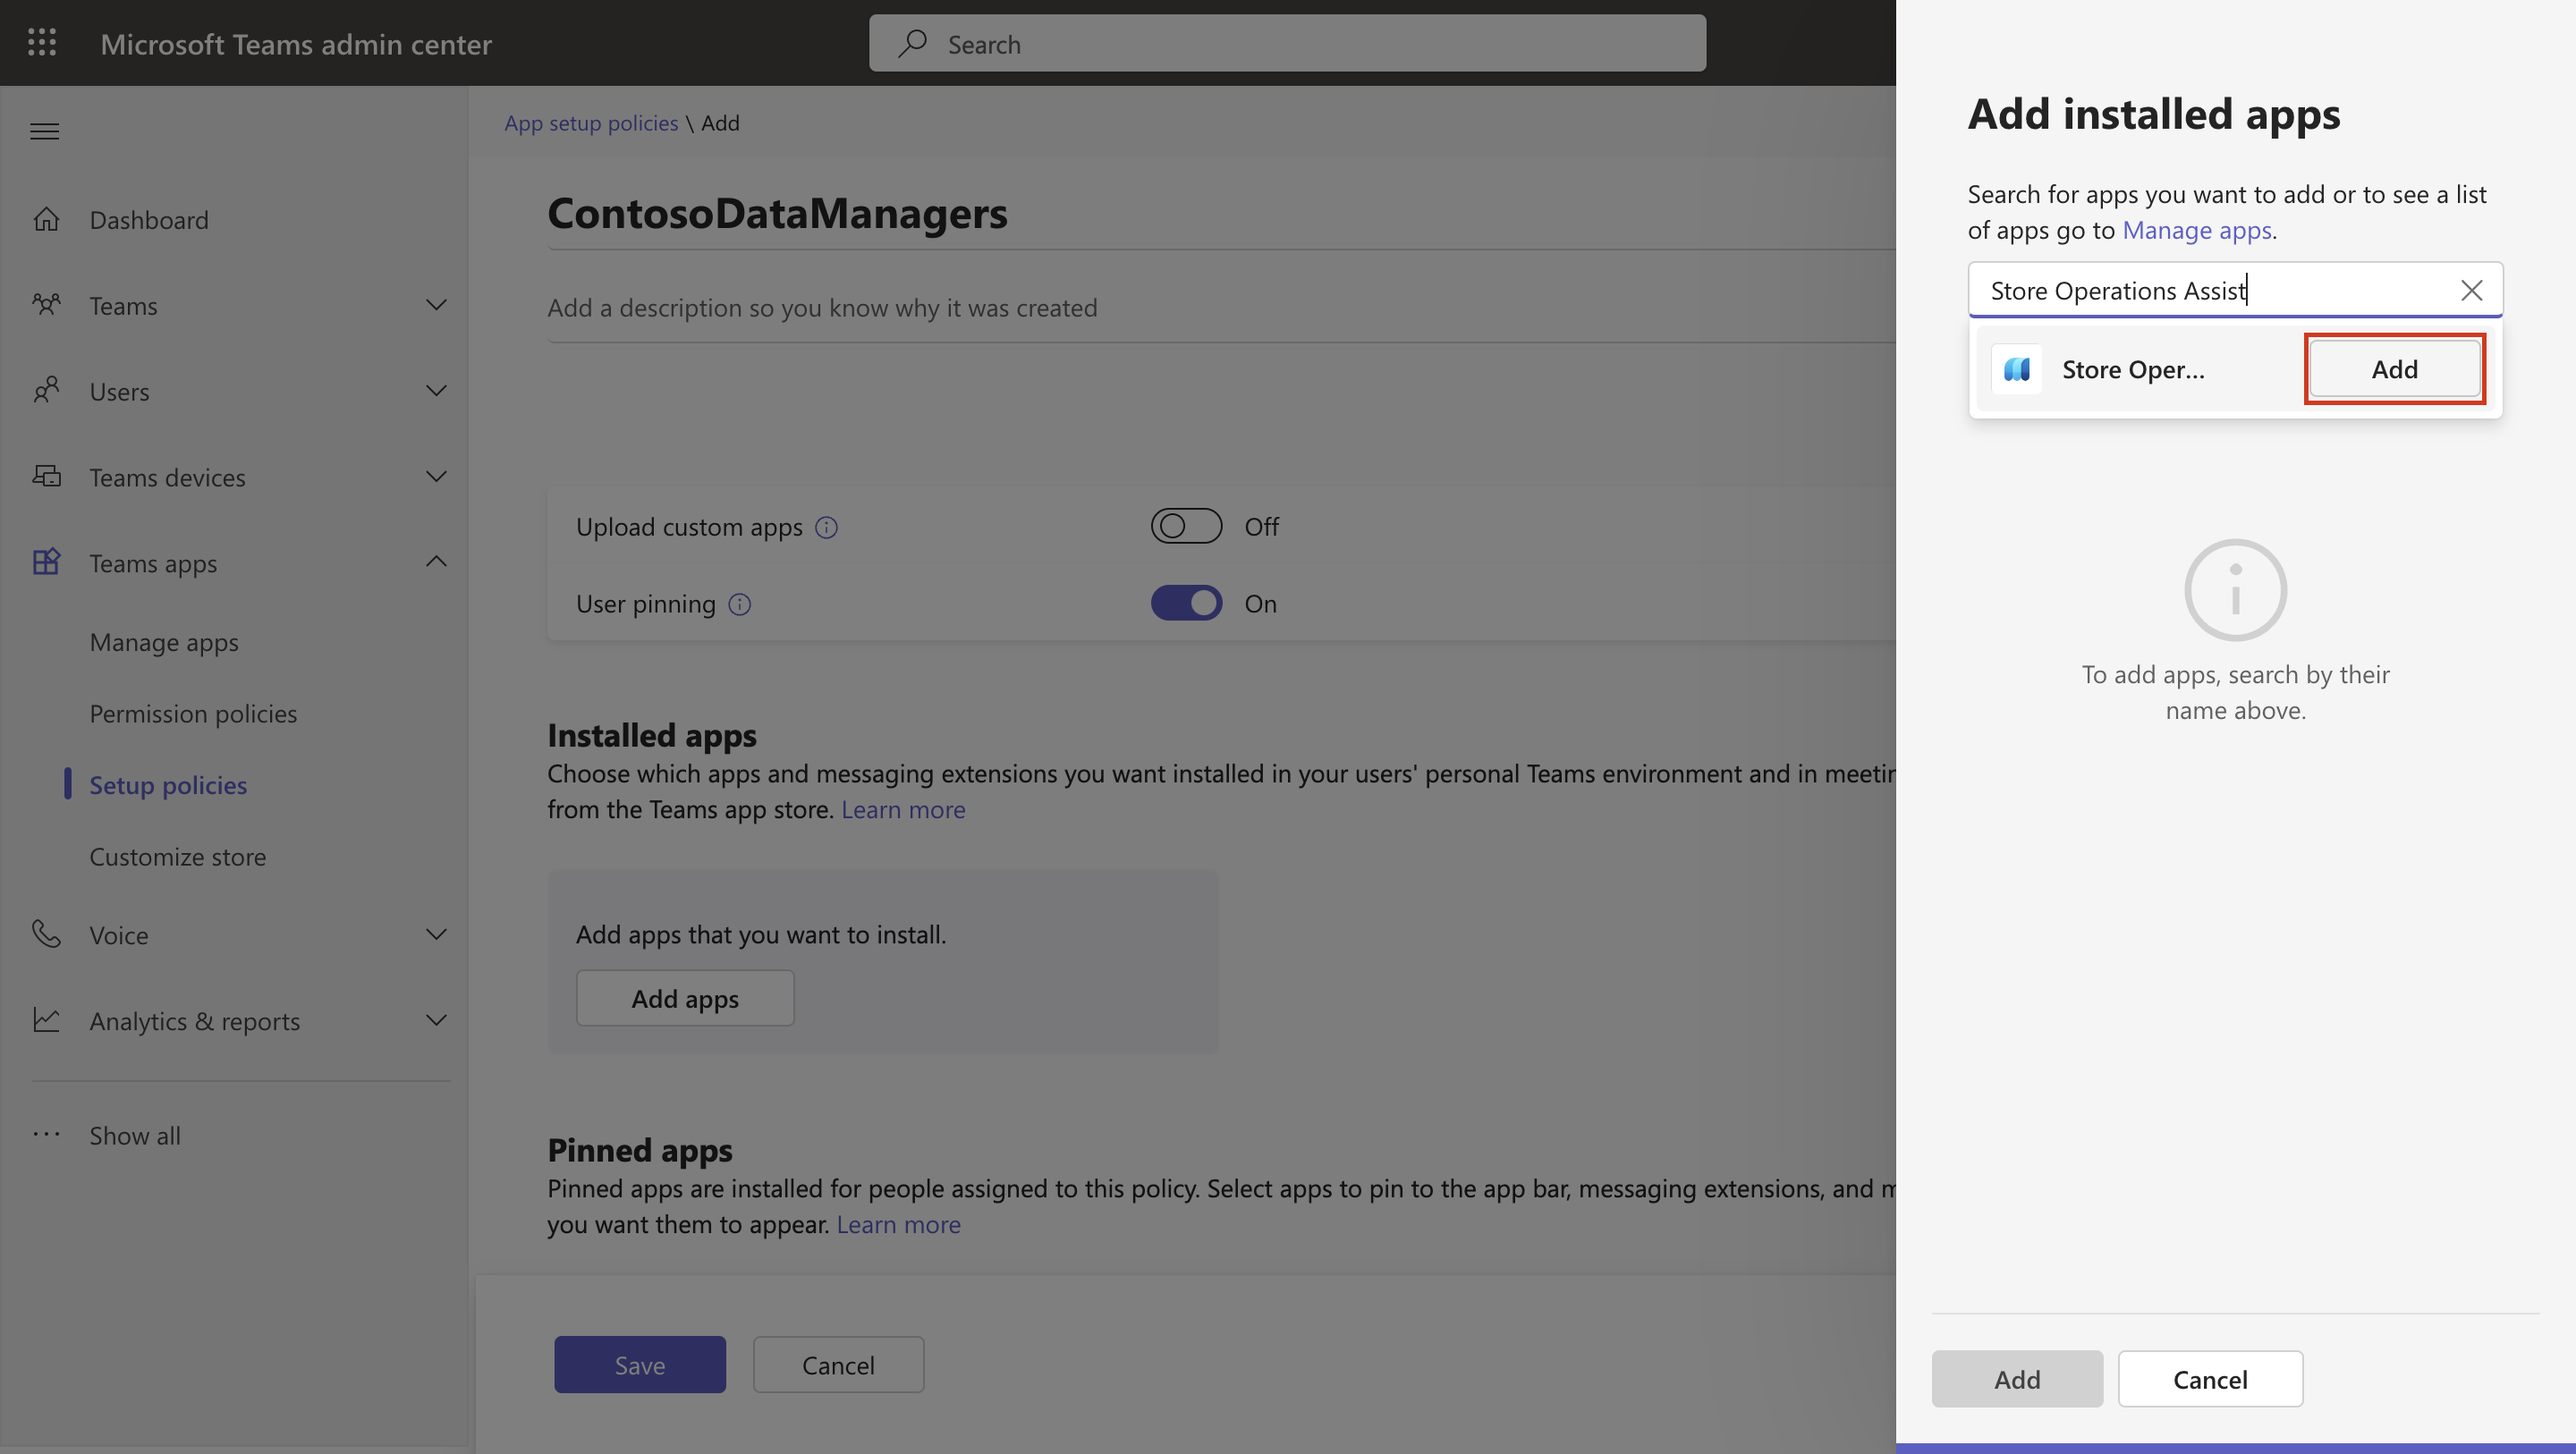
Enter ContosoDataManagers as the policy name. Under Installed apps, select Add apps.
In the right pane, search for Store operations from the dropdown menu, and select Add.
Select Add again and then select Save. You're redirected to the App setup policies page in the Teams admin center. The policy that you created should display on this page under the Manage policies tab.
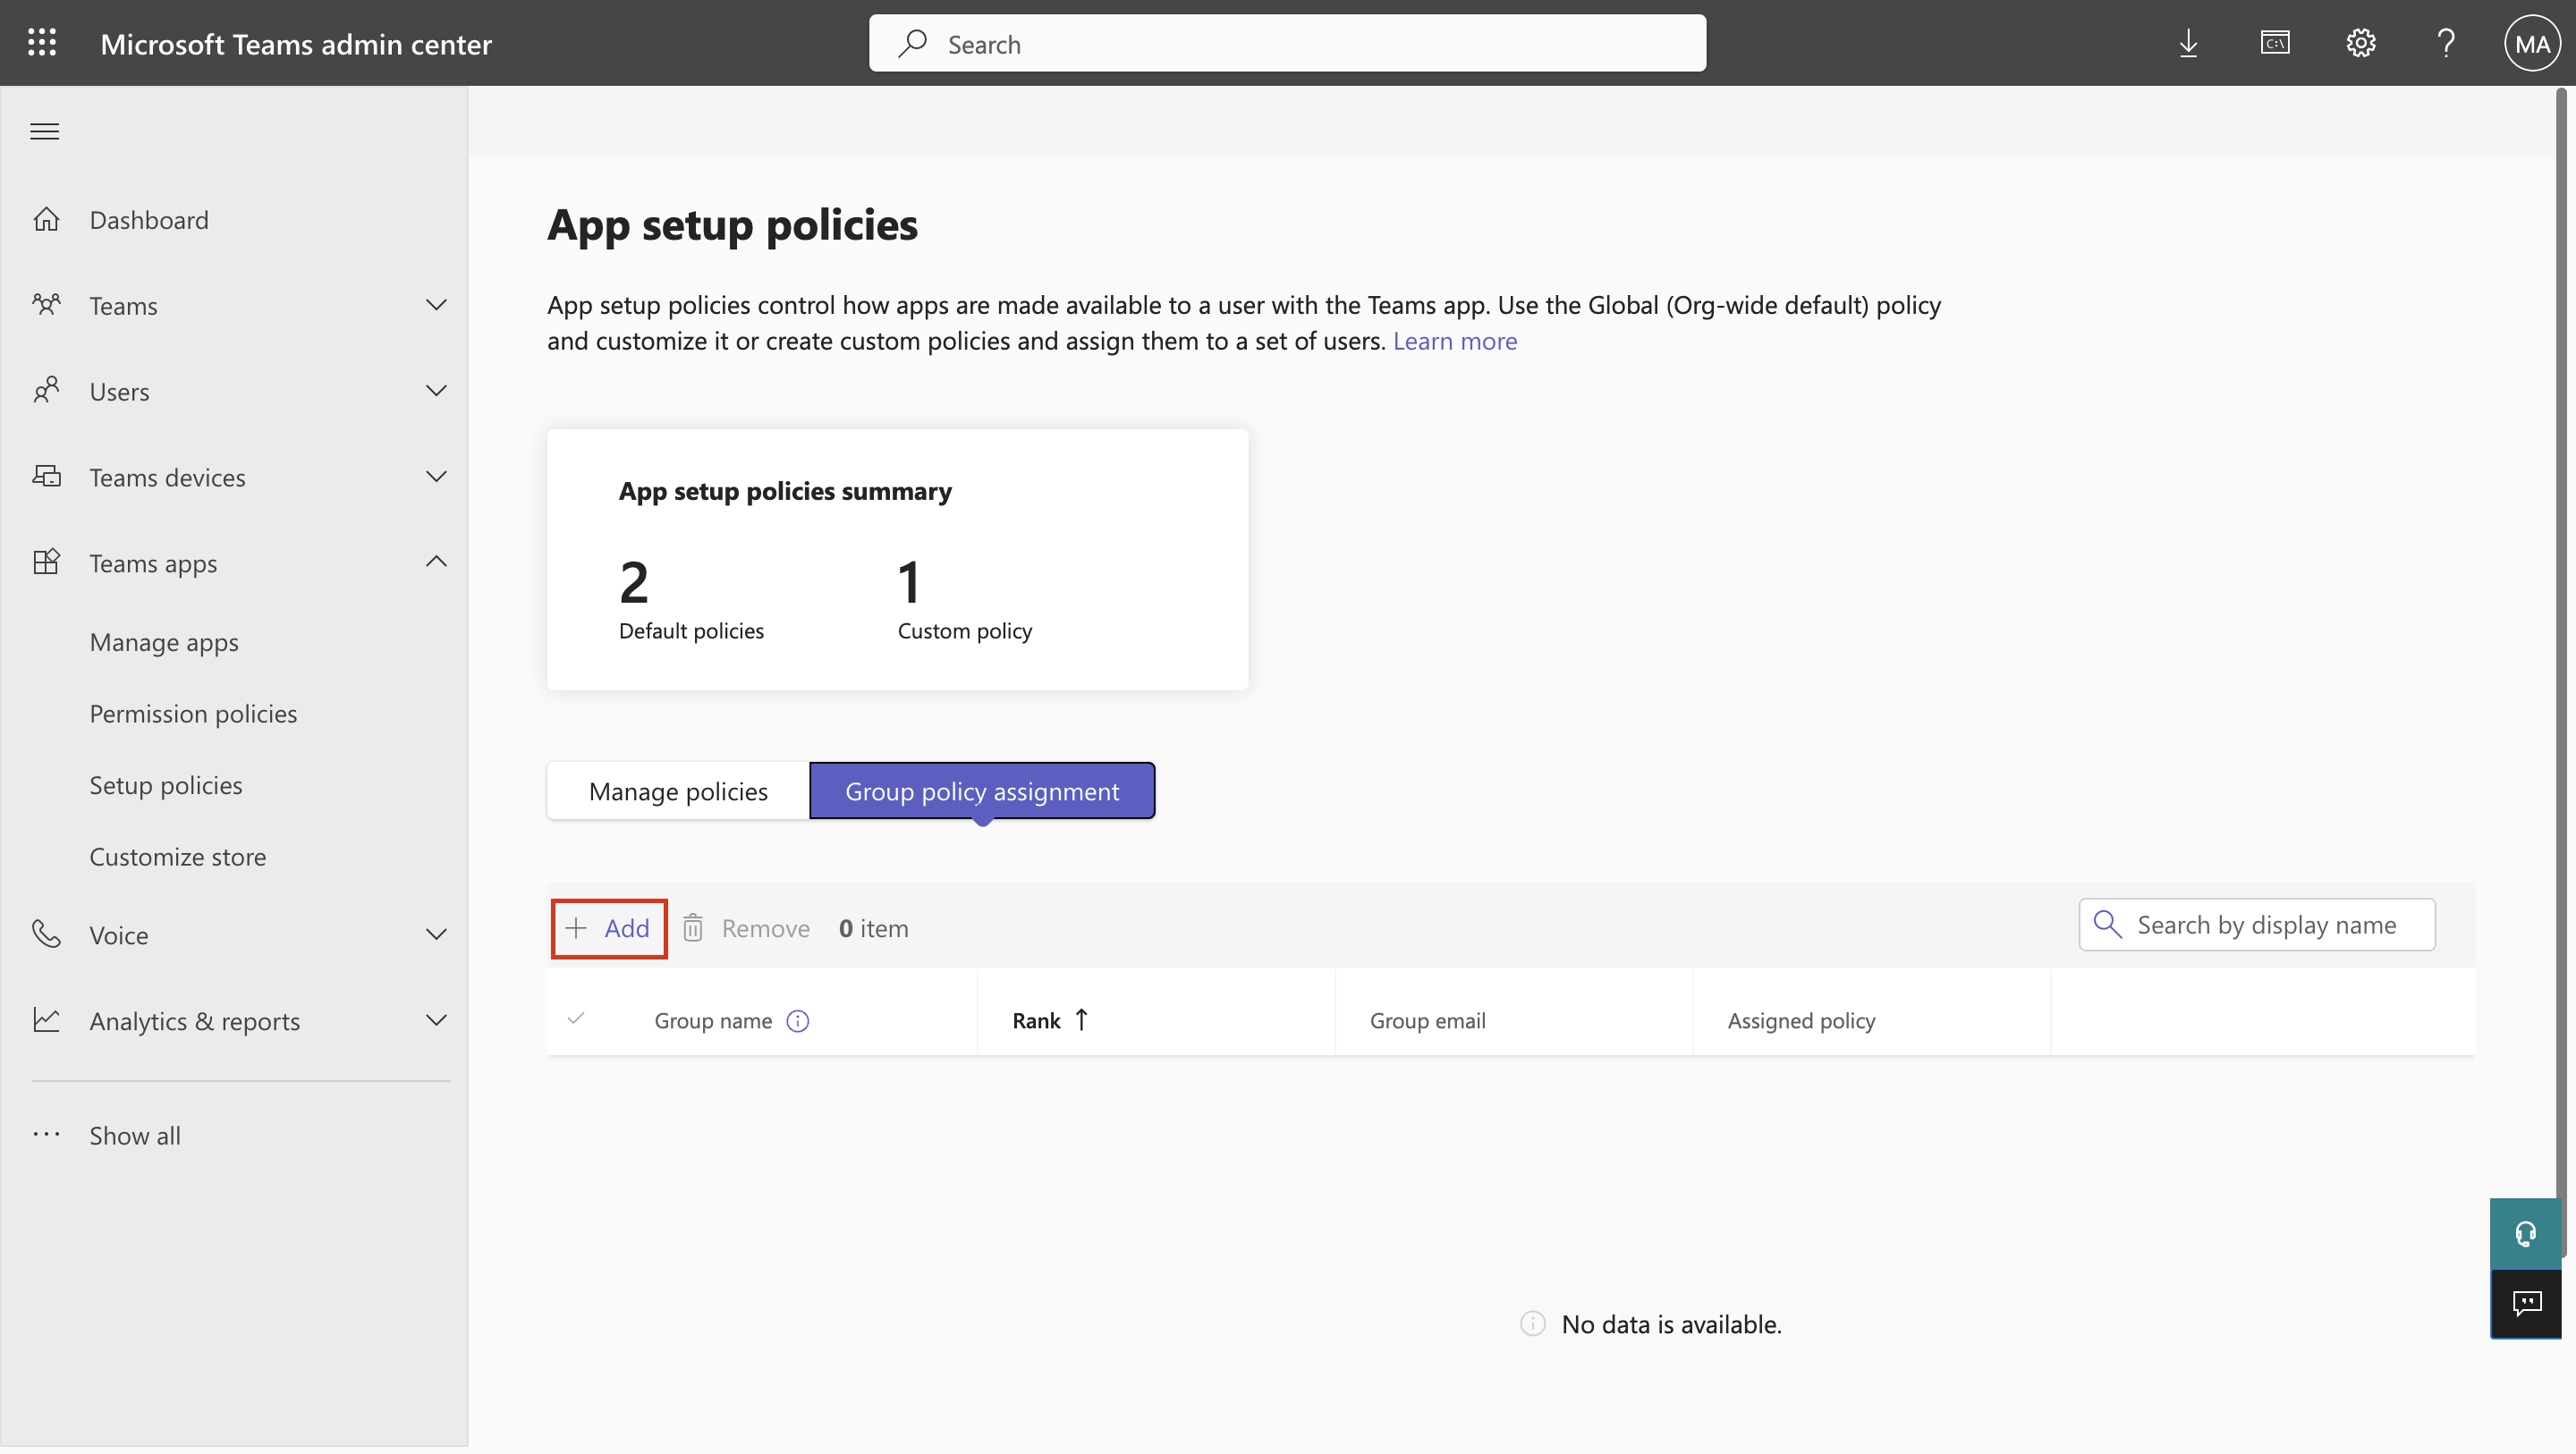
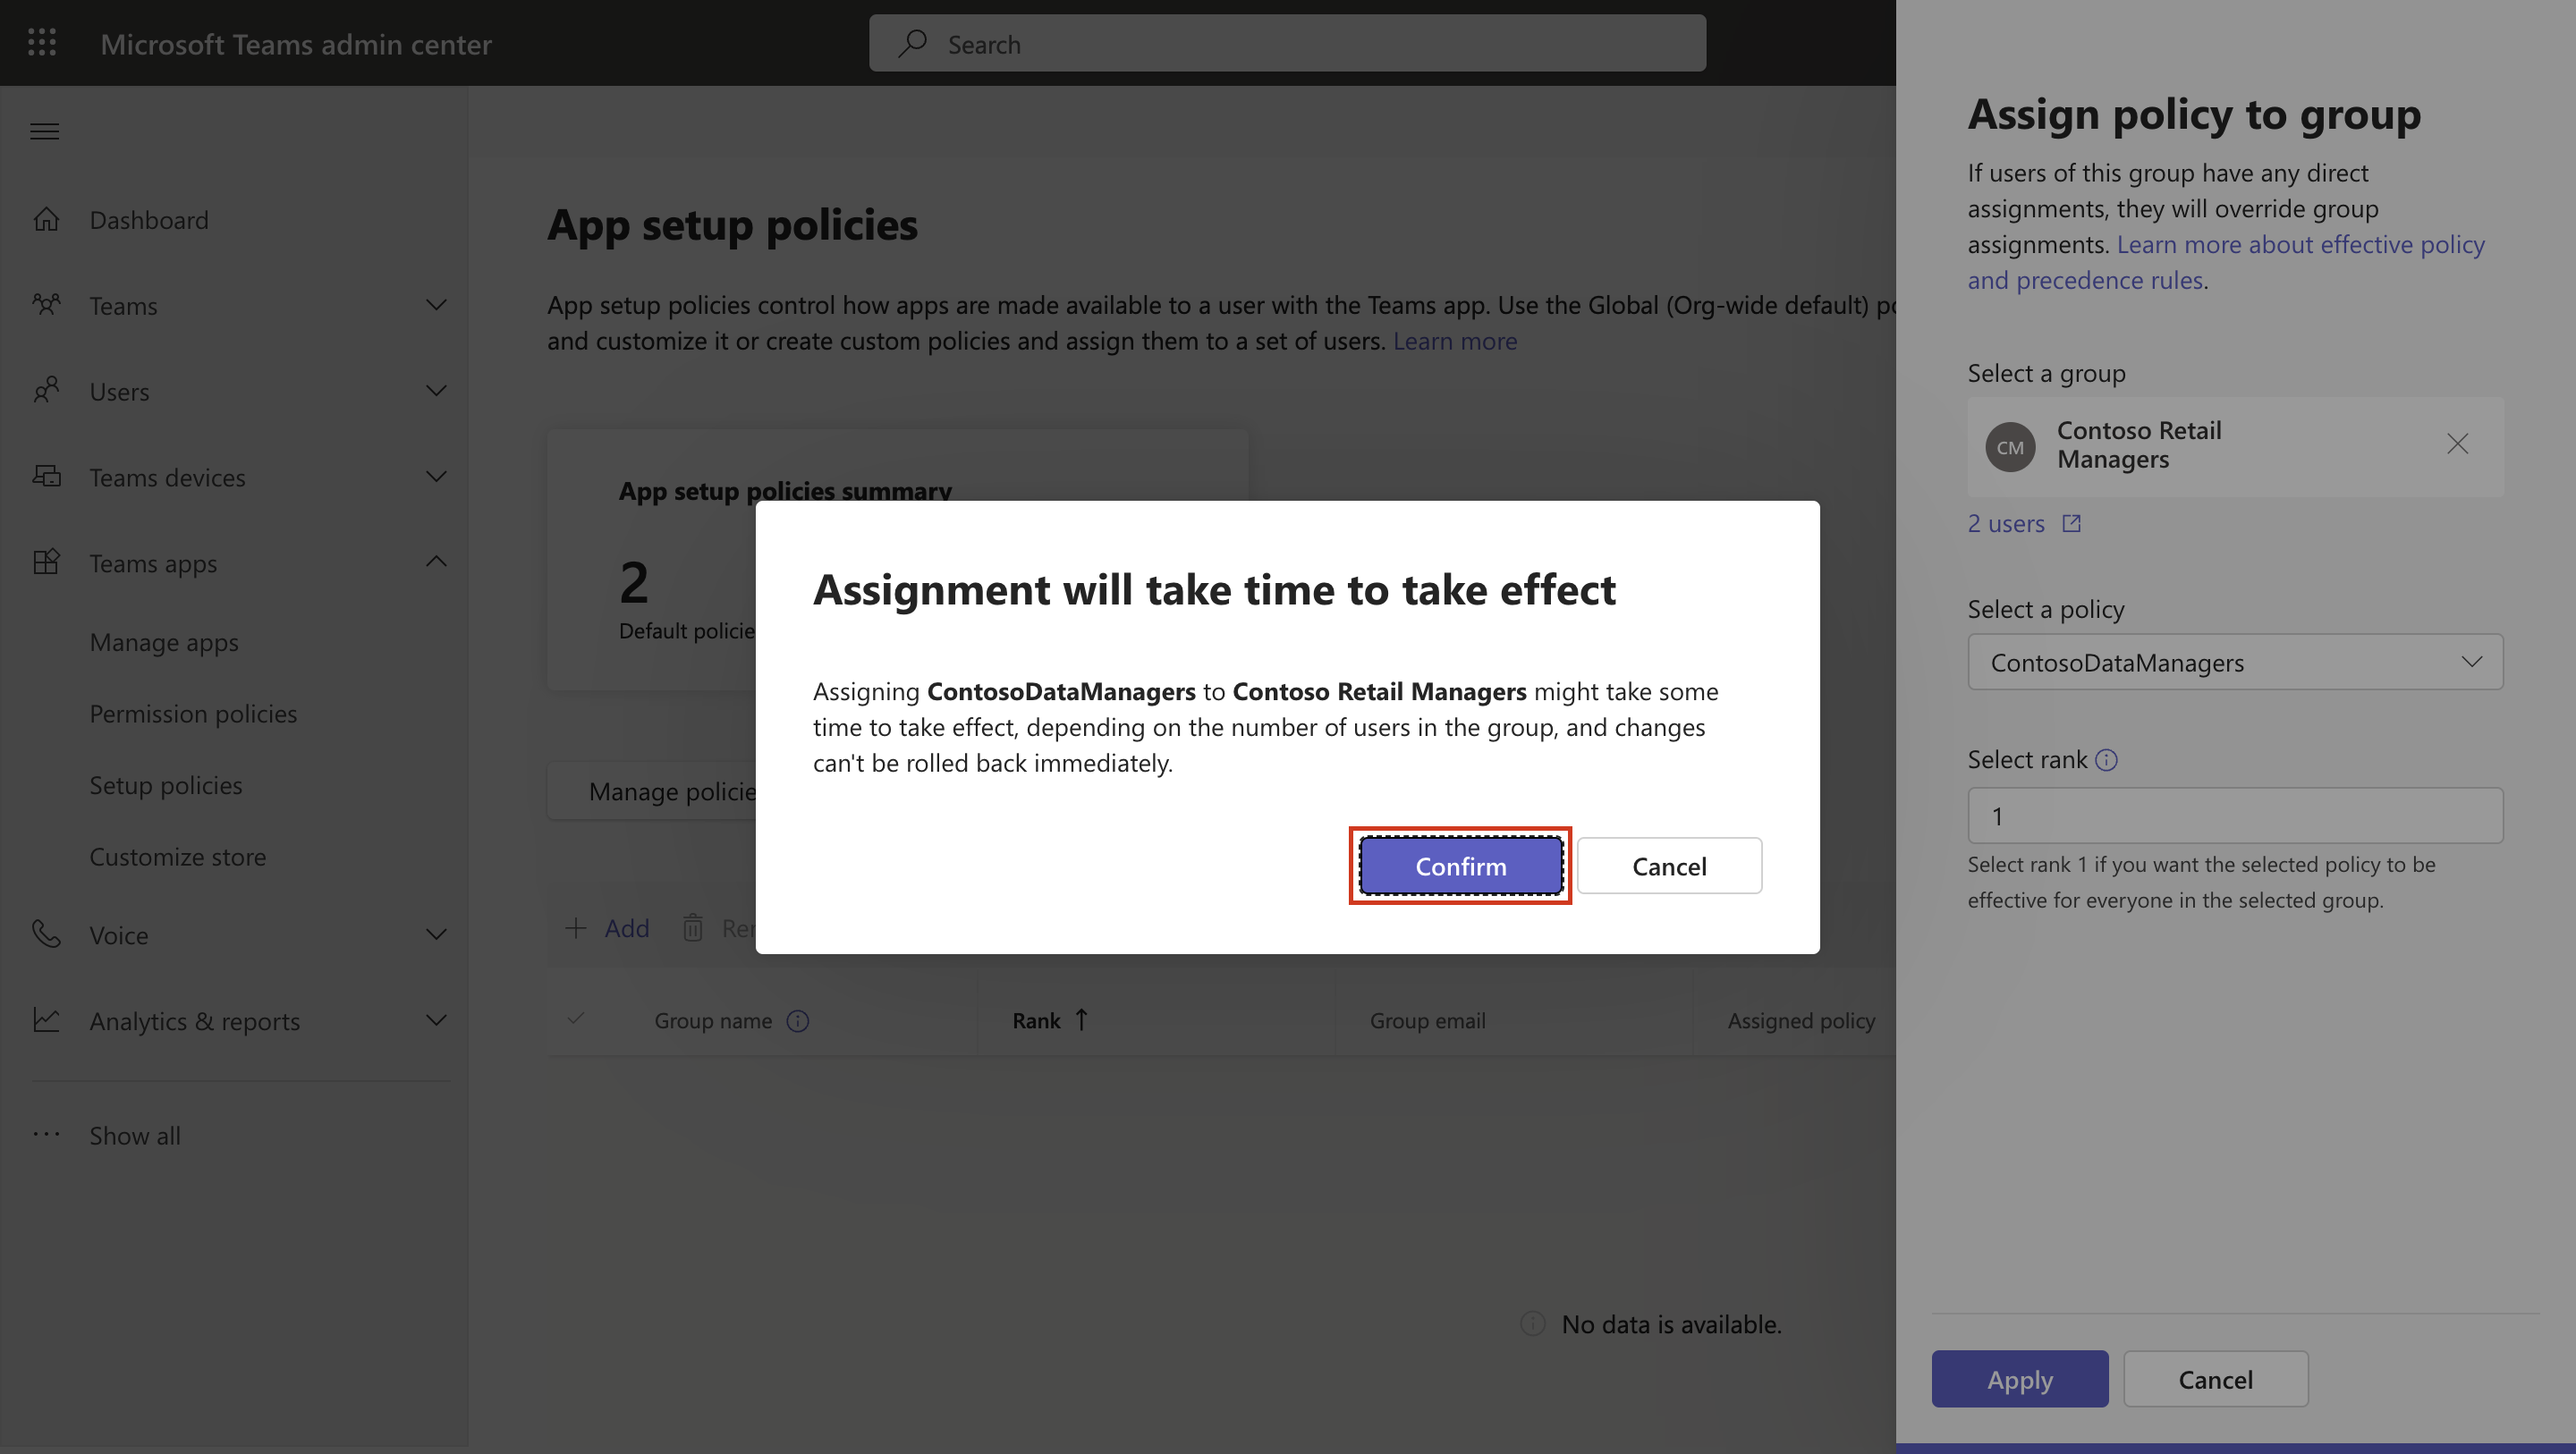
Select the Group policy assignment tab and select Add.
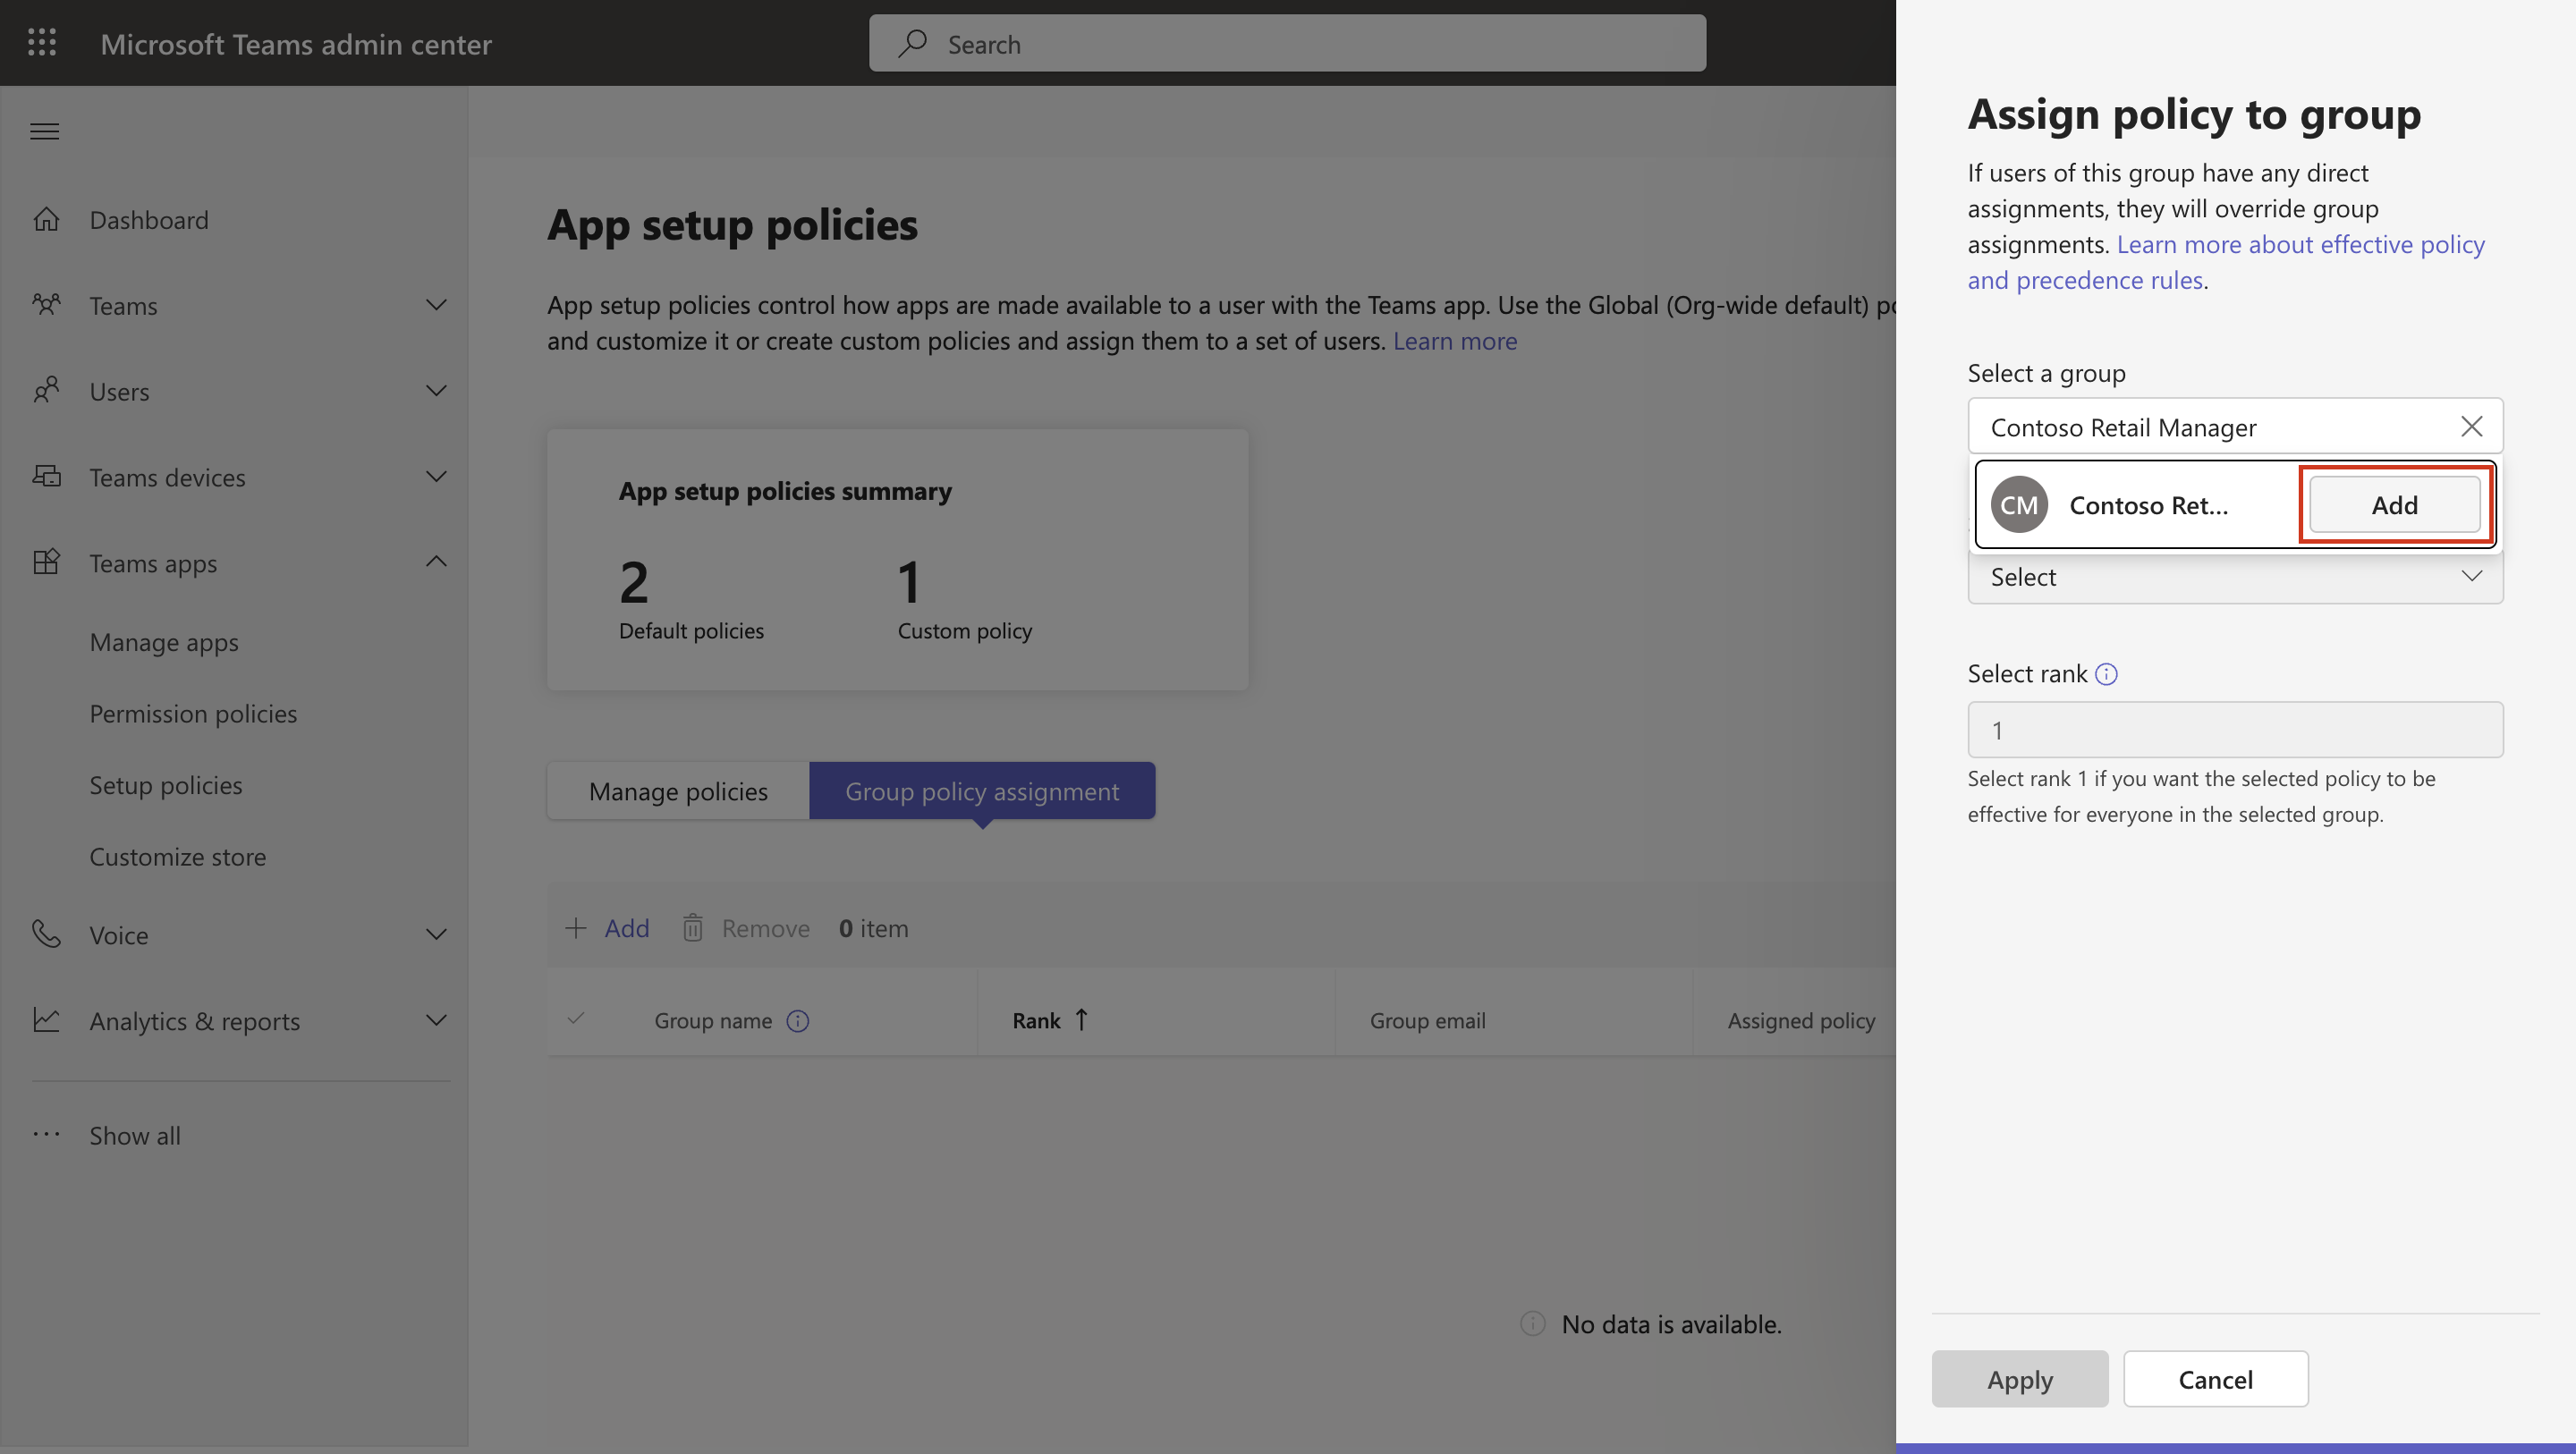
The Assign policy to a group panel opens on the right side of the screen. In the Select a group field, search for the Contoso Retail Managers group, and select Add.
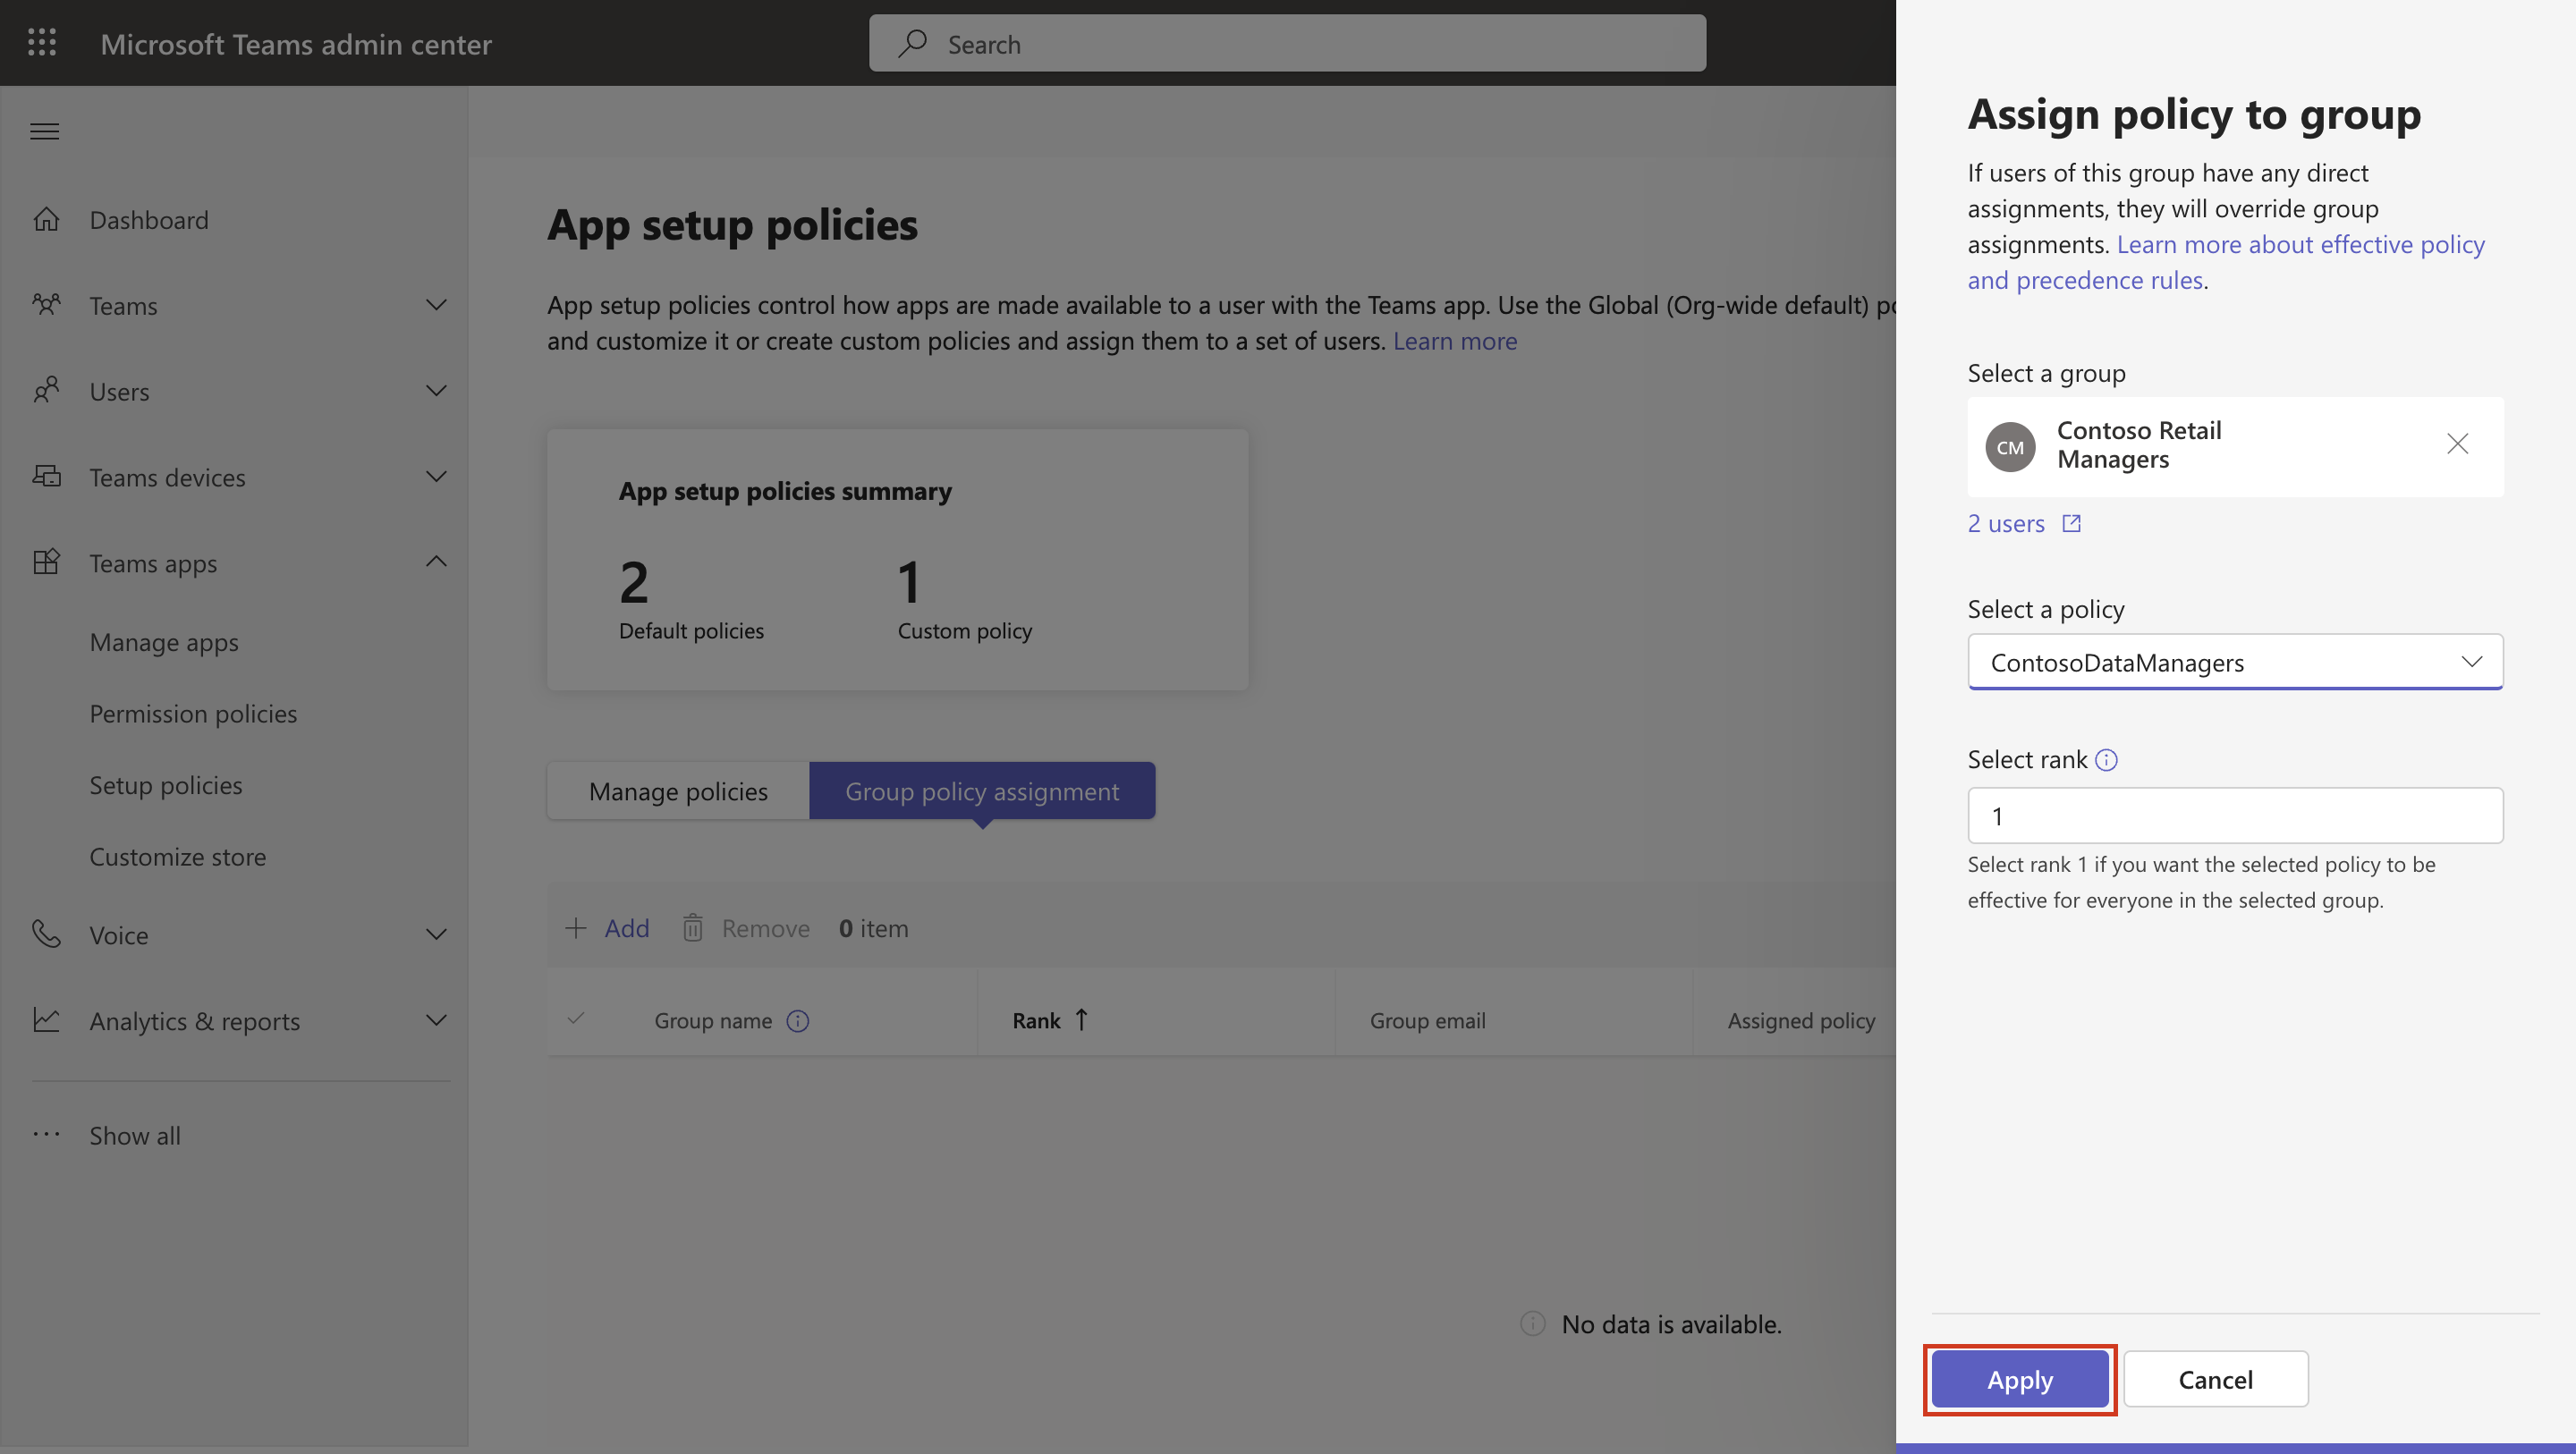
Under Select a policy field, select the ContosoDataManagers policy. Then select Apply.
Select Confirm.
Your policy is now assigned for all the retail data managers at Contoso. Hence, they can access Store operations from their Microsoft Teams.
