練習 - 使用 MSAL.NET 實作互動式驗證
在此練習中,您會了解如何執行下列動作:
- 使用 Microsoft 身分識別平台來註冊應用程式
- 在 MSAL.NET 中使用
PublicClientApplicationBuilder類別 - 在主控台應用程式中以互動方式取得權杖
必要條件
- 具有有效訂用帳戶的 Azure 帳戶。 如果還沒有訂閱,則可在 https://azure.com/free 註冊免費試用版。
- Visual Studio Code:您可以從 https://code.visualstudio.com 安裝 Visual Studio Code。
- .NET SDK https://dotnet.microsoft.com/download/dotnet 的版本 (6.0、7.0 或 8.0)
註冊新的應用程式
登入入口網站:https://portal.azure.com
搜尋並選取 [Microsoft Entra ID]。
在 [管理] 底下,選取 [應用程式註冊] > [新增註冊] 。
在出現的 [註冊應用程式] 頁面中,輸入應用程式的註冊資訊:
欄位 值 名稱 az204appreg支援的帳戶類型 選取 [僅此組織目錄中的帳戶] 重新導向 URI (選用) 選取 [公用用戶端/原生](行動裝置和桌面版), 然後在右側方塊中輸入 http://localhost。選取註冊。
Microsoft Entra ID 會將唯一應用程式 (用戶端) 識別碼指派給您的應用程式,然後系統會帶您進入應用程式的 [概觀] 頁面。
設定主控台應用程式
啟動 Visual Studio Code,然後依序選取 [終端] 和 [新增終端] 以開啟終端。
建立專案的資料夾並進行變更。
md az204-auth
cd az204-auth
建立 .NET 主控台應用程式。
dotnet new console在 Visual Studio Code 中開啟 az204-auth 資料夾。
code . -r
建置主控台應用程式
在本節中,您會將必要的套件和程式碼新增至專案。
使用陳述式新增套件
將
Microsoft.Identity.Client套件新增至 Visual Studio Code 終端中的專案。dotnet add package Microsoft.Identity.Client開啟 Program.cs 檔案,然後新增
using陳述式以包含Microsoft.Identity.Client並啟用非同步作業。using System.Threading.Tasks; using Microsoft.Identity.Client;變更 Main 方法以啟用非同步。
public static async Task Main(string[] args)
新增互動式驗證的程式碼
我們需要兩個變數來保留應用程式 (用戶端) 和目錄 (租用戶) 識別碼。 您可以從入口網站複製這些值。 新增下列程式碼,並將字串值取代為入口網站中的適當值。
private const string _clientId = "APPLICATION_CLIENT_ID"; private const string _tenantId = "DIRECTORY_TENANT_ID";使用
PublicClientApplicationBuilder類別來建置授權內容。var app = PublicClientApplicationBuilder .Create(_clientId) .WithAuthority(AzureCloudInstance.AzurePublic, _tenantId) .WithRedirectUri("http://localhost") .Build();代碼 描述 .Create從 clientID 建立 PublicClientApplicationBuilder。.WithAuthority新增對應至 ADFS 伺服器的已知授權單位。 在程式碼中,我們會指定公用雲端,並針對我們註冊的應用程式使用租用戶。
取得權杖
當您註冊 az204appreg 應用程式時,它會自動產生 Microsoft Graph 的 API 權限 user.read。 我們將使用該權限來取得權杖。
設定權杖要求的權限範圍。 將下列程式碼新增至
PublicClientApplicationBuilder。string[] scopes = { "user.read" };新增程式碼以要求權杖,並將結果寫入至主控台。
AuthenticationResult result = await app.AcquireTokenInteractive(scopes).ExecuteAsync(); Console.WriteLine($"Token:\t{result.AccessToken}");
檢閱已完成的應用程式
Program.cs 檔案的內容應該類似下列範例:
using System;
using System.Threading.Tasks;
using Microsoft.Identity.Client;
namespace az204_auth
{
class Program
{
private const string _clientId = "APPLICATION_CLIENT_ID";
private const string _tenantId = "DIRECTORY_TENANT_ID";
public static async Task Main(string[] args)
{
var app = PublicClientApplicationBuilder
    .Create(_clientId)
    .WithAuthority(AzureCloudInstance.AzurePublic, _tenantId)
    .WithRedirectUri("http://localhost")
    .Build();
string[] scopes = { "user.read" };
AuthenticationResult result = await app.AcquireTokenInteractive(scopes).ExecuteAsync();

Console.WriteLine($"Token:\t{result.AccessToken}");
}
}
}
執行應用程式
在 Visual Studio Code 終端中,執行
dotnet build以檢查錯誤,然後執行dotnet run以執行應用程式。應用程式會開啟預設瀏覽器,提示您選取想要用來驗證的帳戶。 如果列出多個帳戶,請選取與應用程式中所使用租用戶相關聯的帳戶。
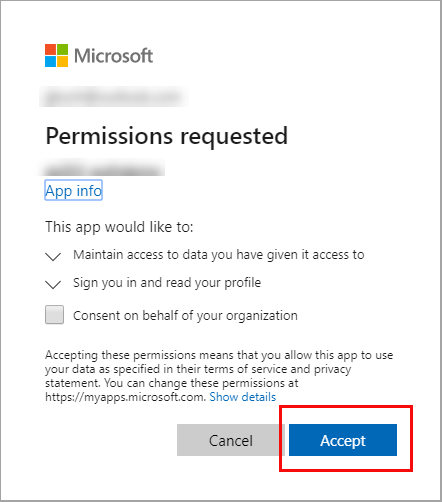
如果這是您第一次向已註冊的應用程式進行驗證,您會收到 [要求的權限] 通知,要求您核准應用程式以讀取與您帳戶相關聯的資料。 選取 [接受]。
您應該會在主控台中看到類似下列範例的結果。
Token: eyJ0eXAiOiJKV1QiLCJub25jZSI6IlVhU.....