練習 - 藉由建立範本來重複使用元件
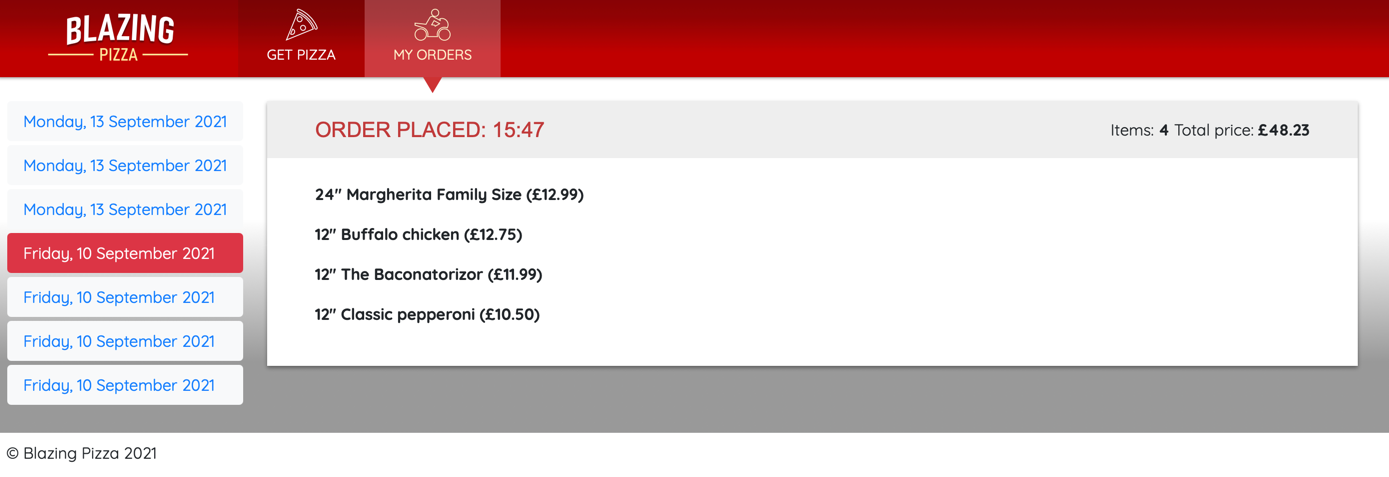
披薩公司想要讓 [我的訂單] 頁面顯示客戶過去訂單的詳細資料,例如訂單中的披薩是什麼,以及客戶進行訂購的時間。
範本可協助您改善 Blazing Pizza 應用程式上 [我的訂單] 頁面的顯示和功能。 在此練習中,您會建立可在 [我的訂單] 頁面上重複使用的分頁範本元件。
建立分頁範本元件
建立新的 Blazor 分頁範本元件檔案和分頁控制項。
建立檔案並新增標記
在 Visual Studio Code 的 Blazor 應用程式專案中,建立名為 Components 的新資料夾,然後在該資料夾中建立名為 PaginationComponent.razor 的新檔案。
將下列 Razor 標記新增至新建立的範本元件:
@typeparam TItem

<div class="container-sm py-4">
    @ItemContent(Items.ElementAt(selectedIndex))
</div>
<nav aria-label="Pagination functionality">
    <ul class="pagination pagination-lg justify-content-center">
        <li class="page-item @(previousDisabled ? "disabled" : "")" disabled="@previousDisabled">
            <a class="page-link" @onclick="@(() => SetIndex(0))">
                <span>⏪</span>
            </a>
        </li>
        <li class="page-item @(previousDisabled ? "disabled" : "")" disabled="@previousDisabled">
            <a class="page-link" @onclick="DecrementIndex"><span>⬅️</span></a>
        </li>
        @foreach ((int index, TItem item) in Items.Select((item, index) => (index, item)))
        {
            var isActive = index == selectedIndex;
            <li class="page-item @(isActive ? "active" :"")">
                <a class="page-link" @onclick="@(() => SetIndex(index))">
                    @ItemLabel(item)
                </a>
            </li>
        }
        <li class="page-item @(nextDisabled ? "disabled" : "")" disabled="@nextDisabled">
            <a class="page-link" @onclick="IncrementIndex"><span>➡️</span></a>
        </li>
        <li class="page-item @(nextDisabled ? "disabled" : "")" disabled="@nextDisabled">
            <a class="page-link" @onclick="@(() => SetIndex(Items.Count - 1))">
                <span>⏩</span>
            </a>
        </li>
    </ul>
</nav>
標記接受泛型型別參數 TItem、定義容器以顯示選取的項目,並使用 <nav> 元素來顯示分頁控制項。
控制項會使用 <ul> 元素,其中每個清單項目都是頁碼。 頁碼是由 ItemLabel 轉譯片段所定義,以參數的形式傳入。 ItemLabel 轉譯片段定義於使用範本的元件中。
新增程式碼指示詞
新增 @code 指示詞以處理哪個項目為使用中。
@code {
    [Parameter, EditorRequired]
    public required List<TItem> Items { get; set; }

    [Parameter, EditorRequired]
    public required RenderFragment<TItem> ItemContent { get; set; }

    [Parameter, EditorRequired]
    public required Func<TItem, MarkupString> ItemLabel { get; set; }

    int selectedIndex;

    bool previousDisabled => selectedIndex == 0;
    bool nextDisabled => selectedIndex == Items.Count - 1;

    void IncrementIndex() => selectedIndex++;
    void DecrementIndex() => selectedIndex--;
    void SetIndex(int index) => selectedIndex = index;

    protected override void OnInitialized() =>
        selectedIndex = Items.Count - 1;
}
上述程式碼區塊會定義使用範本所需的參數。
Items參數是要顯示的TItem項目的清單。ItemContent參數是一個轉譯片段,定義如何顯示所選取項目的內容。ItemLabel參數是一個函式,定義如何顯示每個項目的標籤。
selectedIndex 欄位會追蹤目前選取的項目。 IncrementIndex、DecrementIndex 和 SetIndex 方法可用來變更選取的項目索引。
OnInitialized 方法會將初始選取的項目設定為清單中的最後一個項目。
更新 MyOrders 元件
現在,更新 [我的訂單] 頁面以使用範本元件。
在 [Explorer] 中展開 [頁面],然後選取 [MyOrders.razor]。
在最後一個
@inject指示詞後面,新增@using指示詞:@using BlazingPizza.Components這一行可讓
MyOrder元件使用新建立的元件範本。在
<div class="main">標記內,在if/else if/else邏輯區塊中,以下列程式碼取代現有的else分支:else { <PaginationComponent TItem="OrderWithStatus" Items="ordersWithStatus.OrderBy(o => o.Order.CreatedTime).ToList()" ItemLabel='item => new($"{item.Order.CreatedTime:ddd, MMM. d, yyyy}")'> <ItemContent> <div class="list-group-item bg-secondary text-white"> <div class="col"> <h5>@($"{context.Order.CreatedTime:dddd, MMMM d, yyyy hh:mm tt}")</h5> Items: <strong>@context.Order.Pizzas.Count</strong> </div> <div class="col"> Status: <strong>@context.StatusText</strong> </div> @if (@context.StatusText != "Delivered") { <div class="col flex-grow-0"> <a href="myorders/@context.Order.OrderId" class="btn btn-success"> Track > </a> </div> } </div> <div class="list-group-item"> <div class="col"> <OrderReview Order="@context.Order" /> </div> </div> </ItemContent> </PaginationComponent> }
程式碼現在依賴 PaginationComponent,提供 OrderWithStatus 的泛型型別、依其建立日期排序的過去訂單清單,以及為每個項目產生標籤的函式。 ItemContent 轉譯片段會定義每個項目的標記。
測試更新
在 Visual Studio Code 中按 F5,或選取 [執行] > [開始偵錯]。
在應用程式中,進行一些訂購,然後選取 [我的訂單]。 確認您看到具有訂單清單的分頁控制項,並且可以選取訂單以載入訂單詳細資料。
按下 Shift+F5 或選取 [執行] > [停止偵錯] 以停止應用程式。
