Xamarin.Mac 中的 .storyboard/.xib-less 使用者介面設計
本文涵蓋直接從 C# 程式代碼建立 Xamarin.Mac 應用程式的使用者介面,而不需要 .storyboard 檔案、.xib 檔案或介面產生器。
概觀
在 Xamarin.Mac 應用程式中使用 C# 和 .NET 時,您可以存取開發人員在 和 Xcode 中Objective-C運作的相同使用者介面元素和工具。 一般而言,建立 Xamarin.Mac 應用程式時,您會使用 Xcode 的 Interface Builder 搭配 .storyboard 或 .xib 檔案來建立和維護應用程式的使用者介面。
您也可以選擇直接在 C# 程式代碼中建立部分或所有 Xamarin.Mac 應用程式的 UI。 在本文中,我們將討論在 C# 程式代碼中建立使用者介面和 UI 元素的基本概念。
切換視窗以使用程序代碼
當您建立新的 Xamarin.Mac Cocoa 應用程式時,預設會取得標準空白視窗。 此視窗定義於 Main.storyboard (或傳統上是 MainWindow.xib) 檔案中,自動包含在專案中。 這也包含 管理應用程式主要檢視的ViewController.cs 檔案(或傳統上 是MainWindow.cs 和 MainWindowController.cs 檔案)。
若要切換至應用程式的 Xibless 視窗,請執行下列動作:
開啟您想要停止使用
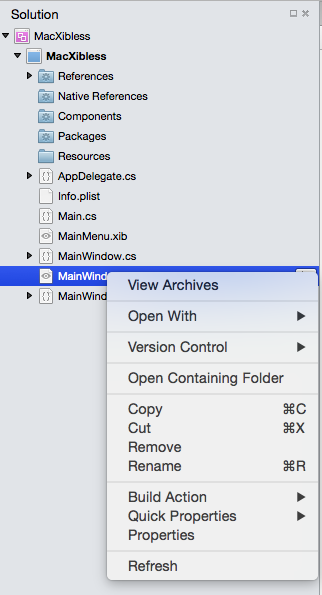
.storyboard或 .xib 檔案的應用程式,以在 Visual Studio for Mac 中定義使用者介面。在 Solution Pad 中,以滑鼠右鍵按兩下 Main.storyboard 或 MainWindow.xib 檔案,然後選取 [移除]:

從 [ 移除對話框] 中,按兩下 [ 刪除] 按鈕,從專案完全移除 .storyboard 或 .xib:

現在,我們必須修改MainWindow.cs檔案來定義視窗的配置,並修改ViewController.cs或MainWindowController.cs檔案來建立類別MainWindow的實例,因為我們不再使用 .storyboard 或 .xib 檔案。
針對使用者介面使用 Storyboards 的新式 Xamarin.Mac 應用程式可能不會自動包含 MainWindow.cs、 ViewController.cs 或 MainWindowController.cs 檔案。 視需要,只要將新的空白 C# 類別新增至專案 (新增>檔案...>一般>空白類別)並將它命名為與遺漏的檔案相同。
在程式代碼中定義視窗
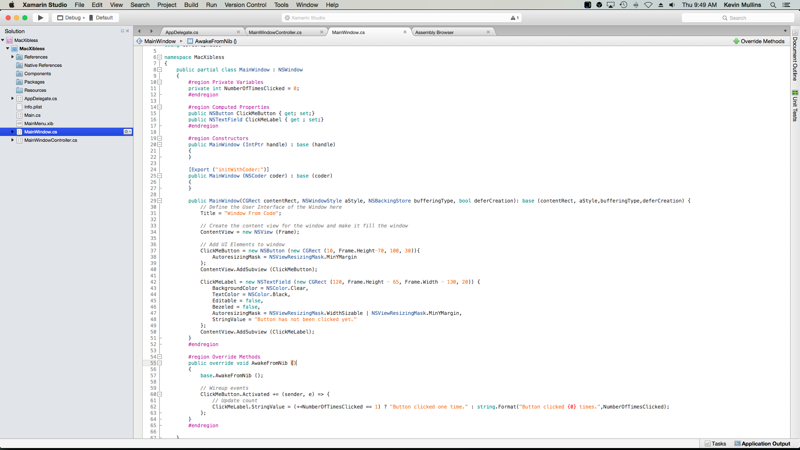
接下來,編輯 MainWindow.cs 檔案,使其看起來如下:
using System;
using Foundation;
using AppKit;
using CoreGraphics;

namespace MacXibless
{
    public partial class MainWindow : NSWindow
    {
        #region Private Variables
        private int NumberOfTimesClicked = 0;
        #endregion

        #region Computed Properties
        public NSButton ClickMeButton { get; set;}
        public NSTextField ClickMeLabel { get ; set;}
        #endregion

        #region Constructors
        public MainWindow (IntPtr handle) : base (handle)
        {
        }

        [Export ("initWithCoder:")]
        public MainWindow (NSCoder coder) : base (coder)
        {
        }

        public MainWindow(CGRect contentRect, NSWindowStyle aStyle, NSBackingStore bufferingType, bool deferCreation): base (contentRect, aStyle,bufferingType,deferCreation) {
            // Define the user interface of the window here
            Title = "Window From Code";

            // Create the content view for the window and make it fill the window
            ContentView = new NSView (Frame);

            // Add UI elements to window
            ClickMeButton = new NSButton (new CGRect (10, Frame.Height-70, 100, 30)){
                AutoresizingMask = NSViewResizingMask.MinYMargin
            };
            ContentView.AddSubview (ClickMeButton);

            ClickMeLabel = new NSTextField (new CGRect (120, Frame.Height - 65, Frame.Width - 130, 20)) {
                BackgroundColor = NSColor.Clear,
                TextColor = NSColor.Black,
                Editable = false,
                Bezeled = false,
                AutoresizingMask = NSViewResizingMask.WidthSizable | NSViewResizingMask.MinYMargin,
                StringValue = "Button has not been clicked yet."
            };
            ContentView.AddSubview (ClickMeLabel);
        }
        #endregion

        #region Override Methods
        public override void AwakeFromNib ()
        {
            base.AwakeFromNib ();

            // Wireup events
            ClickMeButton.Activated += (sender, e) => {
                // Update count
                ClickMeLabel.StringValue = (++NumberOfTimesClicked == 1) ? "Button clicked one time." : string.Format("Button clicked {0} times.",NumberOfTimesClicked);
            };
        }
        #endregion

    }
}
讓我們討論一些重要元素。
首先,我們新增了一些 類似出口的計算屬性 (如同視窗是在 .storyboard 或 .xib 檔案中建立):
public NSButton ClickMeButton { get; set;}
public NSTextField ClickMeLabel { get ; set;}
這些會讓我們存取要顯示在視窗上的UI元素。 由於視窗不會從 .storyboard 或 .xib 檔案擴充,因此我們需要一種方法來具現化它(如稍後在 類別中看到 MainWindowController 的)。 這就是這個新建構函式方法的用途:
public MainWindow(CGRect contentRect, NSWindowStyle aStyle, NSBackingStore bufferingType, bool deferCreation): base (contentRect, aStyle,bufferingType,deferCreation) {
    ...
}
在此,我們將設計視窗的配置,並放置建立必要使用者介面所需的任何 UI 元素。 我們必須先有 內容檢視 來包含元素,才能將任何 UI 元素新增至視窗:
ContentView = new NSView (Frame);
這會建立將填滿視窗的內容檢視。 現在,我們會將第一個UI元素,新增 NSButton至視窗:
ClickMeButton = new NSButton (new CGRect (10, Frame.Height-70, 100, 30)){
    AutoresizingMask = NSViewResizingMask.MinYMargin
};
ContentView.AddSubview (ClickMeButton);
這裡要注意的第一件事是,與iOS不同,macOS 會使用數學表示法來定義其視窗座標系統。 因此,原點位於視窗的左下角,值會向右和向視窗右上角增加。 當我們建立新的 NSButton時,我們會將此納入考慮,因為我們會在畫面上定義其位置和大小。
屬性 AutoresizingMask = NSViewResizingMask.MinYMargin 會告訴按鈕,我們想要在視窗垂直重設大小時,保持與視窗頂端相同的位置。 同樣地,這是必要的,因為 (0,0) 位於視窗的左下角。
最後,方法 ContentView.AddSubview (ClickMeButton) 會將 新增 NSButton 至 [內容檢視],以便在應用程式執行時顯示在畫面上,並顯示視窗。
接下來,標籤會新增至視窗,以顯示已按下 的次數 NSButton :
ClickMeLabel = new NSTextField (new CGRect (120, Frame.Height - 65, Frame.Width - 130, 20)) {
    BackgroundColor = NSColor.Clear,
    TextColor = NSColor.Black,
    Editable = false,
    Bezeled = false,
    AutoresizingMask = NSViewResizingMask.WidthSizable | NSViewResizingMask.MinYMargin,
    StringValue = "Button has not been clicked yet."
};
ContentView.AddSubview (ClickMeLabel);
由於 macOS 沒有特定的 Label UI 元素,因此我們新增了特別樣式、不可 NSTextField 編輯的標籤作為標籤。 就像先前的按鈕一樣,大小和位置會考慮視窗左下角 (0,0) 。 屬性 AutoresizingMask = NSViewResizingMask.WidthSizable | NSViewResizingMask.MinYMargin 使用 或 運算符來結合兩 NSViewResizingMask 個功能。 這會讓標籤在視窗垂直重設大小並縮小並放大時,讓標籤保持與視窗頂端相同的位置,因為視窗會水準重設大小。
同樣地,方法會將 ContentView.AddSubview (ClickMeLabel) 新增 NSTextField 至內容檢視,以便在執行應用程式並開啟視窗時顯示在畫面上。
調整視窗控制器
由於的設計 MainWindow 不再從 .storyboard 或 .xib 檔案載入,因此我們必須對視窗控制器進行一些調整。 編輯MainWindowController.cs檔案,使其看起來如下:
using System;

using Foundation;
using AppKit;
using CoreGraphics;

namespace MacXibless
{
    public partial class MainWindowController : NSWindowController
    {
        public MainWindowController (IntPtr handle) : base (handle)
        {
        }

        [Export ("initWithCoder:")]
        public MainWindowController (NSCoder coder) : base (coder)
        {
        }

        public MainWindowController () : base ("MainWindow")
        {
            // Construct the window from code here
            CGRect contentRect = new CGRect (0, 0, 1000, 500);
            base.Window = new MainWindow(contentRect, (NSWindowStyle.Titled | NSWindowStyle.Closable | NSWindowStyle.Miniaturizable | NSWindowStyle.Resizable), NSBackingStore.Buffered, false);

            // Simulate Awaking from Nib
            Window.AwakeFromNib ();
        }

        public override void AwakeFromNib ()
        {
            base.AwakeFromNib ();
        }

        public new MainWindow Window {
            get { return (MainWindow)base.Window; }
        }
    }
}
讓我們討論這項修改的重要元素。
首先,我們會定義 類別的新實例 MainWindow ,並將它指派給基底視窗控制器的 Window 屬性:
CGRect contentRect = new CGRect (0, 0, 1000, 500);
base.Window = new MainWindow(contentRect, (NSWindowStyle.Titled | NSWindowStyle.Closable | NSWindowStyle.Miniaturizable | NSWindowStyle.Resizable), NSBackingStore.Buffered, false);
我們會使用 CGRect定義螢幕視窗的位置。 就像視窗的座標系統一樣,螢幕會將 (0,0) 定義為左下角。 接下來,我們會使用 Or 運算符來結合兩個或多個 NSWindowStyle 功能來定義視窗的樣式:
... (NSWindowStyle.Titled | NSWindowStyle.Closable | NSWindowStyle.Miniaturizable | NSWindowStyle.Resizable) ...
下列 NSWindowStyle 功能可供使用:
- 無 框線 - 視窗沒有框線。
- 標題 - 視窗會有標題列。
- Closable - 視窗具有 [關閉] 按鈕,而且可以關閉。
- 可 小型化 - 視窗具有小型按鈕,而且可以最小化。
- 可 重設大小 - 視窗會有 [重設大小] 按鈕,且可重設大小。
- 公用程式 - 視窗是公用程式 樣式視窗(面板)。
- DocModal - 如果視窗是面板,則會是文件強制回應,而不是系統強制回應。
- NonactivatingPanel - 如果視窗是 Panel,則不會將它設為主視窗。
- TexturedBackground - 視窗會有紋理背景。
- 未調整 - 不會調整視窗。
- UnifiedTitleAndToolbar - 視窗的標題和工具列區域將會聯結。
- Hud - 視窗會顯示為抬頭顯示面板。
- FullScreenWindow - 視窗可以進入全螢幕模式。
- FullSizeContentView - 視窗的內容檢視位於標題和工具列區域後面。
最後兩個屬性會定義 視窗的緩衝類型 ,以及是否延後視窗的繪圖。 如需 的詳細資訊 NSWindows,請參閱 Apple 的 Windows 簡介檔。
最後,由於窗口並未從 .storyboard 或 .xib 檔案擴充,因此我們需要藉由呼叫 windows AwakeFromNib 方法,在MainWindowController.cs中模擬它:
Window.AwakeFromNib ();
這可讓您對視窗進行程序代碼,就像從 .storyboard 或 .xib 檔案載入的標準窗口一樣。
顯示視窗
拿掉 .storyboard 或 .xib 檔案並修改MainWindow.cs和MainWindowController.cs檔案後,您將會使用視窗,就像使用 .xib 檔案在 Xcode 介面產生器中建立的任何一般視窗一樣。
下列會建立視窗及其控制器的新實例,並在畫面上顯示視窗:
private MainWindowController mainWindowController;
...

mainWindowController = new MainWindowController ();
mainWindowController.Window.MakeKeyAndOrderFront (this);
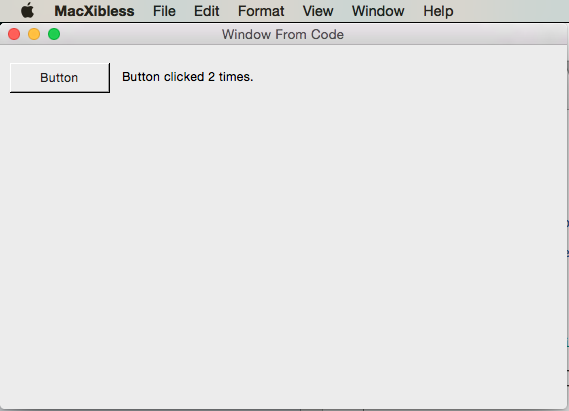
此時,如果應用程式執行且按下按鈕數次,則會顯示下列專案:

新增僅限程式代碼視窗
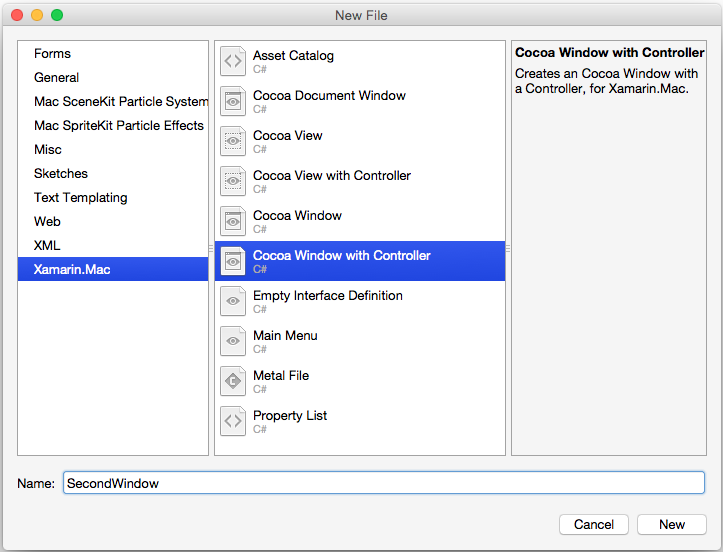
如果只想要新增程式代碼,xibless 視窗會新增至現有的 Xamarin.Mac 應用程式,請在 Solution Pad 中的專案上按下滑鼠右鍵,然後選取 [新增>檔案]。。在 [新增檔案] 對話框中,選擇 [具有控制器的 Xamarin.Mac>Cocoa Window],如下所示:

就像以前一樣,我們將從專案刪除預設的 .storyboard 或 .xib 檔案(在此案例中為 SecondWindow.xib),並遵循上述切換視窗以使用程式代碼的程式代碼區段中的步驟來涵蓋視窗的定義。
將 UI 元素新增至程式代碼中的視窗
無論是在程式代碼中建立視窗,還是從 .storyboard 或 .xib 檔案載入,我們有時可能想要從程式代碼將 UI 元素新增至視窗。 例如:
var ClickMeButton = new NSButton (new CGRect (10, 10, 100, 30)){
    AutoresizingMask = NSViewResizingMask.MinYMargin
};
MyWindow.ContentView.AddSubview (ClickMeButton);
上述程式代碼會建立新的 NSButton ,並將它新增至窗口實例以供 MyWindow 顯示。 基本上,可以在 .storyboard 或 .xib 檔案的 Xcode 介面產生器中定義的任何 UI 元素,都可以在程式代碼中建立並顯示在視窗中。
在程式代碼中定義功能表列
由於 Xamarin.Mac 中目前的限制,因此不建議您建立 Xamarin.Mac 應用程式的功能表列–NSMenuBarin 程式代碼,但繼續使用 Main.storyboard 或 MainMenu.xib 檔案來定義它。 也就是說,您可以在 C# 程式代碼中新增和移除功能表和功能表項。
例如,編輯 AppDelegate.cs 檔案,並讓 DidFinishLaunching 方法看起來如下所示:
public override void DidFinishLaunching (NSNotification notification)
{
    mainWindowController = new MainWindowController ();
    mainWindowController.Window.MakeKeyAndOrderFront (this);

    // Create a Status Bar Menu
    NSStatusBar statusBar = NSStatusBar.SystemStatusBar;

    var item = statusBar.CreateStatusItem (NSStatusItemLength.Variable);
    item.Title = "Phrases";
    item.HighlightMode = true;
    item.Menu = new NSMenu ("Phrases");

    var address = new NSMenuItem ("Address");
    address.Activated += (sender, e) => {
        Console.WriteLine("Address Selected");
    };
    item.Menu.AddItem (address);

    var date = new NSMenuItem ("Date");
    date.Activated += (sender, e) => {
        Console.WriteLine("Date Selected");
    };
    item.Menu.AddItem (date);

    var greeting = new NSMenuItem ("Greeting");
    greeting.Activated += (sender, e) => {
        Console.WriteLine("Greetings Selected");
    };
    item.Menu.AddItem (greeting);

    var signature = new NSMenuItem ("Signature");
    signature.Activated += (sender, e) => {
        Console.WriteLine("Signature Selected");
    };
    item.Menu.AddItem (signature);
}
上述會從程式代碼建立狀態列功能表,並在應用程式啟動時顯示它。 如需使用功能表的詳細資訊,請參閱功能表檔。
摘要
本文詳細探討如何在 C# 程式代碼中建立 Xamarin.Mac 應用程式的使用者介面,而不是搭配 .storyboard 或 .xib 檔案使用 Xcode 的 Interface Builder。
相關連結
- Windows
- 功能表
- macOS 人性化介面指導方針 \(英文\)
- Windows 簡介
