啟動顯示畫面
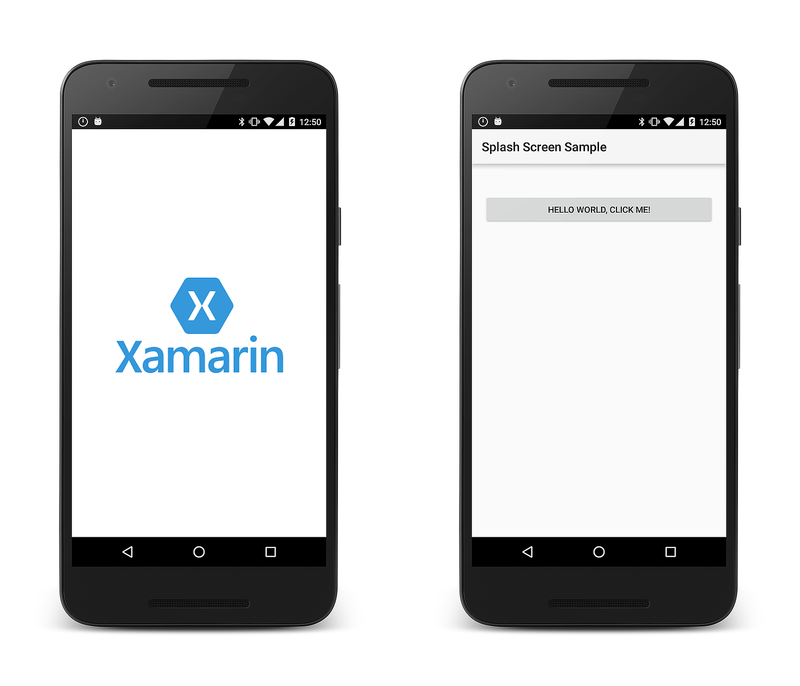
Android 應用程式需要一些時間才能啟動,尤其是在裝置上第一次啟動應用程式時。 啟動顯示畫面可能會向使用者顯示啟動進度,或指出商標。
概觀
Android 應用程式需要一些時間才能啟動,特別是在第一次在裝置上執行應用程式時(有時這稱為 冷啟動)。 啟動顯示畫面可能會向使用者顯示啟動進度,或者它可能會顯示商標資訊來識別和推廣應用程式。
本指南討論在Android應用程式中實作啟動顯示畫面的一種技術。 其涵蓋下列步驟:
建立啟動顯示畫面的可繪製資源。
定義會顯示可繪製資源的新主題。
將新的 Activity 新增至應用程式,以作為上一個步驟中建立的主題所定義的啟動顯示畫面。
需求
本指南假設應用程式是以Android API層級21或更高版本為目標。 應用程式也必須將 Xamarin.Android.Support.v4 和 Xamarin.Android.Support.v7.AppCompat NuGet 套件新增至專案。
實作啟動顯示畫面
轉譯和顯示啟動顯示畫面的最快方式是建立自定義主題,並將其套用至展示啟動顯示畫面的活動。 轉譯活動時,它會載入主題,並將可繪製的資源(由主題參考)套用至活動的背景。 這種方法可避免建立版面配置檔案的需求。
啟動顯示畫面會實作為活動,以顯示品牌可繪製、執行任何初始化,並啟動任何工作。 應用程式啟動後,啟動顯示畫面活動會啟動主要活動,並從應用程式返回堆疊中移除本身。
建立啟動顯示畫面的可繪製專案
啟動顯示畫面會在啟動顯示畫面活動的背景中顯示可繪製的 XML。 您必須使用點陣圖影像(例如 PNG 或 JPG)來顯示影像。
範例應用程式會定義稱為 splash_screen.xml的可繪製專案。 此可繪製會使用 層次清單 將啟動顯示畫面影像置中應用程式,如下列 xml 所示:
<?xml version="1.0" encoding="utf-8"?>
<layer-list xmlns:android="http://schemas.android.com/apk/res/android">
  <item>
    <color android:color="@color/splash_background"/>
  </item>
  <item>
    <bitmap
        android:src="@drawable/splash_logo"
        android:tileMode="disabled"
        android:gravity="center"/>
  </item>
</layer-list>
這會 layer-list 將啟動顯示影像置中於資源所指定的背景色彩上 @color/splash_background 。 範例應用程式會在 Resources/values/colors.xml 檔案中定義此色彩:
<?xml version="1.0" encoding="utf-8"?>
<resources>
  ...
  <color name="splash_background">#FFFFFF</color>
</resources>
如需對象的詳細資訊 Drawable ,請參閱 Android Drawable 上的 Google 檔。
實作主題
若要為啟動顯示畫面活動建立自定義主題,請編輯/或新增檔案 值/styles.xml 並建立啟動顯示畫面的新 style 元素。 範例 值/style.xml 檔案如下所示,並具有 style 名為 MyTheme.Splash:
<resources>
  <style name="MyTheme.Base" parent="Theme.AppCompat.Light">
  </style>

  <style name="MyTheme" parent="MyTheme.Base">
  </style>

  <style name="MyTheme.Splash" parent ="Theme.AppCompat.Light.NoActionBar">
    <item name="android:windowBackground">@drawable/splash_screen</item>
    <item name="android:windowNoTitle">true</item>
    <item name="android:windowFullscreen">true</item>
    <item name="android:windowContentOverlay">@null</item>
    <item name="android:windowActionBar">true</item>
  </style>
</resources>
MyTheme.Splash 非常斯巴達 – 它會宣告視窗背景、明確地從視窗移除標題欄,並宣告它是全螢幕。 如果您想要在活動擴大第一個版面配置之前,建立模擬應用程式 UI 的啟動顯示畫面,則可以在樣式定義中使用 windowContentOverlay ,而不是 windowBackground 在樣式定義中。 在此情況下,您也必須修改 可繪製splash_screen.xml ,使其顯示UI的模擬。
建立啟動顯示活動
現在我們需要新的 Android 活動來啟動,其具有啟動顯示影像並執行任何啟動工作。 下列程式代碼是完整的啟動顯示畫面實作範例:
[Activity(Theme = "@style/MyTheme.Splash", MainLauncher = true, NoHistory = true)]
public class SplashActivity : AppCompatActivity
{
    static readonly string TAG = "X:" + typeof(SplashActivity).Name;

    public override void OnCreate(Bundle savedInstanceState, PersistableBundle persistentState)
    {
        base.OnCreate(savedInstanceState, persistentState);
        Log.Debug(TAG, "SplashActivity.OnCreate");
    }

    // Launches the startup task
    protected override void OnResume()
    {
        base.OnResume();
        Task startupWork = new Task(() => { SimulateStartup(); });
        startupWork.Start();
    }

    // Simulates background work that happens behind the splash screen
    async void SimulateStartup ()
    {
        Log.Debug(TAG, "Performing some startup work that takes a bit of time.");
        await Task.Delay (8000); // Simulate a bit of startup work.
        Log.Debug(TAG, "Startup work is finished - starting MainActivity.");
        StartActivity(new Intent(Application.Context, typeof (MainActivity)));
    }
}
SplashActivity 明確使用在上一節中建立的主題,覆寫應用程式的默認主題。
不需要在 中 OnCreate 載入版面配置,因為主題會將可繪製宣告為背景。
請務必設定 NoHistory=true 屬性,讓活動從後台堆疊移除。 若要防止 [上一頁] 按鈕取消啟動程式,您也可以覆寫 OnBackPressed 並讓它不執行任何動作:
public override void OnBackPressed() { }
啟動工作會在 中 OnResume以異步方式執行。 這是必要的,讓啟動工作不會變慢或延遲啟動畫面的外觀。 當工作完成時, SplashActivity 將會啟動 MainActivity ,且使用者可能會開始與應用程式互動。
這個新功能SplashActivity是將 屬性true設定MainLauncher為 應用程式的啟動器活動。 因為 SplashActivity 現在是啟動器活動,因此您必須編輯 MainActivity.cs,並從 中移除 MainLauncher 屬性 MainActivity:
[Activity(Label = "@string/ApplicationName")]
public class MainActivity : AppCompatActivity
{
    // Code omitted for brevity
}
橫向模式
在先前步驟中實作的啟動顯示畫面將會以直向和橫向模式正確顯示。 不過,在某些情況下,必須針對直向和橫向模式使用不同的啟動顯示畫面(例如,如果啟動顯示影像為全螢幕)。
若要新增橫向模式的啟動顯示畫面,請使用下列步驟:
在 [ 資源/可 繪製] 資料夾中,新增您想要使用的啟動顯示畫面影像橫向版本。 在此範例中, splash_logo_land.png 是上述範例中使用的標誌橫向版本(其使用白色字母而非藍色)。
在 [ 資源/可 繪製] 資料夾中,建立先前定義之可繪製的橫向版本
layer-list(例如, splash_screen_land.xml)。 在此檔案中,將位圖路徑設定為啟動顯示畫面影像的橫向版本。 在下列範例中, splash_screen_land.xml 使用 splash_logo_land.png:<?xml version="1.0" encoding="utf-8"?> <layer-list xmlns:android="http://schemas.android.com/apk/res/android"> <item> <color android:color="@color/splash_background"/> </item> <item> <bitmap android:src="@drawable/splash_logo_land" android:tileMode="disabled" android:gravity="center"/> </item> </layer-list>如果資源/values-land 資料夾不存在,請建立它。
將檔案colors.xml和style.xml新增至 values-land(這些檔案可以從現有的值/colors.xml和值/style.xml檔案複製和修改)。
修改 values-land/style.xml ,讓它使用 的可
windowBackground繪製橫向版本。 在此範例中, 會使用splash_screen_land.xml :<resources> <style name="MyTheme.Base" parent="Theme.AppCompat.Light"> </style> <style name="MyTheme" parent="MyTheme.Base"> </style> <style name="MyTheme.Splash" parent ="Theme.AppCompat.Light.NoActionBar"> <item name="android:windowBackground">@drawable/splash_screen_land</item> <item name="android:windowNoTitle">true</item> <item name="android:windowFullscreen">true</item> <item name="android:windowContentOverlay">@null</item> <item name="android:windowActionBar">true</item> </style> </resources>修改 values-land/colors.xml ,以設定您想要用於啟動顯示畫面橫向版本的色彩。 在這裡範例中,橫向模式的啟動顯示背景色彩會變更為藍色:
<?xml version="1.0" encoding="utf-8"?>
<resources>
  <color name="primary">#2196F3</color>
  <color name="primaryDark">#1976D2</color>
  <color name="accent">#FFC107</color>
  <color name="window_background">#F5F5F5</color>
  <color name="splash_background">#3498DB</color>
</resources>
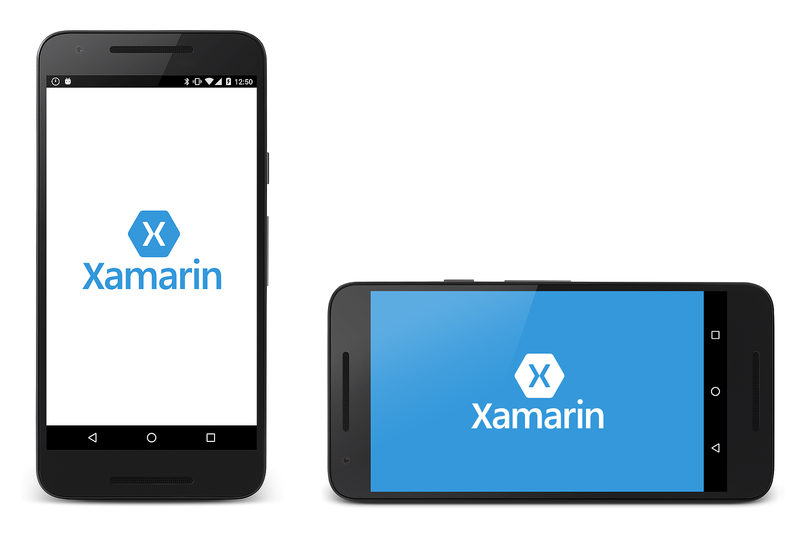
再次建置和執行應用程式。 在顯示啟動顯示畫面時,將裝置旋轉為橫向模式。 啟動顯示畫面會變更為橫向版本:
請注意,使用橫向模式啟動顯示畫面不一定會提供順暢的體驗。 根據預設,Android 會以直向模式啟動應用程式,並將它轉換為橫向模式,即使裝置已處於橫向模式也一樣。 因此,如果在裝置處於橫向模式時啟動應用程式,裝置會短暫呈現直向啟動顯示畫面,然後以動畫顯示從直向旋轉到橫向啟動顯示畫面。 不幸的是,即使在啟動顯示活動旗標中指定時 ScreenOrientation = Android.Content.PM.ScreenOrientation.Landscape ,也會進行這個初始直向到橫向轉換。 解決這項限制的最佳方式是建立單一啟動顯示畫面影像,以在直向和橫向模式中正確呈現。
摘要
本指南討論了在 Xamarin.Android 應用程式中實作啟動顯示畫面的其中一種方式;也就是說,將自定義主題套用至啟動活動。

