逐步解說 - 在 Xamarin.Android 中使用本機通知
本逐步解說示範如何在 Xamarin.Android 應用程式中使用本機通知。 它示範建立和發佈本機通知的基本概念。 當使用者按下通知區域中的通知時,就會啟動第二個活動。
概觀
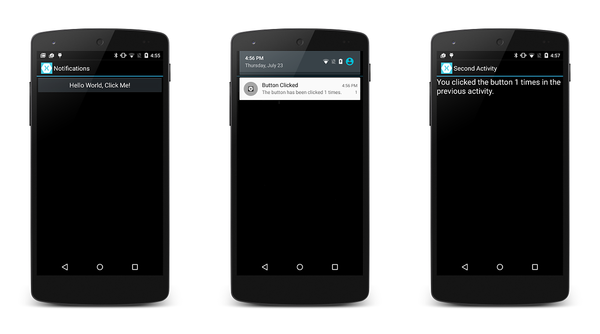
在本逐步解說中,我們將建立Android應用程式,當用戶按兩下活動中的按鈕時,就會引發通知。 當使用者按下通知時,它會啟動第二個活動,以顯示使用者在第一個活動中按兩下按鈕的次數。
下列螢幕快照說明此應用程式的一些範例:
注意
本指南著重於 Android 支持連結庫中的 NotificationCompat API。 這些 API 可確保 Android 4.0 的最大回溯相容性(API 層級 14)。
建立專案
首先,讓我們使用 Android應用程式 範本建立新的Android專案。 讓我們呼叫此專案 LocalNotifications。 (如果您不熟悉建立 Xamarin.Android 專案,請參閱 Hello, Android.)
編輯資源檔案 值/Strings.xml ,使其包含兩個額外的字串資源,以便在建立通知通道時使用:
<?xml version="1.0" encoding="utf-8"?>

<resources>
  <string name="Hello">Hello World, Click Me!</string>
  <string name="ApplicationName">Notifications</string>

  <string name="channel_name">Local Notifications</string>
  <string name="channel_description">The count from MainActivity.</string>
</resources>
新增 Android.Support.V4 NuGet 套件
在本逐步解說中,我們會使用 NotificationCompat.Builder 來建置本機通知。 如本機通知中所述,我們必須在專案中包含 Android 支援連結庫 v4 NuGet,才能使用 NotificationCompat.Builder。
接下來,讓我們編輯 MainActivity.cs 並新增下列 using 語句,讓 中的 Android.Support.V4.App 類型可供我們的程式代碼使用:
using Android.Support.V4.App;
此外,我們必須向編譯程式清楚說明我們使用 Android.Support.V4.App 的版本 TaskStackBuilder ,而不是 Android.App 版本。 新增下列 using 語句以解析任何模棱兩可:
using TaskStackBuilder = Android.Support.V4.App.TaskStackBuilder;
建立通知通道
接下來,將 方法新增至 MainActivity ,以建立通知通道(如有必要):
void CreateNotificationChannel()
{
    if (Build.VERSION.SdkInt < BuildVersionCodes.O)
    {
        // Notification channels are new in API 26 (and not a part of the
        // support library). There is no need to create a notification
        // channel on older versions of Android.
        return;
    }

    var name = Resources.GetString(Resource.String.channel_name);
    var description = GetString(Resource.String.channel_description);
    var channel = new NotificationChannel(CHANNEL_ID, name, NotificationImportance.Default)
                  {
                      Description = description
                  };

    var notificationManager = (NotificationManager) GetSystemService(NotificationService);
    notificationManager.CreateNotificationChannel(channel);
}
OnCreate更新 方法以呼叫這個新方法:
protected override void OnCreate(Bundle bundle)
{
    base.OnCreate(bundle);
    SetContentView(Resource.Layout.Main);

    CreateNotificationChannel();
}
定義通知標識碼
我們需要通知和通知通道的唯一標識符。 讓我們編輯 MainActivity.cs ,並將下列靜態實例變數新增至 MainActivity 類別:
static readonly int NOTIFICATION_ID = 1000;
static readonly string CHANNEL_ID = "location_notification";
internal static readonly string COUNT_KEY = "count";
新增程式代碼以產生通知
接下來,我們需要為按鈕 Click 事件建立新的事件處理程式。 將下列方法新增至 MainActivity:
void ButtonOnClick(object sender, EventArgs eventArgs)
{
    // Pass the current button press count value to the next activity:
    var valuesForActivity = new Bundle();
    valuesForActivity.PutInt(COUNT_KEY, count);

    // When the user clicks the notification, SecondActivity will start up.
    var resultIntent = new Intent(this, typeof(SecondActivity));

    // Pass some values to SecondActivity:
    resultIntent.PutExtras(valuesForActivity);

    // Construct a back stack for cross-task navigation:
    var stackBuilder = TaskStackBuilder.Create(this);
    stackBuilder.AddParentStack(Class.FromType(typeof(SecondActivity)));
    stackBuilder.AddNextIntent(resultIntent);

    // Create the PendingIntent with the back stack:
    var resultPendingIntent = stackBuilder.GetPendingIntent(0, (int) PendingIntentFlags.UpdateCurrent);

    // Build the notification:
    var builder = new NotificationCompat.Builder(this, CHANNEL_ID)
                  .SetAutoCancel(true) // Dismiss the notification from the notification area when the user clicks on it
                  .SetContentIntent(resultPendingIntent) // Start up this activity when the user clicks the intent.
                  .SetContentTitle("Button Clicked") // Set the title
                  .SetNumber(count) // Display the count in the Content Info
                  .SetSmallIcon(Resource.Drawable.ic_stat_button_click) // This is the icon to display
                  .SetContentText($"The button has been clicked {count} times."); // the message to display.

    // Finally, publish the notification:
    var notificationManager = NotificationManagerCompat.From(this);
    notificationManager.Notify(NOTIFICATION_ID, builder.Build());

    // Increment the button press count:
    count++;
}
OnCreate MainActivity 的 方法必須進行呼叫以建立通知通道,並將 方法指派ButtonOnClick給Click按鈕的事件(取代範本所提供的委派事件處理程式):
protected override void OnCreate(Bundle bundle)
{
    base.OnCreate(bundle);
    SetContentView(Resource.Layout.Main);

    CreateNotificationChannel();

    // Display the "Hello World, Click Me!" button and register its event handler:
    var button = FindViewById<Button>(Resource.Id.MyButton);
    button.Click += ButtonOnClick;
}
建立第二個活動
現在,我們需要建立 Android 會在使用者按下通知時顯示的另一個活動。 將另一個 Android 活動新增至名為 SecondActivity 的專案。 開啟 SecondActivity.cs ,並以下列程式代碼取代其內容:
using System;
using Android.App;
using Android.OS;
using Android.Widget;

namespace LocalNotifications
{
    [Activity(Label = "Second Activity")]
    public class SecondActivity : Activity
    {
        protected override void OnCreate(Bundle bundle)
        {
            base.OnCreate(bundle);

            // Get the count value passed to us from MainActivity:
            var count = Intent.Extras.GetInt(MainActivity.COUNT_KEY, -1);

            // No count was passed? Then just return.
            if (count <= 0)
            {
                return;
            }

            // Display the count sent from the first activity:
            SetContentView(Resource.Layout.Second);
            var txtView = FindViewById<TextView>(Resource.Id.textView1);
            txtView.Text = $"You clicked the button {count} times in the previous activity.";
        }
    }
}
我們也必須建立 SecondActivity 的資源配置。 將新的 Android 版面配置 檔案新增至名為 Second.axml 的專案。 編輯 Second.axml 並貼上下列版面設定程式代碼:
<?xml version="1.0" encoding="utf-8"?>
<LinearLayout xmlns:android="http://schemas.android.com/apk/res/android"
    android:orientation="vertical"
    android:layout_width="fill_parent"
    android:layout_height="fill_parent"
    android:minWidth="25px"
    android:minHeight="25px">
    <TextView
        android:text=""
        android:textAppearance="?android:attr/textAppearanceLarge"
        android:layout_width="fill_parent"
        android:layout_height="wrap_content"
        android:id="@+id/textView1" />
</LinearLayout>
新增通知圖示
最後,新增一個小圖示,以在啟動通知時出現在通知區域中。 您可以將此圖示複製到您的專案,或建立自己的自定義圖示。 將圖示檔案 命名為ic_stat_button_click.png , 並將其複製到 Resources/drawable 資料夾。 請記得使用 [新增 > 現有專案... ] 將這個圖示檔包含在專案中。
執行應用程式
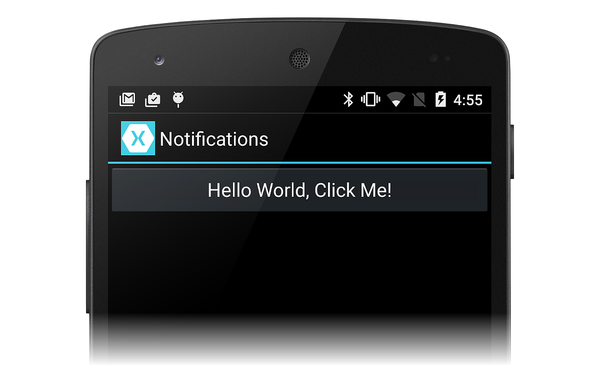
建置並執行應用程式。 您應該會看到第一個活動,如下所示的螢幕快照:
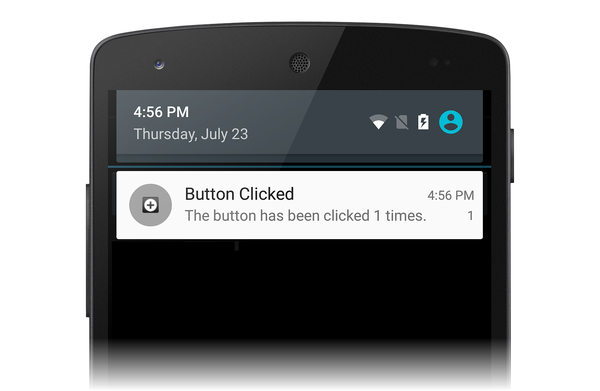
當您按鍵時,您應該注意到通知的小圖示會出現在通知區域中:
如果您向下撥動並公開通知選單,您應該會看到通知:
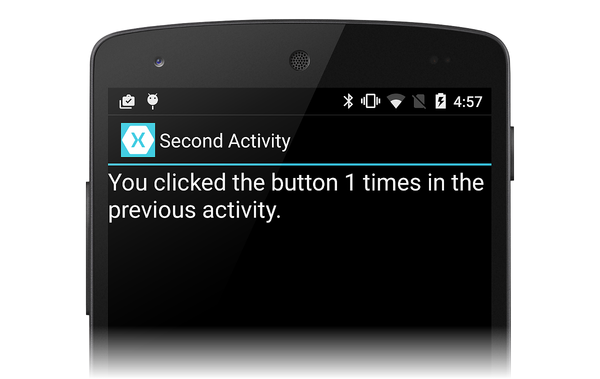
當您按下通知時,它應該會消失,而我們的其他活動應該會啟動 –看起來類似下列螢幕快照:
恭喜! 此時,您已完成 Android 本機通知逐步解說,而且您有可參考的工作範例。 通知比我們這裏顯示的要多得多,所以如果您想要更多資訊,請查看 Google關於通知的檔。
摘要
這個逐步解說用來 NotificationCompat.Builder 建立和顯示通知。 它示範了如何啟動第二個活動的基本範例,以回應使用者與通知的互動,並示範如何將數據從第一個活動傳輸到第二個活動。


