Classic portal: Working with Security Alerts
Note
The experience described in this page can also be accessed at https://security.microsoft.com as part of Microsoft Defender XDR. The supporting documents for the new experience can be found here. For more information about Microsoft Defender for Identity and when other features will be available in Microsoft Defender XDR, see Microsoft Defender for Identity in Microsoft Defender XDR.
This article explains the basics of how to work with Microsoft Defender for Identity security alerts.
Review security alerts on the attack timeline
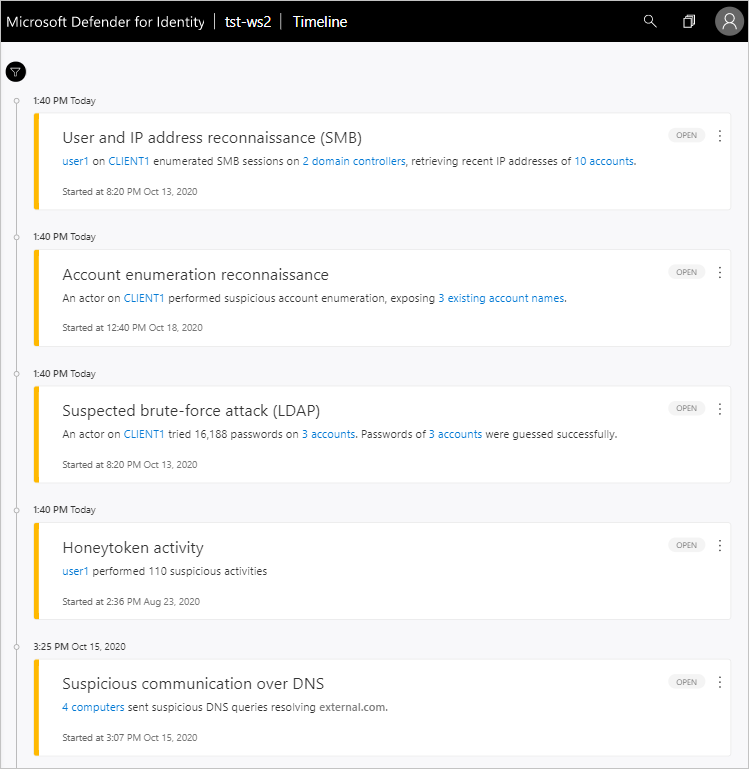
After logging in to the Defender for Identity portal, you're automatically taken to the open Security Alerts Timeline. Security alerts are listed in chronological order, with the newest alert on the top of the timeline.
Each security alert has the following information:
Entities involved, including users, computers, servers, domain controllers, and resources.
Times and time frame of the suspicious activities that initiated the security alert.
Severity of the alert: High, Medium, or Low.
Status: Open, closed, or suppressed.
Ability to:
- Share the security alert with other people in your organization via email.
- Download the security alert in Excel format.
Note
- When you hover your mouse over a user or computer, a mini entity profile is displayed. The mini-profile provides additional information about the entity and includes the number of security alerts that the entity is linked to.
- Clicking on an entity, takes you to the entity profile of the user or computer.

Security alert categories
Defender for Identity security alerts are divided into the following categories or phases, like the phases seen in a typical cyber-attack kill chain.
- Reconnaissance alerts
- Compromised credential alerts
- Lateral movement alerts
- Domain dominance alerts
- Exfiltration alerts
Preview detections
The Defender for Identity research team constantly works on implementing new detections for newly discovered attacks. Because Defender for Identity is a cloud service, new detections are released quickly to enable Defender for Identity customers to benefit from new detections as soon as possible.
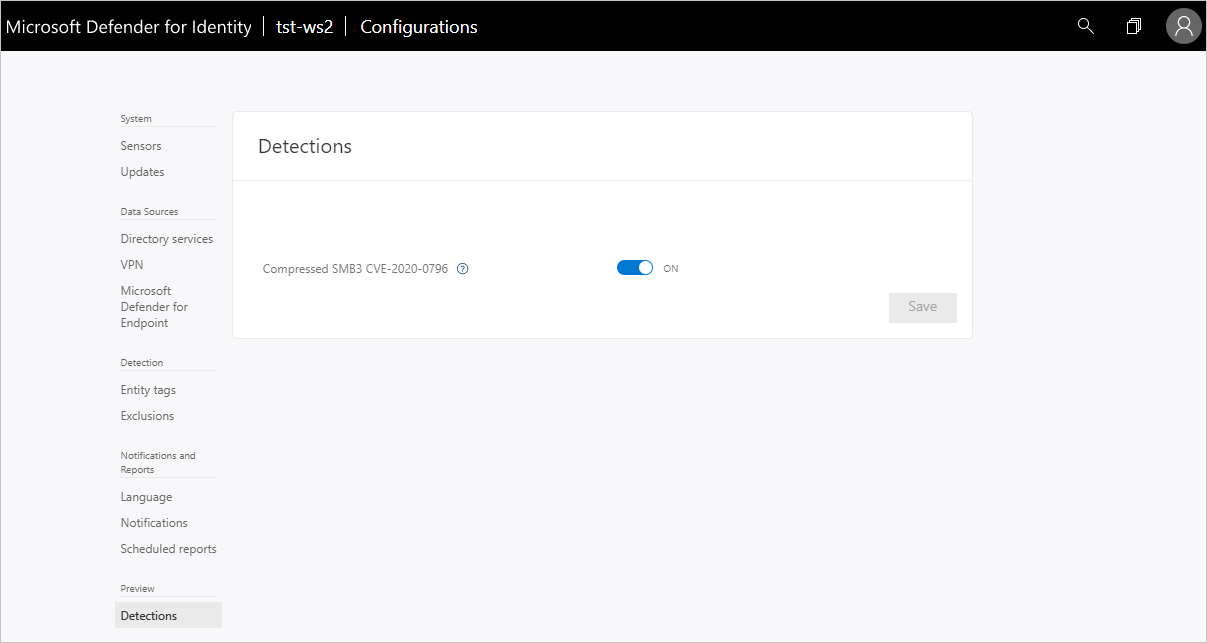
These detections are tagged with a preview badge, to help you identify the new detections and know that they are new to the product. If you turn off preview detections, they will not be displayed in the Defender for Identity console - not in the timeline or in entity profiles - and new alerts won't be opened.

By default, preview detections are enabled in Defender for Identity.
To disable preview detections:
- In the Defender for Identity console, select Configuration.
- In the left menu, under Preview, click Detections.
- Use the slider to turn the preview detections on and off.

Filter security alerts list
To filter the security alert list:
In the Filter by pane on the left side of the screen, select one of the following options: All, Open, Closed, or Suppressed.
To further filter the list, select High, Medium, or Low.
Suspicious activity severity
Low
Indicates activities that can lead to attacks designed for malicious users or software to gain access to organizational data.
Medium
Indicates activities that can put specific identities at risk for more severe attacks that could result in identity theft or privileged escalation
High
Indicates activities that can lead to identity theft, privilege escalation, or other high-impact attacks
Managing security alerts
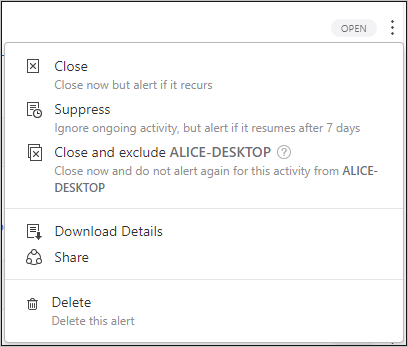
You can change the status of a security alert by clicking the current status of the security alert and selecting one of the following Open, Suppressed, Closed, or Deleted. To do this, click the three dots at the top right corner of a specific alert to reveal the list of available actions.

Security alert status
Open: All new security alerts appear in this list.
Close: Is used to track security alerts that you identified, researched, and fixed for mitigated.
Suppress: Suppressing an alert means you want to ignore it for now, and only be alerted again if there's a new instance. This means that if there's a similar alert Defender for Identity doesn't reopen it. But if the alert stops for seven days, and is then seen again, a new alert is opened.
Delete: If you Delete an alert, it is deleted from the system, from the database and you will NOT be able to restore it. After you click delete, you'll be able to delete all security alerts of the same type.
Exclude: The ability to exclude an entity from raising more of a certain type of alerts. For example, you can set Defender for Identity to exclude a specific entity (user or computer) from alerting again for a certain type of activity, such as a specific admin who runs remote code or a security scanner that does DNS reconnaissance. In addition to being able to add exclusions directly on the security alert as it is detected in the time line, you can also go to the Configuration page to Exclusions, and for each security alert you can manually add and remove excluded entities or subnets (for example for Pass-the-Ticket).
Note
The configuration pages can only be modified by Defender for Identity admins.
See Also
Learn more
- Try our interactive guide: Detect suspicious activities and potential attacks with Microsoft Defender for Identity