開始使用 Azure PowerShell
警告
自 2024 年 2 月 29 日起,AzureRM PowerShell 模組已正式淘汰。 建議使用者從 AzureRM 遷移至 Az PowerShell 模組,以確保持續支援和更新。
雖然 AzureRM 模組可能仍可運作,但不再維護或支援它,但會根據用戶的判斷權和風險放置任何繼續使用。 如需轉換至 Az 模組的指引,請參閱我們的 移轉資源 。
Azure PowerShell 的設計目的是從命令行管理和管理 Azure 資源,以及建置適用於 Azure Resource Manager 的自動化腳本。 您可以在瀏覽器中搭配 Azure Cloud Shell 使用它,或在本機電腦上安裝它。 本文可協助您開始使用 Azure PowerShell,並教導其背後的核心概念。
安裝 Azure PowerShell
第一個步驟是確定您已安裝最新版的 Azure PowerShell。 如需最新版本的相關信息,請參閱 版本資訊。
若要確認安裝成功,請從PowerShell執行
Get-InstalledModule -Name AzureRM -AllVersions。
Azure Cloud Shell
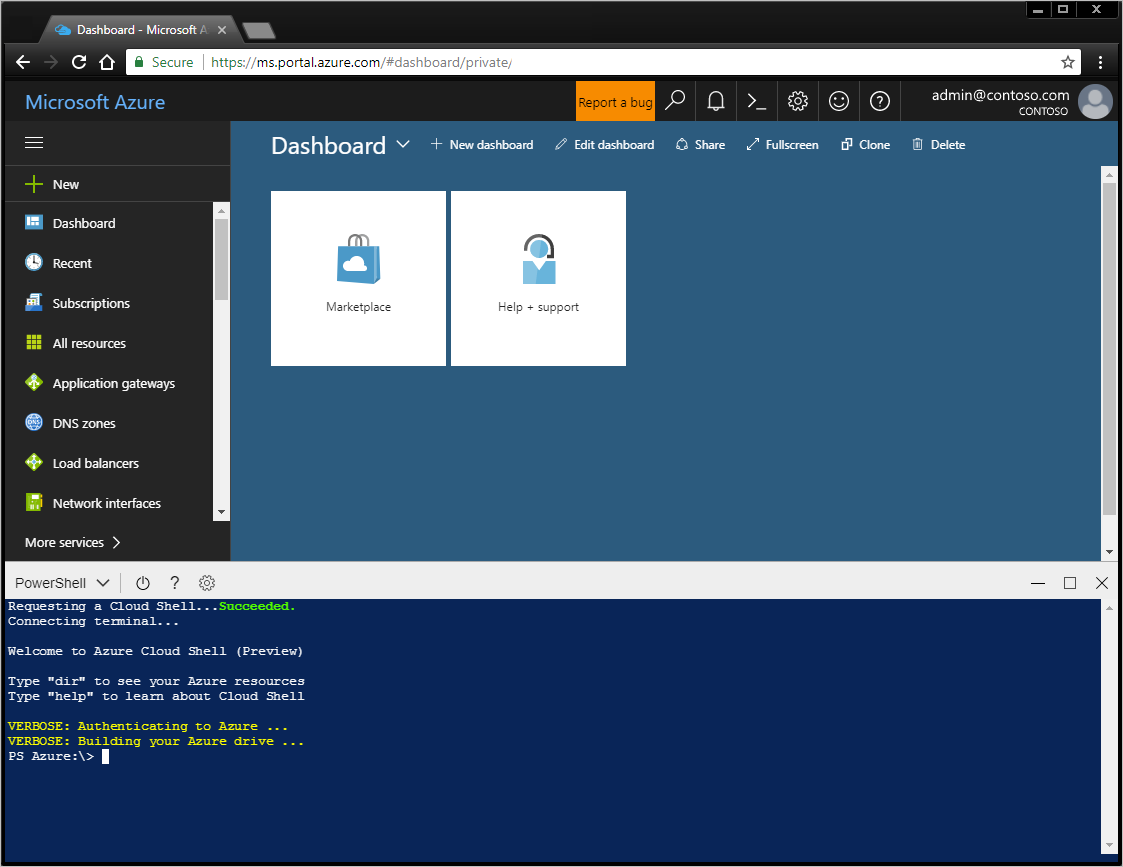
最簡單的開始使用方式是 啟動 Cloud Shell。
從 Azure 入口網站的頂端導覽啟動 Cloud Shell。

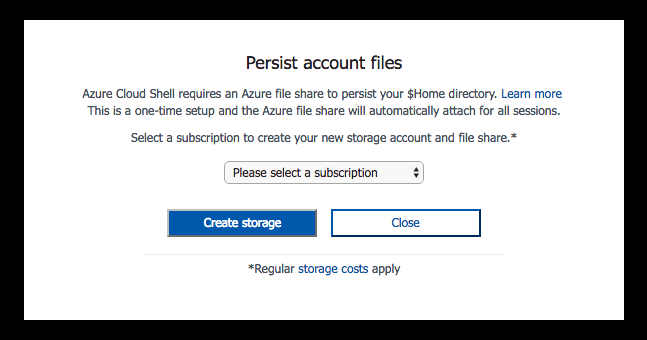
選擇您想要使用的訂用帳戶,並建立記憶體帳戶。

建立記憶體之後,Cloud Shell 會在瀏覽器中開啟 PowerShell 工作階段。

您也可以安裝 Azure PowerShell,並在 PowerShell 工作階段中於本機使用。
登入 Azure
以互動方式登入:
輸入
Connect-AzureRmAccount。 您會收到一個對話框,要求您提供 Azure 認證。 選項 '-Environment' 可讓您驗證 Azure 中國或 Azure 德國。例如,連線-AzureRmAccount -Environment AzureChinaCloud
輸入與您的帳戶相關聯的電子郵件地址和密碼。 Azure 會驗證並儲存認證資訊,然後關閉視窗。
登入 Azure 帳戶之後,您可以使用 Azure PowerShell Cmdlet 來存取和管理訂用帳戶中的資源。
使用簡單預設值建立 Windows 虛擬機
Cmdlet New-AzureRmVM 提供簡化的語法,可讓您輕鬆地建立新的虛擬機。 您只能提供兩個參數值:VM 的名稱,以及 VM 上本機系統管理員帳戶的一組認證。
首先,建立認證物件。
$cred = Get-Credential -Message 'Enter a username and password for the virtual machine.'
Windows PowerShell credential request.
Enter a username and password for the virtual machine.
User: localAdmin
Password for user localAdmin: *********
接下來,建立 VM。
New-AzureRmVM -Name SampleVM -Credential $cred
ResourceGroupName        : SampleVM
Id                       : /subscriptions/XXXXXXXX-XXXX-XXXX-XXXX-XXXXXXXXXXXX/resourceGroups/SampleVM/providers/Microsoft.Compute/virtualMachines/SampleVM
VmId                     : 43f6275d-ce50-49c8-a831-5d5974006e63
Name                     : SampleVM
Type                     : Microsoft.Compute/virtualMachines
Location                 : eastus
Tags                     : {}
HardwareProfile          : {VmSize}
NetworkProfile           : {NetworkInterfaces}
OSProfile                : {ComputerName, AdminUsername, WindowsConfiguration, Secrets}
ProvisioningState        : Succeeded
StorageProfile           : {ImageReference, OsDisk, DataDisks}
FullyQualifiedDomainName : samplevm-2c0867.eastus.cloudapp.azure.com
您可能想知道建立的其他專案,以及 VM 的設定方式。 首先,讓我們看看我們的資源群組。
Get-AzureRmResourceGroup |
  Select-Object -Property ResourceGroupName, Location
ResourceGroupName          Location
-----------------          --------
cloud-shell-storage-westus westus
SampleVM                   eastus
第 一次使用 Cloud Shell 時,會建立 cloud-shell-storage-westus 資源群組。 SampleVM 資源群組是由 New-AzureRmVM Cmdlet 所建立。
現在,在這個新的資源群組中建立了哪些其他資源?
Get-AzureRmResource |
  Where ResourceGroupName -eq SampleVM |
    Select-Object -Property ResourceGroupName, Location, ResourceType, Name
ResourceGroupName          Location ResourceType                            Name
-----------------          -------- ------------                            ----
SAMPLEVM                   eastus   Microsoft.Compute/disks                 SampleVM_OsDisk_1_9b286c54b168457fa1f8c47...
SampleVM                   eastus   Microsoft.Compute/virtualMachines       SampleVM
SampleVM                   eastus   Microsoft.Network/networkInterfaces     SampleVM
SampleVM                   eastus   Microsoft.Network/networkSecurityGroups SampleVM
SampleVM                   eastus   Microsoft.Network/publicIPAddresses     SampleVM
SampleVM                   eastus   Microsoft.Network/virtualNetworks       SampleVM
讓我們取得 VM 的一些詳細數據。 此範例示範如何擷取用來建立 VM 之 OS 映像的相關信息。
Get-AzureRmVM -Name SampleVM -ResourceGroupName SampleVM |
  Select-Object -ExpandProperty StorageProfile |
    Select-Object -ExpandProperty ImageReference
Publisher : MicrosoftWindowsServer
Offer     : WindowsServer
Sku       : 2016-Datacenter
Version   : latest
Id        :
建立完整設定的Linux虛擬機
上述範例使用簡化的語法和預設參數值來建立 Windows 虛擬機。 在此範例中,我們會提供虛擬機所有選項的值。
建立資源群組
在此範例中,我們想要建立資源群組。 Azure 中的資源群組提供一種方式來管理您想要以邏輯方式群組在一起的多個資源。 例如,您可以為應用程式或專案建立資源群組,並在其中新增虛擬機、資料庫和 CDN 服務。
讓我們在 Azure 的 westeurope 區域中建立名為 “MyResourceGroup” 的資源群組。 若要這樣做,請輸入下列命令:
New-AzureRmResourceGroup -Name 'myResourceGroup' -Location 'westeurope'
ResourceGroupName : myResourceGroup
Location          : westeurope
ProvisioningState : Succeeded
Tags              :
ResourceId        : /subscriptions/XXXXXXXX-XXXX-XXXX-XXXX-XXXXXXXXXXXX/resourceGroups/myResourceGroup
這個新的資源群組將用來包含我們建立之新 VM 所需的所有資源。 若要建立新的Linux VM,我們必須先建立其他必要資源,並將其指派給設定。 然後,我們可以使用該組態來建立 VM。 此外,您必須在使用者配置檔的 .ssh 目錄中有名為 id_rsa.pub 的 SSH 公鑰。
建立所需的網路資源
首先,我們需要建立子網組態,以搭配虛擬網路建立程式使用。 我們也會建立公用IP位址,以便連線到此 VM。 我們會建立網路安全組來保護公用位址的存取。 最後,我們會使用上述所有資源來建立虛擬 NIC。
# Variables for common values
$resourceGroup = 'myResourceGroup'
$location = 'westeurope'
$vmName = 'myLinuxVM'

# Definer user name and blank password
$securePassword = ConvertTo-SecureString 'azurepassword' -AsPlainText -Force
$cred = New-Object -TypeName System.Management.Automation.PSCredential ('azureuser', $securePassword)

# Create a subnet configuration
$subnetConfig = New-AzureRmVirtualNetworkSubnetConfig -Name mySubnet2 -AddressPrefix 192.168.2.0/24

# Create a virtual network
$vnet = New-AzureRmVirtualNetwork -ResourceGroupName $resourceGroup -Location $location `
  -Name MYvNET2 -AddressPrefix 192.168.0.0/16 -Subnet $subnetConfig

# Create a public IP address and specify a DNS name
$publicIp = New-AzureRmPublicIpAddress -ResourceGroupName $resourceGroup -Location $location `
  -Name "mypublicdns$(Get-Random)" -AllocationMethod Static -IdleTimeoutInMinutes 4
$publicIp | Select-Object Name,IpAddress

# Create an inbound network security group rule for port 22
$nsgRuleSSH = New-AzureRmNetworkSecurityRuleConfig -Name myNetworkSecurityGroupRuleSSH  -Protocol Tcp `
  -Direction Inbound -Priority 1000 -SourceAddressPrefix * -SourcePortRange * -DestinationAddressPrefix * `
  -DestinationPortRange 22 -Access Allow

# Create a network security group
$nsg = New-AzureRmNetworkSecurityGroup -ResourceGroupName $resourceGroup -Location $location `
  -Name myNetworkSecurityGroup2 -SecurityRules $nsgRuleSSH

# Create a virtual network card and associate with public IP address and NSG
$nic = New-AzureRmNetworkInterface -Name myNic2 -ResourceGroupName $resourceGroup -Location $location `
  -SubnetId $vnet.Subnets[0].Id -PublicIpAddressId $publicIp.Id -NetworkSecurityGroupId $nsg.Id
建立 VM 組態
現在,我們有必要的資源,我們可以建立 VM 組態物件。
# Create a virtual machine configuration
$vmConfig = New-AzureRmVMConfig -VMName $vmName -VMSize Standard_D1 |
  Set-AzureRmVMOperatingSystem -Linux -ComputerName $vmName -Credential $cred -DisablePasswordAuthentication |
  Set-AzureRmVMSourceImage -PublisherName Canonical -Offer UbuntuServer -Skus 14.04.2-LTS -Version latest |
  Add-AzureRmVMNetworkInterface -Id $nic.Id

# Configure SSH Keys
$sshPublicKey = Get-Content -Raw "$env:USERPROFILE\.ssh\id_rsa.pub"
Add-AzureRmVMSshPublicKey -VM $vmConfig -KeyData $sshPublicKey -Path '/home/azureuser/.ssh/authorized_keys'
建立虛擬機器
現在,我們可以使用 VM 組態物件來建立 VM。
New-AzureRmVM -ResourceGroupName $resourceGroup -Location $location -VM $vmConfig
現在已建立 VM,您可以使用 SSH 搭配您所建立 VM 的公用 IP 位址來登入新的 Linux VM:
ssh xx.xxx.xxx.xxx
Welcome to Ubuntu 14.04.4 LTS (GNU/Linux 3.19.0-65-generic x86_64)

 * Documentation:  https://help.ubuntu.com/

  System information as of Sun Feb 19 00:32:28 UTC 2017

  System load: 0.31              Memory usage: 3%   Processes:       89
  Usage of /:  39.6% of 1.94GB   Swap usage:   0%   Users logged in: 0

  Graph this data and manage this system at:
    https://landscape.canonical.com/

  Get cloud support with Ubuntu Advantage Cloud Guest:
    http://www.ubuntu.com/business/services/cloud

0 packages can be updated.
0 updates are security updates.


The programs included with the Ubuntu system are free software;
the exact distribution terms for each program are described in the
individual files in /usr/share/doc/*/copyright.

Ubuntu comes with ABSOLUTELY NO WARRANTY, to the extent permitted by
applicable law.

my-login@MyLinuxVM:../../..$
在 Azure 中建立其他資源
我們現在已逐步解說如何建立資源群組、Linux VM 和 Windows Server VM。 您也可以建立許多其他類型的 Azure 資源。
例如,若要建立 Azure 網路負載平衡器,然後我們可以與新建立的 VM 產生關聯,我們可以使用下列 create 命令:
New-AzureRmLoadBalancer -Name MyLoadBalancer -ResourceGroupName myResourceGroup -Location westeurope
我們也可以使用下列命令,為基礎結構建立新的私人 虛擬網絡(通常稱為 Azure 中的「VNet」:
$subnetConfig = New-AzureRmVirtualNetworkSubnetConfig -Name mySubnet2 -AddressPrefix 10.0.0.0/16
$vnet = New-AzureRmVirtualNetwork -ResourceGroupName myResourceGroup -Location westeurope `
  -Name MYvNET3 -AddressPrefix 10.0.0.0/16 -Subnet $subnetConfig
Azure 和 Azure PowerShell 的功能在於,我們不僅能使用它來取得雲端式基礎結構,還能建立受控平台服務。 受控平臺服務也可以與基礎結構結合,以建置更強大的解決方案。
例如,您可以使用 Azure PowerShell 來建立 Azure AppService。 Azure AppService 是受控平台服務,可提供裝載 Web 應用程式的絕佳方式,而不需要擔心基礎結構。 建立 Azure AppService 之後,您可以使用下列命令在 AppService 內建立兩個新的 Azure Web Apps:
# Create an Azure AppService that we can host any number of web apps within
New-AzureRmAppServicePlan -Name MyAppServicePlan -Tier Basic -NumberofWorkers 2 -WorkerSize Small -ResourceGroupName myResourceGroup -Location westeurope

# Create Two Web Apps within the AppService (note: name param must be a unique DNS entry)
New-AzureRmWebApp -Name MyWebApp43432 -AppServicePlan MyAppServicePlan -ResourceGroupName myResourceGroup -Location westeurope
New-AzureRmWebApp -Name MyWebApp43433 -AppServicePlan MyAppServicePlan -ResourceGroupName myResourceGroup -Location westeurope
列出已部署的資源
您可以使用 Get-AzureRmResource Cmdlet 來列出在 Azure 中執行的資源。 下列範例顯示我們在新資源群組中建立的資源。
Get-AzureRmResource |
  Where-Object ResourceGroupName -eq myResourceGroup |
    Select-Object Name,Location,ResourceType
Name                                                  Location   ResourceType
----                                                  --------   ------------
myLinuxVM_OsDisk_1_36ca038791f642ba91270879088c249a   westeurope Microsoft.Compute/disks
myWindowsVM_OsDisk_1_f627e6e2bb454c72897d72e9632adf9a westeurope Microsoft.Compute/disks
myLinuxVM                                             westeurope Microsoft.Compute/virtualMachines
myWindowsVM                                           westeurope Microsoft.Compute/virtualMachines
myWindowsVM/BGInfo                                    westeurope Microsoft.Compute/virtualMachines/extensions
myNic1                                                westeurope Microsoft.Network/networkInterfaces
myNic2                                                westeurope Microsoft.Network/networkInterfaces
myNetworkSecurityGroup1                               westeurope Microsoft.Network/networkSecurityGroups
myNetworkSecurityGroup2                               westeurope Microsoft.Network/networkSecurityGroups
mypublicdns245369171                                  westeurope Microsoft.Network/publicIPAddresses
mypublicdns779537141                                  westeurope Microsoft.Network/publicIPAddresses
MYvNET1                                               westeurope Microsoft.Network/virtualNetworks
MYvNET2                                               westeurope Microsoft.Network/virtualNetworks
micromyresomywi032907510                              westeurope Microsoft.Storage/storageAccounts
刪除資源
若要清除您的 Azure 帳戶,您想要移除我們在此範例中建立的資源。 您可以使用 Remove-AzureRm* Cmdlet 來刪除不再需要的資源。 若要移除我們建立的 Windows VM,請使用下列命令:
Remove-AzureRmVM -Name myWindowsVM -ResourceGroupName myResourceGroup
系統會提示您確定要移除資源。
Confirm
Are you sure you want to remove resource group 'myResourceGroup'
[Y] Yes  [N] No  [S] Suspend  [?] Help (default is "Y"): Y
您也可以一次刪除許多資源。 例如,下列命令會刪除我們到目前為止用於所有範例的資源群組 「MyResourceGroup」。 群組中的所有資源也會一併刪除。
Remove-AzureRmResourceGroup -Name myResourceGroup
Confirm
Are you sure you want to remove resource group 'myResourceGroup'
[Y] Yes  [N] No  [S] Suspend  [?] Help (default is "Y"): Y
工作可能需要幾分鐘的時間才能完成,視資源的數目和類型而定。
取得範例
若要深入瞭解如何使用 Azure PowerShell,請參閱我們最常見的 Linux VM、Windows VM、Web Apps 和 SQL 資料庫 腳本。