Quick Start: Web API sample (C#)
In this quick start, you create a console application to connect to your Microsoft Dataverse environment and invoke the Web API WhoAmI Function. This function retrieves information about the logged on Dataverse user. Once you understand the basic functionality described here, you can move onto other Web API operations such as create, retrieve, update, and deletion of Dataverse table rows.
This program authenticates and uses an HttpClient to send a GET request to the WhoAmI Function. The response is a WhoAmIResponse ComplexType. The program display the UserId property value obtained from the response.
Note
This is a very simple example to show how to get connected with a minimum of code.
You can find the complete Visual Studio solution for this .NET 6 project in the PowerApps-Samples repo under dataverse/webapi/C#-NETx/QuickStart. There's also a .NET Framework version of the sample under dataverse/webapi/C#/QuickStart.
Prerequisites
- Visual Studio 2022 or later
- Internet connection
- Valid user account for a Dataverse environment
- Url to the Dataverse environment you want to connect with
- Basic understanding of the C# language
Note
To authenticate, you must have an app registered in Microsoft Entra ID. This quick start example provides an app registration clientid value you can use for running sample code published by Microsoft. However, for your own custom applications you must register your apps with AD. More information: Walkthrough: Register an app with Microsoft Entra ID
Create Visual Studio project
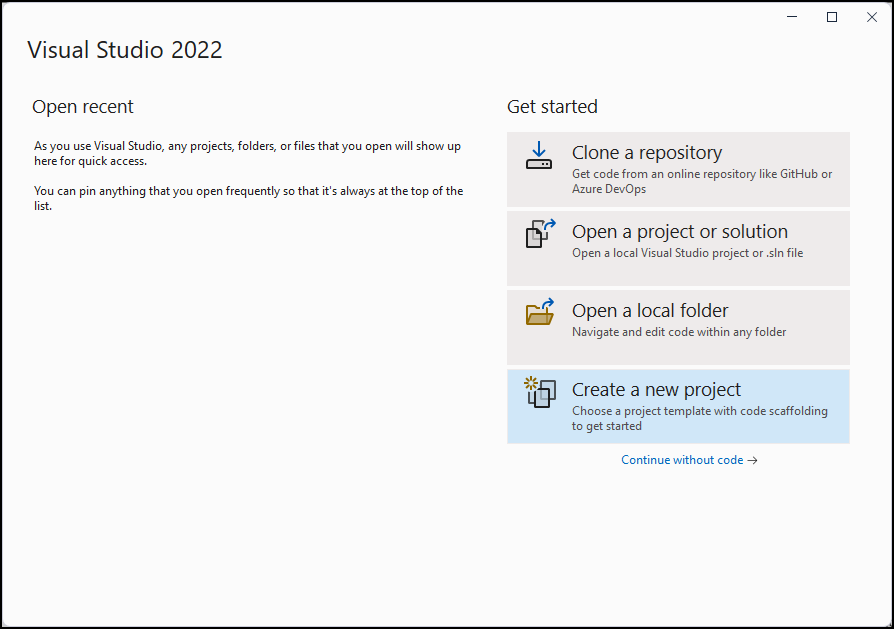
Launch Visual Studio 2022 and select Create a new project.

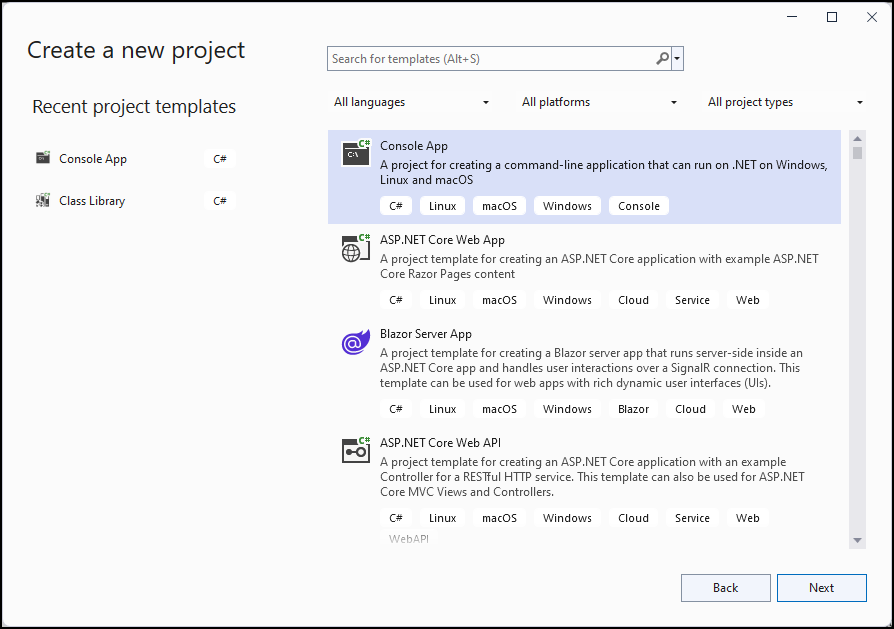
Create a new Console App project.

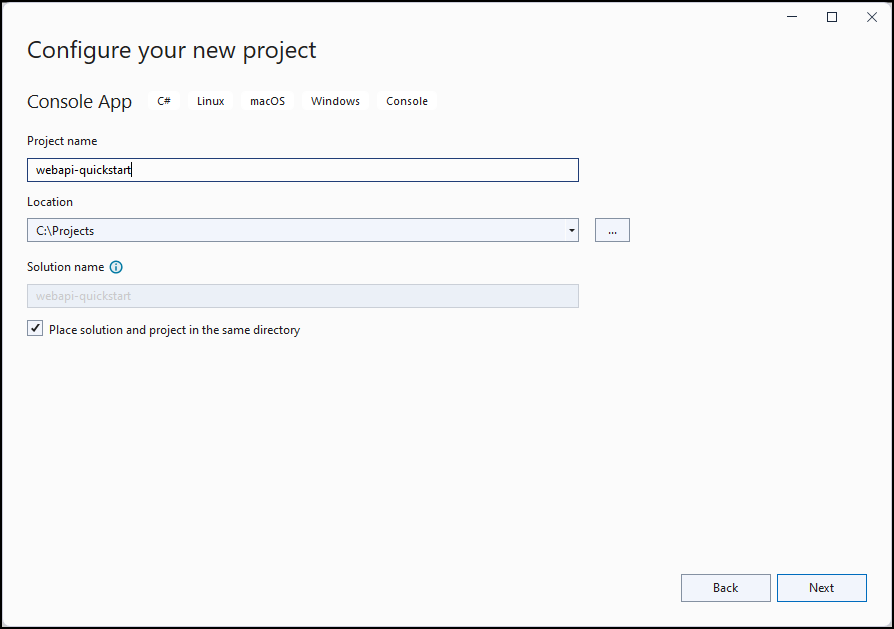
Configure the project by setting a Location and Project name.

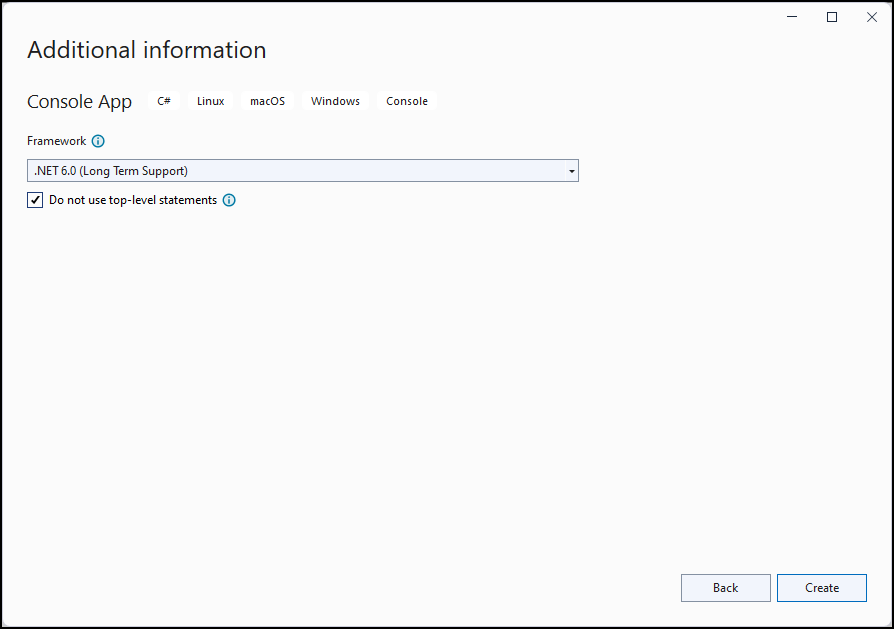
Configure the project by selecting .NET 6.0 (Long Term Support) and Do not use top-level statements. Then select Create.

In Solution Explorer, right-click the project you created and select Manage NuGet Packages... in the context menu. NuGet allows you to bring required assemblies into your project.
Browse for the Microsoft Authentication Library (MSAL) NuGet package named
Microsoft.Identity.Client, select it, and then choose Install.Note
You are prompted to accept the license terms before installing. Select I Accept in the License Acceptance dialog.
Edit Program.cs
Follow these next steps to add code for the main program.
Replace the entire contents of
Program.cswith the following code.using Microsoft.Identity.Client; // Microsoft Authentication Library (MSAL) using System; using System.Net.Http; using System.Net.Http.Headers; using System.Text.Json; using System.Threading.Tasks; namespace PowerApps.Samples { /// <summary> /// Demonstrates Azure authentication and execution of a Dataverse Web API function. /// </summary> class Program { static async Task Main() { // TODO Specify the Dataverse environment name to connect with. // See https://learn.microsoft.com/power-apps/developer/data-platform/webapi/compose-http-requests-handle-errors#web-api-url-and-versions string resource = "https://<env-name>.api.<region>.dynamics.com"; // Microsoft Entra ID app registration shared by all Power App samples. var clientId = "51f81489-12ee-4a9e-aaae-a2591f45987d"; var redirectUri = "http://localhost"; // Loopback for the interactive login. // For your custom apps, you will need to register them with Microsoft Entra ID yourself. // See https://docs.microsoft.com/powerapps/developer/data-platform/walkthrough-register-app-azure-active-directory #region Authentication var authBuilder = PublicClientApplicationBuilder.Create(clientId) .WithAuthority(AadAuthorityAudience.AzureAdMultipleOrgs) .WithRedirectUri(redirectUri) .Build(); var scope = resource + "/user_impersonation"; string[] scopes = { scope }; AuthenticationResult token = await authBuilder.AcquireTokenInteractive(scopes).ExecuteAsync(); #endregion Authentication #region Client configuration var client = new HttpClient { // See https://docs.microsoft.com/powerapps/developer/data-platform/webapi/compose-http-requests-handle-errors#web-api-url-and-versions BaseAddress = new Uri(resource + "/api/data/v9.2/"), Timeout = new TimeSpan(0, 2, 0) // Standard two minute timeout on web service calls. }; // Default headers for each Web API call. // See https://docs.microsoft.com/powerapps/developer/data-platform/webapi/compose-http-requests-handle-errors#http-headers HttpRequestHeaders headers = client.DefaultRequestHeaders; headers.Authorization = new AuthenticationHeaderValue("Bearer", token.AccessToken); headers.Add("OData-MaxVersion", "4.0"); headers.Add("OData-Version", "4.0"); headers.Accept.Add( new MediaTypeWithQualityHeaderValue("application/json")); #endregion Client configuration #region Web API call // Invoke the Web API 'WhoAmI' unbound function. // See https://docs.microsoft.com/powerapps/developer/data-platform/webapi/compose-http-requests-handle-errors // See https://docs.microsoft.com/powerapps/developer/data-platform/webapi/use-web-api-functions#unbound-functions var response = await client.GetAsync("WhoAmI"); if (response.IsSuccessStatusCode) { // Parse the JSON formatted service response (WhoAmIResponse) to obtain the user ID value. // See https://learn.microsoft.com/power-apps/developer/data-platform/webapi/reference/whoamiresponse Guid userId = new(); string jsonContent = await response.Content.ReadAsStringAsync(); // Using System.Text.Json using (JsonDocument doc = JsonDocument.Parse(jsonContent)) { JsonElement root = doc.RootElement; JsonElement userIdElement = root.GetProperty("UserId"); userId = userIdElement.GetGuid(); } // Alternate code, but requires that the WhoAmIResponse class be defined (see below). // WhoAmIResponse whoAmIresponse = JsonSerializer.Deserialize<WhoAmIResponse>(jsonContent); // userId = whoAmIresponse.UserId; Console.WriteLine($"Your user ID is {userId}"); } else { Console.WriteLine("Web API call failed"); Console.WriteLine("Reason: " + response.ReasonPhrase); } #endregion Web API call } } /// <summary> /// WhoAmIResponse class definition /// </summary> /// <remarks>To be used for JSON deserialization.</remarks> /// <see cref="https://learn.microsoft.com/power-apps/developer/data-platform/webapi/reference/whoamiresponse"/> public class WhoAmIResponse { public Guid BusinessUnitId { get; set; } public Guid UserId { get; set; } public Guid OrganizationId { get; set; } } }Right below the TODO comment in the above code, replace the
resourcevariable value with the actual URL of your Dataverse test environment. To find the URL value for your test environment, follow these steps:- Navigate your browser to Power Apps.
- Select the environments icon (to the right of the search field), and choose a test environment.
- Select the settings icon
 and choose Developer resources.
 - Copy the Web API endpoint URL from "https:" through ".com" leaving off the trailing
/api/data/v9.2. - Replace the resource string value in the program code with that endpoint URL value. For example:
string resource = "https://contoso.api.crm.dynamics.com";
Run the program
Press F5 to build and run the program.
A browser window opens and prompts you to pick an account. Choose the account that you use to access your Dataverse environment. If that account doesn't appear in the list, select Use another account.
Once the account is selected, enter your password and select Sign in.
Look at the console application window. The output should look something like this:
Your user ID is 22cc22cc-dd33-ee44-ff55-66aa66aa66aa

C:\Projects\webapi-quickstart\bin\Debug\net6.0\webapi-quickstart.exe (process 21524) exited with code 0.
To automatically close the console when debugging stops, enable Tools->Options->Debugging->Automatically close the console when debugging stops.
Press any key to close this window . . .
Congratulations!
You have successfully connected to the Web API.
This quick start sample shows a simple approach to create a Visual Studio project without any exception handling or method to refresh the access token. This is enough to verify you can connect, and try different operations.
For a more complete example that demonstrates recommended design patterns, review the WebAPIService class library (C#). This is the project we use for our Web API Data operations Samples (C#). It demonstrates:
- Managing Dataverse service protection API limits with the .NET resilience and transient fault handling library Polly.
- Managing an HttpClient in .NET using IHttpClientFactory.
- Using configuration data to manage the behavior of the client.
- Managing errors returned by Dataverse Web API.
- A pattern of code reuse by:
- Creating classes that inherit from HttpRequestMessage and HttpResponseMessage.
- Methods that use those classes.
- A modular pattern for adding new capabilities as needed.
Next steps
Try creating a web application.
Learn more about Dataverse Web API capabilities by understanding the service documents.
