Teams AI library quick start guide
Get started with Teams AI library using the LightBot sample, which is designed to help you through the process of creating apps that can control lights, such as turning them on and off using Teams AI library. The bot uses the gpt-3.5-turbo model to chat with Microsoft Teams users and respond in a polite and respectful manner, staying within the scope of the conversation.
Prerequisites
To get started, ensure that you have the following tools:
| Install | For using... |
|---|---|
| Visual Studio Code | JavaScript, TypeScript, and Python build environments. Use the latest version. |
| Teams Toolkit | Microsoft Visual Studio Code extension that creates a project scaffolding for your app. Use the latest version. |
| Git | Git is a version control system that helps you manage different versions of code within a repository. |
| Node.js | Back-end JavaScript runtime environment. For more information, see Node.js version compatibility table for project type. |
| Microsoft Teams | To collaborate with everyone, you work with them through apps for chat, meetings, and call all in one place. |
| OpenAI or Azure OpenAI | First create your OpenAI API key to use OpenAI's GPT. If you want to host your app or access resources in Microsoft Azure, you must create an Azure OpenAI service. |
| Microsoft Edge (recommended) or Google Chrome | A browser with developer tools. |
| Microsoft 365 developer account | Access to Teams account with the appropriate permissions to install an app and enable custom Teams apps and turn on custom app uploading. |
If you've already run the samples before or encountered a runtime error, follow these steps to start fresh:
- Check all the
.envandenv/.env.*.*files in the sample and delete any automatically populated values to ensure that Teams Toolkit generates new resources for you. - If you don’t want Teams Toolkit to generate the app ID and password, update the
BOT_IDandBOT_PASSWORDin the.envfile with your own values. - Remove values or leave the values blank for SECRET_BOT_PASSWORD and TEAMS_APP_UPDATE_TIME in the
.envfile to avoid conflicts.
Teams Toolkit automatically provisions BOT_ID and BOT_PASSWORD resources. If you want to use your own resources, you need to manually add them to the .env file. Teams Toolkit doesn't auto-generate the following resources:
- An Azure OpenAI or OpenAI key
- A database or similar storage options
Build and run the sample app
Get started with Teams AI library using the LightBot sample. It enables your computer’s localhost to quickly execute a Teams AI library-based sample.
Go to the sample.
Run the following command to clone the repository:
git clone https://github.com/microsoft/teams-ai.gitGo to Visual Studio Code.
Select File > Open Folder.
Go to the location where you cloned teams-ai repo and select the teams-ai folder.
Select Select Folder.
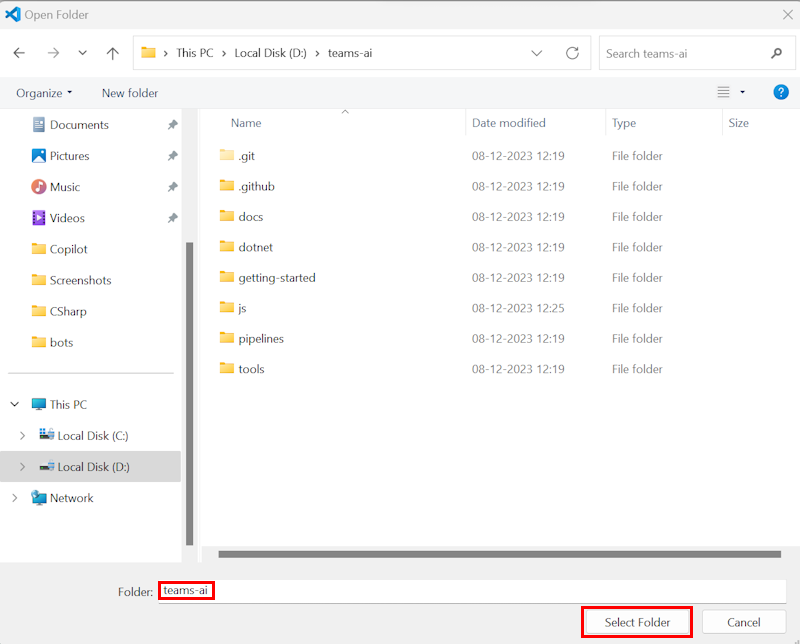
Select View > Terminal. A terminal window opens.
In the terminal window, run the following command to go to the js folder:
cd .\js\Run the following command to install dependencies:
yarn installRun the following command to build dependencies:
yarn buildAfter the dependencies are installed, select File > Open Folder.
Go to teams-ai > js > samples> 03.ai-concepts> c.actionMapping-lightBot and select Select Folder. All the files for the LightBot sample are listed under the EXPLORER section in Visual Studio Code.
Update the following steps based on the AI services you select.
Go to the
envfolder and update the following code in./env/.env.local.userfile:SECRET_OPENAI_KEY=<your OpenAI key>Go to the
infrafolder and ensure that the following lines in theazure.bicepfile are commented out:// { // name: 'AZURE_OPENAI_KEY' // value: azureOpenAIKey // } // { // name: 'AZURE_OPENAI_ENDPOINT' // value: azureOpenAIEndpoint // }
From the left pane, select Teams Toolkit.
Under ACCOUNTS, sign-in to the following:
- Microsoft 365 account
- Azure account
To debug your app, select F5.
A browser tab opens the Teams web client to add the bot to your tenant.
Select Add.
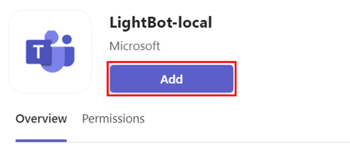
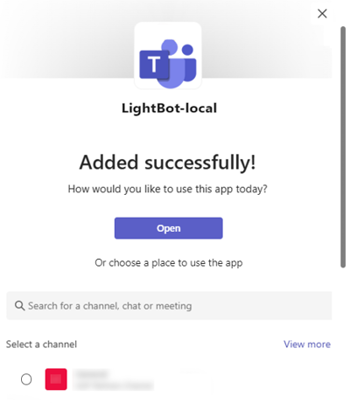
When the app is added, a dialog to select the required scope appears.
Select Open to open the app in personal scope.
Alternatively, you can either search and select the required scope or select a channel, chat, or meeting from the list, and move through the dialog to select Go.
A chat window opens.
In the message compose area, send a message to invoke the bot.
Note
If you're building a bot for the first time, it's recommended to use Teams Toolkit extension for Visual Studio Code to build a bot, see build your first bot app using JavaScript.
Prerequisites
To get started, ensure that you have the following tools:
| Install | For using... |
|---|---|
| Visual Studio | C Sharp build environments. Use the latest version. |
| Teams Toolkit | Microsoft Visual Studio Code extension that creates a project scaffolding for your app. Use the latest version. |
| Git | Git is a version control system that helps you manage different versions of code within a repository. |
| Microsoft Teams | To collaborate with everyone, you work with them through apps for chats, meetings, and calls all in one place. |
| OpenAI or Azure OpenAI | First create your OpenAI API key to use OpenAI's GPT. If you want to host your app or access resources in Microsoft Azure, you must create an Azure OpenAI service. |
| Microsoft Edge (recommended) or Google Chrome | A browser with developer tools. |
| Microsoft 365 developer account | Access to Teams account with the appropriate permissions to install an app and enable custom Teams apps and turn on custom app uploading. |
If you've already run the samples before or encountered a runtime error, follow these steps to start fresh:
- Check all the
.envandenv/.env.*.*files in the sample and delete any automatically populated values to ensure that Teams Toolkit generates new resources for you. - If you don’t want Teams Toolkit to generate the app ID and password, update the
MicrosoftAppIdandMicrosoftAppPasswordin the.envfile with your own values. - Remove values or leave the values blank for SECRET_BOT_PASSWORD and TEAMS_APP_UPDATE_TIME in the
.envfile to avoid conflicts.
Teams Toolkit automatically provisions MicrosoftAppId and MicrosoftAppPassword resources. If you want to use your own resources, you need to manually add them to the .env file. Teams Toolkit doesn't auto-generate the following resources:
- An Azure OpenAI or OpenAI key
- A database or similar storage options
Build and run the sample app
Go to the sample.
Clone the repository to test the sample app.
git clone https://github.com/microsoft/teams-ai.gitGo to the dotnet folder.
cd teams-ai/dotnetGo to the folder where you cloned the repository and select 04.ai.c.actionMapping.lightBot.
Select LightBot.sln. The solution opens in Visual Studio.
In Visual Studio, update your OpenAI-related settings in the
appsettings.Development.jsonfile."Azure": { "OpenAIApiKey": "<your-azure-openai-api-key>", "OpenAIEndpoint": "<your-azure-openai-endpoint>" },Go to
Prompts/sequence/skprompt.txtand update the following code inskprompt.txtfile:The following is a conversation with an AI assistant. The assistant can turn a light on or off. The assistant must return the following JSON structure: {"type":"plan","commands":[{"type":"DO","action":"<name>","entities":{"<name>":<value>}},{"type":"SAY","response":"<response>"}]} The following actions are supported: - LightsOn - LightsOff - Pause time=<duration in ms> - LightStatus The lights are currently {{getLightStatus}}. Always respond in the form of a JSON based plan. Stick with DO/SAY.In the debug dropdown menu, select Dev Tunnels > Create a Tunnel...
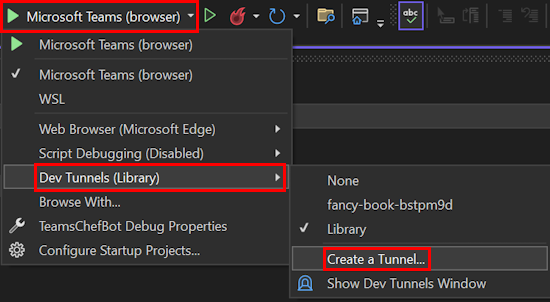
Select the Account to use to create the tunnel. Azure, Microsoft Account (MSA), and GitHub accounts are supported. Update the following options:
- Name: Enter a name for the tunnel.
- Tunnel Type: Select Persistent or Temporary.
- Access: Select Public.
- Select OK. Visual Studio displays a confirmation message that a tunnel is created.
The tunnel you created is listed under Dev Tunnels > (name of the tunnel).
Go to Solution Explorer and select your project.
Right-click menu and select Teams Toolkit > Prepare Teams App Dependencies.
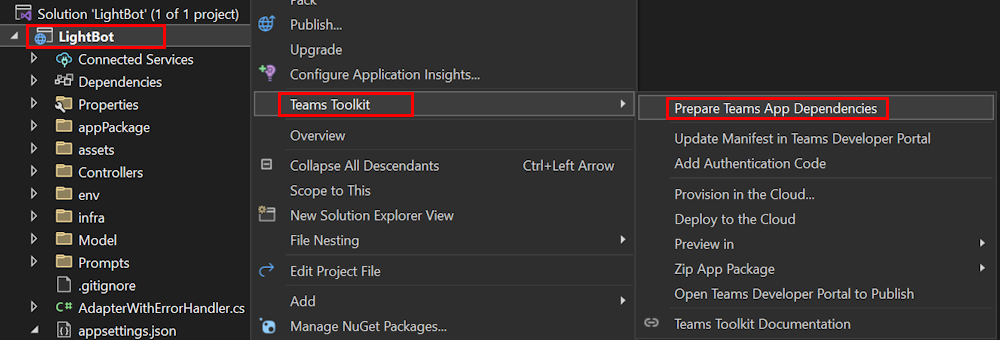
If prompted, sign in to your Microsoft 365 account. You receive a message that Teams app dependencies are successfully prepared.
Select OK.
Select F5 or select Debug > Start.
Select Add to add the bot to your tenant.

When the app is added, a dialog to select the required scope appears.
Select Open to open the app in personal scope.
Alternatively, you can either search and select the required scope or select a channel, chat, or meeting from the list, and move through the dialog to select Go.

A chat window opens.
In the message compose area, send a message to invoke the bot.
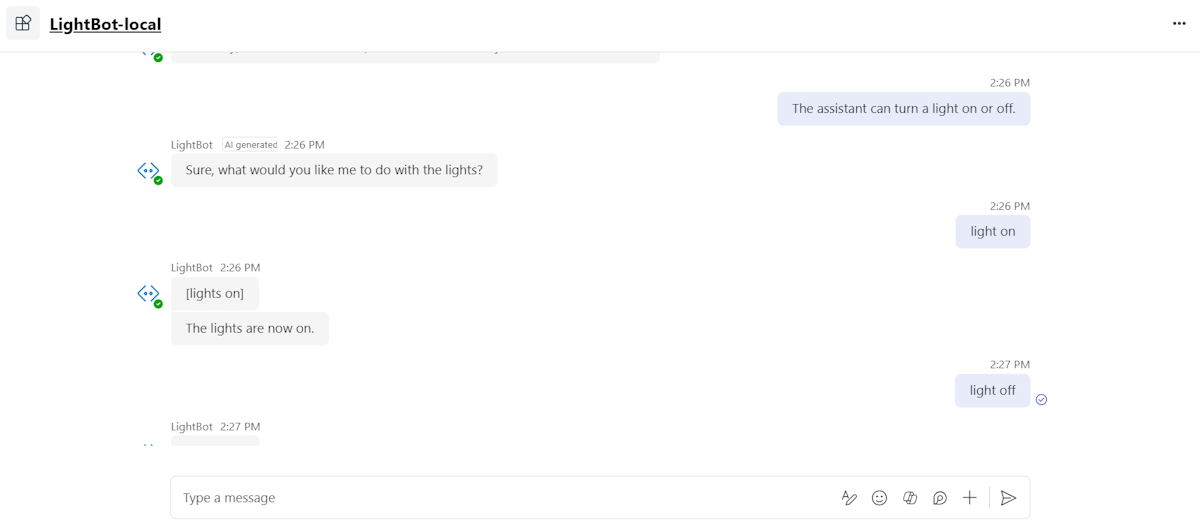
You can also deploy the samples to Azure using Teams Toolkit. To deploy, follow these steps:
- In Visual Studio, go to Solution Explorer and select your project.
- Right-click menu and select Teams Toolkit > Provision in the Cloud. Toolkit provisions your sample to Azure.
- Right-click menu and select Teams Toolkit > Deploy to the Cloud.
Prerequisites
To get started, ensure that you have the following tools:
| Install | For using... |
|---|---|
| Visual Studio Code | JavaScript, TypeScript, and Python build environments. Use the latest version. |
| Teams Toolkit | Microsoft Visual Studio Code extension that creates a project scaffolding for your app. Use the latest version. |
| Python | Python is an interpreted and object-oriented programming language with dynamic semantics. Use versions between 3.8 to 4.0. |
| Poetry | Dependency management and packaging tool for Python. |
| Python VSCode Extension | Provides rich support for Python on VSCode. |
| Git | Git is a version control system that helps you manage different versions of code within a repository. |
| Microsoft Teams | To collaborate with everyone, you work with them through apps for chats, meetings, and calls all in one place. |
| OpenAI or Azure OpenAI | First create your OpenAI API key to use OpenAI's GPT. If you want to host your app or access resources in Microsoft Azure, you must create an Azure OpenAI service. |
| Microsoft Edge (recommended) or Google Chrome | A browser with developer tools. |
| Microsoft 365 developer account | Access to Teams account with the appropriate permissions to install an app and enable custom Teams apps and turn on custom app uploading. |
If you've already run the samples before or encountered a runtime error, follow these steps to start fresh:
- Check all the
.envandenv/.env.*.*files in the sample and delete any automatically populated values to ensure that Teams Toolkit generates new resources for you. - If you don’t want Teams Toolkit to generate the app ID and password, update the
BOT_IDandBOT_PASSWORDin the.envfile with your own values. - Remove values or leave the values blank for SECRET_BOT_PASSWORD and TEAMS_APP_UPDATE_TIME in the
.envfile to avoid conflicts.
Teams Toolkit automatically provisions BOT_ID and BOT_PASSWORD resources. If you want to use your own resources, you need to manually add them to the .env file. Teams Toolkit doesn't auto-generate the following resources:
- An Azure OpenAI or OpenAI key
- A database or similar storage options
Build and run the sample app
Go to the sample.
Clone the repository to test the sample app.
git clone https://github.com/microsoft/teams-ai.gitGo to the python folder.
cd teams-ai/pythonGo to the folder where you cloned the repository and select 04.ai.c.actionMapping.lightBot. All the files for the LightBot sample are listed under the EXPLORER section in Visual Studio Code.
Under EXPLORER, duplicate the sample.env file and update the duplicate file to .env.
Go to the
envfolder and update the following code in./env/.env.local.userfile:SECRET_OPENAI_KEY=<your OpenAI key>To install the following dependencies, go to View > Terminal and run the following commands:
Dependencies Command python-dotenv pip install python-dotenv load-dotenv pip install load-dotenv teams-ai pip install teams-ai botbuilder-core pip install botbuilder-core Update
config.jsonandbot.pywith your model deployment name.Go to View > Command Palette... or select Ctrl+Shift+P.
Enter Python: Create Environment to create a virtual environment.
To debug your app, select F5.
A browser tab opens the Teams web client to add the bot to your tenant.
Select Add.

When the app is added, a dialog to select the required scope appears.
Select Open to open the app in personal scope.
Alternatively, you can either search and select the required scope or select a channel, chat, or meeting from the list, and move through the dialog to select Go.

A chat window opens.
In the message compose area, send a message to invoke the bot.

Additional tools
You can also use the following tools to run and set up a sample:
Teams Toolkit CLI: You can use the Teams Toolkit CLI to create and manage Teams apps from the command line. For more information, see Teams Toolkit CLI set up instructions.
Bot Framework Emulator: The Bot Framework Emulator is a desktop application that allows you to test and debug your bot locally. You can connect to your bot by entering the bot’s endpoint URL and Microsoft app ID and password. You can then send messages to your bot and see its responses in real-time. For more information, see Bot Framework Emulator set up instructions.
Manual setup: If you prefer to set up your resources manually, you can do so by following the instructions provided by the respective services. For more information, see manual set up instructions.
Next step
Choose one of the following as a next step:
If you want to learn how to use Teams AI library to create an AI-powered bot, select the following:
Build with Teams AI library
If you want to build a a custom engine agent using Teams Toolkit, select the following:
Build a custom engine agent