IP 安全性 < ipSecurity>
概觀
元素 <ipSecurity> 會定義 IIS 7 和更新版本中以 IP 為基礎的安全性限制清單。 這些限制可以根據 IP 第 4 版位址、IP 第 4 版位址的範圍或 DNS 功能變數名稱。
相容性
| 版本 | 備註 |
|---|---|
| IIS 10.0 | 未在 IIS 10.0 中修改專案 <ipSecurity> 。 |
| IIS 8.5 | 未在 IIS 8.5 中修改專案 <ipSecurity> 。 |
| IIS 8.0 | 已 enableProxyMode 新增 屬性,可讓您封鎖透過 Proxy 連線之用戶端的要求。 已 denyAction 新增 屬性,以指定 IIS 傳回給用戶端的預設拒絕模式回應。 |
| IIS 7.5 | 未在 IIS 7.5 中修改專案 <ipSecurity> 。 |
| IIS 7.0 | 元素 <ipSecurity> 是在 IIS 7.0 中引進。 |
| IIS 6.0 | 元素 <ipSecurity> 會取代 IIS 6.0 IPSecurity Metabase 屬性。 |
安裝程式
IIS 的預設安裝不包含 IP 安全性的角色服務或 Windows 功能。 若要在 IIS 上使用 IP 安全性,您必須使用下列步驟來安裝角色服務或 Windows 功能:
Windows Server 2012 或 Windows Server 2012 R2
- 在工作列上,按一下 [伺服器管理員]。
- 在[伺服器管理員] 中,按一下 [管理] 功能表,然後按一下 [新增角色及功能]。
- 在 [ 新增角色及功能精 靈] 中,按 [ 下一步]。 選取安裝類型,然後按 [ 下一步]。 選取目的地伺服器,然後按 [ 下一步]。
- 在 [ 伺服器角色] 頁面上,依序展開 [ Web 服務器] (IIS) 、[ Web 服務器]、[ 安全性],然後選取 [ IP 和網域限制]。 按一下 [下一步] 。
 .
. - 在 [選取功能] 頁面上,按 [下一步]。
- 在 [確認安裝選項] 頁面上,按一下 [安裝]。
- 在 [結果] 頁面上,按一下 [關閉]。
Windows 8 或 Windows 8.1
- 在 [開始] 畫面上,將指標一路移至左下角,以滑鼠右鍵按一下 [開始] 按鈕,然後按一下[主控台]。
- 在主控台中,按一下 [程式和功能],然後按一下 [開啟或關閉 Windows 功能]。
- 依 序展開 [Internet Information Services]、[ 萬維網服務]、[ 安全性],然後選取 [ IP 安全性]。
![顯示已針對 Windows 8 選取 [I P 安全性] 的螢幕擷取畫面。](index/_static/image4.png)
- 按一下 [確定]。
- 按一下 [關閉] 。
![顯示已針對 Windows 8 選取 [I P 安全性] 的螢幕擷取畫面。](index/_static/image3.png)
Windows Server 2008 或 Windows Server 2008 R2
在工作列上,按一下 [開始],指向 [系統管理工具],然後按一下[伺服器管理員]。
在[伺服器管理員階層] 窗格中,展開 [角色],然後按一下 [Web 服務器] (IIS) 。
在 [ Web Server (IIS) ] 窗格中,捲動至 [ 角色服務 ] 區段,然後按一下 [ 新增角色服務]。
在 [新增角色服務精靈] 的 [選取角色服務] 頁面上,選取[IP 和網域限制],然後按 [下一步]。
![顯示針對 Windows Server 2008 選取 [I P] 和 [網域限制] 的螢幕擷取畫面。](index/_static/image6.png)
在 [確認安裝選項] 頁面上,按一下 [安裝]。
在 [結果] 頁面上,按一下 [關閉]。
![顯示針對 Windows Server 2008 選取 [I P] 和 [網域限制] 的螢幕擷取畫面。](index/_static/image5.png)
Windows Vista 或 Windows 7
在工作列上,按一下 [開始],然後按一下[主控台]。
在主控台中,按一下 [程式和功能],然後按一下[開啟或關閉 Windows 功能]。
依序展開 [Internet Information Services]、[ World Wide Web 服務] 和 [ 安全性]。
選取 [IP 安全性],然後按一下 [ 確定]。
![顯示針對 Windows Vista 或 Windows 7 選取 [I P 安全性] 的螢幕擷取畫面。](index/_static/image8.png)
![顯示針對 Windows Vista 或 Windows 7 選取 [I P 安全性] 的螢幕擷取畫面。](index/_static/image7.png)
作法
如何新增 IP 限制以拒絕網站存取
開啟 [Internet Information Services (IIS) 管理員:
如果您使用 Windows Server 2012 或 Windows Server 2012 R2:
- 在工作列上,依序按一下 [伺服器管理員]、[工具],然後按一下 [Internet Information Services (IIS) Manager]。
如果您使用 Windows 8 或 Windows 8.1:
- 按住Windows鍵,按字母X,然後按一下[主控台]。
- 按一下 [系統管理工具],然後按兩下 [ Internet Information Services (IIS) Manager]。
如果您使用 Windows Server 2008 或 Windows Server 2008 R2:
- 在工作列上,按一下 [ 開始],指向 [ 系統管理工具],然後按一下 [ Internet Information Services (IIS) 管理員]。
如果您使用 Windows Vista 或 Windows 7:
- 在工作列上,按一下 [開始],然後按一下[主控台]。
- 按兩下 [系統管理工具],然後按兩下 [ Internet Information Services] (IIS) Manager。
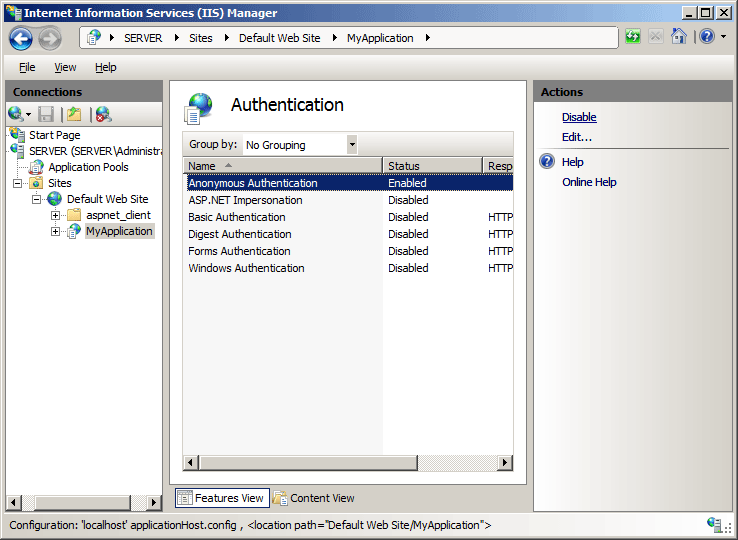
在 [ 連線] 窗格中,展開伺服器名稱、 [網站],然後展開您要為其新增 IP 限制的網站、應用程式或 Web 服務。
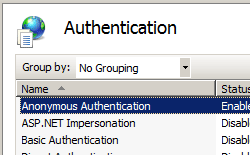
在 [ 首頁 ] 窗格中,按兩下 [ IP 位址和網域限制] 功能。
![顯示 [首頁] 窗格中 [I P 位址和網域限制] 圖示的螢幕擷取畫面。](index/_static/image10.png)
在 [IP 位址和網域限制]功能中,按一下 [動作] 窗格中的 [新增拒絕專案...]。
![顯示 I I S Manager 中 [I P 位址和網域限制] 窗格的螢幕擷取畫面。](index/_static/image12.png)
輸入您想要拒絕的 IP 位址,然後按一下 [ 確定]。
![顯示 [新增拒絕限制規則] 對話方塊的螢幕擷取畫面。已選取特定的 I P 位址。](index/_static/image14.png)
![顯示 [首頁] 窗格中 [I P 位址和網域限制] 圖示的螢幕擷取畫面。](index/_static/image9.png)
![顯示 I I S Manager 中 [I P 位址和網域限制] 窗格的螢幕擷取畫面。](index/_static/image11.png)
![顯示 [新增拒絕限制規則] 對話方塊的螢幕擷取畫面。已選取特定的 I P 位址。](index/_static/image13.png)
如何編輯網站的 IP 限制功能設定
開啟 [Internet Information Services (IIS) 管理員:
如果您使用 Windows Server 2012 或 Windows Server 2012 R2:
- 在工作列上,依序按一下 [伺服器管理員]、[工具],然後按一下 [Internet Information Services (IIS) Manager]。
如果您使用 Windows 8 或 Windows 8.1:
- 按住Windows鍵,按字母X,然後按一下[主控台]。
- 按一下 [系統管理工具],然後按兩下 [ Internet Information Services (IIS) Manager]。
如果您使用 Windows Server 2008 或 Windows Server 2008 R2:
- 在工作列上,按一下 [ 開始],指向 [ 系統管理工具],然後按一下 [ Internet Information Services (IIS) 管理員]。
如果您使用 Windows Vista 或 Windows 7:
- 在工作列上,按一下 [開始],然後按一下[主控台]。
- 按兩下 [系統管理工具],然後按兩下 [ Internet Information Services] (IIS) Manager。
在 [ 連線] 窗格中,展開伺服器名稱、 [網站],然後展開您要為其新增 IP 限制的網站、應用程式或 Web 服務。
在 [ 首頁 ] 窗格中,按兩下 [ IP 位址和網域限制] 功能。

在 [IP 位址和網域限制] 功能中,按一下 [動作] 窗格中的 [編輯功能設定...]。
![顯示 [I P 位址和網域限制] 窗格的螢幕擷取畫面。](index/_static/image18.png)
為未指定的用戶端選擇預設存取行為、指定是否要依功能變數名稱啟用限制、指定是否啟用 Proxy 模式、選取 [拒絕動作類型],然後按一下 [ 確定]。
![[編輯 I P 和網域限制設定] 對話方塊的螢幕擷取畫面。已針對 [拒絕動作類型] 選取 [禁止]。](index/_static/image20.png)

![顯示 [I P 位址和網域限制] 窗格的螢幕擷取畫面。](index/_static/image17.png)
![[編輯 I P 和網域限制設定] 對話方塊的螢幕擷取畫面。已針對 [拒絕動作類型] 選取 [禁止]。](index/_static/image19.png)
組態
規則會依照規則出現在清單中的順序,從上到下進行處理。 allowUnlisted屬性最後處理。 網際網路通訊協定安全性 (IPsec) 限制的最佳做法是先列出拒絕規則。 如果 allowUnlisted 屬性設定為 false,則無法清除此屬性。
下列預設 <ipSecurity> 專案是在 IIS 7 和更新版本中的根ApplicationHost.config檔案中設定。 除非您使用 元素,否則此組態區段會繼承預設組 <clear> 態設定。
<ipSecurity allowUnlisted="true" />
屬性
| 屬性 | 描述 | ||||||||||
|---|---|---|---|---|---|---|---|---|---|---|---|
allowUnlisted |
選擇性的 Boolean 屬性。 指定是否允許未列出的 IP 位址。 將 allowUnlisted 屬性設定為 true 可讓未列出的 IP 位址存取伺服器。 將 allowUnlisted 屬性設定為 false 會鎖定伺服器,以防止存取所有 IP 位址,除非列出它們。 如果您將此屬性設定為 false,且未將本機回送位址 (127.0.0.1) 列為允許的 IP 位址,則您無法從本機主控台使用瀏覽器來存取伺服器。 這個屬性也會影響委派。 如果您要在父組態中將此屬性設定為 false,您將無法使用 <clear> 元素在子組態檔中清除此組態。預設值是 true。 |
||||||||||
denyAction |
選擇性列舉屬性。 指定 IIS 應該傳回給用戶端的預設拒絕模式回應。 預設值是 forbidden。
|
||||||||||
enableProxyMode |
選擇性的 Boolean 屬性。 讓 IIS 不只封鎖 IIS 所看到之用戶端 IP 的要求,還能封鎖來自 x-forwarded-for HTTP 標頭中接收之 IP 位址的要求。 此標頭可讓您識別透過 HTTP Proxy 或負載平衡器連線之用戶端的原始 IP 位址。 這稱為 Proxy 模式。 預設值是 false。 |
||||||||||
enableReverseDns |
選擇性的 Boolean 屬性。 指定是否要啟用或停用網頁伺服器的反向網域名稱系統 (DNS) 查閱。 反向對應牽涉到在已知 IP 位址時查閱功能變數名稱。 注意:反向 DNS 查閱會使用大量的資源和時間。 預設值是 false。 |
子元素
| 元素 | 描述 |
|---|---|
add |
選擇性項目。 將 IP 限制新增至 IP 位址限制的集合。 |
remove |
選擇性項目。 從集合中移除限制的 <ipSecurity> 參考。 |
clear |
選擇性項目。 從集合中移除限制 <ipSecurity> 的所有參考。 |
組態範例
下列設定範例會將兩個 IP 限制新增至預設網站;第一個限制會拒絕存取 IP 位址 192.168.100.1,而第二個限制會拒絕存取整個 169.254.0.0 網路。
<location path="Default Web Site">
   <system.webServer>
      <security>
         <ipSecurity>
            <add ipAddress="192.168.100.1" />
            <add ipAddress="169.254.0.0" subnetMask="255.255.0.0" />
         </ipSecurity>
      </security>
   </system.webServer>
</location>
範例程式碼
下列程式碼範例會列舉預設網站的反向 DNS 查閱。
AppCmd.exe
appcmd.exe set config "Default Web Site" -section:system.webServer/security/ipSecurity /enableReverseDns:true /commit:apphost
注意
當您使用 AppCmd.exe 來設定這些設定時,請務必將 認可 參數 apphost 設定為 。 這會將組態設定認可至ApplicationHost.config檔案中的適當位置區段。
C#
using System;
using System.Text;
using Microsoft.Web.Administration;

internal static class Sample
{
   private static void Main()
   {
      using (ServerManager serverManager = new ServerManager())
      {
         Configuration config = serverManager.GetApplicationHostConfiguration();
         ConfigurationSection ipSecuritySection = config.GetSection("system.webServer/security/ipSecurity", "Default Web Site");
         ipSecuritySection["enableReverseDns"]=true;

         serverManager.CommitChanges();
      }
   }
}
VB.NET
Imports System
Imports System.Text
Imports Microsoft.Web.Administration

Module Sample

   Sub Main()
      Dim serverManager As ServerManager = New ServerManager
      Dim config As Configuration = serverManager.GetApplicationHostConfiguration
      Dim ipSecuritySection As ConfigurationSection = config.GetSection("system.webServer/security/ipSecurity", "Default Web Site")

      ipSecuritySection("enableReverseDns") = True

      serverManager.CommitChanges()
   End Sub

End Module
JavaScript
var adminManager = new ActiveXObject('Microsoft.ApplicationHost.WritableAdminManager');
adminManager.CommitPath = "MACHINE/WEBROOT/APPHOST";
var ipSecuritySection = adminManager.GetAdminSection("system.webServer/security/ipSecurity", "MACHINE/WEBROOT/APPHOST/Default Web Site");

ipSecuritySection.Properties.Item("enableReverseDns").Value = True;

adminManager.CommitChanges();
VBScript
Set adminManager = WScript.CreateObject("Microsoft.ApplicationHost.WritableAdminManager")
adminManager.CommitPath = "MACHINE/WEBROOT/APPHOST"
Set ipSecuritySection = adminManager.GetAdminSection("system.webServer/security/ipSecurity", "MACHINE/WEBROOT/APPHOST/Default Web Site")

ipSecuritySection.Properties.Item("enableReverseDns").Value = True

adminManager.CommitChanges()