教學課程:使用 Yeoman 封裝和部署容器作為 Service Fabric 應用程式
本教學課程是一個系列中的第二部分。 本教學課程使用範本產生器工具 (Yeoman),來產生 Service Fabric 應用程式定義。 此應用程式接著可用來將容器部署到 Service Fabric。 在本教學課程中,您將了解如何:
- 安裝 Yeoman
- 使用 Yeoman 建立應用程式封裝
- 設定應用程式封裝中的設定來與容器搭配使用
- 建置應用程式
- 部署和執行應用程式
- 清除應用程式
必要條件
安裝 Yeoman
Service Fabric 提供 Scaffolding 工具,可協助您使用 Yeoman 範本產生器,從終端機建立應用程式。 依照下列步驟執行,以確定您具有 Yeoman 範本產生器。
在您的電腦上安裝 nodejs 和節點套件管理員。 如果您使用 macOS X,則必須使用套件管理員Homebrew。
curl -o- https://raw.githubusercontent.com/creationix/nvm/v0.33.0/install.sh | bash
nvm install node
在您的機器上透過節點套件管理員安裝 Yeoman 範本產生器:
npm install -g yo安裝 Service Fabric Yeoman 容器產生器
npm install -g generator-azuresfcontainer
使用 Yeoman 封裝 Docker 映像容器
若要建立 Service Fabric 容器應用程式,在複製存放庫的 'container-tutorial' 目錄中,執行下列命令。
yo azuresfcontainer請輸入 "TestContainer" 命名您的應用程式
請輸入 "azurevotefront" 命名您的應用程式服務。
為前端存放庫提供 ACR 中的容器映像路徑,例如 '<acrName>.azurecr.io/azure-vote-front:v1'。 <acrName> 欄位的值必須與上一個教學課程中所使用的值相同。
按 Enter 鍵,讓 Commands 區段保留空白。
將執行個體計數指定為 1。
下圖顯示執行 yo 命令的輸入和輸出:
? Name your application TestContainer
? Name of the application service: azurevotefront
? Input the Image Name: <acrName>.azurecr.io/azure-vote-front:v1
? Commands:
? Number of instances of guest container application: 1
   create TestContainer/TestContainer/ApplicationManifest.xml
   create TestContainer/TestContainer/azurevotefrontPkg/ServiceManifest.xml
   create TestContainer/TestContainer/azurevotefrontPkg/config/Settings.xml
   create TestContainer/TestContainer/azurevotefrontPkg/code/Dummy.txt
   create TestContainer/install.sh
   create TestContainer/uninstall.sh
若要將其他容器服務新增至已使用 Yeoman 建立的應用程式,請執行下列步驟︰
- 將目錄變更一個層級至 TestContainer 目錄,例如 ./TestContainer
yo azuresfcontainer:AddService執行- 將服務命名為 'azurevoteback'
- 為 Redis 提供容器映像路徑 - 'redis:alpine'
- 按 Enter 鍵,讓 Commands 區段保留空白
- 指定執行個體計數為 "1"。
用於新增所用服務的項目均會顯示:
? Name of the application service: azurevoteback
? Input the Image Name: redis:alpine
? Commands:
? Number of instances of guest container application: 1
   create TestContainer/azurevotebackPkg/ServiceManifest.xml
   create TestContainer/azurevotebackPkg/config/Settings.xml
   create TestContainer/azurevotebackPkg/code/Dummy.txt
針對本教學課程的其餘部分,我們會在 TestContainer 目錄中運作。 例如,./TestContainer/TestContainer。 此目錄的內容應該如下所示。
$ ls
ApplicationManifest.xml azurevotefrontPkg azurevotebackPkg
使用適用於 Azure Container Registry 的認證來設定應用程式資訊清單
針對要從 Azure Container Registry 提取容器映像的 Service Fabric,我們需要在 ApplicationManifest.xml 中提供認證。
登入您的 ACR 執行個體。 使用 az acr login 命令來完成此作業。 在建立容器登錄時,為它提供唯一名稱。
az acr login --name <acrName>
此命令在完成之後會傳回登入成功訊息。
接下來,執行下列命令以取得容器登錄的密碼。 Service Fabric 會使用此密碼來向 ACR 進行驗證以提取容器映像。
az acr credential show -n <acrName> --query passwords[0].value
在 ApplicationManifest.xml 中,針對前端服務,在 ServiceManifestImport 元素下方加入程式碼片段。 針對 AccountName 欄位插入您的 acrName,並針對 Password 欄位使用從前一個命令傳回的密碼。 本文件結尾會提供完整的 ApplicationManifest.xml。
<Policies>
  <ContainerHostPolicies CodePackageRef="Code">
    <RepositoryCredentials AccountName="<acrName>" Password="<password>" PasswordEncrypted="false"/>
  </ContainerHostPolicies>
</Policies>
設定通訊和容器連接埠對主機連接埠的對應
設定通訊連接埠
設定 HTTP 端點,讓用戶端可以與您的服務通訊。 開啟 ./TestContainer/azurevotefrontPkg/ServiceManifest.xml 檔案,並在 ServiceManifest 元素中宣告端點資源。 新增通訊協定、連接埠和名稱。 在本教學課程中,服務會接聽連接埠 80。 下列程式碼片段放在資源中的 ServiceManifest 標記下方。
<Resources>
  <Endpoints>
    <!-- This endpoint is used by the communication listener to obtain the port on which to
            listen. Please note that if your service is partitioned, this port is shared with
            replicas of different partitions that are placed in your code. -->
    <Endpoint Name="azurevotefrontTypeEndpoint" UriScheme="http" Port="80" Protocol="http"/>
  </Endpoints>
</Resources>
同樣地,修改適用於後端服務的服務資訊清單。 開啟 ./TestContainer/azurevotebackPkg/ServiceManifest.xml 檔案,並在 ServiceManifest 元素中宣告端點資源。 本教學課程會保留 redis 預設值 6379。 下列程式碼片段放在資源中的 ServiceManifest 標記下方。
<Resources>
  <Endpoints>
    <!-- This endpoint is used by the communication listener to obtain the port on which to
            listen. Please note that if your service is partitioned, this port is shared with
            replicas of different partitions that are placed in your code. -->
    <Endpoint Name="azurevotebackTypeEndpoint" Port="6379" Protocol="tcp"/>
  </Endpoints>
</Resources>
提供 UriScheme,就會自動向 Service Fabric 命名服務註冊容器端點以供搜尋。 本文結尾會針對後端服務提供完整的 ServiceManifest.xml 範例檔案作為範例。
將容器連接埠對應至服務
為了公開叢集中的容器,我們也需要在 'ApplicationManifest.xml' 中建立連接埠繫結。 PortBinding 原則會參考我們在 ServiceManifest.xml 檔案中定義的 Endpoints。 將要求傳入這些端點,會對應至已在此處開啟並繫結的容器連接埠。 在 ApplicationManifest.xml 檔案中,新增下列程式碼,將連接埠 80 和 6379 繫結至端點。 本文件結尾會提供完整的 ApplicationManifest.xml。
<ContainerHostPolicies CodePackageRef="Code">
    <PortBinding ContainerPort="80" EndpointRef="azurevotefrontTypeEndpoint"/>
</ContainerHostPolicies>
<ContainerHostPolicies CodePackageRef="Code">
    <PortBinding ContainerPort="6379" EndpointRef="azurevotebackTypeEndpoint"/>
</ContainerHostPolicies>
將 DNS 名稱新增至後端服務
針對要將這個 DNS 名稱指派至後端服務的 Service Fabric,必須將名稱指定於 ApplicationManifest.xml 中。 將 ServiceDnsName 屬性新增至 Service 元素,如下所示:
<Service Name="azurevoteback" ServiceDnsName="redisbackend.testapp">
  <StatelessService ServiceTypeName="azurevotebackType" InstanceCount="1">
    <SingletonPartition/>
  </StatelessService>
</Service>
前端服務會讀取環境變數,以了解 Redis 執行個體的 DNS 名稱。 此環境變數已經定義在用來產生 Docker 映像的 Docerkfile 中,這裡不需要採取任何動作。
ENV REDIS redisbackend.testapp
下列程式碼片段說明前端的 Python 程式碼如何挑選 Dockerfile 中所述的環境變數。 這裡不需要採取任何動作。
# Get DNS Name
redis_server = os.environ['REDIS']

# Connect to the Redis store
r = redis.StrictRedis(host=redis_server, port=6379, db=0)
在本教學課程中,現在可以使用適用於服務封裝應用程式的範本來部署到叢集。 在後續的教學課程中,此應用程式會部署並執行於 Service Fabric 叢集中。
建立 Service Fabric 叢集
若要將應用程式部署至 Azure,您需要用來執行該應用程式的 Service Fabric 叢集。 下列命令會在 Azure 中建立包含五個節點的叢集。 這些命令也會建立自我簽署憑證,然後將其新增至金鑰保存庫,並在本機將憑證下載為 PEM 檔案。 新的憑證用來在部署叢集時保護叢集,而且用來驗證用戶端。
#!/bin/bash

# Variables
ResourceGroupName="containertestcluster"
ClusterName="containertestcluster"
Location="eastus"
Password="q6D7nN%6ck@6"
Subject="containertestcluster.eastus.cloudapp.azure.com"
VaultName="containertestvault"
VmPassword="Mypa$$word!321"
VmUserName="sfadminuser"

# Login to Azure and set the subscription
az login

az account set --subscription <mySubscriptionID>

# Create resource group
az group create --name $ResourceGroupName --location $Location

# Create secure five node Linux cluster. Creates a key vault in a resource group
# and creates a certficate in the key vault. The certificate's subject name must match
# the domain that you use to access the Service Fabric cluster.
# The certificate is downloaded locally as a PEM file.
az sf cluster create --resource-group $ResourceGroupName --location $Location \
--certificate-output-folder . --certificate-password $Password --certificate-subject-name $Subject \
--cluster-name $ClusterName --cluster-size 5 --os UbuntuServer1804 --vault-name $VaultName \
--vault-resource-group $ResourceGroupName --vm-password $VmPassword --vm-user-name $VmUserName
注意
Web 前端服務設定為在連接埠 80 上接聽傳入流量。 根據預設,連接埠 80 在您的叢集 VM 和 Azure 負載平衡器上是開啟的。
如需建立您自己叢集的詳細資訊,請參閱在 Azure 上建立您的 Service Fabric 叢集。
建置應用程式並部署到叢集
您可以使用 Service Fabric CLI,將應用程式部署到 Azure 叢集。 如果您的電腦上並未安裝 Service Fabric CLI,請依照這裡的指示來安裝它。
連線到 Azure 中的 Service Fabric 叢集。 以您自己的端點取代範例端點。 端點必須是類似以下的完整 URL。 PEM 檔案是先前建立的自我簽署憑證。
sfctl cluster select --endpoint https://containertestcluster.eastus.cloudapp.azure.com:19080 --pem containertestcluster22019013100.pem --no-verify
使用 TestContainer 目錄中所提供的安裝指令碼,將應用程式封裝複製到叢集的映像存放區、註冊應用程式類型,以及建立應用程式的執行個體。
./install.sh
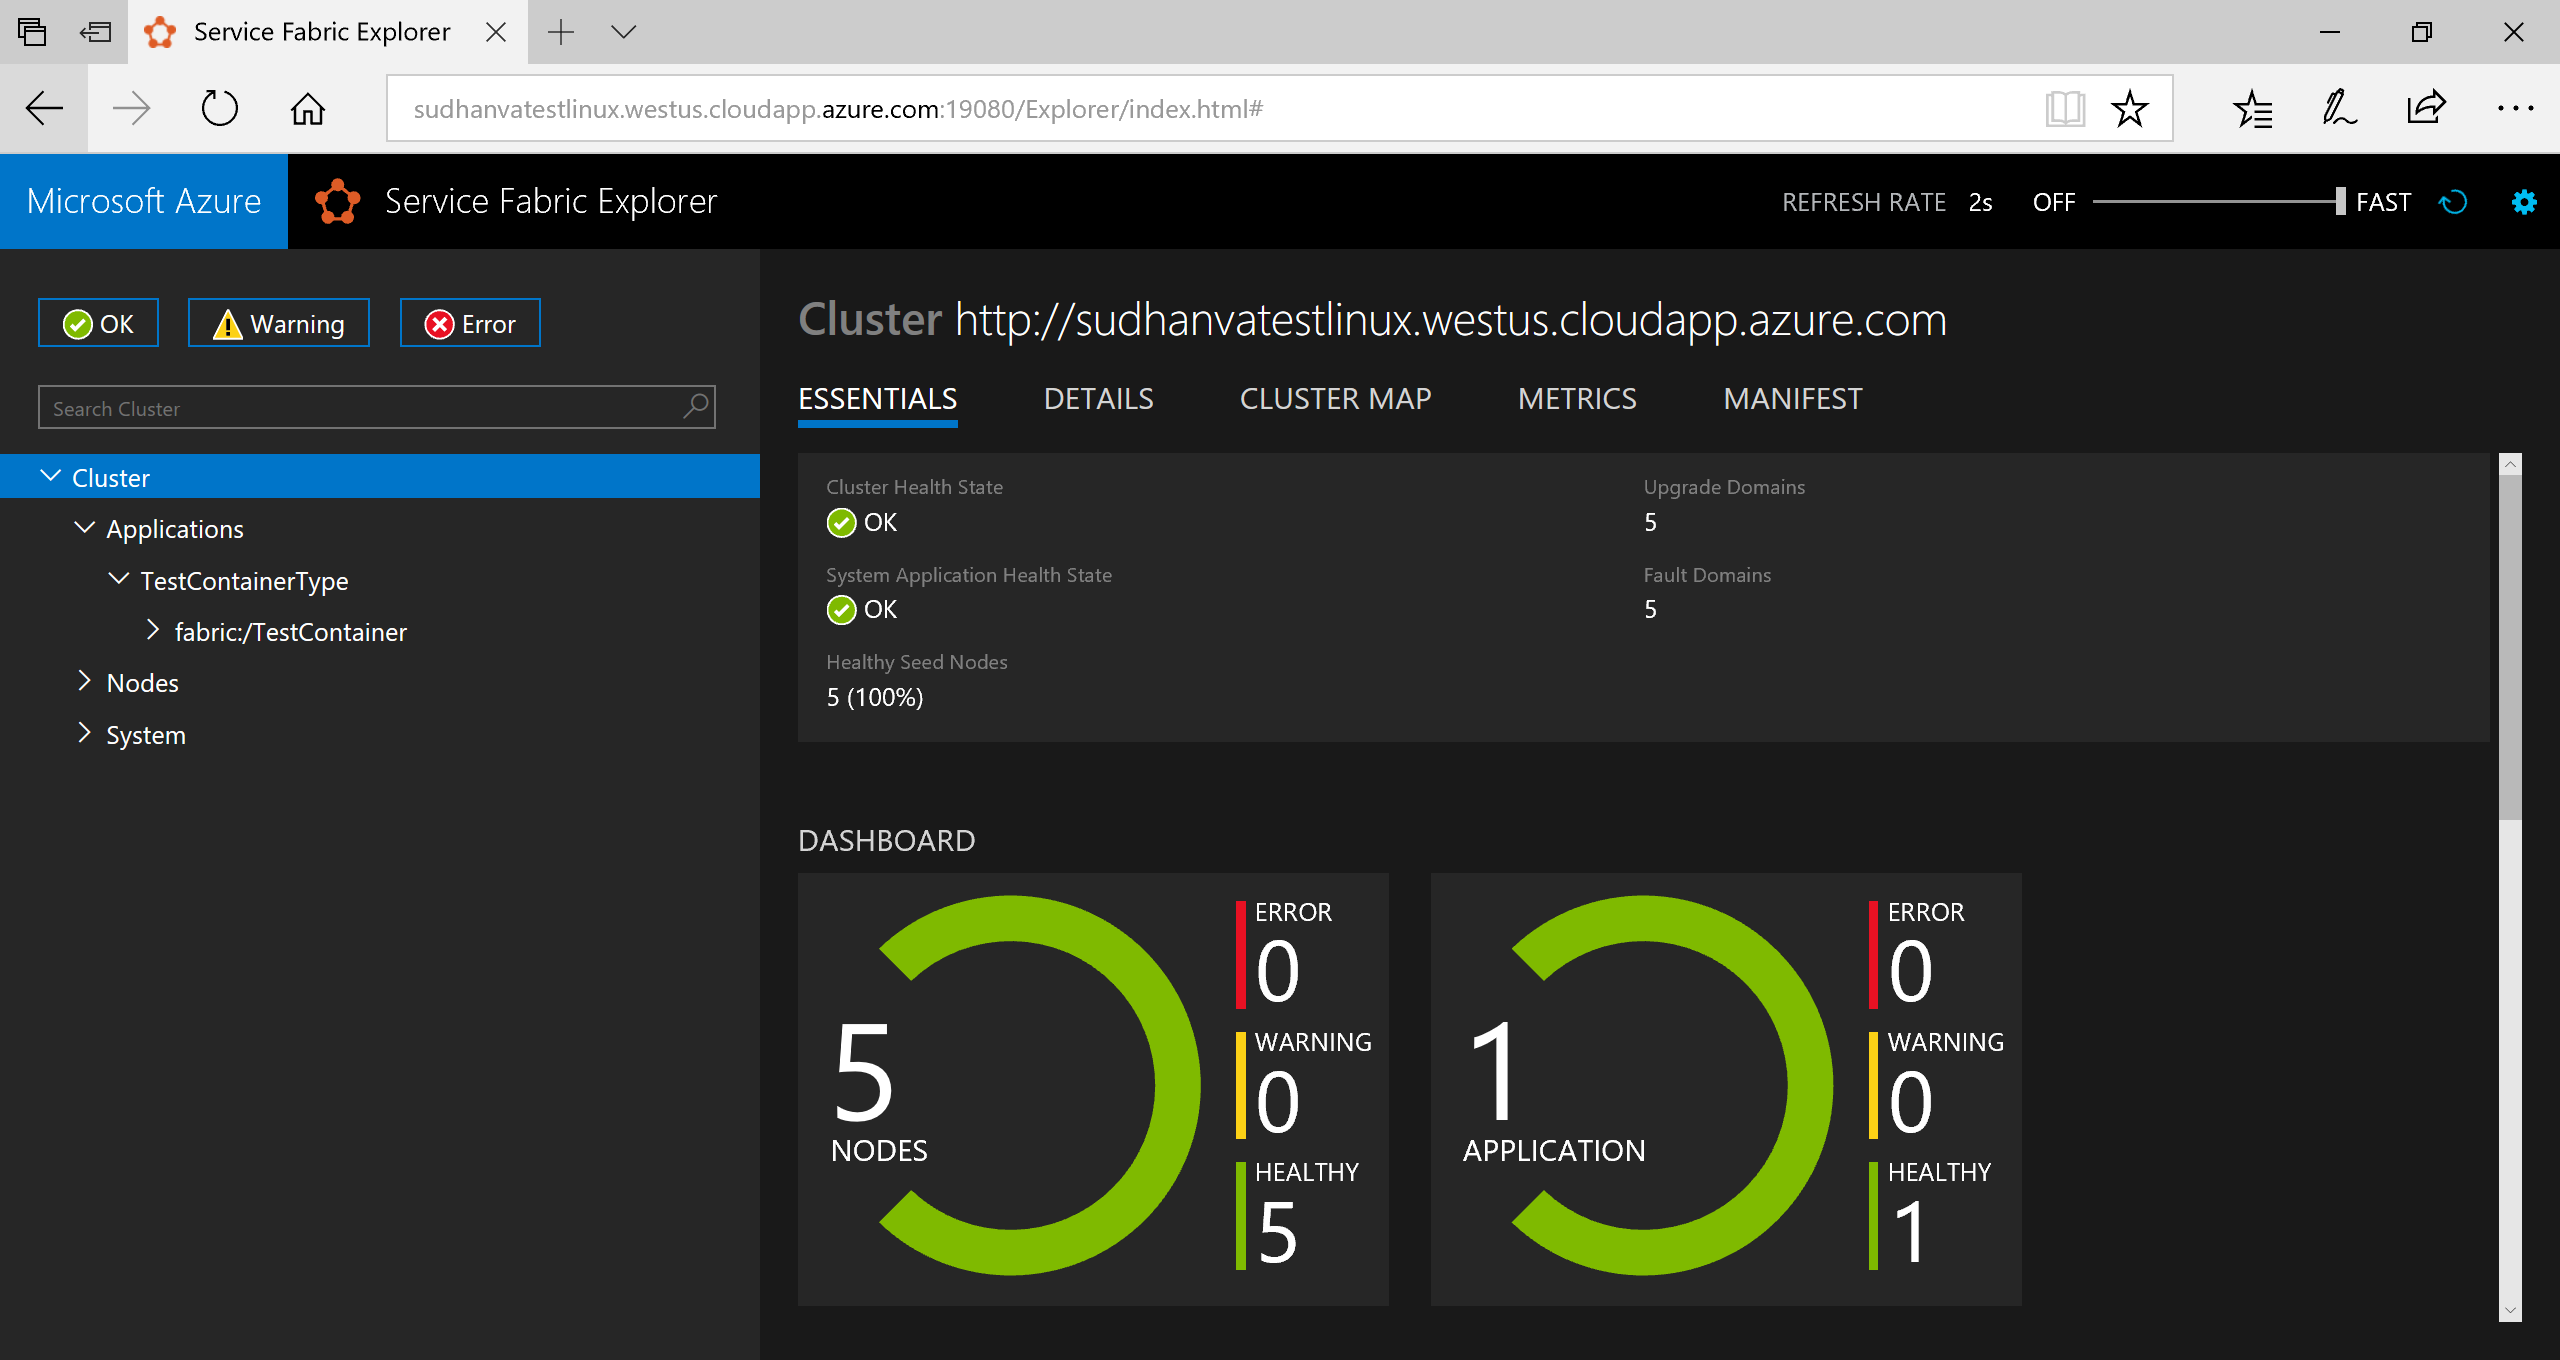
開啟瀏覽器,並瀏覽至 https://containertestcluster.eastus.cloudapp.azure.com:19080/Explorer. 上的 Service Fabric Explorer 展開 [應用程式] 節點,請注意,有一個適用於您應用程式類型的項目,另一個則適用於執行個體。

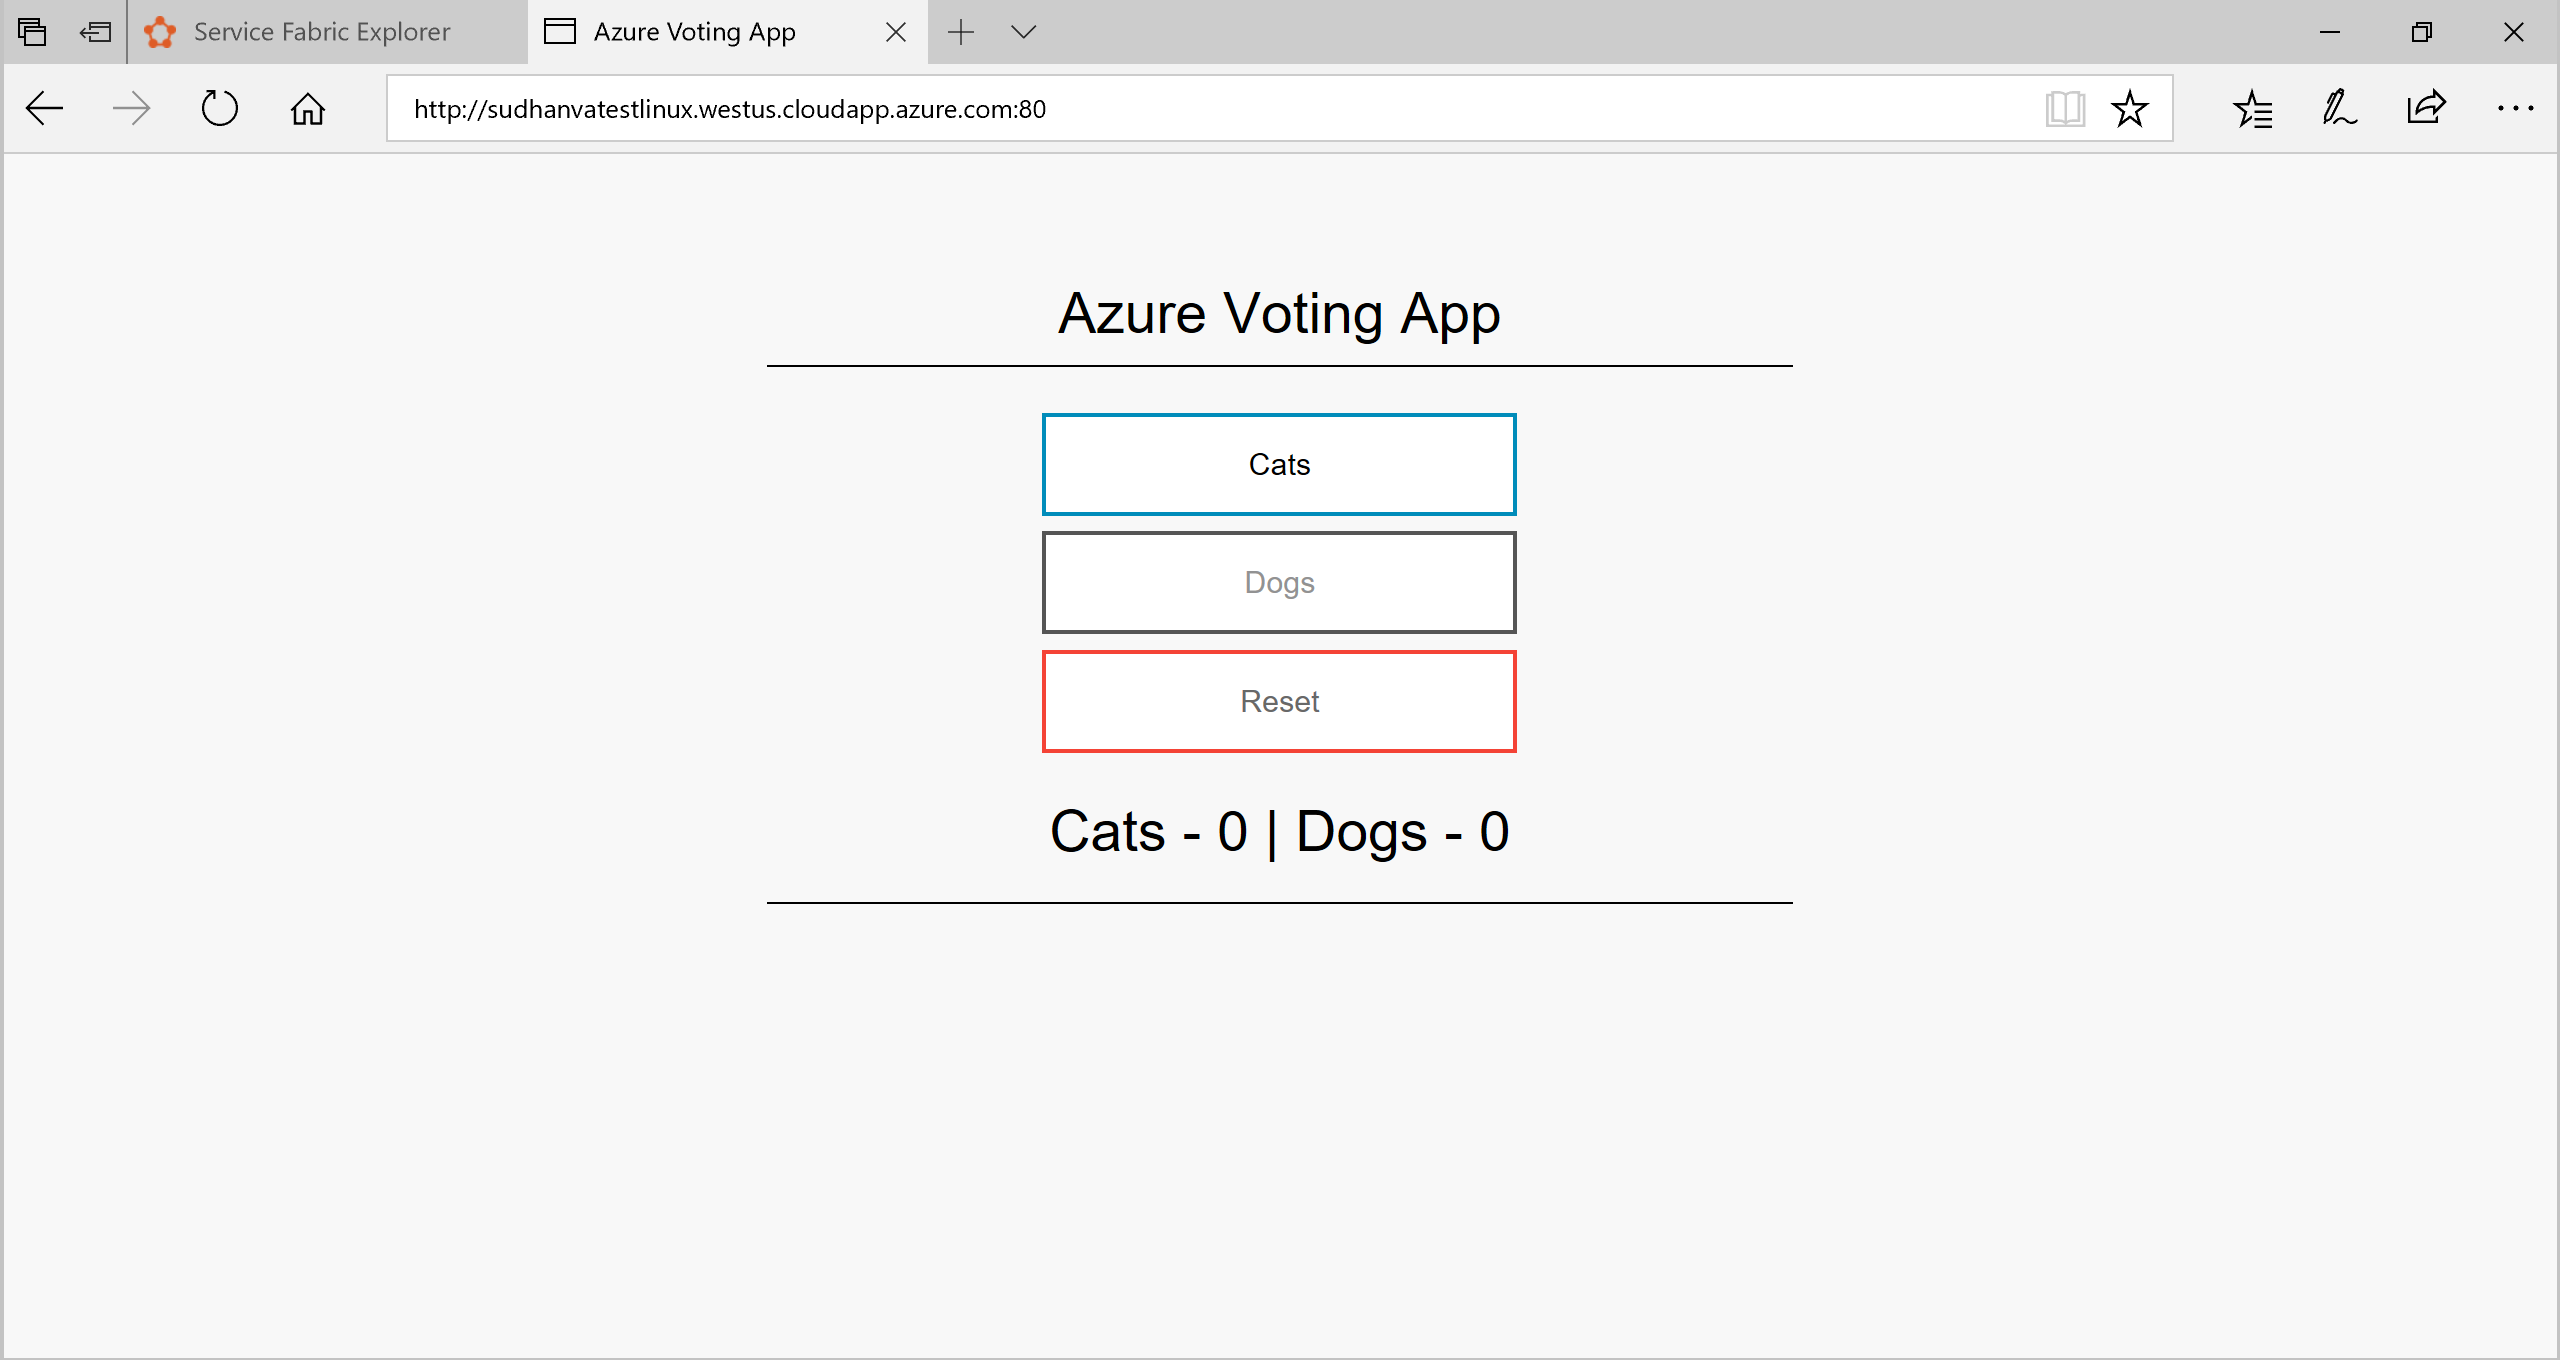
為了連接到執行中應用程式,請開啟網頁瀏覽器並移至叢集 URL,例如 http://containertestcluster.eastus.cloudapp.azure.com:80. 您應會在 Web UI 中看到投票應用程式。

清理
使用範本中提供的解除安裝指令碼,刪除叢集中的應用程式執行個體並取消註冊應用程式類型。 這個命令會花一些時間來清除執行個體,而且無法在此指令碼之後立即執行 'install'sh' 命令。
./uninstall.sh
已完成的資訊清單範例
ApplicationManifest.xml
<?xml version="1.0" encoding="UTF-8" standalone="yes"?>
<ApplicationManifest ApplicationTypeName="TestContainerType" ApplicationTypeVersion="1.0.0" xmlns="http://schemas.microsoft.com/2011/01/fabric" xmlns:xsd="https://www.w3.org/2001/XMLSchema" xmlns:xsi="https://www.w3.org/2001/XMLSchema-instance">
  <ServiceManifestImport>
    <ServiceManifestRef ServiceManifestName="azurevotefrontPkg" ServiceManifestVersion="1.0.0"/>
    <Policies>
    <ContainerHostPolicies CodePackageRef="Code">
        <RepositoryCredentials AccountName="myaccountname" Password="<password>" PasswordEncrypted="false"/>
        <PortBinding ContainerPort="80" EndpointRef="azurevotefrontTypeEndpoint"/>
    </ContainerHostPolicies>
        </Policies>
  </ServiceManifestImport>
  <ServiceManifestImport>
    <ServiceManifestRef ServiceManifestName="azurevotebackPkg" ServiceManifestVersion="1.0.0"/>
      <Policies>
        <ContainerHostPolicies CodePackageRef="Code">
          <PortBinding ContainerPort="6379" EndpointRef="azurevotebackTypeEndpoint"/>
        </ContainerHostPolicies>
      </Policies>
  </ServiceManifestImport>
  <DefaultServices>
    <Service Name="azurevotefront">
      <StatelessService ServiceTypeName="azurevotefrontType" InstanceCount="1">
        <SingletonPartition/>
      </StatelessService>
    </Service>
    <Service Name="azurevoteback" ServiceDnsName="redisbackend.testapp">
      <StatelessService ServiceTypeName="azurevotebackType" InstanceCount="1">
        <SingletonPartition/>
      </StatelessService>
    </Service>
  </DefaultServices>
</ApplicationManifest>
Front-end ServiceManifest.xml
<?xml version="1.0" encoding="utf-8"?>
<ServiceManifest Name="azurevotefrontPkg" Version="1.0.0"
                 xmlns="http://schemas.microsoft.com/2011/01/fabric" xmlns:xsd="https://www.w3.org/2001/XMLSchema" xmlns:xsi="https://www.w3.org/2001/XMLSchema-instance" >

   <ServiceTypes>
      <StatelessServiceType ServiceTypeName="azurevotefrontType" UseImplicitHost="true">
   </StatelessServiceType>
   </ServiceTypes>

   <CodePackage Name="code" Version="1.0.0">
      <EntryPoint>
         <ContainerHost>
            <ImageName>acrName.azurecr.io/azure-vote-front:v1</ImageName>
            <Commands></Commands>
         </ContainerHost>
      </EntryPoint>
      <EnvironmentVariables>
      </EnvironmentVariables>
   </CodePackage>

  <Resources>
    <Endpoints>
      <!-- This endpoint is used by the communication listener to obtain the port on which to
           listen. Please note that if your service is partitioned, this port is shared with
           replicas of different partitions that are placed in your code. -->
      <Endpoint Name="azurevotefrontTypeEndpoint" UriScheme="http" Port="80" Protocol="http"/>
    </Endpoints>
  </Resources>

 </ServiceManifest>
Redis ServiceManifest.xml
<?xml version="1.0" encoding="utf-8"?>
<ServiceManifest Name="azurevotebackPkg" Version="1.0.0"
                 xmlns="http://schemas.microsoft.com/2011/01/fabric" xmlns:xsd="https://www.w3.org/2001/XMLSchema" xmlns:xsi="https://www.w3.org/2001/XMLSchema-instance" >

   <ServiceTypes>
      <StatelessServiceType ServiceTypeName="azurevotebackType" UseImplicitHost="true">
   </StatelessServiceType>
   </ServiceTypes>

   <CodePackage Name="code" Version="1.0.0">
      <EntryPoint>
         <ContainerHost>
            <Commands></Commands>
         </ContainerHost>
      </EntryPoint>
      <EnvironmentVariables>
      </EnvironmentVariables>
   </CodePackage>
     <Resources>
    <Endpoints>
      <!-- This endpoint is used by the communication listener to obtain the port on which to
           listen. Please note that if your service is partitioned, this port is shared with
           replicas of different partitions that are placed in your code. -->
      <Endpoint Name="azurevotebackTypeEndpoint" Port="6379" Protocol="tcp"/>
    </Endpoints>
  </Resources>
 </ServiceManifest>
下一步
本教學課程會使用 Yeoman,將多個容器封裝為 Service Fabric 應用程式。 此應用程式接著會部署並執行於 Service Fabric 叢集上。 已完成下列步驟:
- 安裝 Yeoman
- 使用 Yeoman 建立應用程式封裝
- 設定應用程式封裝中的設定來與容器搭配使用
- 建置應用程式
- 部署和執行應用程式
- 清除應用程式
前進到下一個教學課程,以了解如何在 Service Fabric 中容錯移轉和調整應用程式。