部署 Open Liberty Micro Web 應用程式以使用 Maven Azure App 服務
在本快速入門中,您將使用適用於 Azure App 服務 Web Apps 的 Maven 外掛程式,將 Open Liberty 應用程式部署至 Linux 上的 Azure App 服務。 當您想要將應用程式的相依性、運行時間和設定合併成單一可部署成品時,想要選擇透過 Tomcat 和 WAR 檔案 的 Java SE 部署。
如尚未擁有 Azure 訂用帳戶,請在開始之前先建立免費帳戶。
重要
雖然 Azure App 服務 是由 Microsoft 所設計、操作和支援,但您在其上執行的軟體受限於其本身的支援方案支援和授權條款。 如需本文所述軟體支援的詳細數據,請參閱本文所列的軟體主頁面。 如需 Open Liberty 的支援,請參閱 Open Liberty 支援頁面。 如需 WebSphere Liberty 的支援,請參閱 IBM 雲端支援。
必要條件
- Azure CLI,無論是在本機還是透過 Azure Cloud Shell。
- 受支援的 Java 開發套件 (JDK)。 如需在 Azure 上進行開發時可供使用的 JDK 詳細資訊,請參閱 Azure 和 Azure Stack 上的 Java 支援。
- Apache Maven 第 3 版。
登入 Azure CLI
取得部署 Open Liberty 應用程式的 Maven 外掛程式最簡單的方式是使用 Azure CLI。
使用 Azure CLI 登入您的 Azure 帳戶:
az login
請遵循指示來完成登入程式。
從 MicroProfile Starter 建立範例應用程式
在本節中,您將建立 Open Liberty 應用程式,並在本機進行測試。
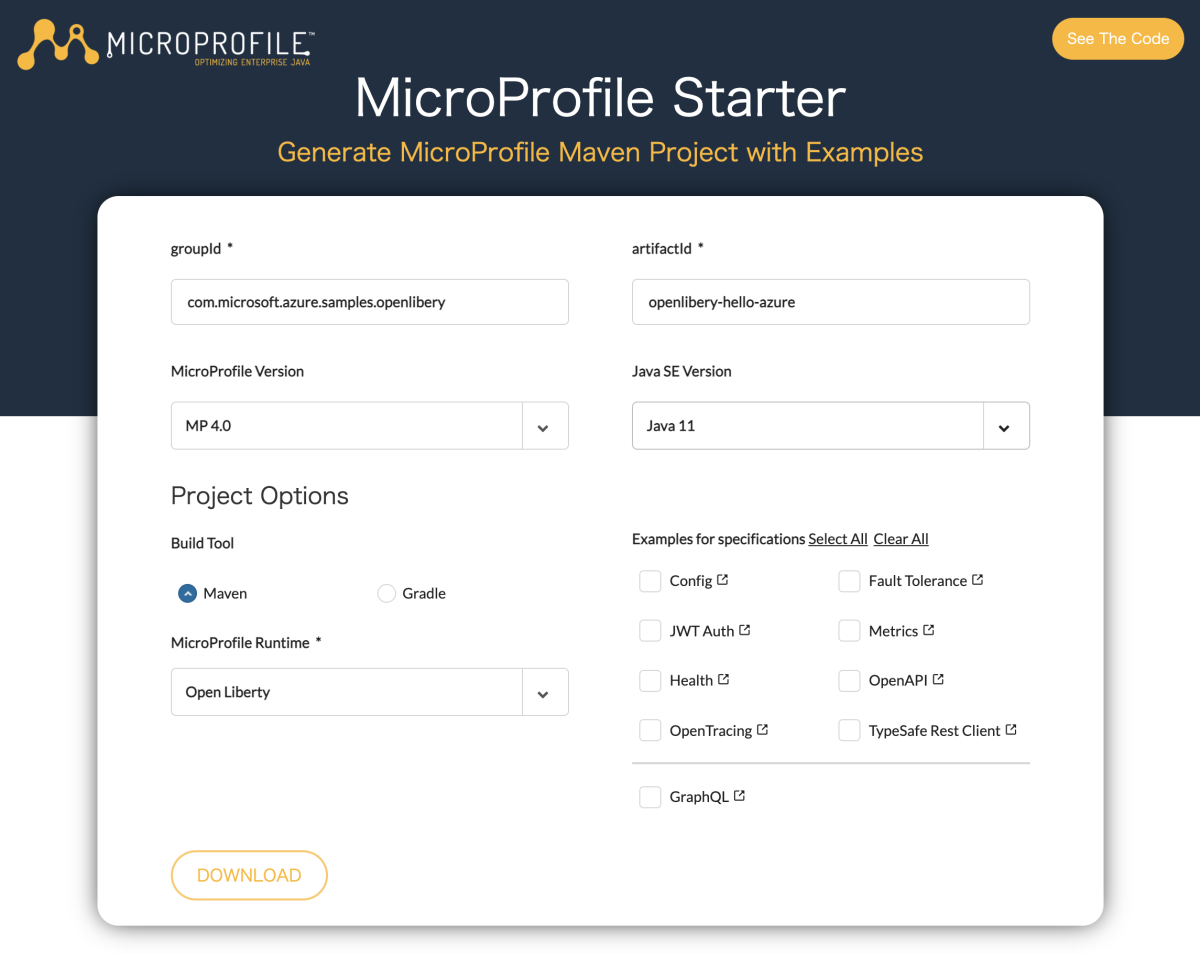
開啟網頁瀏覽器並流覽至 MicroProfile Starter 網站。

使用下表中的值來填入 MicroProfile Starter。
欄位 值 groupId com.microsoft.azure.samples.openliberty artifactId openliberty-hello-azure MicroProfile 版本 MP 4.0 Java SE 版本 Java 11 MicroProfile 運行時間 Open Liberty 規格的範例 計量、OpenAPI 選取 [ 下載 ] 以下載專案。
解壓縮封存盤案;例如:
unzip openliberty-hello-azure.zip
在本機環境中執行應用程式
將目錄變更為已完成的專案;例如:
cd openliberty-hello-azure/使用 Maven 建置專案;例如:
mvn clean package執行專案;例如:
java -jar target/openliberty-hello-azure.jar使用網頁瀏覽器在本機流覽至 Web 應用程式,以測試 Web 應用程式。 例如,如果您有 curl 可用,您可以使用下列命令:
curl http://localhost:9080/data/hello您應該會看到下列訊息顯示: Hello World
設定適用於 Azure App 服務 的 Maven 外掛程式
在本節中,您將設定 Open Liberty 專案pom.xml檔案,讓 Maven 可以將應用程式部署至 Linux 上的 Azure App 服務。
若要設定部署,請執行下列 Maven 命令:
mvn com.microsoft.azure:azure-webapp-maven-plugin:2.3.0:config出現提示時,請選取下列選項:
輸入欄位 輸入/選取值 定義 OS 的值(預設值:Linux): 1. linux 定義 javaVersion 的值(預設值:Java 8): 2. Java 11 定義 runtimeStack 的值(預設值:TOMCAT 8.5): 2. TOMCAT 8.5 Confirm (Y/N) (確認 (Y/N)) y
注意
雖然我們沒有使用 Tomcat,但目前仍選取 TOMCAT 8.5 。 在詳細的設定期間,您會將 值從 TOMCAT 8.5 修改為 Java。
此範例會使用特定版本的 Azure App 服務 Maven 外掛程式。 您應該考慮使用可用的最新版本。 您可以流覽 mvnrepository.com 等網站,以探索最新版本的數目。
此命令所產生的輸出與下列範例類似:
 [INFO] Scanning for projects...
 [INFO]
 [INFO] ---< com.microsoft.azure.samples.openliberty:openliberty-hello-azure >----
 [INFO] Building openliberty-hello-azure 1.0-SNAPSHOT
 [INFO] --------------------------------[ war ]---------------------------------
 [INFO]
 [INFO] --- azure-webapp-maven-plugin:2.3.0:config (default-cli) @ openliberty-hello-azure ---
 Auth type: AZURE_CLI
 Default subscription:
 Username:
 [INFO] Subscription:
 [INFO] It may take a few minutes to load all Java Web Apps, please be patient.
 Define value for OS [Linux]:
   1: Windows
 * 2: Linux
   3: Docker
 Enter your choice:
 Define value for javaVersion [Java 8]:
 * 1: Java 8
   2: Java 11
 Enter your choice: 2
 Define value for webContainer [Tomcat 8.5]:
   1: Jbosseap 7
 * 2: Tomcat 8.5
   3: Tomcat 9.0
 Enter your choice:
 Define value for pricingTier [P1v2]:
   1: B1
   2: B2
   3: B3
   4: D1
   5: EP1
   6: EP2
   7: EP3
   8: F1
 *  9: P1v2
   10: P1v3
   11: P2v2
   12: P2v3
   13: P3v2
   14: P3v3
   15: S1
   16: S2
   17: S3
   18: Y1
 Enter your choice:
 Please confirm webapp properties
 Subscription Id : ********-****-****-****-************
 AppName : openliberty-hello-azure-1642075767899
 ResourceGroup : openliberty-hello-azure-1642075767899-rg
 Region : centralus
 PricingTier : P1v2
 OS : Linux
 Java : Java 11
 Web server stack: Tomcat 8.5
 Deploy to slot : false
 Confirm (Y/N) [Y]:
 [INFO] Saving configuration to pom.
 [INFO] ------------------------------------------------------------------------
 [INFO] BUILD SUCCESS
 [INFO] ------------------------------------------------------------------------
 [INFO] Total time:  21.981 s
 [INFO] Finished at: 2022-01-13T21:09:39+09:00
 [INFO] ------------------------------------------------------------------------
修改 /src/main/liberty/config/ 目錄下的server.xml檔案,以在 Azure Web Apps 上執行應用程式。 在 檔案中,新增
host="*"標記中的<httpEndpoint>行,如下列範例所示:<httpEndpoint id="defaultHttpEndpoint" host="*" httpPort="9080" httpsPort="9443"/>在 pom.xml 檔案中,
runtime將項目從javadeploymentTOMCAT 8.5修改為 ,以及從*.war修改為 。*.jar然後將 區<appSettings>段新增至<configuration>、WEBSITES_PORT和WEBSITES_CONTAINER_START_TIME_LIMIT的PORT區段。 XML 項目azure-webapp-maven-plugin看起來會類似下列範例:<plugin> <groupId>com.microsoft.azure</groupId> <artifactId>azure-webapp-maven-plugin</artifactId> <version>2.3.0</version> <configuration> <schemaVersion>v2</schemaVersion> <subscriptionId>********-****-****-****-************</subscriptionId> <resourceGroup>openliberty-hello-azure-1642075767899-rg</resourceGroup> <appName>openliberty-hello-azure-1642075767899</appName> <pricingTier>P1v2</pricingTier> <region>japaneast</region> <runtime> <os>Linux</os> <javaVersion>Java 11</javaVersion> <webContainer>java</webContainer> </runtime> <appSettings> <property> <name>PORT</name> <value>9080</value> </property> <property> <name>WEBSITES_PORT</name> <value>9080</value> </property> <property> <name>WEBSITES_CONTAINER_START_TIME_LIMIT</name> <value>600</value> </property> </appSettings> <deployment> <resources> <resource> <directory>${project.basedir}/target</directory> <includes> <include>*.jar</include> </includes> </resource> </resources> </deployment> </configuration> </plugin>
將應用程式部署至 Azure
在本文前幾節中設定所有設定之後,即可將 Web 應用程式部署至 Azure。 若要這樣做,請使用下列步驟:
如果您對pom.xml檔案進行任何變更,請從稍早使用的命令提示字元或終端機視窗中,使用 Maven 重建 JAR 檔案;例如:
mvn clean package使用 Maven 將 Web 應用程式部署至 Azure;例如:
mvn azure-webapp:deploy
如果部署成功,您會看到下列輸出。
[INFO] Scanning for projects...
[INFO]
[INFO] ---< com.microsoft.azure.samples.openliberty:openliberty-hello-azure >----
[INFO] Building openliberty-hello-azure 1.0-SNAPSHOT
[INFO] --------------------------------[ war ]---------------------------------
[INFO]
[INFO] --- azure-webapp-maven-plugin:2.3.0:deploy (default-cli) @ openliberty-hello-azure ---
Auth type: AZURE_CLI
[INFO] Creating web app openliberty-hello-azure-1642075767899...
[INFO] Successfully created Web App openliberty-hello-azure-1642075767899.
[INFO] Trying to deploy external resources to openliberty-hello-azure-1642075767899...
[INFO] Successfully deployed the resources to openliberty-hello-azure-1642075767899
[INFO] Trying to deploy artifact to openliberty-hello-azure-1642075767899...
[INFO] Deploying (/Users/Downloads/openliberty-hello-azure/target/openliberty-hello-azure.jar)[jar]  ...
[INFO] Successfully deployed the artifact to https://openliberty-hello-azure-1642075767899.azurewebsites.net
[INFO] ------------------------------------------------------------------------
[INFO] BUILD SUCCESS
[INFO] ------------------------------------------------------------------------
[INFO] Total time:  01:11 min
[INFO] Finished at: 2022-01-13T21:29:50+09:00
[INFO] ------------------------------------------------------------------------
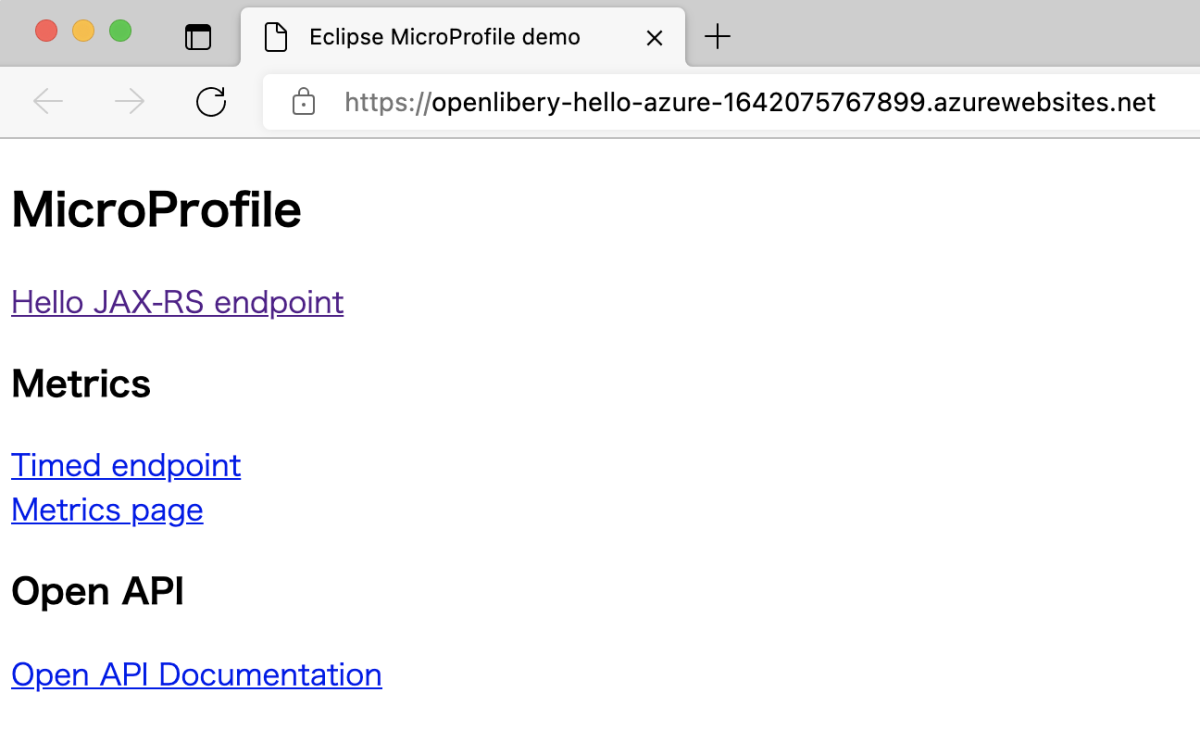
Maven 會將 Web 應用程式部署至 Azure。 如果 Web 應用程式或 Web 應用程式方案尚未存在,將會為您建立它。 可能需要幾分鐘的時間,Web 應用程式才會顯示在輸出中顯示的URL。 流覽至網頁瀏覽器中的 URL。 您應該會看到下列畫面。

部署應用程式之後,您可以透過 Azure 入口網站 加以管理。
您的 Web 應用程式將會列在資源群組中。
您可以在 Web 應用程式的 [概觀] 頁面上選取 [瀏覽],以存取您的 Web 應用程式。 確認部署成功且正在執行。
從執行中的 App Service 確認記錄數據流
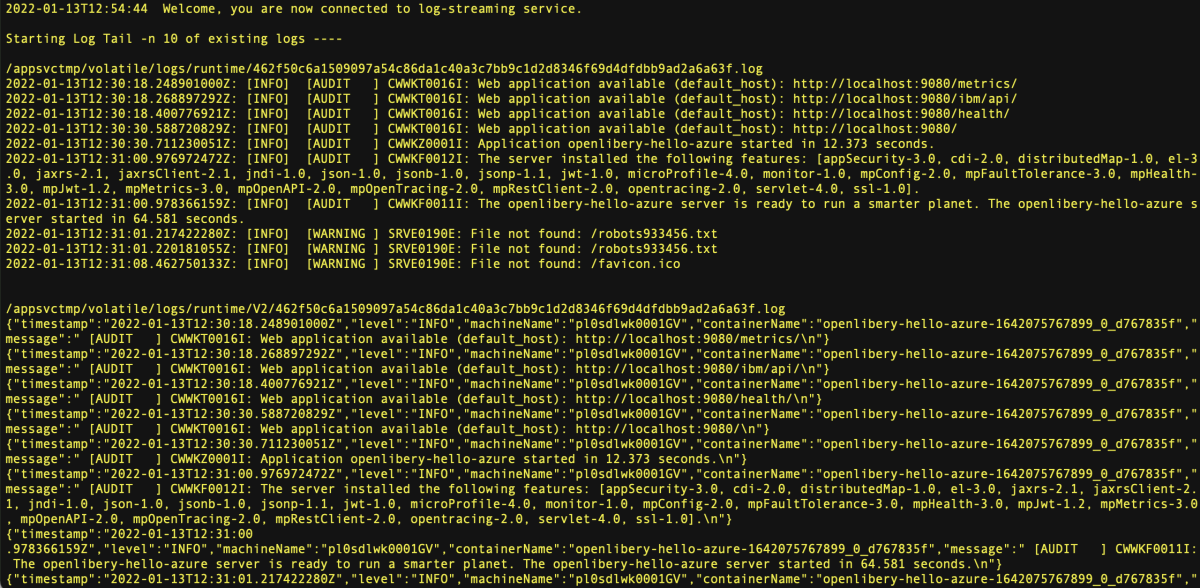
您可以從執行中的 App Service 看到記錄檔(或「tail」。 月臺碼中的任何呼叫 console.log 都會顯示在終端機中。
az webapp log tail \
    --resource-group openliberty-hello-azure-1642075767899-rg \
    --name openliberty-hello-azure-1642075767899
清除資源
不再需要 Azure 資源時,可藉由刪除資源群組來清除您所部署的資源。
- 在 Azure 入口網站中,選取左側功能表中的 [資源群組]。
- 在 [依名稱篩選] 字段中輸入 microprofile,本教學課程中建立的資源群組應具有此前置詞。
- 選取在本教學課程中建立的資源群組。
- 從頂端功能表中選取 [刪除資源群組]。
下一步
若要深入瞭解 MicroProfile 和 Azure,請繼續前往 Azure 上的 MicroProfile 檔中心。
其他資源
如需本文所討論各種技術的詳細資訊,請參閱下列文章:
