共用方式為


使用自訂資源提供者擴充資源

在本教學課程中,您會對 Azure 部署自訂資源提供者,以使用 Microsoft.CustomProviders/associations 資源類型來擴充 Azure Resource Manager API。 本教學課程會示範如何在自訂資源提供者執行個體所在的資源群組外部,擴充現有資源。 在本教學課程中,自訂資源提供者是由 Azure 邏輯應用程式提供支援,但是您可以使用任何公用 API 端點。

必要條件

若要完成本教學課程,請務必檢閱下列項目︰

開始使用資源上線

在本教學課程中,有兩個部分需要部署:自訂資源提供者關聯。 若要讓流程變得更簡單,您可以選擇使用單一範本來部署這兩個項目。

此範本會使用這些資源:

{
    "$schema": "https://schema.management.azure.com/schemas/2019-04-01/deploymentTemplate.json#",
    "contentVersion": "1.0.0.0",
    "parameters": {
        "location": {
            "type": "string",
            "allowedValues": [
                "australiaeast",
                "eastus",
                "westeurope"
            ],
            "metadata": {
                "description": "Location for the resources."
            }
        },
        "logicAppName": {
            "type": "string",
            "defaultValue": "[uniqueString(resourceGroup().id)]",
            "metadata": {
                "description": "Name of the logic app to be created."
            }
        },
        "customResourceProviderName": {
            "type": "string",
            "defaultValue": "[uniqueString(resourceGroup().id)]",
            "metadata": {
                "description": "Name of the custom resource provider to be created."
            }
        },
        "customResourceProviderId": {
            "type": "string",
            "defaultValue": "",
            "metadata": {
                "description": "The resource ID of an existing custom resource provider. Provide this to skip deployment of new logic app and custom resource provider."
            }
        },
        "associationName": {
            "type": "string",
            "defaultValue": "myAssociationResource",
            "metadata": {
                "description": "Name of the custom resource that is being created."
            }
        }
    },
    "resources": [
        {
            "type": "Microsoft.Resources/deployments",
            "apiVersion": "2021-04-01",
            "condition": "[empty(parameters('customResourceProviderId'))]",
            "name": "customProviderInfrastructureTemplate",
            "properties": {
                "mode": "Incremental",
                "template": {
                    "$schema": "https://schema.management.azure.com/schemas/2015-01-01/deploymentTemplate.json#",
                    "contentVersion": "1.0.0.0",
                    "parameters": {
                        "logicAppName": {
                            "type": "string",
                            "defaultValue": "[parameters('logicAppName')]"
                        }
                    },
                    "resources": [
                        {
                            "type": "Microsoft.Logic/workflows",
                            "apiVersion": "2019-05-01",
                            "name": "[parameters('logicAppName')]",
                            "location": "[parameters('location')]",
                            "properties": {
                                "state": "Enabled",
                                "definition": {
                                    "$schema": "https://schema.management.azure.com/providers/Microsoft.Logic/schemas/2016-06-01/workflowdefinition.json#",
                                    "actions": {
                                        "Switch": {
                                            "cases": {
                                                "Case": {
                                                    "actions": {
                                                        "CreateCustomResource": {
                                                            "inputs": {
                                                                "body": {
                                                                    "properties": "@addProperty(triggerBody().Body['properties'], 'myDynamicProperty', 'myDynamicValue')"
                                                                },
                                                                "statusCode": 200
                                                            },
                                                            "kind": "Http",
                                                            "type": "Response"
                                                        }
                                                    },
                                                    "case": "CREATE"
                                                }
                                            },
                                            "default": {
                                                "actions": {
                                                    "DefaultHttpResponse": {
                                                        "inputs": {
                                                            "statusCode": 200
                                                        },
                                                        "kind": "Http",
                                                        "type": "Response"
                                                    }
                                                }
                                            },
                                            "expression": "@triggerBody().operationType",
                                            "type": "Switch"
                                        }
                                    },
                                    "contentVersion": "1.0.0.0",
                                    "outputs": {},
                                    "parameters": {},
                                    "triggers": {
                                        "CustomProviderWebhook": {
                                            "inputs": {
                                                "schema": {}
                                            },
                                            "kind": "Http",
                                            "type": "Request"
                                        }
                                    }
                                }
                            }
                        },
                        {
                            "type": "Microsoft.CustomProviders/resourceProviders",
                            "apiVersion": "2018-09-01-preview",
                            "name": "[parameters('customResourceProviderName')]",
                            "location": "[parameters('location')]",
                            "properties": {
                                "resourceTypes": [
                                    {
                                        "name": "associations",
                                        "mode": "Secure",
                                        "routingType": "Webhook,Cache,Extension",
                                        "endpoint": "[[listCallbackURL(concat(resourceId('Microsoft.Logic/workflows', parameters('logicAppName')), '/triggers/CustomProviderWebhook'), '2019-05-01').value]"
                                    }
                                ]
                            }
                        }
                    ],
                    "outputs": {
                        "customProviderResourceId": {
                            "type": "string",
                            "value": "[resourceId('Microsoft.CustomProviders/resourceProviders', parameters('customResourceProviderName'))]"
                        }
                    }
                }
            }
        },
        {
            "type": "Microsoft.CustomProviders/associations",
            "apiVersion": "2018-09-01-preview",
            "name": "[parameters('associationName')]",
            "location": "global",
            "properties": {
                "targetResourceId": "[if(empty(parameters('customResourceProviderId')), reference('customProviderInfrastructureTemplate').outputs.customProviderResourceId.value, parameters('customResourceProviderId'))]",
                "myCustomInputProperty": "myCustomInputValue",
                "myCustomInputObject": {
                    "Property1": "Value1"
                }
            }
        }
    ],
    "outputs": {
        "associationResource": {
            "type": "object",
            "value": "[reference(parameters('associationName'), '2018-09-01-preview', 'Full')]"
        }
    }
}

部署自訂資源提供者基礎結構

範本的第一個部分會部署自訂資源提供者基礎結構。 此基礎結構會定義關聯資源的影響。 如果您不熟悉自訂資源提供者,請參閱 Azure 自訂資源提供者概觀

讓我們部署自訂資源提供者基礎結構。 您可以複製、儲存及部署上述範本,或使用 Azure 入口網站來遵循並部署基礎結構。

  1. 前往 Azure 入口網站

  2. 在 [所有服務] 中搜尋範本,或使用主要搜尋方塊來搜尋:

    Screenshot of the search bar in Azure portal with 'templates' entered as the search query.

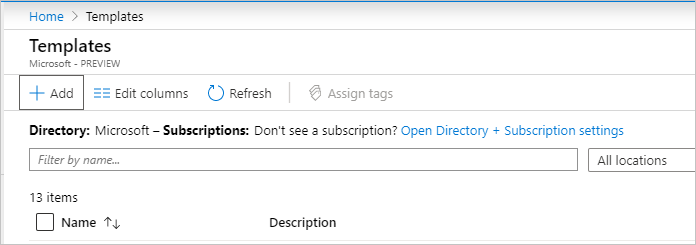
  3. 在 [範本] 窗格中,選取 [新增]

    Screenshot of the Templates pane in Azure portal with the Add button highlighted.

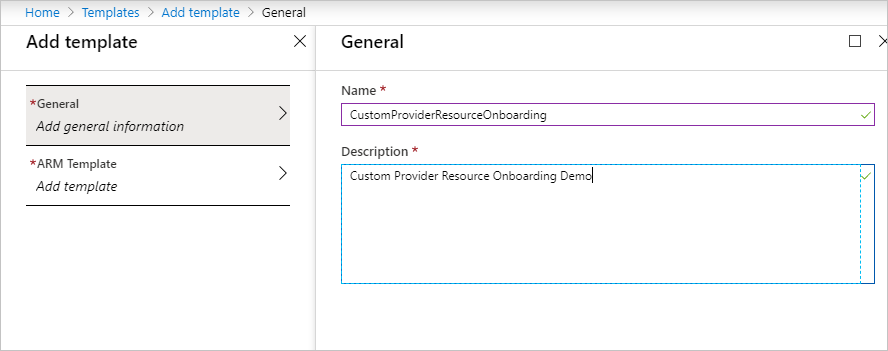
  4. 在 [一般] 底下,輸入新範本的名稱描述

    Screenshot of the General section in Azure portal where the user enters a Name and Description for the new template.

  5. 從本文的「開始使用資源上線」一節中複製 JSON 範本,以建立 Resource Manager 範本:
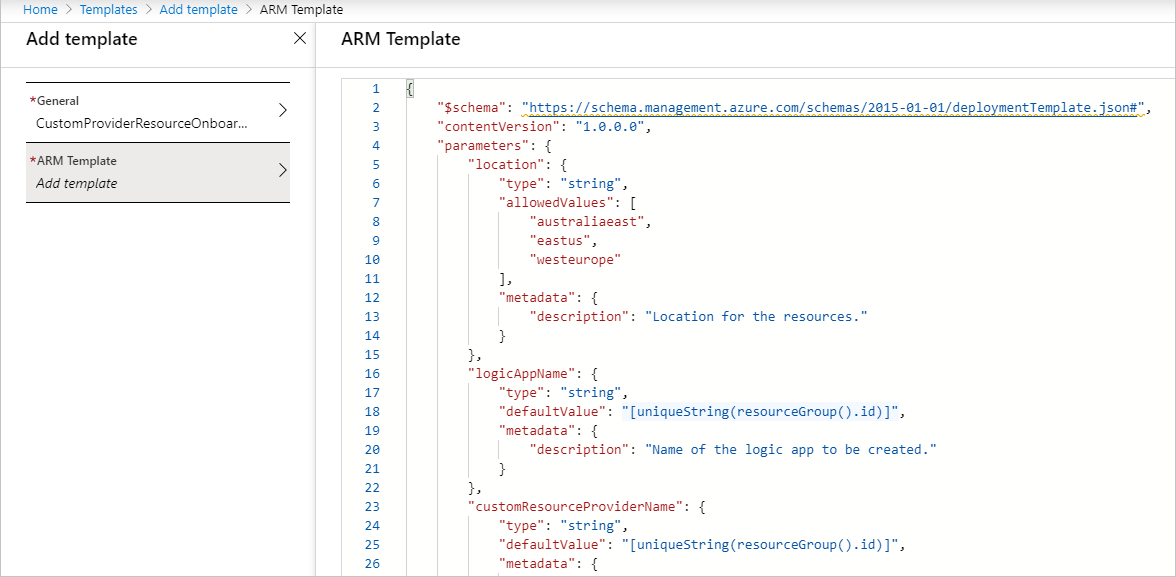
    Screenshot of the Azure portal where the user pastes the JSON template into the ARM Template section.

  6. 選取 [新增] 以建立範本。 如果未出現新範本,請選取 [重新整理]

  7. 選取新建立的範本,然後選取 [部署]

    Screenshot of the Azure portal showing the newly created template with the Deploy button highlighted.

  8. 輸入必要欄位的設定,然後選取訂用帳戶和資源群組。 您可以將 [自訂資源提供者識別碼] 方塊保留空白。

    設定名稱 是必要的嗎? 描述
    Location Yes 範本中資源的位置。
    邏輯應用程式名稱 No 邏輯應用程式的名稱。
    自訂資源提供者名稱 No 自訂資源提供者名稱。
    自訂資源提供者識別碼 No 支援關聯資源的現有自訂資源提供者。 如果您在此指定值,則會略過邏輯應用程式和自訂資源提供者部署。
    關聯名稱 No 關聯資源的名稱。

    範例參數:
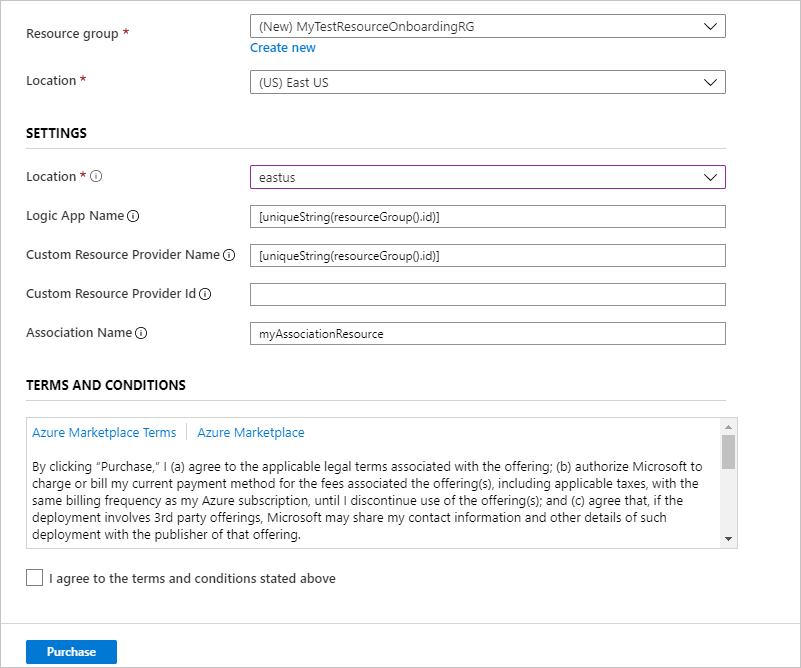
    Screenshot of the Azure portal displaying the template parameters input fields for the custom resource provider deployment.

  9. 移至部署並等候部署完成。 您應該會看到類似於下列螢幕擷取畫面的內容。 您應該會看到作為輸出的新關聯資源:

    Screenshot of the Azure portal showing a successful deployment with the new association resource as an output.

    以下是資源群組,其中已選取 [顯示隱藏的類型]

    Screenshot of the resource group in Azure portal with Show hidden types selected, displaying the custom resource provider deployment.

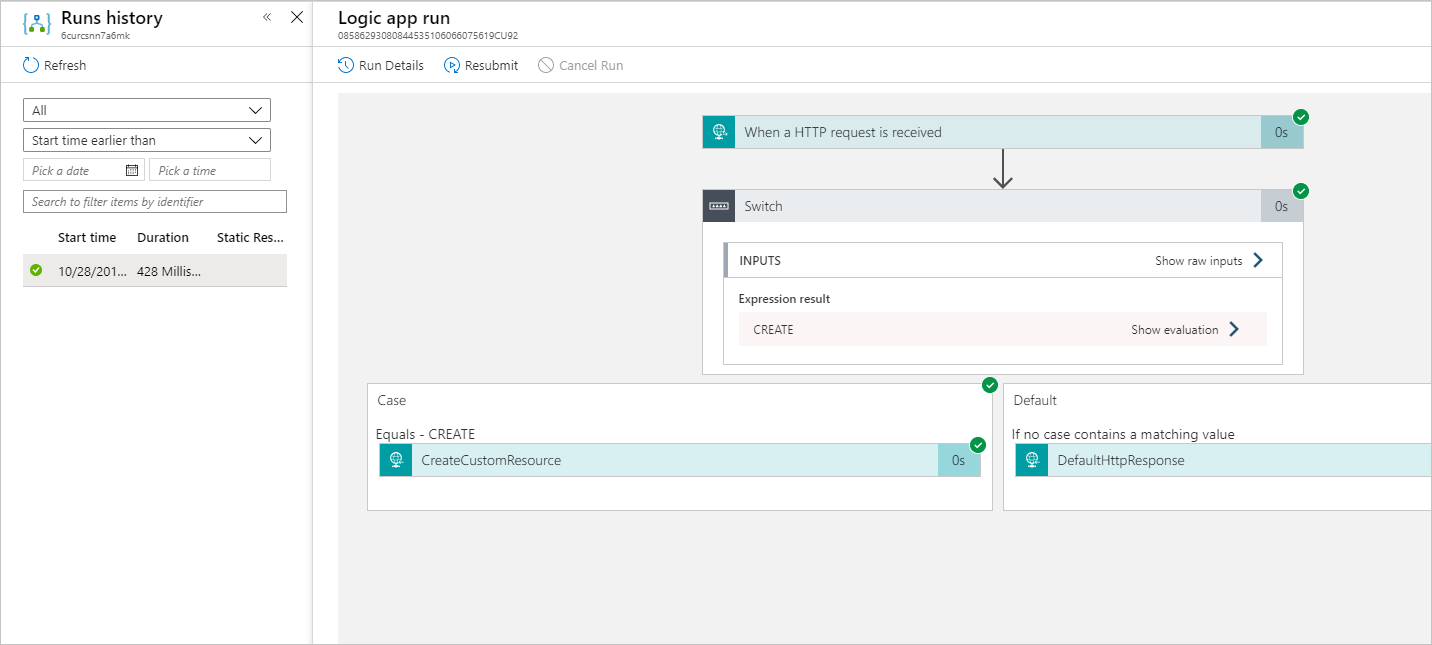
  10. 瀏覽邏輯應用程式的 [執行記錄] 索引標籤,以查看用於建立關聯的呼叫:

    Screenshot of the Logic app Runs history tab in Azure portal showing the calls for the association create.

部署其他關聯

設定好自訂資源提供者基礎結構之後,您就可以輕鬆地部署更多關聯。 其他關聯的資源群組不一定要與您部署自訂資源提供者基礎結構的資源群組相同。 若要建立關聯,您必須在指定的自訂資源提供者識別碼上具有 Microsoft.CustomProviders/resourceproviders/write 權限。

  1. 在先前部署的資源群組中,移至自訂資源提供者 Microsoft.CustomProviders/resourceProviders 資源。 您必須選取 [顯示隱藏的類型] 核取方塊:

    Screenshot of the Azure portal displaying the custom resource provider resource in the resource group with Show hidden types selected.

  2. 複製自訂資源提供者的資源識別碼屬性。

  3. 在 [所有服務] 中搜尋範本,或使用主要搜尋方塊來搜尋:

    Screenshot of the search bar in Azure portal with 'templates' entered as the search query.

  4. 選取先前建立的範本,然後選取 [部署]

    Screenshot of the Azure portal showing the previously created template with the Deploy button highlighted.

  5. 輸入必要欄位的設定,然後選取訂用帳戶和不同的資源群組。 針對 [自訂資源提供者識別碼] 設定,輸入您稍早部署自訂資源提供者時複製的資源識別碼。

  6. 移至部署並等候部署完成。 現在應該只有新的關聯資源會進行部署:

    Screenshot of the Azure portal displaying the successful deployment of the new associations resource.

您可以回到邏輯應用程式的執行記錄,並查看是否已對邏輯應用程式進行另一個呼叫。 您可以更新邏輯應用程式,為每個建立的關聯增加額外的功能。

下一步

在本文中,您已對 Azure 部署自訂資源提供者,以使用 Microsoft.CustomProviders/associates 資源類型來擴充 Azure Resource Manager API。 若要繼續瞭解自訂資源提供者,請參閱: