如何使用簡單語言模式比對來辨識意圖
Azure AI 服務語音 SDK 有內建的功能,可使用簡單的語言模式比對來提供意圖辨識。 意圖是使用者想要執行的動作:關閉視窗、標記核取方塊、插入一些文字等等。
在本指南中,您會使用語音 SDK 來開發 C++ 主控台應用程式,其會透過裝置的麥克風從使用者的語句推導出意圖。 您將學習如何:
- 建立 Visual Studio 專案,並讓其參考語音 SDK NuGet 套件
- 建立語音設定並取得意圖辨識器
- 透過語音 SDK API 新增意圖和模式
- 從麥克風辨識語音
- 使用非同步的事件驅動連續辨識
使用模式比對的時機
使用模式比對,要是:
- 您只想要嚴格比對使用者所說的內容。 這些模式相比交談語言理解 (CLU) 而言更為嚴格。
- 您沒有 CLU 模型的存取權,但仍想得知意圖。
如需詳細資訊,請參閱模式比對概觀。
必要條件
開始使用本指南之前,請務必準備好下列項目:
- Azure AI 服務資源或統一語音資源
- Visual Studio 2019 (任何版本)。
語音和簡單模式
簡單模式是語音 SDK 的功能,需要 Azure AI 服務資源或統一語音資源。
模式是一種包含實體內某個實體的片語。 實體是以大括弧括住單字來定義。 此範例定義識別碼為 "floorName" 的實體 (區分大小寫):
Take me to the {floorName}
所有其他特殊字元和標點符號都會忽略。
意圖是使用對 IntentRecognizer->AddIntent() API 的呼叫來新增。
建立專案
在 Visual Studio 2019 中建立新的 C# 主控台應用程式專案,並安裝語音 SDK。
從重複使用程式碼開始著手
讓我們開啟 Program.cs,並新增一些程式碼作為專案的基本架構。
using System;
using System.Threading.Tasks;
using Microsoft.CognitiveServices.Speech;
using Microsoft.CognitiveServices.Speech.Intent;

namespace helloworld
{
    class Program
    {
        static void Main(string[] args)
        {
            IntentPatternMatchingWithMicrophoneAsync().Wait();
        }

        private static async Task IntentPatternMatchingWithMicrophoneAsync()
        {
            var config = SpeechConfig.FromSubscription("YOUR_SUBSCRIPTION_KEY", "YOUR_SUBSCRIPTION_REGION");
        }
    }
}
建立語音設定
您必須先建立使用 Azure AI 服務預測資源索引鍵和位置的組態,才能夠初始化 IntentRecognizer 物件。
- 將
"YOUR_SUBSCRIPTION_KEY"取代為 Azure AI 服務預測索引鍵。 - 將
"YOUR_SUBSCRIPTION_REGION"取代為 Azure AI 服務資源區域。
此範例會使用 FromSubscription() 方法來建置 SpeechConfig。 如需可用方法的完整清單,請參閱 SpeechConfig 類別 \(英文\)。
初始化 IntentRecognizer
現在建立 IntentRecognizer。 將此程式碼插入您的語音設定的下方。
using (var intentRecognizer = new IntentRecognizer(config))
{

}
新增一些意圖
您必須藉由呼叫 AddIntent(),以將某些模式與 IntentRecognizer 建立關聯。
我們將針對變更樓層新增兩個具有相同標識符的意圖,以及另一個意圖使用個別標識符來開啟和關閉門。
在 using 區塊內插入此程式碼:
intentRecognizer.AddIntent("Take me to floor {floorName}.", "ChangeFloors");
intentRecognizer.AddIntent("Go to floor {floorName}.", "ChangeFloors");
intentRecognizer.AddIntent("{action} the door.", "OpenCloseDoor");
注意
您可以宣告的實體數目沒有限制,但會鬆散地比對它們。 如果您新增類似 “{action} door” 的片語,它會在 “door” 一詞之前隨時比對文字。 意圖會根據其實體數目進行評估。 如果兩個模式相符,則會傳回具有更多已定義實體的模式。
辨識意圖
從 IntentRecognizer 物件,您將呼叫 RecognizeOnceAsync() 方法。 此方法會要求語音服務以單一片語辨識語音,並在識別出該片語之後停止辨識語音。 為了簡單起見,我們將等待傳回的結果完成。
在您的意圖下插入此程式碼:
Console.WriteLine("Say something...");

var result = await intentRecognizer.RecognizeOnceAsync();
顯示辨識結果 (或錯誤)
當語音服務傳回辨識結果時,我們會列印結果。
在 var result = await recognizer.RecognizeOnceAsync(); 下方插入此程式碼:
string floorName;
switch (result.Reason)
{
    case ResultReason.RecognizedSpeech:
        Console.WriteLine($"RECOGNIZED: Text= {result.Text}");
        Console.WriteLine($"    Intent not recognized.");
        break;
    case ResultReason.RecognizedIntent:
        Console.WriteLine($"RECOGNIZED: Text= {result.Text}");
        Console.WriteLine($"       Intent Id= {result.IntentId}.");
        var entities = result.Entities;
        if (entities.TryGetValue("floorName", out floorName))
        {
            Console.WriteLine($"       FloorName= {floorName}");
        }

        if (entities.TryGetValue("action", out floorName))
        {
            Console.WriteLine($"       Action= {floorName}");
        }

        break;
    case ResultReason.NoMatch:
    {
        Console.WriteLine($"NOMATCH: Speech could not be recognized.");
        var noMatch = NoMatchDetails.FromResult(result);
        switch (noMatch.Reason)
        {
            case NoMatchReason.NotRecognized:
                Console.WriteLine($"NOMATCH: Speech was detected, but not recognized.");
                break;
            case NoMatchReason.InitialSilenceTimeout:
                Console.WriteLine($"NOMATCH: The start of the audio stream contains only silence, and the service timed out waiting for speech.");
                break;
            case NoMatchReason.InitialBabbleTimeout:
                Console.WriteLine($"NOMATCH: The start of the audio stream contains only noise, and the service timed out waiting for speech.");
                break;
            case NoMatchReason.KeywordNotRecognized:
                Console.WriteLine($"NOMATCH: Keyword not recognized");
                break;
        }
        break;
    }
    case ResultReason.Canceled:
    {
        var cancellation = CancellationDetails.FromResult(result);
        Console.WriteLine($"CANCELED: Reason={cancellation.Reason}");

        if (cancellation.Reason == CancellationReason.Error)
        {
            Console.WriteLine($"CANCELED: ErrorCode={cancellation.ErrorCode}");
            Console.WriteLine($"CANCELED: ErrorDetails={cancellation.ErrorDetails}");
            Console.WriteLine($"CANCELED: Did you set the speech resource key and region values?");
        }
        break;
    }
    default:
        break;
}
檢查您的程式碼
此時,您的程式碼應會如下所示:
using System;
using System.Threading.Tasks;
using Microsoft.CognitiveServices.Speech;
using Microsoft.CognitiveServices.Speech.Intent;

namespace helloworld
{
    class Program
    {
        static void Main(string[] args)
        {
            IntentPatternMatchingWithMicrophoneAsync().Wait();
        }

        private static async Task IntentPatternMatchingWithMicrophoneAsync()
        {
            var config = SpeechConfig.FromSubscription("YOUR_SUBSCRIPTION_KEY", "YOUR_SUBSCRIPTION_REGION");
            using (var intentRecognizer = new IntentRecognizer(config))
            {
                intentRecognizer.AddIntent("Take me to floor {floorName}.", "ChangeFloors");
                intentRecognizer.AddIntent("Go to floor {floorName}.", "ChangeFloors");
                intentRecognizer.AddIntent("{action} the door.", "OpenCloseDoor");

                Console.WriteLine("Say something...");

                var result = await intentRecognizer.RecognizeOnceAsync();

                string floorName;
                switch (result.Reason)
                {
                    case ResultReason.RecognizedSpeech:
                        Console.WriteLine($"RECOGNIZED: Text= {result.Text}");
                        Console.WriteLine($"    Intent not recognized.");
                        break;
                    case ResultReason.RecognizedIntent:
                        Console.WriteLine($"RECOGNIZED: Text= {result.Text}");
                        Console.WriteLine($"       Intent Id= {result.IntentId}.");
                        var entities = result.Entities;
                        if (entities.TryGetValue("floorName", out floorName))
                        {
                            Console.WriteLine($"       FloorName= {floorName}");
                        }

                        if (entities.TryGetValue("action", out floorName))
                        {
                            Console.WriteLine($"       Action= {floorName}");
                        }

                        break;
                    case ResultReason.NoMatch:
                    {
                        Console.WriteLine($"NOMATCH: Speech could not be recognized.");
                        var noMatch = NoMatchDetails.FromResult(result);
                        switch (noMatch.Reason)
                        {
                            case NoMatchReason.NotRecognized:
                                Console.WriteLine($"NOMATCH: Speech was detected, but not recognized.");
                                break;
                            case NoMatchReason.InitialSilenceTimeout:
                                Console.WriteLine($"NOMATCH: The start of the audio stream contains only silence, and the service timed out waiting for speech.");
                                break;
                            case NoMatchReason.InitialBabbleTimeout:
                                Console.WriteLine($"NOMATCH: The start of the audio stream contains only noise, and the service timed out waiting for speech.");
                                break;
                            case NoMatchReason.KeywordNotRecognized:
                                Console.WriteLine($"NOMATCH: Keyword not recognized");
                                break;
                        }
                        break;
                    }
                    case ResultReason.Canceled:
                    {
                        var cancellation = CancellationDetails.FromResult(result);
                        Console.WriteLine($"CANCELED: Reason={cancellation.Reason}");

                        if (cancellation.Reason == CancellationReason.Error)
                        {
                            Console.WriteLine($"CANCELED: ErrorCode={cancellation.ErrorCode}");
                            Console.WriteLine($"CANCELED: ErrorDetails={cancellation.ErrorDetails}");
                            Console.WriteLine($"CANCELED: Did you set the speech resource key and region values?");
                        }
                        break;
                    }
                    default:
                        break;
                }
            }
        }
    }
}
建置並執行您的應用程式
現在您已準備好使用語音服務來建立應用程式,並測試我們的語音辨識。
- 編譯程式碼 - 從 Visual Studio 的功能表列中,選擇 [建置]>[建置解決方案]。
- 啟動應用程式 - 從功能表列中,選擇 [偵錯]>[開始偵錯],或按 F5。
- 開始辨識 - 它會提示您說些什麼。 預設語言為英文。 您的語音會傳送至語音服務、轉譯為文字,並在主控台中轉譯。
例如,如果您說 "Take me to floor 7",輸出應如下所示:
Say something ...
RECOGNIZED: Text= Take me to floor 7.
  Intent Id= ChangeFloors
  FloorName= 7
建立專案
在 Visual Studio 2019 中建立新的 C++ 主控台應用程式專案,並安裝語音 SDK。
從重複使用程式碼開始著手
讓我們開啟 helloworld.cpp,並新增一些程式碼作為專案的基本架構。
    #include <iostream>
    #include <speechapi_cxx.h>

    using namespace Microsoft::CognitiveServices::Speech;
    using namespace Microsoft::CognitiveServices::Speech::Intent;

    int main()
    {
        std::cout << "Hello World!\n";

        auto config = SpeechConfig::FromSubscription("YOUR_SUBSCRIPTION_KEY", "YOUR_SUBSCRIPTION_REGION");
    }
建立語音設定
您必須先建立使用 Azure AI 服務預測資源索引鍵和位置的組態,才能夠初始化 IntentRecognizer 物件。
- 將
"YOUR_SUBSCRIPTION_KEY"取代為 Azure AI 服務預測索引鍵。 - 將
"YOUR_SUBSCRIPTION_REGION"取代為 Azure AI 服務資源區域。
此範例會使用 FromSubscription() 方法來建置 SpeechConfig。 如需可用方法的完整清單,請參閱 SpeechConfig 類別 \(英文\)。
初始化 IntentRecognizer
現在建立 IntentRecognizer。 將此程式碼插入您的語音設定的下方。
auto intentRecognizer = IntentRecognizer::FromConfig(config);
新增一些意圖
您必須藉由呼叫 AddIntent(),以將某些模式與 IntentRecognizer 建立關聯。
我們將針對變更樓層新增兩個具有相同標識符的意圖,以及另一個意圖使用個別標識符來開啟和關閉門。
    intentRecognizer->AddIntent("Take me to floor {floorName}.", "ChangeFloors");
    intentRecognizer->AddIntent("Go to floor {floorName}.", "ChangeFloors");
    intentRecognizer->AddIntent("{action} the door.", "OpenCloseDoor");
注意
您可以宣告的實體數目沒有限制,但會鬆散地比對它們。 如果您新增類似 “{action} door” 的片語,它會在 “door” 一詞之前隨時比對文字。 意圖會根據其實體數目進行評估。 如果兩個模式相符,則會傳回具有更多已定義實體的模式。
辨識意圖
從 IntentRecognizer 物件,您將呼叫 RecognizeOnceAsync() 方法。 此方法會要求語音服務以單一片語辨識語音,並在識別出該片語之後停止辨識語音。 為了簡單起見,我們將等待傳回的結果完成。
在您的意圖下插入此程式碼:
    std::cout << "Say something ..." << std::endl;
    auto result = intentRecognizer->RecognizeOnceAsync().get();
顯示辨識結果 (或錯誤)
當語音服務傳回辨識結果時,我們會列印結果。
在 auto result = intentRecognizer->RecognizeOnceAsync().get(); 下方插入此程式碼:
switch (result->Reason)
{
case ResultReason::RecognizedSpeech:
        std::cout << "RECOGNIZED: Text = " << result->Text.c_str() << std::endl;
        std::cout << "NO INTENT RECOGNIZED!" << std::endl;
        break;
case ResultReason::RecognizedIntent:
    std::cout << "RECOGNIZED: Text = " << result->Text.c_str() << std::endl;
    std::cout << "  Intent Id = " << result->IntentId.c_str() << std::endl;
    auto entities = result->GetEntities();
    if (entities.find("floorName") != entities.end())
    {
        std::cout << "  Floor name: = " << entities["floorName"].c_str() << std::endl;
    }

    if (entities.find("action") != entities.end())
    {
        std::cout << "  Action: = " << entities["action"].c_str() << std::endl;
    }

    break;
case ResultReason::NoMatch:
{
    auto noMatch = NoMatchDetails::FromResult(result);
    switch (noMatch->Reason)
    {
    case NoMatchReason::NotRecognized:
        std::cout << "NOMATCH: Speech was detected, but not recognized." << std::endl;
        break;
    case NoMatchReason::InitialSilenceTimeout:
        std::cout << "NOMATCH: The start of the audio stream contains only silence, and the service timed out waiting for speech." << std::endl;
        break;
    case NoMatchReason::InitialBabbleTimeout:
        std::cout << "NOMATCH: The start of the audio stream contains only noise, and the service timed out waiting for speech." << std::endl;
        break;
    case NoMatchReason::KeywordNotRecognized:
        std::cout << "NOMATCH: Keyword not recognized" << std::endl;
        break;
    }
    break;
}
case ResultReason::Canceled:
{
    auto cancellation = CancellationDetails::FromResult(result);

    if (!cancellation->ErrorDetails.empty())
    {
        std::cout << "CANCELED: ErrorDetails=" << cancellation->ErrorDetails.c_str() << std::endl;
        std::cout << "CANCELED: Did you set the speech resource key and region values?" << std::endl;
    }
}
default:
    break;
}
檢查您的程式碼
此時,您的程式碼應會如下所示:
#include <iostream>
#include <speechapi_cxx.h>

using namespace Microsoft::CognitiveServices::Speech;
using namespace Microsoft::CognitiveServices::Speech::Intent;

int main()
{
    auto config = SpeechConfig::FromSubscription("YOUR_SUBSCRIPTION_KEY", "YOUR_SUBSCRIPTION_REGION");
    auto intentRecognizer = IntentRecognizer::FromConfig(config);

    intentRecognizer->AddIntent("Take me to floor {floorName}.", "ChangeFloors");
    intentRecognizer->AddIntent("Go to floor {floorName}.", "ChangeFloors");
    intentRecognizer->AddIntent("{action} the door.", "OpenCloseDoor");

    std::cout << "Say something ..." << std::endl;

    auto result = intentRecognizer->RecognizeOnceAsync().get();

    switch (result->Reason)
    {
    case ResultReason::RecognizedSpeech:
        std::cout << "RECOGNIZED: Text = " << result->Text.c_str() << std::endl;
        std::cout << "NO INTENT RECOGNIZED!" << std::endl;
        break;
    case ResultReason::RecognizedIntent:
        std::cout << "RECOGNIZED: Text = " << result->Text.c_str() << std::endl;
        std::cout << "  Intent Id = " << result->IntentId.c_str() << std::endl;
        auto entities = result->GetEntities();
        if (entities.find("floorName") != entities.end())
        {
            std::cout << "  Floor name: = " << entities["floorName"].c_str() << std::endl;
        }

        if (entities.find("action") != entities.end())
        {
            std::cout << "  Action: = " << entities["action"].c_str() << std::endl;
        }

        break;
    case ResultReason::NoMatch:
    {
        auto noMatch = NoMatchDetails::FromResult(result);
        switch (noMatch->Reason)
        {
        case NoMatchReason::NotRecognized:
            std::cout << "NOMATCH: Speech was detected, but not recognized." << std::endl;
            break;
        case NoMatchReason::InitialSilenceTimeout:
            std::cout << "NOMATCH: The start of the audio stream contains only silence, and the service timed out waiting for speech." << std::endl;
            break;
        case NoMatchReason::InitialBabbleTimeout:
            std::cout << "NOMATCH: The start of the audio stream contains only noise, and the service timed out waiting for speech." << std::endl;
            break;
        case NoMatchReason::KeywordNotRecognized:
            std::cout << "NOMATCH: Keyword not recognized." << std::endl;
            break;
        }
        break;
    }
    case ResultReason::Canceled:
    {
        auto cancellation = CancellationDetails::FromResult(result);

        if (!cancellation->ErrorDetails.empty())
        {
            std::cout << "CANCELED: ErrorDetails=" << cancellation->ErrorDetails.c_str() << std::endl;
            std::cout << "CANCELED: Did you set the speech resource key and region values?" << std::endl;
        }
    }
    default:
        break;
    }
}
建置並執行您的應用程式
現在您已準備好使用語音服務來建立應用程式,並測試我們的語音辨識。
- 編譯程式碼 - 從 Visual Studio 的功能表列中,選擇 [建置]>[建置解決方案]。
- 啟動應用程式 - 從功能表列中,選擇 [偵錯]>[開始偵錯],或按 F5。
- 開始辨識 - 它會提示您說些什麼。 預設語言為英文。 您的語音會傳送至語音服務、轉譯為文字,並在主控台中轉譯。
例如,如果您說 "Take me to floor 7",輸出應如下所示:
Say something ...
RECOGNIZED: Text = Take me to floor 7.
  Intent Id = ChangeFloors
  Floor name: = 7
在本快速入門中,您會安裝適用於 Java 的 語音 SDK。
平台需求
選擇您的目標環境:
適用於 Java 的語音 SDK 與 Windows、Linux 和 macOS 相容。
在 Windows 上,您必須使用 64 位元目標結構。 需要 Windows 10 或更新版本。
為您的平台安裝 適用於 Visual Studio 2015、2017、2019 和 2022 的 Microsoft Visual C++ 可轉散發套件。 第一次安裝此套件時可能需要重新啟動。
適用於 Java 的語音 SDK 不支援 ARM64 上的 Windows。
安裝 Java 開發套件,例如 Azul Zulu OpenJDK。 Microsoft Build of OpenJDK 或您慣用的 JDK 也應該可以運作。
安裝適用於 Java 的語音 SDK
某些指示會使用特定的 SDK 版本,例如 1.42.0。 若要檢查最新版本,請搜尋我們的 GitHub 存放庫。
選擇您的目標環境:
本指南說明如何在 Java 執行階段上安裝適用於 Java 的語音 SDK。
受支援的作業系統
適用於 Java 語音 SDK 套件適用於下列作業系統:
- Windows:僅 64 位元。
- Mac:macOS X 10.14 版或更新版本。
- Linux:請參閱 支援的 Linux 發行版和目標架構。
請遵循下列步驟,使用 Apache Maven 安裝適用於 Java 的語音 SDK:
安裝 Apache Maven。
開啟您想要新專案的命令提示字元,並建立新的 pom.xml 檔案。
將下列 XML 內容複製到 pom.xml:
<project xmlns="http://maven.apache.org/POM/4.0.0" xmlns:xsi="http://www.w3.org/2001/XMLSchema-instance" xsi:schemaLocation="http://maven.apache.org/POM/4.0.0 http://maven.apache.org/xsd/maven-4.0.0.xsd">
    <modelVersion>4.0.0</modelVersion>
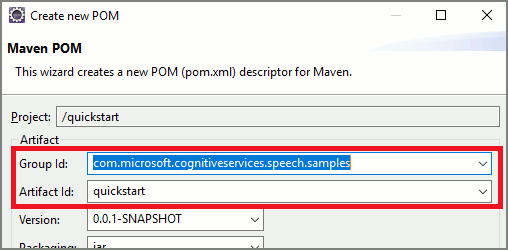
    <groupId>com.microsoft.cognitiveservices.speech.samples</groupId>
    <artifactId>quickstart-eclipse</artifactId>
    <version>1.0.0-SNAPSHOT</version>
    <build>
        <sourceDirectory>src</sourceDirectory>
        <plugins>
        <plugin>
            <artifactId>maven-compiler-plugin</artifactId>
            <version>3.7.0</version>
            <configuration>
            <source>1.8</source>
            <target>1.8</target>
            </configuration>
        </plugin>
        </plugins>
    </build>
    <dependencies>
        <dependency>
        <groupId>com.microsoft.cognitiveservices.speech</groupId>
        <artifactId>client-sdk</artifactId>
        <version>1.42.0</version>
        </dependency>
    </dependencies>
</project>
執行下列 Maven 命令來安裝語音 SDK 和相依性。
mvn clean dependency:copy-dependencies
從重複使用程式碼開始著手
從 src dir 開啟
Main.java。以下列內容取代檔案的內容:
package quickstart;
import java.util.Dictionary;
import java.util.concurrent.ExecutionException;

import com.microsoft.cognitiveservices.speech.*;
import com.microsoft.cognitiveservices.speech.intent.*;

public class Program {
    public static void main(String[] args) throws InterruptedException, ExecutionException {
        IntentPatternMatchingWithMicrophone();
    }

    public static void IntentPatternMatchingWithMicrophone() throws InterruptedException, ExecutionException {
        SpeechConfig config = SpeechConfig.fromSubscription("YOUR_SUBSCRIPTION_KEY", "YOUR_SUBSCRIPTION_REGION");
    }
}
建立語音設定
您必須先建立使用 Azure AI 服務預測資源索引鍵和位置的組態,才能夠初始化 IntentRecognizer 物件。
- 將
"YOUR_SUBSCRIPTION_KEY"取代為 Azure AI 服務預測索引鍵。 - 將
"YOUR_SUBSCRIPTION_REGION"取代為 Azure AI 服務資源區域。
此範例會使用 FromSubscription() 方法來建置 SpeechConfig。 如需可用方法的完整清單,請參閱 SpeechConfig 類別 \(英文\)。
初始化 IntentRecognizer
現在建立 IntentRecognizer。 將此程式碼插入您的語音設定的下方。
try (IntentRecognizer intentRecognizer = new IntentRecognizer(config)) {

}
新增一些意圖
您必須藉由呼叫 addIntent(),以將某些模式與 IntentRecognizer 建立關聯。
我們會新增 2 個意圖,其中一個具有用來變更樓層的相同識別碼,而另一個意圖具有開門和關門的個別識別碼。
在 try 區塊內插入此程式碼:
intentRecognizer.addIntent("Take me to floor {floorName}.", "ChangeFloors");
intentRecognizer.addIntent("Go to floor {floorName}.", "ChangeFloors");
intentRecognizer.addIntent("{action} the door.", "OpenCloseDoor");
注意
您可以宣告的實體數目沒有任何限制,但是會很鬆散地比對。 如果您新增像是 "{action} door" 的片語,則會在每當文字 "door" 前面有文字時進行比對。 意圖會根據其實體數目進行評估。 如果兩個模式相符,則會傳回具有更多已定義實體的模式。
辨識意圖
從 IntentRecognizer 物件,您將呼叫 recognizeOnceAsync() 方法。 此方法會要求語音服務以單一片語辨識語音,並在識別出該片語之後停止辨識語音。 為了簡單起見,我們將等待傳回的結果完成。
在您的意圖下插入此程式碼:
System.out.println("Say something...");

IntentRecognitionResult result = intentRecognizer.recognizeOnceAsync().get();
顯示辨識結果 (或錯誤)
當語音服務傳回辨識結果時,我們將會列印結果。
在 IntentRecognitionResult result = recognizer.recognizeOnceAsync().get(); 下方插入此程式碼:
if (result.getReason() == ResultReason.RecognizedSpeech) {
    System.out.println("RECOGNIZED: Text= " + result.getText());
    System.out.println(String.format("%17s", "Intent not recognized."));
}
else if (result.getReason() == ResultReason.RecognizedIntent) {
    System.out.println("RECOGNIZED: Text= " + result.getText());
    System.out.println(String.format("%17s %s", "Intent Id=", result.getIntentId() + "."));
    Dictionary<String, String> entities = result.getEntities();

    if (entities.get("floorName") != null) {
        System.out.println(String.format("%17s %s", "FloorName=", entities.get("floorName")));
    }
    if (entities.get("action") != null) {
        System.out.println(String.format("%17s %s", "Action=", entities.get("action")));
    }
}
else if (result.getReason() == ResultReason.NoMatch) {
    System.out.println("NOMATCH: Speech could not be recognized.");
}
else if (result.getReason() == ResultReason.Canceled) {
    CancellationDetails cancellation = CancellationDetails.fromResult(result);
    System.out.println("CANCELED: Reason=" + cancellation.getReason());

    if (cancellation.getReason() == CancellationReason.Error)
    {
        System.out.println("CANCELED: ErrorCode=" + cancellation.getErrorCode());
        System.out.println("CANCELED: ErrorDetails=" + cancellation.getErrorDetails());
        System.out.println("CANCELED: Did you update the subscription info?");
    }
}
檢查您的程式碼
此時,您的程式碼應會如下所示:
package quickstart;
import java.util.Dictionary;
import java.util.concurrent.ExecutionException;

import com.microsoft.cognitiveservices.speech.*;
import com.microsoft.cognitiveservices.speech.intent.*;

public class Main {
    public static void main(String[] args) throws InterruptedException, ExecutionException {
        IntentPatternMatchingWithMicrophone();
    }

    public static void IntentPatternMatchingWithMicrophone() throws InterruptedException, ExecutionException {
        SpeechConfig config = SpeechConfig.fromSubscription("YOUR_SUBSCRIPTION_KEY", "YOUR_SUBSCRIPTION_REGION");

        try (IntentRecognizer intentRecognizer = new IntentRecognizer(config)) {
            intentRecognizer.addIntent("Take me to floor {floorName}.", "ChangeFloors");
            intentRecognizer.addIntent("Go to floor {floorName}.", "ChangeFloors");
            intentRecognizer.addIntent("{action} the door.", "OpenCloseDoor");

            System.out.println("Say something...");

            IntentRecognitionResult result = intentRecognizer.recognizeOnceAsync().get();
            if (result.getReason() == ResultReason.RecognizedSpeech) {
            System.out.println("RECOGNIZED: Text= " + result.getText());
            System.out.println(String.format("%17s", "Intent not recognized."));
            }
            else if (result.getReason() == ResultReason.RecognizedIntent) {
                System.out.println("RECOGNIZED: Text= " + result.getText());
                System.out.println(String.format("%17s %s", "Intent Id=", result.getIntentId() + "."));
                Dictionary<String, String> entities = result.getEntities();

                if (entities.get("floorName") != null) {
                    System.out.println(String.format("%17s %s", "FloorName=", entities.get("floorName")));
                }
                if (entities.get("action") != null) {
                    System.out.println(String.format("%17s %s", "Action=", entities.get("action")));
                }
            }
            else if (result.getReason() == ResultReason.NoMatch) {
                System.out.println("NOMATCH: Speech could not be recognized.");
            }
            else if (result.getReason() == ResultReason.Canceled) {
                CancellationDetails cancellation = CancellationDetails.fromResult(result);
                System.out.println("CANCELED: Reason=" + cancellation.getReason());

                if (cancellation.getReason() == CancellationReason.Error)
                {
                    System.out.println("CANCELED: ErrorCode=" + cancellation.getErrorCode());
                    System.out.println("CANCELED: ErrorDetails=" + cancellation.getErrorDetails());
                    System.out.println("CANCELED: Did you update the subscription info?");
                }
            }
        }
    }
}
建置並執行您的應用程式
現在您已準備好建置應用程式,並使用語音服務和內嵌模式比對器來測試我們的意圖辨識。
選取 Eclipse 中的 [執行] 按鈕或按 ctrl+F11,然後監看「說出某些內容...」提示的輸出。 一旦出現,請說出您的語句並觀看輸出。
例如,如果您說 "Take me to floor 7",輸出應如下所示:
Say something ...
RECOGNIZED: Text= Take me to floor 7.
  Intent Id= ChangeFloors
  FloorName= 7
下一步
使用自訂實體來改善您的模式比對。
![[新增專案] 對話方塊的螢幕擷取畫面,其中反白顯示了 [Java 專案]。](media/sdk/qs-java-jre-02-select-wizard.png)
![[新增 Java 專案精靈] 的螢幕擷取畫面,其中有建立 Java 專案的選項。](media/sdk/qs-java-jre-03-create-java-project.png)
