演講者:Tom Dykstra
Contoso University 範例 Web 應用程式示範如何使用 Entity Framework 5 Code First 和 Visual Studio 2012 建立 ASP.NET MVC 4 應用程式。 如需教學課程系列的資訊,請參閱本系列的第一個教學課程。
在上一個教學課程中,您已顯示相關數據;在本教學課程中,您將更新相關數據。 對於大部分的關聯性,可以藉由更新適當的外鍵字段來完成。 對於多對多關聯性,Entity Framework 不會直接公開聯結數據表,因此您必須明確地在適當的導覽屬性中新增和移除實體。
下列圖例顯示了您將操作的頁面。
![顯示 [建立課程] 頁面的螢幕快照。](updating-related-data-with-the-entity-framework-in-an-asp-net-mvc-application/_static/image1.png)
自訂 Courses 的 [建立] 和 [編輯] 頁面
當新的課程實體建立時,其必須要與現有的部門具有關聯性。 若要達成此目的,Scaffold 程式碼包含了控制器方法和 [建立] 和 [編輯] 檢視,當中包含了一個可選取部門的下拉式清單。 下拉式清單會設定 Course.DepartmentID 外部索引鍵屬性,以讓 Entity Framework 使用適當的 Department 實體載入 Department 導覽屬性。 您將使用 Scaffold 程式碼,但會稍微對其進行一些變更以新增錯誤處理及排序下拉式清單。
在 CourseController.cs 中,刪除四個 Edit 和 Create 方法並用以下程式碼取代它們:
public ActionResult Create()
{
   PopulateDepartmentsDropDownList();
   return View();
}

[HttpPost]
[ValidateAntiForgeryToken]
public ActionResult Create(
   [Bind(Include = "CourseID,Title,Credits,DepartmentID")]
   Course course)
{
   try
   {
      if (ModelState.IsValid)
      {
         db.Courses.Add(course);
         db.SaveChanges();
         return RedirectToAction("Index");
      }
   }
   catch (DataException /* dex */)
   {
      //Log the error (uncomment dex variable name after DataException and add a line here to write a log.)
      ModelState.AddModelError("", "Unable to save changes. Try again, and if the problem persists, see your system administrator.");
   }
   PopulateDepartmentsDropDownList(course.DepartmentID);
   return View(course);
}

public ActionResult Edit(int id)
{
   Course course = db.Courses.Find(id);
   PopulateDepartmentsDropDownList(course.DepartmentID);
   return View(course);
}

[HttpPost]
[ValidateAntiForgeryToken]
public ActionResult Edit(
    [Bind(Include = "CourseID,Title,Credits,DepartmentID")]
    Course course)
{
   try
   {
      if (ModelState.IsValid)
      {
         db.Entry(course).State = EntityState.Modified;
         db.SaveChanges();
         return RedirectToAction("Index");
      }
   }
   catch (DataException /* dex */)
   {
      //Log the error (uncomment dex variable name after DataException and add a line here to write a log.)
      ModelState.AddModelError("", "Unable to save changes. Try again, and if the problem persists, see your system administrator.");
   }
   PopulateDepartmentsDropDownList(course.DepartmentID);
   return View(course);
}

private void PopulateDepartmentsDropDownList(object selectedDepartment = null)
{
   var departmentsQuery = from d in db.Departments
                          orderby d.Name
                          select d;
   ViewBag.DepartmentID = new SelectList(departmentsQuery, "DepartmentID", "Name", selectedDepartment);
}
PopulateDepartmentsDropDownList 方法取得按名稱排序的所有部門的列表,建立下拉列表的 SelectList 集合,並將該集合傳遞到 ViewBag 屬性中的檢視。 方法接受選擇性的 selectedDepartment 參數,可允許呼叫程式碼在呈現下拉式清單時指定選取的項目。 檢視會將名稱DepartmentID傳遞至DropDownList協助程式,而協助程式接著會知道在 物件中ViewBag尋找具名 DepartmentID的 SelectList 。
HttpGet 方法在呼叫 Create 方法時沒有設定所選項目,因為對於新課程,PopulateDepartmentsDropDownList 部門尚未建立:
public ActionResult Create()
{
    PopulateDepartmentsDropDownList();
    return View();
}
HttpGetEdit 方法根據已指派給正在編輯的課程的部門 ID 設定所選項目:
public ActionResult Edit(int id)
{
    Course course = db.Courses.Find(id);
    PopulateDepartmentsDropDownList(course.DepartmentID);
    return View(course);
}
Create 和 Edit 兩者的 HttpPost 方法還包括在錯誤後重新顯示頁面時設定所選目的代碼:
catch (DataException /* dex */)
{
    //Log the error (uncomment dex variable name after DataException and add a line here to write a log.)
    ModelState.AddModelError("", "Unable to save changes. Try again, and if the problem persists, see your system administrator.");
}
PopulateDepartmentsDropDownList(course.DepartmentID);
return View(course);
此程式碼可確保當重新顯示頁面以顯示錯誤訊息時,選取的任何部門都會保持選取狀態。
在 Views\Course\Create.cshtml 中,新增醒目提示的程序代碼,以在 [標題] 字段之前建立新的課程編號字段。 如先前教學課程所述,預設不會建構主鍵欄位,但此主鍵有意義,因此您希望使用者能夠輸入索引鍵值。
@model ContosoUniversity.Models.Course

@{
    ViewBag.Title = "Create";
}

<h2>Create</h2>

@using (Html.BeginForm())
{
    @Html.AntiForgeryToken()
    @Html.ValidationSummary(true)

    <fieldset>
        <legend>Course</legend>

        <div class="editor-label">
            @Html.LabelFor(model => model.CourseID)
        </div>
        <div class="editor-field">
            @Html.EditorFor(model => model.CourseID)
            @Html.ValidationMessageFor(model => model.CourseID)
        </div>

        <div class="editor-label">
            @Html.LabelFor(model => model.Title)
        </div>
        <div class="editor-field">
            @Html.EditorFor(model => model.Title)
            @Html.ValidationMessageFor(model => model.Title)
        </div>

        <div class="editor-label">
            @Html.LabelFor(model => model.Credits)
        </div>
        <div class="editor-field">
            @Html.EditorFor(model => model.Credits)
            @Html.ValidationMessageFor(model => model.Credits)
        </div>

        <div class="editor-label">
            @Html.LabelFor(model => model.DepartmentID, "Department")
        </div>
        <div class="editor-field">
            @Html.DropDownList("DepartmentID", String.Empty)
            @Html.ValidationMessageFor(model => model.DepartmentID)
        </div>

        <p>
            <input type="submit" value="Create" />
        </p>
    </fieldset>
}

<div>
    @Html.ActionLink("Back to List", "Index")
</div>

@section Scripts {
    @Scripts.Render("~/bundles/jqueryval")
}
在 Views\Course\Edit.cshtml、Views\Course\Delete.cshtml 和 Views\Course\Details.cshtml 中,於 [標題] 字段之前新增課程編號字段。 因為它是主鍵,所以會顯示,但無法更改。
<div class="editor-label">
    @Html.LabelFor(model => model.CourseID)
</div>
<div class="editor-field">
    @Html.DisplayFor(model => model.CourseID)
</div>
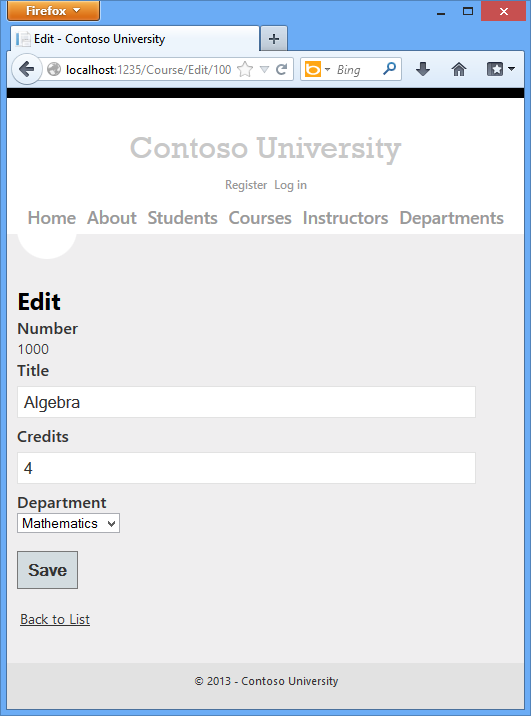
執行建立頁面 (顯示課程索引頁面並點擊新建) 並輸入新課程的資料:

按一下 [建立]。 將顯示「課程索引」頁面,並將新課程新增至清單。 [索引] 頁面中的部門名稱來自於導覽屬性,顯示關聯性已正確建立。

執行編輯頁面 (顯示課程索引頁面並點擊課程上的編輯)。
變更頁面上的資料,然後按一下 [儲存]。 課程索引頁面顯示更新的課程資料。
為講師新增編輯頁面
當您編輯講師記錄時,您可能會想要更新講師的辦公室指派。 Instructor 實體與 OfficeAssignmentBot 控制代碼 實體具有一對零或一的關係,這意味著您必須處理以下情況:
- 如果使用者清除了辦公室分配並且它最初具有值,則您必須移除並刪除
OfficeAssignment實體。 - 如果使用者輸入辦公室分配值且該值最初為空,則您必須建立一個新
OfficeAssignment實體。 - 如果使用者變更辦公室指派的值,您必須變更現有
OfficeAssignment實體中的值。
打開 InstructorController.cs,看一下 HttpGetEdit 方法:
public ActionResult Edit(int id = 0)
{
    Instructor instructor = db.Instructors.Find(id);
    if (instructor == null)
    {
        return HttpNotFound();
    }
    ViewBag.InstructorID = new SelectList(db.OfficeAssignments, "InstructorID", "Location", instructor.InstructorID);
    return View(instructor);
}
這裡的支架程式碼不是您想要的。 它正在為下拉列表設定資料,但您需要的是一個文字方塊。 將此方法替換為以下程式碼:
public ActionResult Edit(int id)
{
    Instructor instructor = db.Instructors
        .Include(i => i.OfficeAssignment)
        .Where(i => i.InstructorID == id)
        .Single();
    return View(instructor);
}
此程式碼刪除 ViewBag 語句並新增關聯 OfficeAssignment 實體的預先載入。 您無法使用 Find 方法執行預先加載,因此使用 Where 和 Single 方法來選擇講師。
將 HttpPostEdit 方法替換為以下程式碼。 它處理辦公室分配更新:
[HttpPost]
[ValidateAntiForgeryToken]
public ActionResult Edit(int id, FormCollection formCollection)
{
   var instructorToUpdate = db.Instructors
       .Include(i => i.OfficeAssignment)
       .Where(i => i.InstructorID == id)
       .Single();

   if (TryUpdateModel(instructorToUpdate, "",
      new string[] { "LastName", "FirstMidName", "HireDate", "OfficeAssignment" }))
   {
      try
      {
         if (String.IsNullOrWhiteSpace(instructorToUpdate.OfficeAssignment.Location))
         {
            instructorToUpdate.OfficeAssignment = null;
         }

         db.Entry(instructorToUpdate).State = EntityState.Modified;
         db.SaveChanges();

         return RedirectToAction("Index");
      }
      catch (DataException /* dex */)
      {
         //Log the error (uncomment dex variable name after DataException and add a line here to write a log.
         ModelState.AddModelError("", "Unable to save changes. Try again, and if the problem persists, see your system administrator.");
      }
   }
   ViewBag.InstructorID = new SelectList(db.OfficeAssignments, "InstructorID", "Location", id);
   return View(instructorToUpdate);
}
程式碼會執行下列操作:
針對
OfficeAssignment導覽屬性使用積極式載入從資料庫中取得目前的Instructor實體。 這與您在HttpGetEdit方法中所做的相同。使用從模型繫結器取得的值更新擷取的
Instructor實體。 使用的 TryUpdateModel 多載可讓您安全地列出您想要包含的屬性。 這可防止大量指派,如同在第二個教學課程中所解釋的。if (TryUpdateModel(instructorToUpdate, "", new string[] { "LastName", "FirstMidName", "HireDate", "OfficeAssignment" }))如果辦公室位置空白,請將
Instructor.OfficeAssignment屬性設定為 null,以便刪除OfficeAssignment資料表中的相關資料列。if (String.IsNullOrWhiteSpace(instructorToUpdate.OfficeAssignment.Location)) { instructorToUpdate.OfficeAssignment = null; }將變更儲存到資料庫。
在 Views\Instructor\Edit.cshtml 中,在div僱用日期欄位的元素後面,新增一個用於編輯辦公地點的新欄位:
<div class="editor-label">
@Html.LabelFor(model => model.OfficeAssignment.Location)
</div>
<div class="editor-field">
@Html.EditorFor(model => model.OfficeAssignment.Location)
@Html.ValidationMessageFor(model => model.OfficeAssignment.Location)
</div>
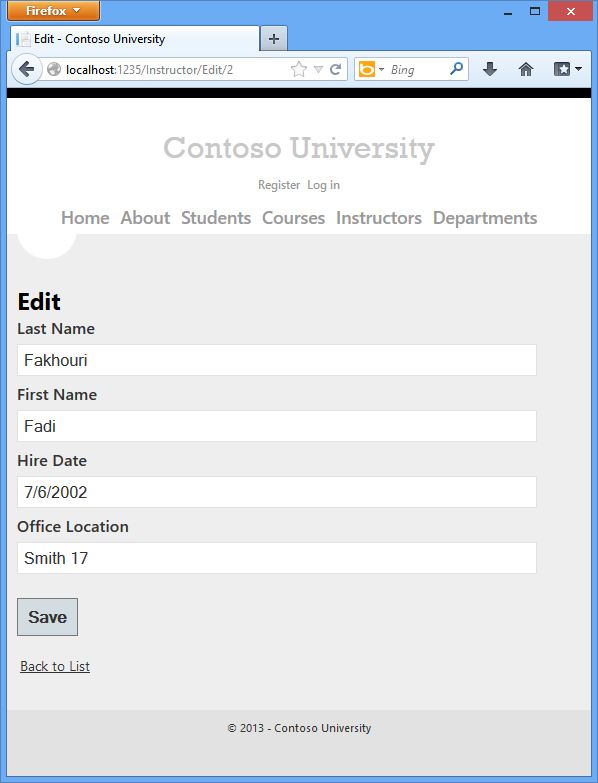
運行該頁面 (選擇講師索引標籤,然後按一下講師上的編輯)。 變更 [辦公室位置],然後按一下 [儲存]。
將課程指派新增至講師編輯頁面
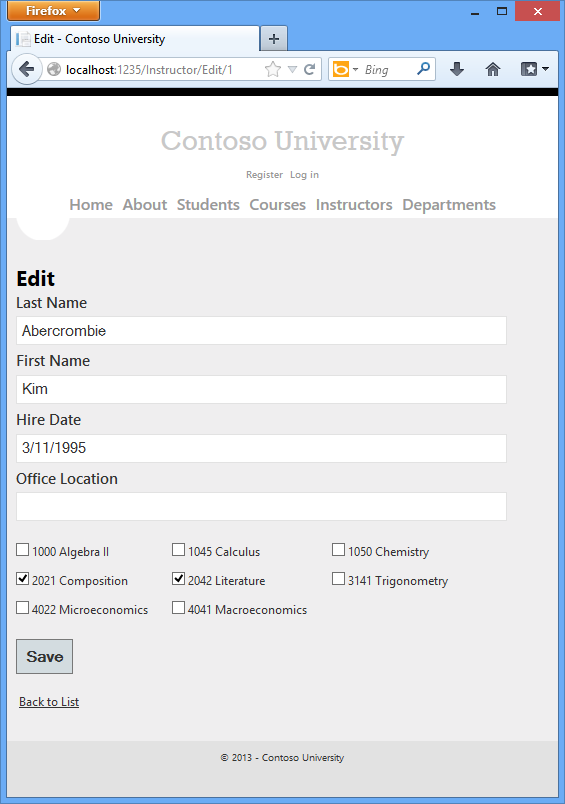
講師可教授任何數量的課程。 現在您將藉由使用核取方塊群組,新增變更課程指派的能力來強化 Instructor [編輯] 頁面,如以下螢幕擷取畫面所示:

和 Instructor 實體之間的Course關聯性是多對多,這表示您沒有聯結數據表的直接存取權。 相反地,您會在導覽屬性中新增 Instructor.Courses 和移除實體。
可讓您變更講師指派之課程的 UI 為一組核取方塊。 資料庫中每個課程的核取方塊都會顯示,而該名講師目前受指派的課程會已選取狀態顯示。 使用者可選取或清除核取方塊來變更課程指派。 如果課程數量更多,您可能想要使用不同的方法在檢視中呈現資料,但您會使用相同的操作導航屬性的方法來建立或刪除關係。
若要針對核取方塊清單提供資料給檢視,您必須使用一個檢視模型類別。 在 ViewModels 資料夾中建立 AssignedCourseData.cs,並將現有程式碼替換為以下程式碼:
namespace ContosoUniversity.ViewModels
{
public class AssignedCourseData
{
public int CourseID { get; set; }
public string Title { get; set; }
public bool Assigned { get; set; }
}
}
在 InstructorController.cs 中,將 HttpGetEdit 方法替換為以下程式碼。 所做的變更已醒目提示。
public ActionResult Edit(int id)
{
Instructor instructor = db.Instructors
.Include(i => i.OfficeAssignment)
.Include(i => i.Courses)
.Where(i => i.InstructorID == id)
.Single();
PopulateAssignedCourseData(instructor);
return View(instructor);
}
private void PopulateAssignedCourseData(Instructor instructor)
{
var allCourses = db.Courses;
var instructorCourses = new HashSet<int>(instructor.Courses.Select(c => c.CourseID));
var viewModel = new List<AssignedCourseData>();
foreach (var course in allCourses)
{
viewModel.Add(new AssignedCourseData
{
CourseID = course.CourseID,
Title = course.Title,
Assigned = instructorCourses.Contains(course.CourseID)
});
}
ViewBag.Courses = viewModel;
}
程式碼會為 Courses 導覽屬性新增積極式載入,然後使用 AssignedCourseData 檢視模型類別來呼叫新的 PopulateAssignedCourseData 方法以提供資訊給核取方塊陣列。
PopulateAssignedCourseData 方法中的程式碼會讀取所有的 Course 實體以使用檢視模型類別載入課程清單。 針對每個課程,程式碼會檢查課程是否存在於講師的 Courses 導覽屬性中。 為了在檢查課程是否分配給教師時建立有效的查找,分配給教師的課程被放入 HashSet 集合中。 此 Assignedtrue 屬性設定為教師分配的課程。 檢視會使用這個屬性,來判斷哪一個核取方塊必須顯示為已選取。 最後,列表被傳遞到 ViewBag 屬性中的檢視。
接下來,新增當使用者按一下 [儲存] 時要執行的程式碼。 HttpPost Edit將方法取代為下列程式代碼,它會呼叫更新Courses實體導覽屬性Instructor的新方法。 所做的變更已醒目提示。
[HttpPost]
[ValidateAntiForgeryToken]
public ActionResult Edit(int id, FormCollection formCollection, string[] selectedCourses)
{
var instructorToUpdate = db.Instructors
.Include(i => i.OfficeAssignment)
.Include(i => i.Courses)
.Where(i => i.InstructorID == id)
.Single();
if (TryUpdateModel(instructorToUpdate, "",
      new string[] { "LastName", "FirstMidName", "HireDate", "OfficeAssignment" }))
{
try
{
if (String.IsNullOrWhiteSpace(instructorToUpdate.OfficeAssignment.Location))
{
    instructorToUpdate.OfficeAssignment = null;
}
UpdateInstructorCourses(selectedCourses, instructorToUpdate);
db.Entry(instructorToUpdate).State = EntityState.Modified;
db.SaveChanges();
return RedirectToAction("Index");
}
catch (DataException /* dex */)
{
//Log the error (uncomment dex variable name after DataException and add a line here to write a log.
ModelState.AddModelError("", "Unable to save changes. Try again, and if the problem persists see your system administrator.");
}
}
PopulateAssignedCourseData(instructorToUpdate);
return View(instructorToUpdate);
}
private void UpdateInstructorCourses(string[] selectedCourses, Instructor instructorToUpdate)
{
if (selectedCourses == null)
{
instructorToUpdate.Courses = new List<Course>();
return;
}
var selectedCoursesHS = new HashSet<string>(selectedCourses);
var instructorCourses = new HashSet<int>
(instructorToUpdate.Courses.Select(c => c.CourseID));
foreach (var course in db.Courses)
{
if (selectedCoursesHS.Contains(course.CourseID.ToString()))
{
if (!instructorCourses.Contains(course.CourseID))
{
instructorToUpdate.Courses.Add(course);
}
}
else
{
if (instructorCourses.Contains(course.CourseID))
{
instructorToUpdate.Courses.Remove(course);
}
}
}
}
由於檢視沒有 Course 實體集合,因此模型綁定器無法自動更新 Courses 導航屬性。 您不會使用模型系結器來更新 Courses 導覽屬性,而是在新的 UpdateInstructorCourses 方法中執行此動作。 因此您必須從模型繫結器中排除 Courses 屬性。 這不需要對呼叫 TryUpdateModel 的程式代碼進行任何變更,因為您使用的是 安全清單 多載, Courses 而且不在 include 清單中。
如果未選取任何複選框,則 UpdateInstructorCourses 中的程式碼將使用空集合初始化 Courses 導覽屬性:
if (selectedCourses == null)
{
instructorToUpdate.Courses = new List<Course>();
return;
}
程式碼會執行迴圈,尋訪資料庫中所有的課程,並檢查每個已指派給講師的課程,以及在檢視中選取的課程。 為了協助達成有效率的搜尋,後者的兩個集合會儲存在 HashSet 物件中。
若課程的核取方塊已被選取,但課程並未位於 Instructor.Courses 導覽屬性中,則課程便會新增至導覽屬性的集合中。
if (selectedCoursesHS.Contains(course.CourseID.ToString()))
{
if (!instructorCourses.Contains(course.CourseID))
{
instructorToUpdate.Courses.Add(course);
}
}
若課程的核取方塊未被選取,但課程卻位於 Instructor.Courses 導覽屬性中,則課程便會從導覽屬性的集合中移除。
else
{
if (instructorCourses.Contains(course.CourseID))
{
instructorToUpdate.Courses.Remove(course);
}
}
在 Views\Instructor\Edit.cshtml 中,新增具有複選框陣列的 Courses 字段,方法是在字段的元素OfficeAssignment後面div立即新增下列醒目提示的程式代碼:
@model ContosoUniversity.Models.Instructor
@{
ViewBag.Title = "Edit";
}
<h2>Edit</h2>
@using (Html.BeginForm())
{
@Html.AntiForgeryToken()
@Html.ValidationSummary(true)
<fieldset>
<legend>Instructor</legend>
@Html.HiddenFor(model => model.InstructorID)
<div class="editor-label">
@Html.LabelFor(model => model.LastName)
</div>
<div class="editor-field">
@Html.EditorFor(model => model.LastName)
@Html.ValidationMessageFor(model => model.LastName)
</div>
<div class="editor-label">
@Html.LabelFor(model => model.FirstMidName)
</div>
<div class="editor-field">
@Html.EditorFor(model => model.FirstMidName)
@Html.ValidationMessageFor(model => model.FirstMidName)
</div>
<div class="editor-label">
@Html.LabelFor(model => model.HireDate)
</div>
<div class="editor-field">
@Html.EditorFor(model => model.HireDate)
@Html.ValidationMessageFor(model => model.HireDate)
</div>
<div class="editor-label">
    @Html.LabelFor(model => model.OfficeAssignment.Location)
</div>
<div class="editor-field">
    @Html.EditorFor(model => model.OfficeAssignment.Location)
    @Html.ValidationMessageFor(model => model.OfficeAssignment.Location)
</div>
<div class="editor-field">
<table>
<tr>
@{
int cnt = 0;
List<ContosoUniversity.ViewModels.AssignedCourseData> courses = ViewBag.Courses;
foreach (var course in courses) {
if (cnt++ % 3 == 0) {
@: </tr> <tr>
}
@: <td>
<input type="checkbox"
name="selectedCourses"
value="@course.CourseID"
@(Html.Raw(course.Assigned ? "checked=\"checked\"" : "")) />
@course.CourseID @: @course.Title
@:</td>
}
@: </tr>
}
</table>
</div>
<p>
<input type="submit" value="Save" />
</p>
</fieldset>
}
<div>
@Html.ActionLink("Back to List", "Index")
</div>
@section Scripts {
@Scripts.Render("~/bundles/jqueryval")
}
此程式碼會建立一個 HTML 表格,該表格中有三個資料行。 在每個資料行中,核取方塊的後方會是由課程號碼和標題組成的標題。 這些複選框都具有相同的名稱 (“selectedCourses”),這通知模型綁定器它們將被視為一個群組。 每個複選框的 value 屬性設定為CourseID.當頁面發佈時的 CourseID 值,模型綁定器將一個陣列傳遞給控制器,該陣列僅包含所選複選框的值。
當複選框最初呈現時,分配給教師的課程的複選框具有 checked 屬性,可以選擇它們 (顯示它們已選中)。
更改課程作業後,您將希望能夠在網站返回 Index 頁面時驗證變更。 因此,您需要在該頁面的表中新增一列。 在這種情況下,您不需要使用該 ViewBag 物件,因為您要顯示的資訊已經位於您作為模型傳遞到頁面的 Instructor 實體的 Courses 導航屬性中。
在 Views\Instructor\Index.cshtml 中,緊跟著在 Office 標題後面新增一個 Courses 標題,如下例所示:
<tr>
    <th></th>
    <th>Last Name</th>
    <th>First Name</th>
    <th>Hire Date</th>
    <th>Office</th>
    <th>Courses</th>
</tr>
然後在辦公室位置詳細資料儲存格後面新增一個新的詳細資料儲存格:
@model ContosoUniversity.ViewModels.InstructorIndexData

@{
    ViewBag.Title = "Instructors";
}

<h2>Instructors</h2>

<p>
    @Html.ActionLink("Create New", "Create")
</p>
<table>
    <tr>
        <th></th>
        <th>Last Name</th>
        <th>First Name</th>
        <th>Hire Date</th>
        <th>Office</th>
        <th>Courses</th>
    </tr>
    @foreach (var item in Model.Instructors)
    {
        string selectedRow = "";
        if (item.InstructorID == ViewBag.InstructorID)
        {
            selectedRow = "selectedrow";
        }
        <tr class="@selectedRow" valign="top">
            <td>
                @Html.ActionLink("Select", "Index", new { id = item.InstructorID }) |
                @Html.ActionLink("Edit", "Edit", new { id = item.InstructorID }) |
                @Html.ActionLink("Details", "Details", new { id = item.InstructorID }) |
                @Html.ActionLink("Delete", "Delete", new { id = item.InstructorID })
            </td>
            <td>
                @item.LastName
            </td>
            <td>
                @item.FirstMidName
            </td>
            <td>
                @String.Format("{0:d}", item.HireDate)
            </td>
            <td>
                @if (item.OfficeAssignment != null)
                {
                    @item.OfficeAssignment.Location
                }
            </td>
            <td>
                @{
                foreach (var course in item.Courses)
                {
                    @course.CourseID @:  @course.Title <br />
                }
                }
            </td>
        </tr>
    }
</table>

@if (Model.Courses != null)
{
    <h3>Courses Taught by Selected Instructor</h3>
    <table>
        <tr>
            <th></th>
            <th>ID</th>
            <th>Title</th>
            <th>Department</th>
        </tr>

        @foreach (var item in Model.Courses)
        {
            string selectedRow = "";
            if (item.CourseID == ViewBag.CourseID)
            {
                selectedRow = "selectedrow";
            }

            <tr class="@selectedRow">

                <td>
                    @Html.ActionLink("Select", "Index", new { courseID = item.CourseID })
                </td>
                <td>
                    @item.CourseID
                </td>
                <td>
                    @item.Title
                </td>
                <td>
                    @item.Department.Name
                </td>
            </tr>
        }

    </table>
}
@if (Model.Enrollments != null)
{
    <h3>Students Enrolled in Selected Course</h3>
    <table>
        <tr>
            <th>Name</th>
            <th>Grade</th>
        </tr>
        @foreach (var item in Model.Enrollments)
        {
            <tr>
                <td>
                    @item.Student.FullName
                </td>
                <td>
                    @Html.DisplayFor(modelItem => item.Grade)
                </td>
            </tr>
        }
    </table>
}
執行 [講師索引] 頁面,以查看指派給每個講師的課程:
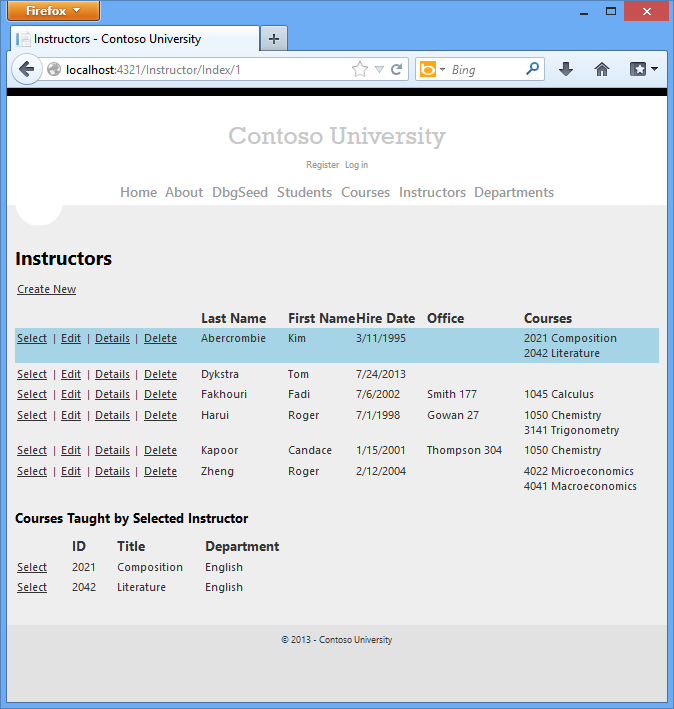
點擊講師上的編輯以查看編輯頁面。

更改一些課程作業並點擊儲存。 您所做的變更會反映在 [索引] 頁面上。
注意:當課程數量有限時,編輯講師課程數據的方法可正常運作。 針對更大的集合,將需要不同的 UI 和不同的更新方法。
更新 Delete 方法
變更 HttpPost Delete 方法中的程式碼,以便在刪除講師時刪除辦公室指派記錄(如果有的話):
[HttpPost, ActionName("Delete")]
[ValidateAntiForgeryToken]
public ActionResult DeleteConfirmed(int id)
{
   Instructor instructor = db.Instructors
     .Include(i => i.OfficeAssignment)
     .Where(i => i.InstructorID == id)
     .Single();

   instructor.OfficeAssignment = null;
   db.Instructors.Remove(instructor);
   db.SaveChanges();
   return RedirectToAction("Index");
}
如果您嘗試刪除指派給部門系統管理員的講師,您將會收到引用完整性錯誤。 如需其他程式代碼,請參閱 本教學 課程的目前版本,以取得將講師指派為系統管理員的任何部門自動移除講師。
摘要
您現在已完成此簡介以處理相關資料。 到目前為止,在這些教學課程中,您已完成各種 CRUD 作業,但您尚未處理並行問題。 下一個教學課程將介紹並行的主題、說明處理它的選項,並將並行處理新增至您已針對一個實體類型撰寫的 CRUD 程式代碼。
您可以在本系列的最後一個教學課程結尾找到其他 Entity Framework 資源的連結。