Load Balanced Test Bed Part 1–Create a Base Image
Creating a Base Image
Part 1 of 5: For overall context, please see the introduction to this series
In this procedure I will create a single operating system base image, which both NLB cluster nodes will eventually use. At a high level, I will be walking through the same steps documented here, but I will be providing more detail in certain areas.
Create a Base Virtual Machine
To begin start Server Manager on the host machine. In the left side navigation tree, expand the Roles branch, Hyper-V branch, Hyper-V Manager branch, then right-click on your host machine’s name, and choose New, Virtual Machine…
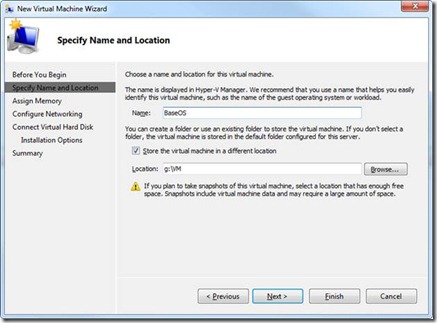
Name the virtual machine “BaseOS”, specify the location to store it, and click Next. Below is a snapshot of what I did.
On the next wizard page, I assigned 1500M of RAM and clicked Next
I set the connection to the “Local Area Network – Virtual Network” and clicked Next
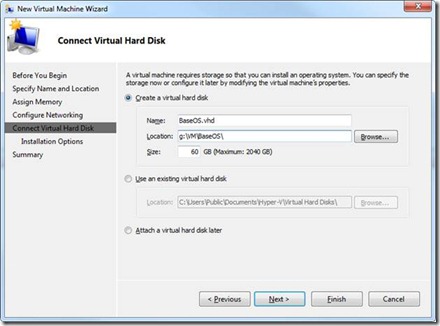
I then created a 60G virtual disk, named it BaseOS.vhd, specified that it be stored in a subdirectory (g:\vm\BaseOS\) virtual machine location. I then clicked Next.
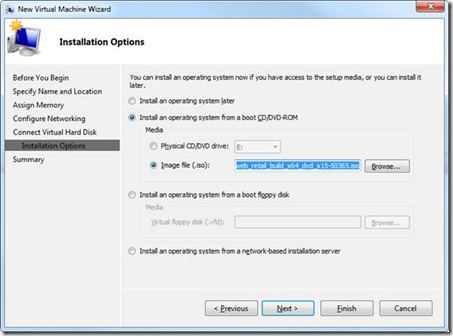
On the final wizard page, I chose “Install an operating system from a boot CD/DVD-ROM”, set the Media to Image file (.iso), and specified the path to the Windows Server 2008 R2 ISO image I downloaded via my MSDN subscription.
Click Finish
You now have a virtual machine named BaseOS.
Installing the Operating System
Now that your virtual machine is created, right-click on it and choose Start
Right-click on it again and choose Connect…
You should see Windows Server 2008 R2 setup start on your VM. It will prompt you for language settings. Specify your language settings, click next. The click Install.
If you’re using the same ISO that I did, you’ll see a list of possible operating systems to install. I used Windows Server 2008 R2 Enterprise, as shown below, and clicked Next.
Finish your installation of the Operating System.
Install the Virtual Machine Additions
Once the OS is installed, right-click on your VM, and choose Connect. Logon to your VM with the local administrator user and password you assigned during setup.
Install the virtual machine additions by clicking the VM’s Action menu, and choosing Insert Integrations Services Setup Disk. These additions are very important for interacting and managing your virtual machine.
Add the Necessary Roles
Logon to your VM and start Server Manager.
Right-click Roles in the left navigation tree, and choose Add Roles.
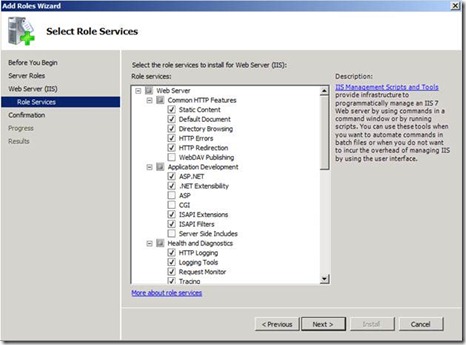
Add the NLB role and any other roles you will want on your cluster nodes. I my case I’m going to add Web Server with HTTP Redirection, ASP.Net, Logging Tools, Tracing, Windows Authentication, IIS Management Scripts and tools. Some roles may prompt you to add features that they are dependent on, so be sure to approve those additions. I could not show the check boxes for all the roles, but below is a snapshot of what the dialog looks like.
Add the Necessary Features
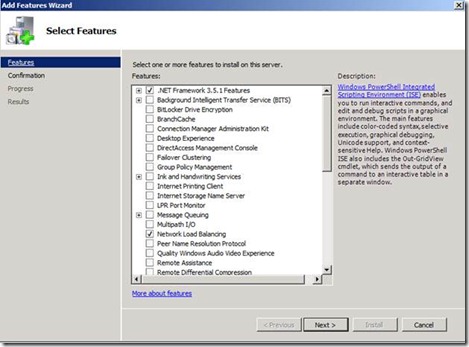
I added the .Net Framework 3.5.1 Features, Network Load Balancing, Windows PowerShell Integrated Scripting Environment, and Windows Process Activation Service. I could not show all of them but they are all check boxes in the dialog below.
Configure other items specific to your needs
Some of these items may be to set the Time Zone, join the VM to your domain, install antivirus, IE ESC settings, etc. Remember that these items will be configured on the machines that will be built from this image, so it is a good time to configure those things that you don’t want to configure repeatedly on each VM.
Fully patch the system
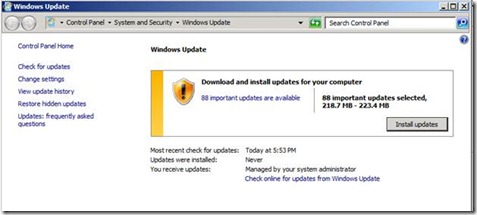
Now that all the roles and features are installed, the patching surface area will have increased. Additionally, I have installed from the Windows 2008 R2 RTM ISO image, so many updates have occurred since. Check for updates and let it patch. It is a good time to go get some sleep ![]() .
.
Sysprep the System
Start Windows Explorer and navigate to %windir%\system32\sysprep\
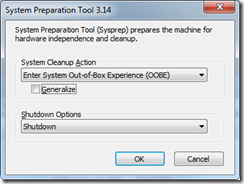
You’ll see a program called sysprep. Run it, configure it as shown below and click ok.
Your BaseOS VM will shutdown. We will not be using the BaseOS VM directly anymore. The base image VHD for this VM (in my case g:\vm\BaseOS\BaseOS.vhd) is now ready to be used to build cluster nodes. Each cluster node will have differencing disks that use BaseOS.VHD as their parent disk.
Go to Introduction, Part2
