Guest Author Series: Securely Publishing EAC
Good day, everyone! A common question we hear from customers is "How do I selectively disable access to the Exchange Administrative Center (e.g. from the Internet or well known internal URLs) while still allowing the /ecp virtual directory for features needed by standard users?" A long time friend of mine (and one of the smartest geeks I know) wrote some content a while back that has been critically acclaimed by his customers and I wanted to share it here.
Without further ado, ladies and gentlemen, let's hear it for Butch Waller!
The formal guidance for disabling administrative access to the EAC for users coming in from the Internet is found here - https://technet.microsoft.com/en-us/library/jj218639(v=exchg.150).aspx. In that guidance, the suggestion is that the only method of achieving this is to "install a separate CAS server and configure it to only handle internal requests". While this is certainly an expeditious way to accomplish the task, it brings with it additional Exchange and Windows Server licensing along with the extra servers to update.
Based on a modified version of the advice we have given Exchange customers over the years to create a second OWA virtual directory to accommodate FBA authentication behind an ISA/TMG firewall, I believe we can accomplish the desired outcome without the need for additional servers.
Henrik Walther (who has worked for Microsoft for the last couple of years now) published a great series of articles on that original guidance I mentioned above on MSExchange.org - https://www.msexchange.org/articles-tutorials/exchange-server-2010/management-administration/enabling-forms-based-authentication-external-internal-owa-2010-users-exchange-2010-published-using-forefront-tmg-2010-part1.html. It is a great idea to digest that information before proceeding.
Here are the steps I have processed through in my lab to accomplish administrative separation in the ECP website:
- Add a second internal IP address to the CAS
- If you have an unused NIC on the server, leverage it to add a second internal IP address
- If no second NIC, add a second IP address in the advanced properties of Ipv4 on the NIC
- Determine the internal only name you want to give the new website - e.g. contoso.com
- Create an A record in DNS to point the new internal website name to the second IP address
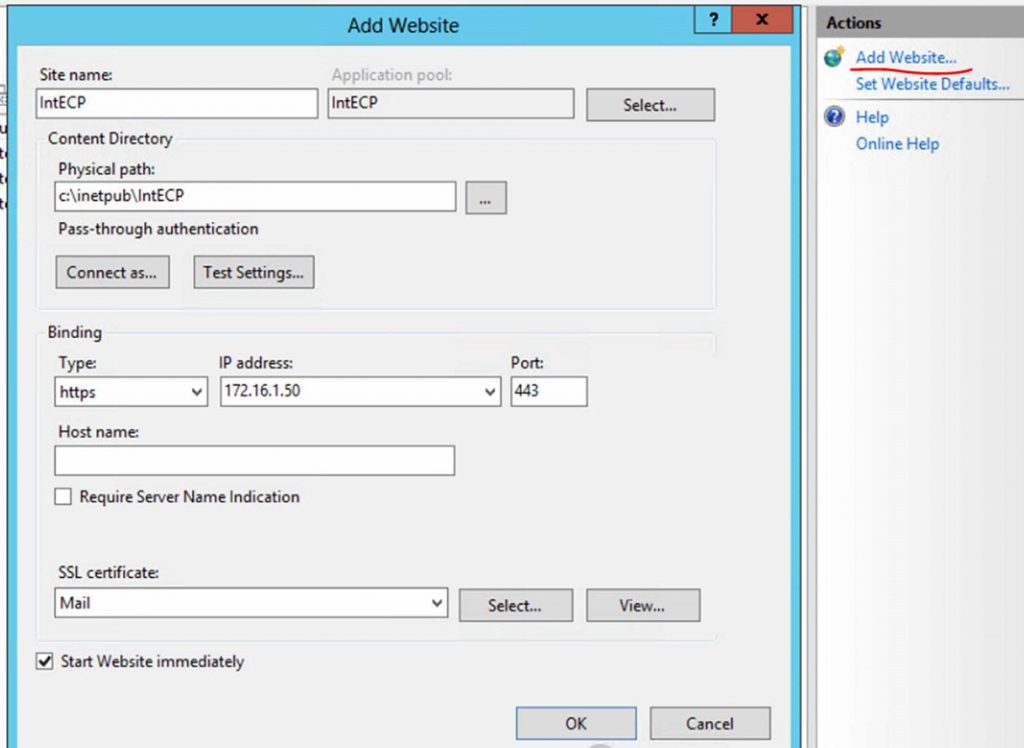
- On each server with the CAS role, open IIS Manager and create a new website. Any site name is acceptable.
- Run the commands to create the new virtual directories
- New-OWAVirtualDirectory -Server CON-E2013CAS -WebSiteName "IntECP"
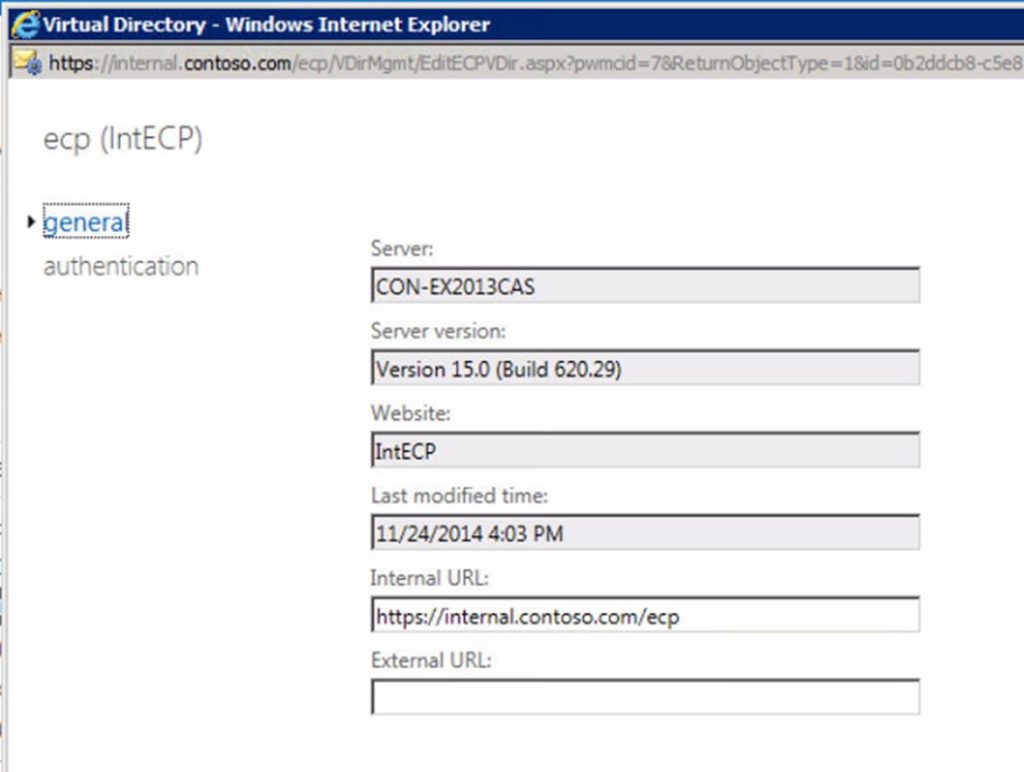
- New-ECPVirtualDirectory -Server CON-E2013CAS -WebSiteName "IntECP"
- Set the Internal URL value on both OWA and ECP virtual directories to the new namespace
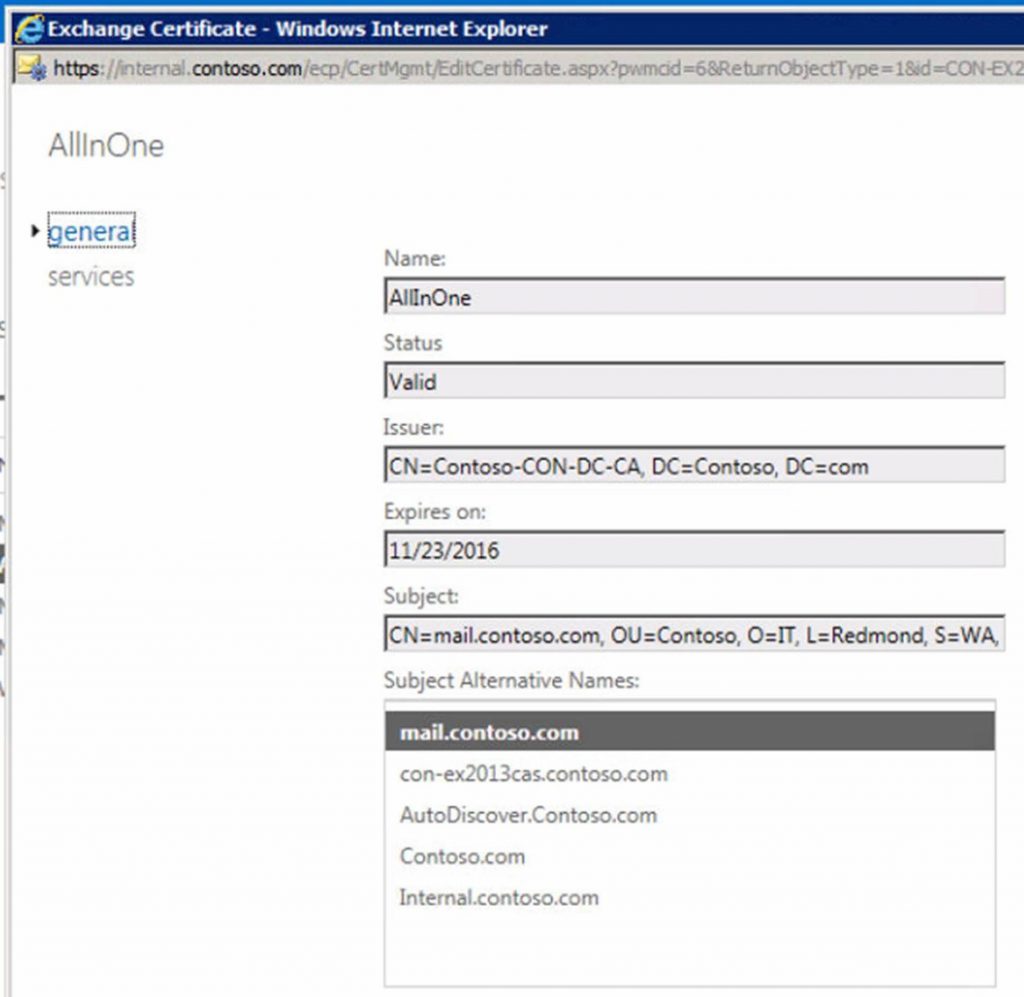
- Add the new name to the Exchange server certificate that will be assigned the IIS service
- Import the certificate
- Assign the IIS service to the new certificate and test access to:
- Run the EMS command to disable full administrative access to the original ECP virtual directory in the Default Web Site
- Set-ECPVirtualDirectory "CON-E15CAS\ecp (Default Web Site)" -AdminEnabled $False (users will still be able to access their mailbox options page via this site)
- Verify access to the following:
- https://mail.contoso.com/ecp - mailbox options only
- https://internal.contoso.com/ecp - full EAC interface
With this in place, you can notify all Exchange admins in the environment about the new admin URL. Since this is only published inside the corporate network, administrative access will only be accomplished while on the LAN locally or via VPN, but the threat of compromised admin credentials is greatly reduced!


