How to remove Android partition from a Teclast x98 PRO “dual boot” - K9C6
The Teclast X98 Pro (a good review here) is the third iteration of the popular Teclast X98 series of tablets. This latest 2015 version features an updated chipset with Intel’s latest Atom SoC the 14nm Cherry Trail and double the Ram of it’s predecessors. The X98 Pro currently comes with Windows 10 and no dual boot or 3G/4G options yet. Because the dual boot device reduce to less than 32Gb the space available for Windows 10, I’ve decided to remove the Android partition.
After various searches over internet and tests I’ve used the following procedure that have worked for my tablet.
What you need
- Teclast x98 PRO – K9C6
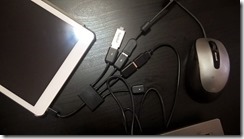
- HUB USB OTG with power charging host
- USB Keyboard
- USB mouse
- 8Gb USB flash drive
Backup Windows 10 product key
You can download the full guide and powershell script on how backup window product key via PowerShell here. Windows 10 should be able to automatically download the product key and re-activate itself on the same hardware, but just in case the procedure doesn’t work, here you have a backup of your product key.
- Open Powershell and “run as Administrator”
- Type “Set-ExecutionPolicy RemoteSigned”
- Type “.\GetProductKey.ps1”
- Save the product key somewhere
function Get-WindowsKey {
## function to retrieve the Windows Product Key from any PC
## by Jakob Bindslet (jakob@bindslet.dk)
param ($targets = ".")
$hklm = 2147483650
$regPath = "Software\Microsoft\Windows NT\CurrentVersion"
$regValue = "DigitalProductId"
Foreach ($target in $targets) {
$productKey = $null
$win32os = $null
$wmi = [WMIClass]"\\$target\root\default:stdRegProv"
$data = $wmi.GetBinaryValue($hklm,$regPath,$regValue)
$binArray = ($data.uValue)[52..66]
$charsArray = "B","C","D","F","G","H","J","K","M","P","Q","R","T","V","W","X","Y","2","3","4","6","7","8","9"
## decrypt base24 encoded binary data
For ($i = 24; $i -ge 0; $i--) {
$k = 0
For ($j = 14; $j -ge 0; $j--) {
$k = $k * 256 -bxor $binArray[$j]
$binArray[$j] = [math]::truncate($k / 24)
$k = $k % 24
}
$productKey = $charsArray[$k] + $productKey
If (($i % 5 -eq 0) -and ($i -ne 0)) {
$productKey = "-" + $productKey
}
}
$win32os = Get-WmiObject Win32_OperatingSystem -computer $target
$obj = New-Object Object
$obj | Add-Member Noteproperty Computer -value $target
$obj | Add-Member Noteproperty Caption -value $win32os.Caption
$obj | Add-Member Noteproperty CSDVersion -value $win32os.CSDVersion
$obj | Add-Member Noteproperty OSArch -value $win32os.OSArchitecture
$obj | Add-Member Noteproperty BuildNumber -value $win32os.BuildNumber
$obj | Add-Member Noteproperty RegisteredTo -value $win32os.RegisteredUser
$obj | Add-Member Noteproperty ProductID -value $win32os.SerialNumber
$obj | Add-Member Noteproperty ProductKey -value $productkey
$obj
}
}Get-WindowsKey
Prepare the USB drive
- Download latest Windows 10 ISO – look for “Windows 10 (Multiple Editions) (x64) - DVD (English)”
- Download Latest Techlast W10 drivers (22 October 2015)
- Prepare the USB flash drive. Insert your usb drive in your USB port, open command prompt and type:
diskpart
list disk
select disk <disk number>
clean
create partition primary
format quick fs=fat32 label="WINPE"
exit
- VERY IMPORTANT do not change the label name
- Copy windows 10 setup files from the .iso to the usb flash drive
- Extract files downloaded from Teclast (see above) in a folder on the USB flash drive
Setup Windows
Plug keyboard, mouse and USB flash drive in the USB HUB
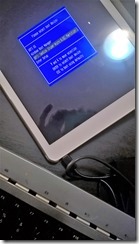
Turn on the tablet while repeatedly press F7 key
Select USB key as boot device
Select Language/Keyboard
Click “Install Now”
Select “Custom Install”
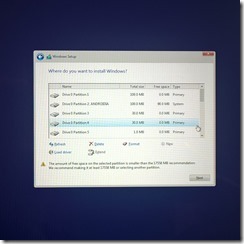
You should see many partitions…
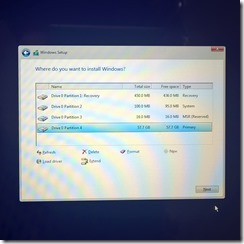
Remove them all
Create new partition
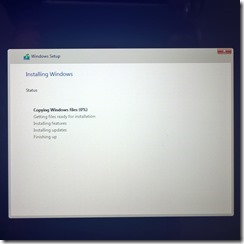
Start installation
Setup Teclast Drivers
Once finished the installation, the tablet is still a “poor pc with a super high resolution display”:-) this means, no wifi, no bluetooth, no motions sensor, no TOUCH and so on.
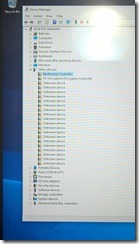
Thanks to Keyboard and Mouse, you can right click on start button, and open Device Manager.
You will find tons of “unknown devices”. No problem, for each of those, Right click and select “update driver software…”:
Select “Browse my computer for driver software”
Select the forder, on the USB flash drive where you have pied Teclast’s software
Fix Touch
At the end of drivers installation, the touch still will not work.
You must copy the file touchsetting.gt (from root of the Teclast driver’s folder) to c:\windows\inf
Restart the laptop and the all should work.
UPDATE: Camera Touch driver problem
If the Camera Driver included in teclast’s zip file doesn’t install, try with the one you find here: https://drive.google.com/file/d/0BzbYIaUEtrV7aVJkdGYwb3lGdUk/view?usp=sharing
more information in the following thread: https://techtablets.com/forum/topic/help-isp-camera-device-missing-driver/#post-14097
Comments
Anonymous
February 10, 2016
This is an excellent posting. Thank you. Would you have heard from anyone who's done it and reported back? One question. I just got this 3G version. Since this is dual boot would the 3G function still work from the Windows side? Sorry if this is a dumb question. I don;t know if there's a Windows app to use the 3G data connection (and phone although that's not really important) .Anonymous
February 14, 2016
The X98 pro I have is without 3G so I don't know... :(Anonymous
April 21, 2016
Just what I was looking for! Thanks!Anonymous
May 03, 2016
Hi. I have 2 questions.1. Is it a good idea to use Double Driver to backup and restore the drivers instead? Like Bill, I too have the 3G version and I can't seem to find the 3G modem driver anywhere. More importantly, all the drivers that are available for download are from seriously sketchy sources (I hate teclast).2. I re-read your article lots of times. One part I really don't get is, you said "remove them all" in the partition part. Don't you need to keep, like, a recovery partition?In my old notebooks there is always a recovery partition that is never to be touched. I reinstall windows by booting into that. In the case of Win 10, I think they use the recovery partition to do factory resets?I'm new to this tablet thing, coming from ancient Win7 notebooks. Your help is greatly appreciated. Thanks.Anonymous
May 22, 2016
The comment has been removedAnonymous
May 24, 2016
Hi,Very good post. I'd like to do the opposite, that is remove windows and leave only android. I have a teclast x80 pro. Any tip on how could I do it?Thanks in advanceP.Anonymous
July 22, 2016
Hi, does the guide work also for Teclast x98 Plus 3G?Or do you know any resources related to this tablet?Thanks ByeAnonymous
November 07, 2016
Hi there, many thanks for this excellent posting, for your help and your guide.I have upgraded BIOS in my K9C6 and I’ve done a clean “only” windows 10 installation. Tablet works now very fine and fast!!! But at startup appears again the option choise about the OS to load (even if Android there is no more….). Is it possible to bypass this passage?Many thanks. Best regards.Davide.Anonymous
July 17, 2017
Dear NicoThanks for your post. I tried exactly the way you said above on my Teclast X98 Pro K9C6. I face two problems:(1). Touchscreen does not work. I copied TouchSetting.gt (from root of the Teclast driver’s folder) to C:\WINDOWS\INF.(2). Display does not autorotate.If you know, could you please help me in this respect?


