Migrating to the Database Consolidation Appliance using the MAP Toolkit
In this blog, I will show you how you can use the MAP Toolkit to help you to migrate to the Database Consolidation Appliance (DBC). The MAP Toolkit provides an easy way to analyze your existing infrastructure and determine recommendations for migrating your existing servers.
References:
- Install the MAP Toolkit 6.5 from Microsoft Download Center.
- For detail information, see the HP Enterprise Database Consolidation Appliance Whitepaper
The main steps
- Perform an Inventory
- Collect Performance Data
- Generating an Assessment
Perform an Inventory
The first think you need to do is perform an inventory to capture information about Windows and SQL Server. See my Using the MAP Toolkit to discover SQL Server across the Enterprise posting on how to complete an inventory.
Collecting Performance Data
1. It is necessary to capture performance data so the MAP Toolkit to can perform an assessment to determine if a SQL Server instance can be moved to the DBC and how much resources would be needed to support. After you have performed an inventory, select the “GO” button next to Collect Performance Data to launch the Performance Metrics Wizard.
2. On the first dialog of the performance wizard, you choose how to provide a list of computers into the wizard. You can either choose the computers from a list, that has been generated from the inventoried computers or through a text file. I am going to select the computers from a list. Click Next to continue…
3. On the next page of the Performance Metrics Wizard page you select the computers that you want to gather performance data from. Currently the MAP Toolkit will only list computers that have captured performance data for SQL Server, since the consolidation assessment is only supported for SQL Server. In the filter box, you can search for certain machine or characteristics. For my blog, I am interested in capture performance data for my Windows Server 2003 machines, so I will enter Windows Server 2003. The wizard will provide instant results.
I will then select all of the machines and click Next.
On the next page, enter the administrator credentials that MAP can use to connect to the selected machines and then click Next.
On the Performance Collection Duration dialog, select the duration to collect perform data. The data and time that you set here is the end time of collect the performance data. The start time is when the wizard starts. Click Next after setting the end time.
Best Practices
- Gather Performance for at least 2 weeks
- Gather Performance data during peak usage such as end month processing
On the Summary page, you can see how many machines MAP will gather performance metrics from and how long the monitoring.
After clicking Finish, MAP will start to collect the performance data
Performance Metrics are gathered for the following resources: CPU, Memory, Physical Disk, Logical Disk, and Network.
Performing an Assessment
After the performance has been completed, select the Microsoft Database Consolidation Appliance node under Database. The details page will provide a summary of the assessment, including the following: the number of hosts that are required, number of required DBC racks, and virtual machine profiles. Each machine where performance data was gathered will be categorized into small, medium, and large virtual machine profiles.
If you would like to customize this assessment, select Custom assessment.
When you click on Customize assessment, this follow dialog displays where you can adjust the the virtual machine sizing.
If you would like to adjust the number of machines that are included in the assessment, click on the Microsoft Database Consolidation appliance Wizard.
After the Database Consolidation Appliance Wizard is launched, you are presented with the Hardware Configuration page for the appliances. Currently, just the appliance configuration for the “HP Enterprise Database Consolidation Appliance” is shown.
If you click on the View… button, the hardware configuration is displayed to you.
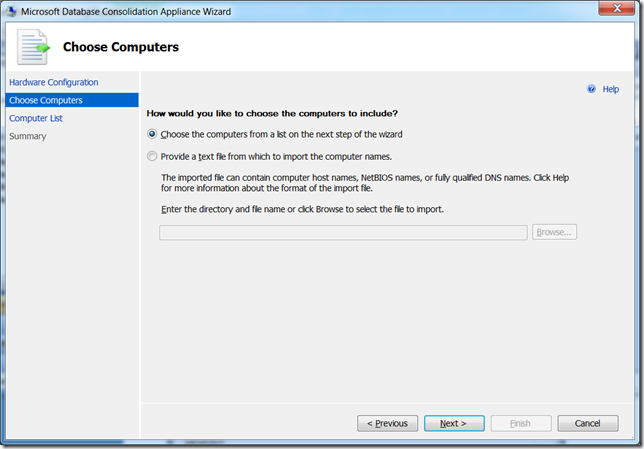
After clicking Next on the Hardware Configuration page, you are given a choice on how to select the computers. I will select “Choose the computers from a list on the next step of the wizard” and then click Next.
Select the computers that you wan to include in the assessment and then click Next.
Review the changes and then click Next.
Generate Report
To generate an Excel report contain the assessment results and performance data, click on the “Generate Report” link


