Git and Visual Studio 2017 part 4 : Branching
In previous article, we reset the changes we made. In this article, I will dig into branching.
Branch in Git
Branching can be considered a copy of entire repository. You typically use branch when you add some changes but keep the original project intact. If you can copy entire repository, then you can do whatever you want without worries too much, right? However if you physically copy entire repository, it make take some times and the disk usage doubled. This is where Git branch does great job.
Let’s add branch to see how it does.
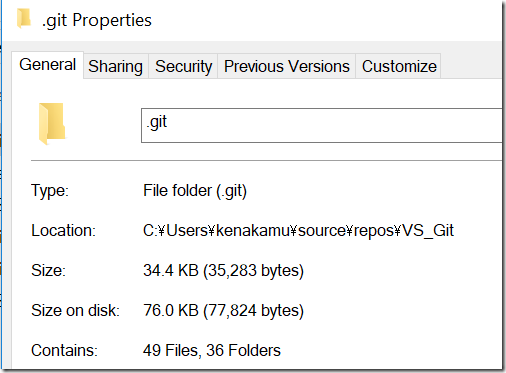
1. Before even create a branch, check the repository size and number of files and folders. There are 49 Files and 36 Folders in .git directory, and the size is 76 KB.
2. Run ‘git branch dev’ to create dev branch.
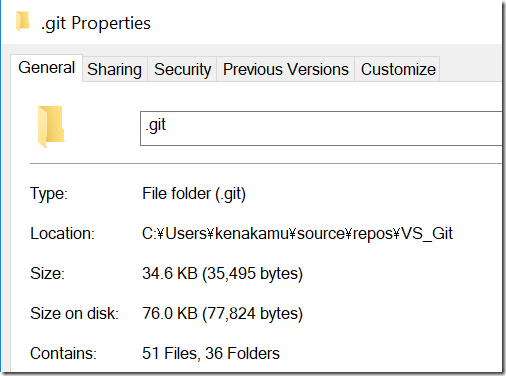
3. Check the .git folder property again. Only two files are added. What are those file? You can see “dev” file in .git\refs\heads and .git\logs\refs\heads directories.
4. Let’s see what the dev file contains. The file under refs\heads contains SHA1 hash value which is the latest commit. The one under logs contains history.
5. When you see .git\refs\heads\master, it points to same SHA1 hash. So when I create a branch, it didn’t copy any repository file, but simply add a file pointing to same SHA1 hash as current HEAD. This is why Git branching works very fast.
6. What happens when I switch the branch? Run ‘git checkout dev’, and see HEAD file. As you can see, it simply update HEAD file to pointing to dev branch file.
Commit in branch
Now I have dev branch in addition to master branch. Let’s see what happens when commit something.
1. Run ’git branch’ to make sure you are on dev branch.
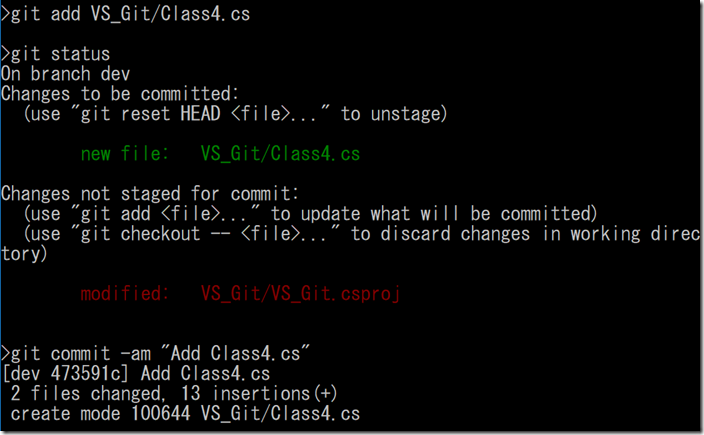
2. Add “Class4.cs” file to the solution and commit the change. As Class4.cs is brand new file, you cannot use ‘git commit -a’ option. You have to use ‘git add’ to explicitly move to staging area. Another important thing is to save all from Visual Studio as .csproj file is not saved automatically. I did specify file to add this time, and use commit -a option to stage and commit csproj file.
3. Run ‘git log --oneline --graph’ to see the history. HEAD points to dev branch, but it seems like adding another commit on top of existing one. Because it is ![]() .
.
4. Switch to master to see history again. Run ‘git checkout master’ and ‘git log --oneline --graph’. The latest commit (473591c) is not shown as it only lives on dev branch.
Delete branch
What happens if I delete dev branch at this moment?
1. Run ‘git branch -d dev’ to delete the branch. Git won’t let you delete it when you changed something but didn’t merge anywhere. Why? Because you may lose the change you did.
2. Run ‘git branch -D dev’ as error said to force delete it. I could delete the branch and Git kindly lets me know the commit SHA1 value.
3. Open Explorer to see if dev file is gone. And yes it did. So did we lose the “Class4.cs” file forever?
4. No it didn’t as Git won’t delete items for a while (90 days as I mentioned in previous articles). There are many ways to restore it depending on the situation. Run ‘git reset --hard 473591c’ and ‘git log --oneline’. I could restore the commit as I didn’t have any commit on top of master while I commit to dev branch. I will discuss this further in the future articles.
Branch operation in VS
Now it’s time to branch from Visual Studio. There are many ways to work with branch in VS, but my favorite one is from the status bar.
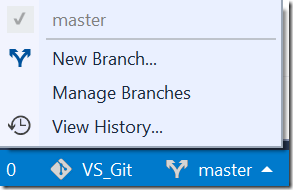
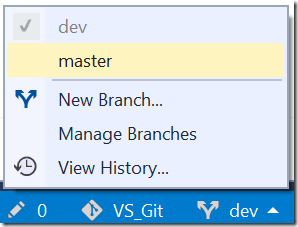
1. Check the branch icon on the bottom right. It shows current branch information.
2. Click master and click “New Branch”, which navigates you to Branch pane.
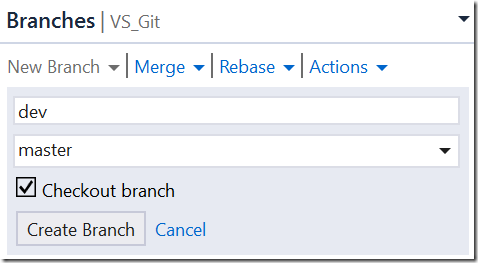
3. Enter name in the first text box, and select any branch in the dropdown box, where you want to make branch from. It means the branch you created will point to the same commit as the selected branch. You notice there is “Checkout branch” checkbox. If you check it, it will issue ‘git checkout -b dev’ command which create a branch and checkout. Click “Create Branch”.
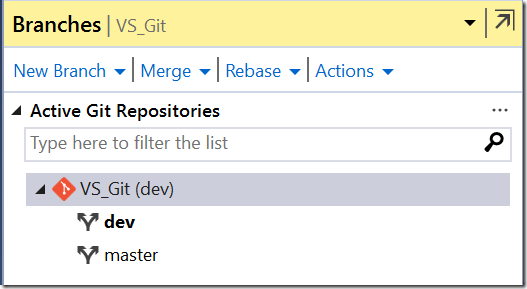
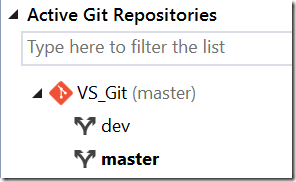
4. Once you created a new branch, you see two branches in Branches pane. Right click the master, then you can checkout, or you can easily checkout the branch from status bar. I, again, prefer to use the status bar as it is there all the time and easy to spot which branch I am on now.
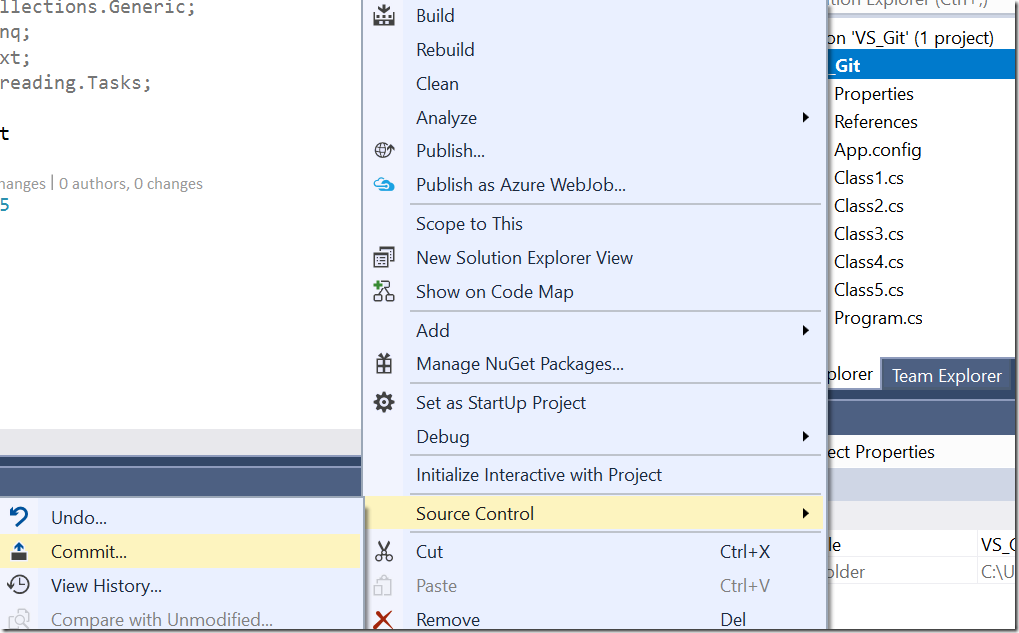
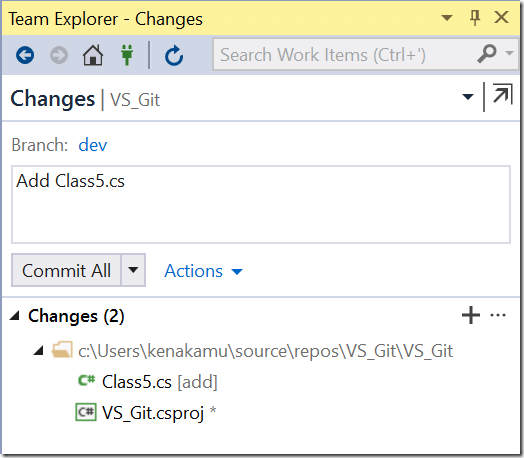
5. After you confirm you are on dev branch, add Class5.cs. Right click the project and select commit.
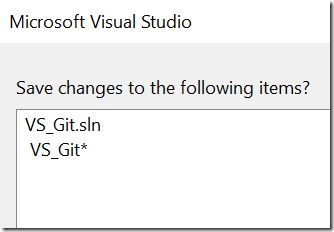
6. Enter commit comment and click “Commit All”. The great part of using Visual Studio is that it prompts you to save file if you didn’t ![]() .
.
7. See the history from Action menu. You see dev points to the latest commit and master still on the previous commit.
8. Okay, delete dev branch now. Go to Branches menu from Team Explorer, and right checkout to master.
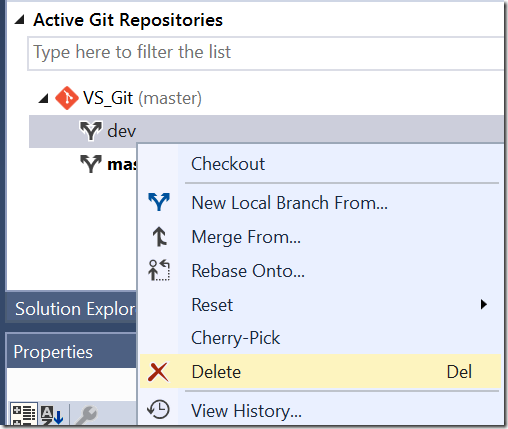
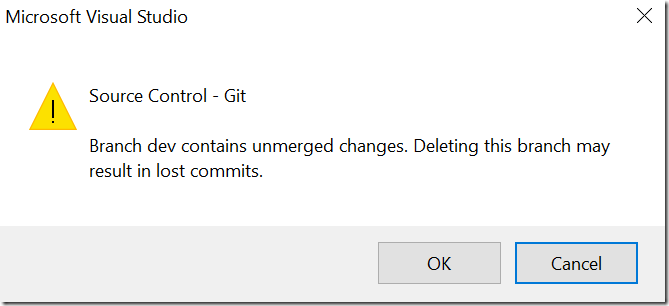
9. Right click dev branch and click Delete. Same as Git, VS warns me about unmerging change. Click OK will delete the branch, which is equivalent to ‘git branch -D dev’.
10. Same as previous article, I couldn’t find a way to restore deleted commit from VS. You can do it via Git though.
Restore branch
Finally, let’s think about how we can restore branch.
1. To illustrate this, I re-created dev branch and added two commits by adding Class5.cs and Class6.cs.
2. If I delete the branch at this point, it looks like this.
3. When I run ‘git reset --hard 096f270’, it restores all commit chains, but then master points to the latest commit. So how can I keep the master points to previous one (473591c) and restore dev branch points to 096f279?
4. Let’s move back to previous state by running ‘git reset --hard 473591c’
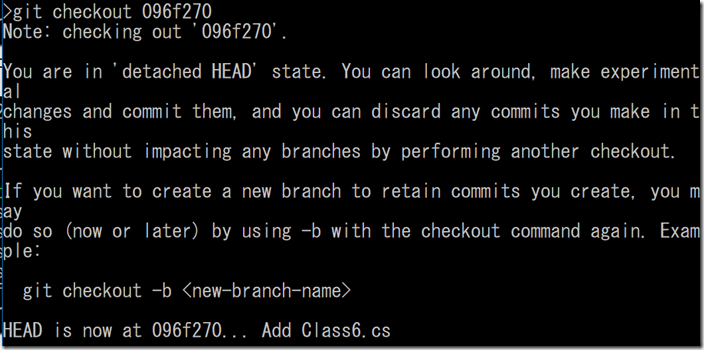
5. From here, run ‘git checkout 096f270’, which gives me a warning saying I am on ‘undetached HEAD’ state. This means I am on commit which no branch pointing to. You remember master is the only branch I have and it points to 473591c.
6. Run ‘git branch’. You see I am on commit 096f270 but not a part of any branch.
7. Run ‘git checkout -b dev’ and ‘git log --oneline --graph’. This seems restore the branch and its state. Why? The checkout -b command created a branch named dev, and keep all the commit, yay!
Summary
Visual Studio supports many branching features, but not everything. (Or at least I couldn’t figure it out.) One thing for sure is that even though you delete the branch you need, no worries too much, as Git will keep everything as long as you committed. As I did branch, I will investigate merging and rebasing in the next article. Go to next article.
Ken
