Deploying a VSTO Word 2007 add-in to All Users (Visual Studio 2008 SP1)
_____________________________________________
!!!! [PERFORM THIS STEP FIRST] !!!!
To be able to deploy an Add-in to all users (without manually installing for each user account on a machine) you must download and install https://support.microsoft.com/kb/976811 (A 2007 Office system application does not load an add-in that is developed by using VSTO);
To enable the hotfix package, follow these steps:
Unpublish and Save as Draft Publish
- Go to Start menu;
- Type regedit, and then press ENTER.
- Locate and then click the following registry subkey:
HKEY_LOCAL_MACHINE\SOFTWARE\Microsoft\Office\12.0\Common\General\
- On the Edit menu, point to New, and then click DWORD Value.
- Type EnableLocalMachineVSTO, and then press ENTER.
- Right-click EnableLocalMachineVSTO, and then click Modify.
In the Value data box, type 1, and then click OK.
Exit Registry Editor.
>>> You do not need this HotFix when creating VSTO 2010 add-in deployment projects from Visual Studio 2008 SP1. <<<
_____________________________________________
- For deploying an Add-in you have a couple of choices https://msdn.microsoft.com/en-us/library/wtzawcsz.aspx (Deploying Applications and Components):
– ClickOnce Deployment (https://msdn.microsoft.com/en-us/library/t71a733d.aspx) or
– Windows Installer Deployment (https://msdn.microsoft.com/en-us/library/2kt85ked.aspx);
_____________________________________________
You cannot use the ClickOnce approach to deploy an Add-in to all users because this method’s setup actions install the registry keys inside the active user account location (HKEY_CURRENT_USER).
- To be able to achieve the functionality that you desire, you must deploy your Add-in by using a MSI approach: https://msdn.microsoft.com/en-us/library/cc616991.aspx (Deploying a Visual Studio Tools for the Office System 3.0 Solution for the 2007 Microsoft Office System Using Windows Installer).
_____________________________________________
1. Open 'Visual Studio 2008';
2. Go to 'File' > 'New' > 'Project';
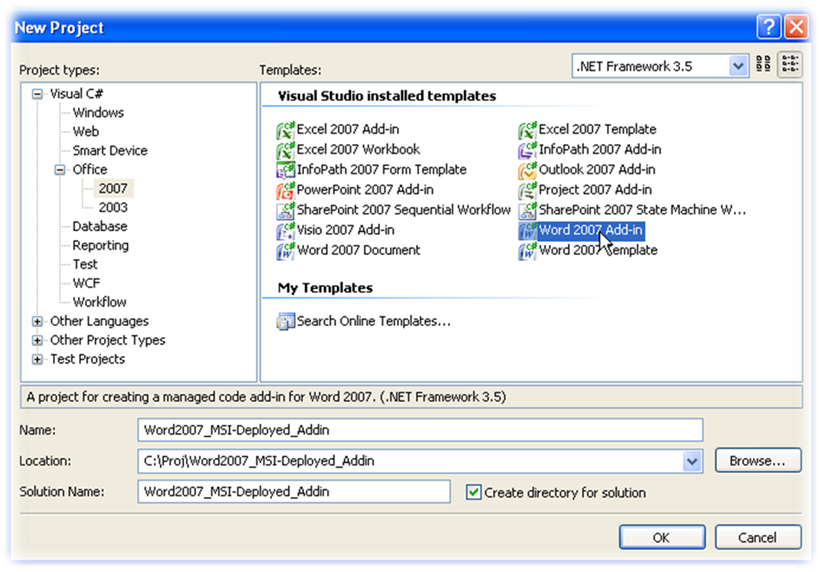
3. In 'Project Types' > go to 'Visual C# ' > 'Office' > '2007' and select 'Word2007 Add-in';
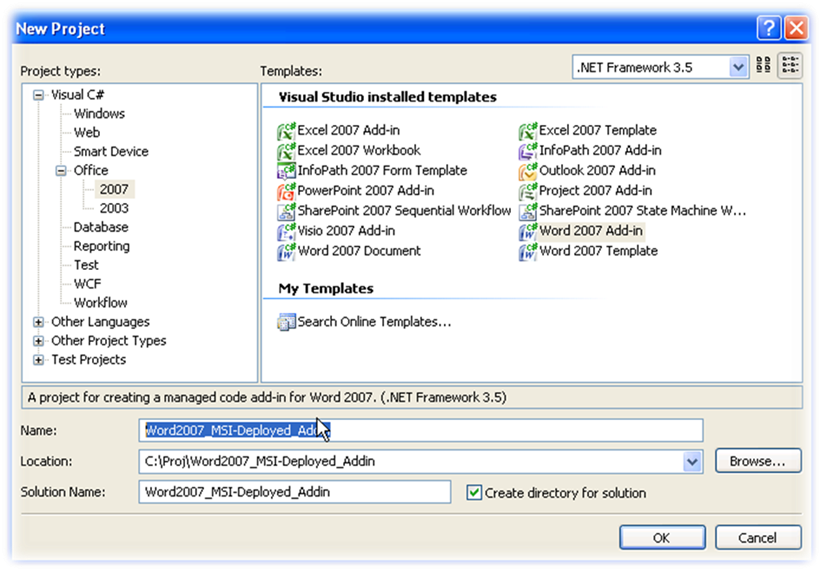
4. Choose a name for the project and click 'OK';
Add a ribbon and some test buttons to your Add-in (you can skip to step 5 if you do not want to perform these steps)
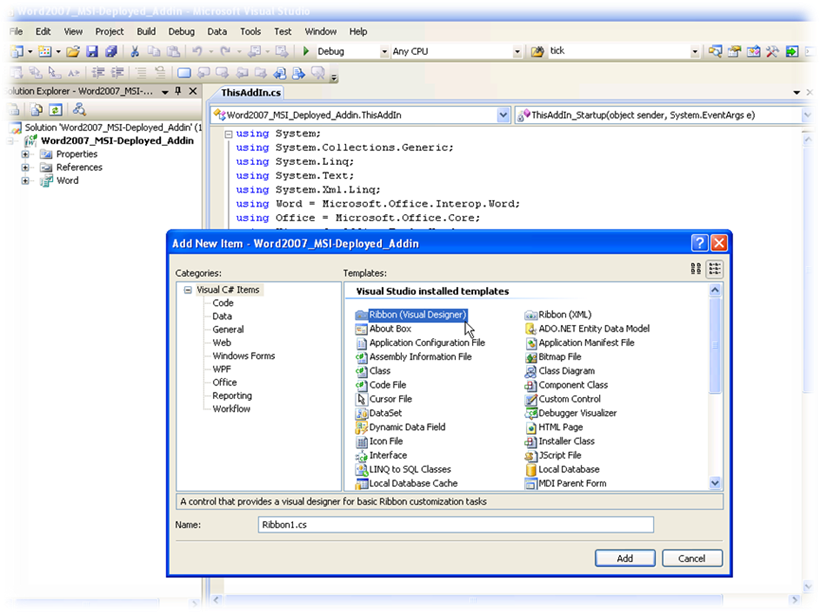
4.1 Right-click the Add-in project and from the context menu choose ‘Add’ then select ‘New Item… ’;
4.2 Inthe ‘Add New Item’ window, under the ‘Templates’ section, select the ‘Ribbon (Visual Designer) ’ template;
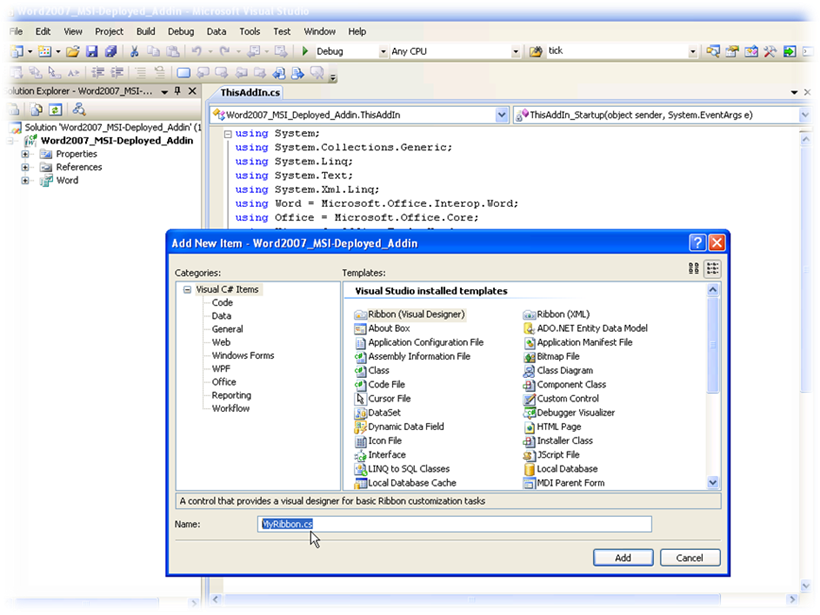
4.3 Type the desired name for the new ribbon component (for example ‘MyRibbon’), and click ‘Add’;
4.4 A visual editor appears, allowing you to customize your newly added component. Notice the ‘Toolbox’ on the right-hand side of the image below.
4.5 From the ‘Toolbox’, using your mouse, drag 3 buttons, a split-button and a separator into the Ribbon tab;
4.6 You can set the properties for each visual items added at the previous step using the ‘Properties’ window. Use the ‘Label’ property to set the name of each item.
Use the ‘OfficeImageId’ to attach icons next to these elements.
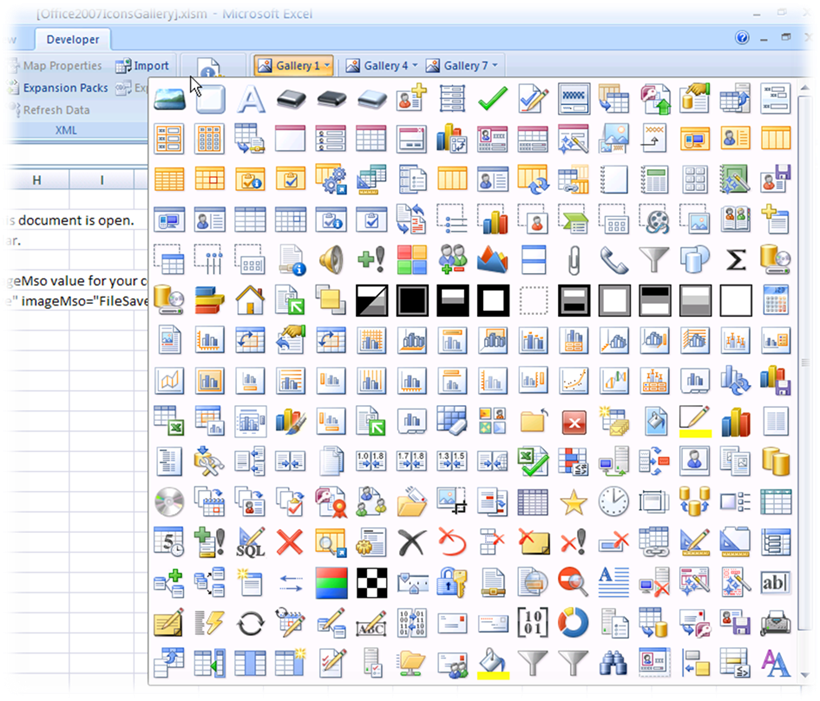
You have the choice of adding your custom images (on the ‘Image’ property, click ‘ (none) ’ and browse to a supported picture format) or using the Office built-in resources: go to https://www.microsoft.com/downloads/details.aspx?FamilyID=12b99325-93e8-4ed4-8385-74d0f7661318&displaylang=en and download the ‘Office 2007 Icons Gallery’.
(To install this download: 1. Download the file by clicking the Download link ( above ) and saving the file to your hard disk. 2. Double-click the Office2007IconsGallery.exe program file on your hard disk to start the installation. Follow the instructions to install the file.
Instructions for use:
Once you have installed this download, use Excel as you normally would.
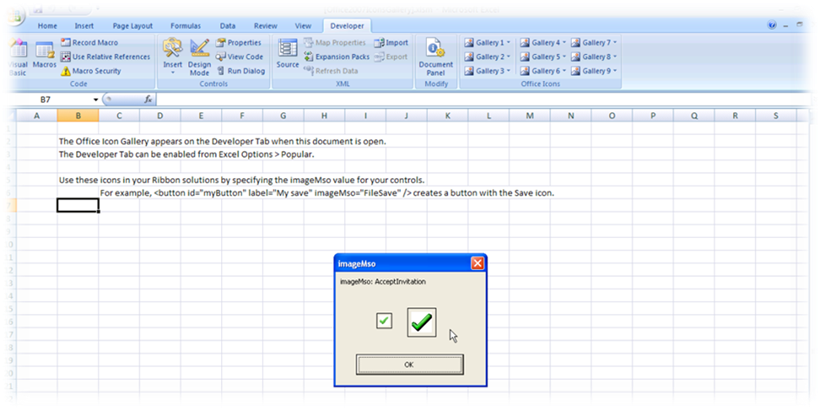
The Office Icon Gallery appears on the Developer Tab when this document is open.
Note: To enable the Developer tab, click the Microsoft Office button and then click Excel Options. In the Popular section, under Top options for working with Excel, select the Show Developer tab in the Ribbon. )
Select an icon from one of the 9 the Built-in galleries and click it. A pop-up dialog box will be shown. Copy the ‘imageMso’ code into the ‘OfficeImageId’ property belonging to your object. After you build and run the Add-in project your visual elements will have that image displayed as an icon.
To add information into the drop-down visual elements (a ‘gallery’ control in our example), just click it to access its property window, and go to ‘Items’ from the list;
Click ‘ (Collection) ’ and the ‘DropDownItem Collection Editor’ will appear. Use the ‘Add’ button to insert new elements. You can also modify their icons just as you did at the previous steps (using ‘OfficeImageId’ property).
You can set actions for the buttons you just added.
Double-click the button, or select it and from the Properties menu, select the Events actions and click the dropdown menu corresponding to the Click event…
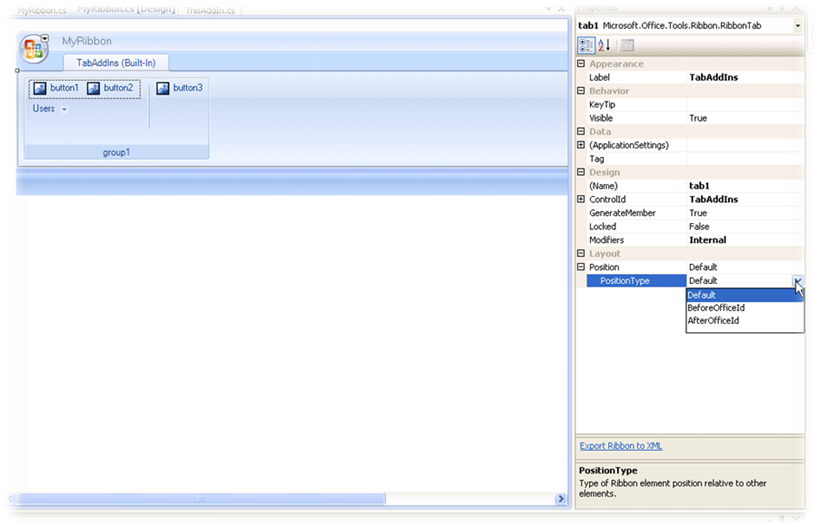
To make your tab appear first and therefore replace ‘Home’ tab making it the first one seen by your user, click the tab from the Ribbon visual designer and go to ‘Position Type’ property. Set its value to ‘BeforeOfficeId’.
After you change ‘Position Type’ from default value, a new property will be available: ‘OfficeId’.
Select the ‘OfficeId’ property and set it to ‘TabHome’.
Caution: the built-in tab names are key sensitive. Setting the OfficeIdproperty to TabHomevalue will correctly position your tab before the Home tab. If you set the OfficeId as tabHome , your new tab will be placed at the end of the built-in tabs list.
Next, select the ‘ControlIdType’ property and choose ‘Custom’from the drop-down list.
This action will make your custom tab to be displayed before ’Home’ tab.
4.7 Run the Add-in. Set it to ‘Release’ configuration, and press ‘Start Debugging’
4.8 Running the Add-in for the first time:
You should see this Ribbon customization as the first tab.
_____________________________________________
Make sure you set the build configuration to release
5. In the ‘Solution Explorer’, right-click the Add-in Solution and click 'Configuration Manager' to show the build configuration manager for the Visual Studio solution.
6. In the 'Configuration Manager' dialog box, for 'Active Solution Configuration', select 'Release'.
_____________________________________________
Adding a deployment project
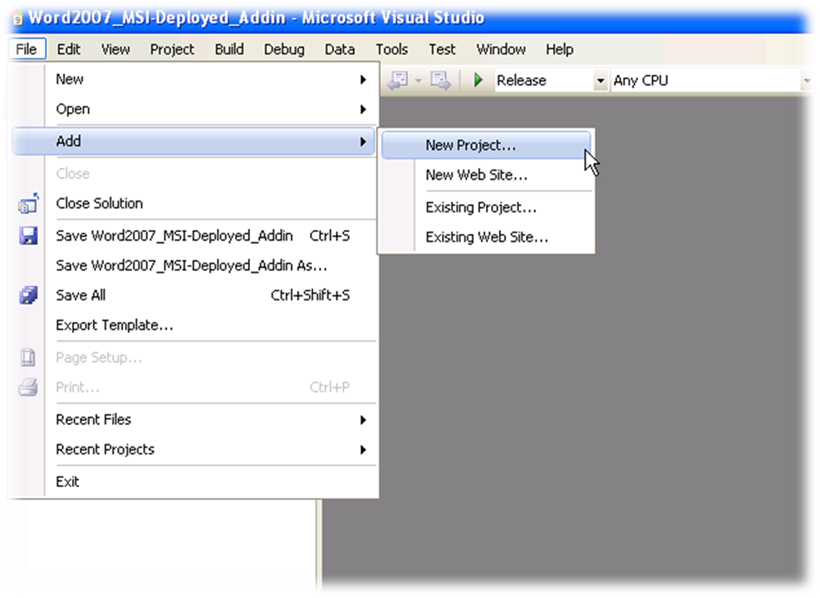
7. On the 'Visual Studio 2008'>'File' menu, expand 'Add' and click 'New Project' to add a new project.
8. In the 'Add New Project' dialog box, in the 'Project types' pane, expand Other 'Project Types' and then select 'Setup and Deployment'.
9. In the 'Templates' pane, select 'Setup Project' from the 'Visual Studio installed templates' group.
10. Type a name and click 'OK' to finish this step and create the new setup project.
_____________________________________________
To add the Add-in project output to the setup
11. In the 'Solution Explorer', right-click the setup project, click 'Add' and then 'Project Output'.
12. In the 'Add Project Output Group' dialog box, confirm that the AddIn project is selected, and the 'Primary Output' option is selected.
13. Click 'OK' to add the project output to the setup project.
_____________________________________________
To add the deployment and application manifests
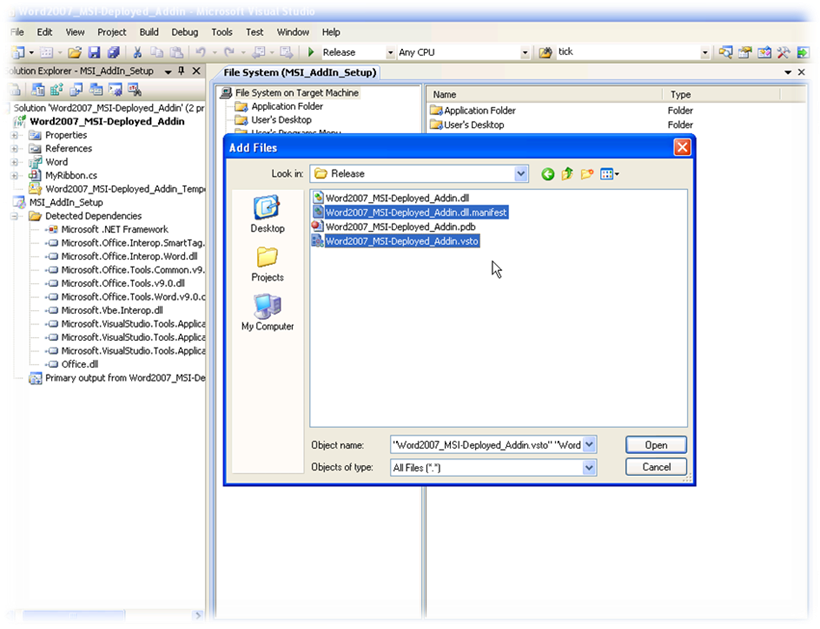
14. In the Solution Explorer, right-click the setup project, click 'Add', and click 'File'.
15. In the 'Add Files' dialog box, navigate to the Word AddIn output directory. Usually the output directory is the 'bin\release' subfolder of the project root directory, depending on the selected build configuration.
16. Select the ' [WordAddinName].vsto' and ' [WordAddinName].manifest' files and click 'Open' to add these two files to the setup project.
_____________________________________________
Excluding Dependencies
Referencing the components that Word AddIn requires: These components must be excluded and deployed using prerequisite packages to allow them to be registered correctly.
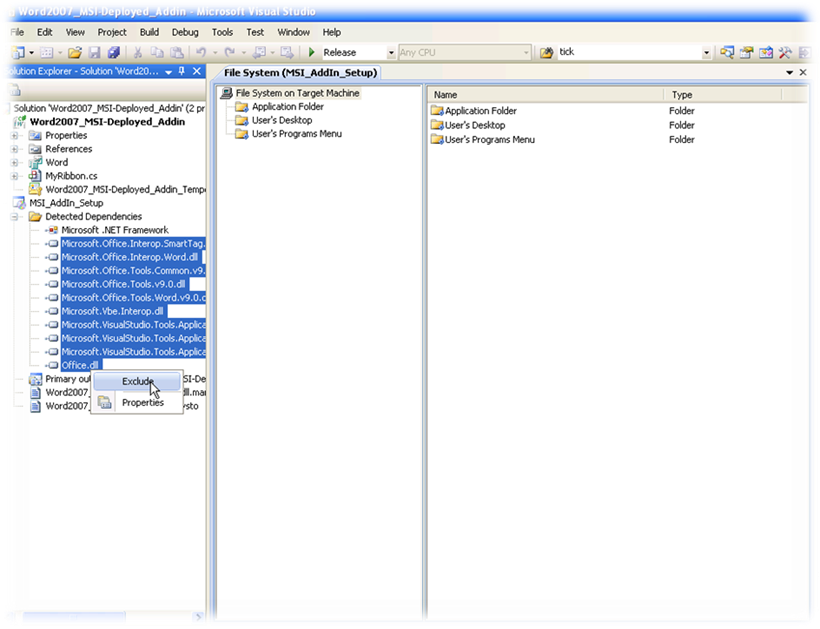
17. To exclude the Word AddIn project dependencies, in the 'Solution Explorer', in the Word AddIn setup node, select all dependency items beneath the 'Detected Dependencies' item except for Microsoft .NET Framework.
18. Right-click the group and select ‘Properties’, change the 'Exclude' property to 'True' to exclude the dependent assemblies from the setup project.
_____________________________________________
To configure dependent components as prerequisites
19. In the 'Solution Explorer', right-click the Setup project and select 'Properties'.
20. Click 'Prerequisites'.
21. In the ‘Prerequisites’ dialog box, perform the following tasks.
22. Select 'Create setup program to install prerequisite components'. This creates the 'setup.exe' bootstrapper together with the MSI file.
23. In the 'Choose prerequisites to install' list, select the following: 'Windows Installer 3.1', ' .NET Framework 3.5', '2007 Microsoft Office Primary Interop Assemblies', 'Visual Studio Tools for the Office system 3.0 Runtime'.
24. For 'Specify the install location for prerequisites', select 'Download prerequisites from the component vendor's web site’.
25. Click 'OK' to close the 'Prerequisites' dialog box.
_____________________________________________
Configuring the required registry keys
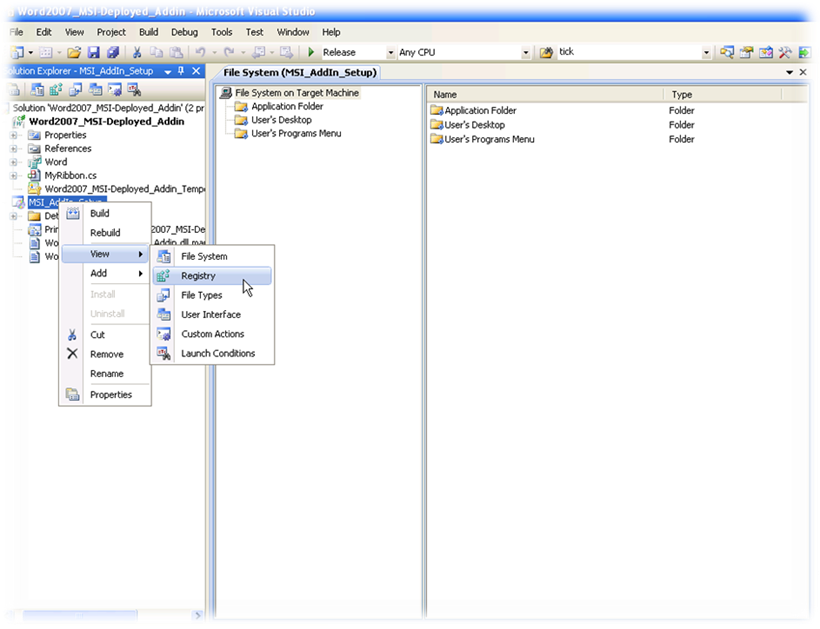
26. In the 'Solution Explorer', right-click the Setup project.
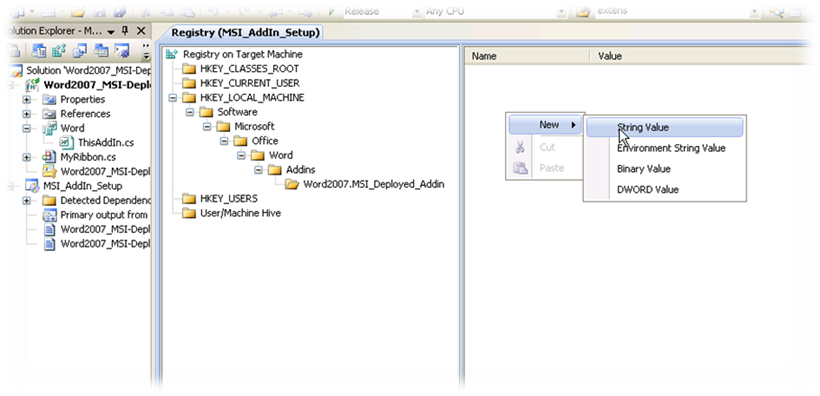
27. Expand 'View', click 'Registry'.
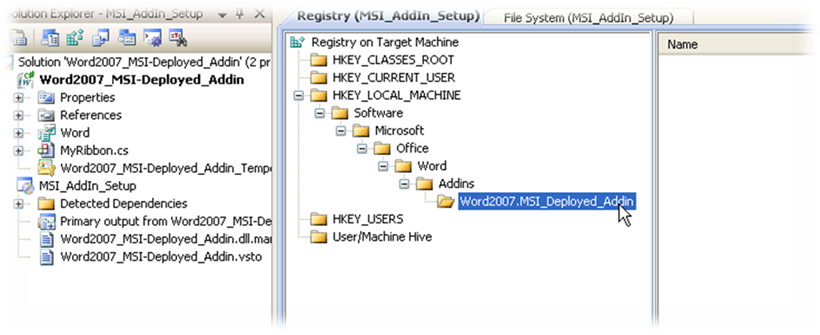
28. In the Registry editor, expand HKEY_LOCAL_MACHINE and then Software.
29. Create the key hierarchy required for the add-in registration: HKEY_LOCAL_MACHINE\Software\Microsoft\Office\Word\Addins\SampleCompany.WordAddInName
30. Right-click the 'SampleCompany.WordAddInName' key, select 'New' and click 'String value'.
Use these steps to add three more values. Use the following names and data type:
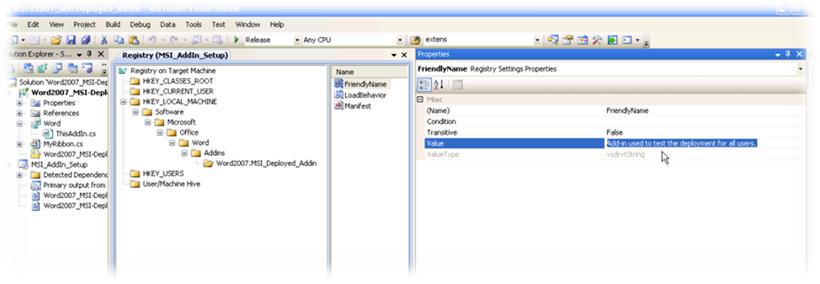
- 'FriendlyName' of type 'String',
- 'LoadBehavior' of type 'DWORD',
- 'Manifest' of type 'String'.
31. Right-click the 'Description' value in the registry editor and click 'Properties' Window. Enter a text that will be displayed as a description in 'Control Panel'.
32. Select the 'FriendlyName' key in the registry editor. Enter a text that will define the name of the Addin in 'Control Panel'.
33. Select the 'LoadBehavior' key in the registry editor. In the 'Properties' Window, change the 'Value property' to 3. The value 3 for the LoadBehavior value indicates that the add-in should be loaded at startup of the host application.
34. Select the 'Manifest' key in the registry editor. In the Properties Window, change the Value property to [TARGETDIR]WordAddInName.vsto|vstolocal
35. In the Registry editor, right-click the 'SampleCompany.WordAddInName' key and click 'Properties'. Set the value of 'DeleteAtUninstall' to 'True' to ensure that the registry keys are deleted when the Visual Studio Tools for Office add-in is uninstalled.
36. Right click the Word Add-in project > select 'Build' and then perform the same step for its setup project.
37. Go to the directory where the Visual Studio editor has saved your Add-in solution, then navigate to [Setup Project] folder, then go to 'Release' and you will find the '.MSI' installer and the 'setup.exe' deployment files.
_____________________________________________
For more information, please visit:
- https://msdn.microsoft.com/en-us/library/cc563937.aspx#VSTO3SolutionPart1_KnownIssues (Deploying a Visual Studio Tools for the Office System 3.0 Solution for the 2007 Microsoft Office System Using Windows Installer (Part 1 of 2) )
- https://msdn.microsoft.com/en-us/library/cc616991.aspx (Deploying a Visual Studio Tools for the Office System 3.0 Solution for the 2007 Microsoft Office System Using Windows Installer (Part 2 of 2) )
_____________________________________________
Download this tutorial: https://blogs.msdn.com/cfs-file.ashx/__key/CommunityServer-Blogs-Components-WeblogFiles/00-00-01-41-69/4456.Word-VSTO-2007-Add_2D00_In-Deployment-For-All-Users.pdf
Word VSTO 2007 Add-In Deployment For All Users.pdf
Comments
- Anonymous
November 19, 2010
The problem with this (Create Setup project, set Reg to LOCAL_MACHINE) installation is:Admin install Ribbon for All Users--> Admin startExcel --> Ribbon is loaded = okeUser start Excel --> popup if he wants the Ribbon: Yes --> User have Ribbon = okeAdmin opens Excel --> Ribbon is loaded --> Do:Option/Addins --> Addin-COM --> GO --> Unsellect the Ribbon --> No ribbon in Excell= OKUser starts Excel --> No Ribbon = Not Oke. Ribbon is for all users, but when the admin/other user unsellect the ribbon, all users don't have the ribbon.If the user want to sellect the ribbon insite Excel, he needs tobe Admin to load the ribbon.Question: Is it possible to have the loadbehavoir on Currect_User level and file directory (Manifest) on LOCAL_MACHINE level? So every User can load or unload the ribbon without Sellecting this option for all users.Thanks if you find the fixGr Hans - Anonymous
November 28, 2010
Hello Hans, Instaling the addin registry entries to:HKEY_LOCAL_MACHINESoftwareMicrosoftOfficeWordAddinsSampleCompany.WordAddInName will make it load for all users on the target machine. However, if certain users do not wish to load the add-in, you can modify the add-in setup project to deploy and additional key to each user's specific registry hive:HKEY_LOCAL_MACHINESoftwareMicrosoftOfficeWordAddinsSampleCompany.WordAddInNameLoadBehavior = 3HKEY_CURRENT_USERSoftwareMicrosoftOfficeWordAddinsSampleCompany.WordAddInNameLoadBehavior = 3After this modification, the registry setting from HKEY_CURRENT_USER will overwrite the one from the machine level.Therefore, on the administrator account, if he wishes to unload the add-in, his keys will look like this:HKEY_LOCAL_MACHINESoftwareMicrosoftOfficeWordAddinsSampleCompany.WordAddInNameLoadBehavior = 0HKEY_CURRENT_USERSoftwareMicrosoftOfficeWordAddinsSampleCompany.WordAddInNameLoadBehavior = 2On the normal user account:HKEY_LOCAL_MACHINESoftwareMicrosoftOfficeWordAddinsSampleCompany.WordAddInNameLoadBehavior = 0HKEY_CURRENT_USERSoftwareMicrosoftOfficeWordAddinsSampleCompany.WordAddInNameLoadBehavior = 3 The add-in will load at start-up for the normal user accounts even though administrator choose to modify the machine-level LoadBehavior setting value.============================================================================= Caution: setting the HKEY_LOCAL_MACHINE LoadBehavior to 0 will no longer show the add-in installer prompt to the new user accounts that are created after installing the add-in. Even if you manually set (from the admin user account) the HKEY_LOCAL_MACHINE LoadBehavior to 3, when you open Word, it will see that you chose to unload the add-in (remember that HKEY_CURRENT_USER LoadBehavior = 2 takes precedence) and it will set HKEY_LOCAL_MACHINE LoadBehavior back to 0. To keep this feature, the administrator should leave the machine level LoadBehavior = 3 (continue to work with the add-in enabled on his account) , or set its machine-level LoadBehavior to 0 (disable the add-in for his user account) but run a logoff script that sets it to 3 again in order for the other un-privileged user accounts to be able to install the add-in when opening Word for the first time.I hope this answer works for you. I will post a separate blog article for this in order to make it easier to understand.Thank you,Cristian - Anonymous
April 08, 2013
Thanks for the details. Will the same steps work for word-2010 on Win-7 machine. I have 32 bit word on a machine which has 64 bit Win-7 as OS. Kindly help with registry settings too

