Complete guide to setting up Power BI connecting to Postgres w/ refresh enabled.
You may or may not have seen but Microsoft announced a couple new database services, namely Postgres and MySQL. What's unique about these two database services is they work very similar to SQL Azure, in particular there is no VM for you to provision or manage. When you provision the resource you get an endpoint to connect to that allows you to create databases and the content on those databases. I was recently working on a scenario that needed to leverage the new Postgres service from Power BI, and while connecting everything works, it was not as straightforward as I expected.
In my endeavors I had to wade through four different sources to piece everything together, so in the interest of saving you time here are the complete steps to getting Power BI Desktop to connect to Postgres plus setting up the gateway service so you can refresh a published model from the Azure Postgres service.
As I mentioned, I pieced together a variety of sources to get to the correct steps. I referenced a series of both community blogs and azure documentation to get this running, those sources are (and what I got from each):
-
-
- https://community.powerbi.com/t5/Community-Blog/Configuring-Power-BI-Connectivity-to-PostgreSQL-Database/ba-p/12567 - This source covers the prerequisites necessary for connecting to Postgres but not specifically the Azure Postgres Service
- https://community.powerbi.com/t5/Integrations-with-Files-and/Azure-PostgreSQL-Direct-Query/td-p/308220 - At the end of this post there is commentary specifically about needing the 3.1.8 version of the driver.
- /en-us/azure/postgresql/concepts-ssl-connection-security - this covers the specifics of getting the appropriate certificate and installing it for connecting to Postgres on Azure.
- https://community.powerbi.com/t5/Integrations-with-Files-and/Connecting-to-PostgresSQL-hosted-on-AWS-RDS/m-p/135666 - this is where I got the tip to use the trusted root CA (appdata directory config in the previous article isn't appropriate for the gateway).
-
Since there are a ton of steps here, I've broken it into a few logical parts. This keeps things better organized and helps you skip over sections that are irrelevant to your scenario. The parts are:
-
-
- Part 1 - Provision your Azure Postgres Database and install the components for connecting to Postgres
- Part 2 - Register the appropriate certificate so SSL connections to Postgres work.
- Part 3 - Connect to your Postgres database with Power BI Desktop.
- Part 4 - Setup and configure the Power BI Gateway for cloud refresh.
-
Part 1 - Provision your Azure Postgres Database and install the components for connecting to Postgres
In case you haven't provisioned an Azure Postgres database, here are the basic steps to creating a new instance of the Postgres database service via the Azure Portal.
-
-
- Login to the Azure Portal, and select "Create a resource"

- Search the marketplace for "Azure Postgres", and select the top search result. (Note: there are several other marketplace templates for Postgres, but for the purposes of this blog I'm focusing on the Azure Database for PostgreSQL)

- Click "Create"
- Fill out the form for the new server including the Server name, Resource group, Server admin login name, password, and click "Create". (Note: there are other settings here like the Postgres version and the number of cores, but they aren't important to this scenario).
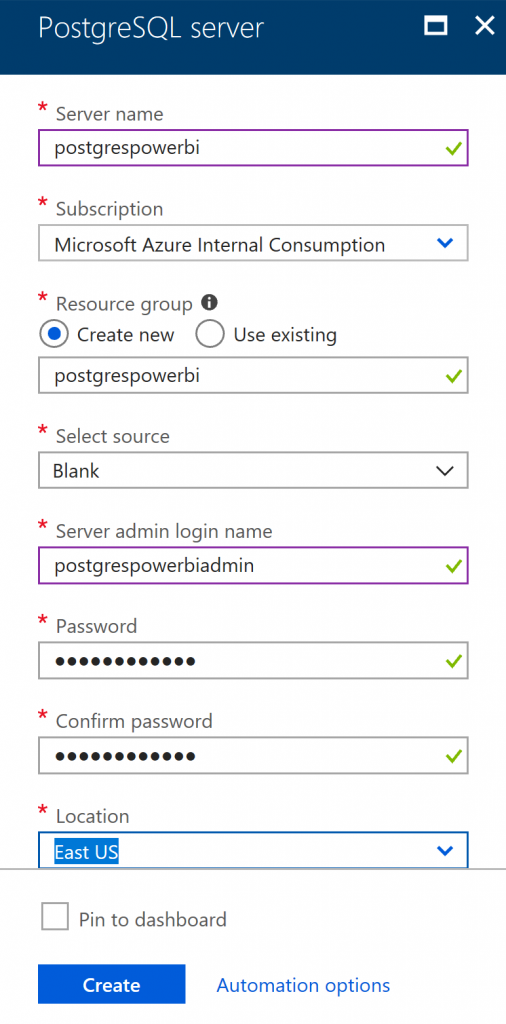
- While your database is being provisioned there are a couple of things you can go ahead and setup.
- Install Npgsql 3.1.8 via the MSI (note this is version specific), you can find the installer here: https://github.com/npgsql/npgsql/releases/tag/v3.1.8
- By default the postgres service has SSL enabled. You need to download and trust a specific certificate so SSL communication will work. (you could turn off SSL for the server in Azure, but that's cheating).
- Login to the Azure Portal, and select "Create a resource"
-
Part 2 - Register the appropriate certificate so SSL connections to Postgres work.
There official version of these instructions can be found here: /en-us/azure/postgresql/concepts-ssl-connection-security. These directions are intended to be generic and therefore cover many scenarios. Since the directions are a bit terse and interleave linux directions with windows directions, I decided to give you an abbreviated step by step specific to Windows (Note: Power BI and the Gateway presently only run on Windows):
-
-
- Download the encrypted cert from: https://www.digicert.com/CACerts/BaltimoreCyberTrustRoot.crt.
- Download and install openssl to decrypt the cert https://slproweb.com/download/Win32OpenSSL_Light-1_1_0h.exe.
- Run the command: openssl x509 -inform DER -in BaltimoreCyberTrustRoot.crt -text -out root.crt (Note: depending on where you install openssl and/or where you dowloaded the .crt file to you may need to amend this command to deal with paths.)
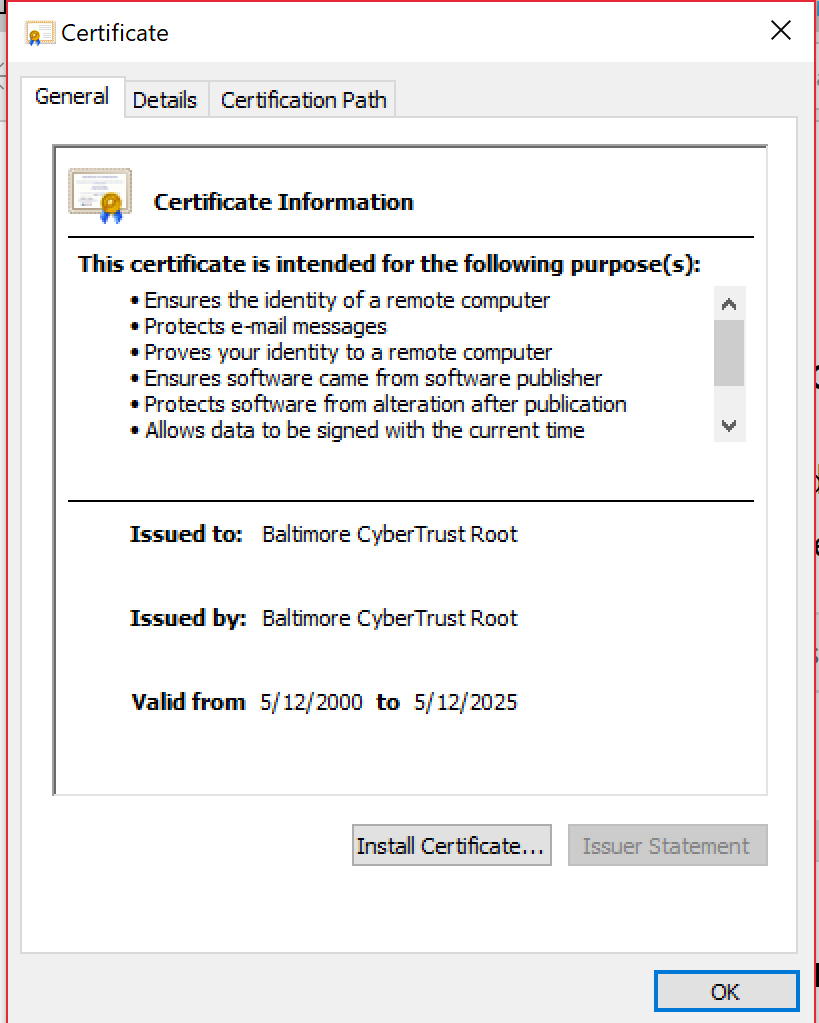
- Double click on the created root.crt file, you'll be presented the certificate info. Click "Install Certificate…"
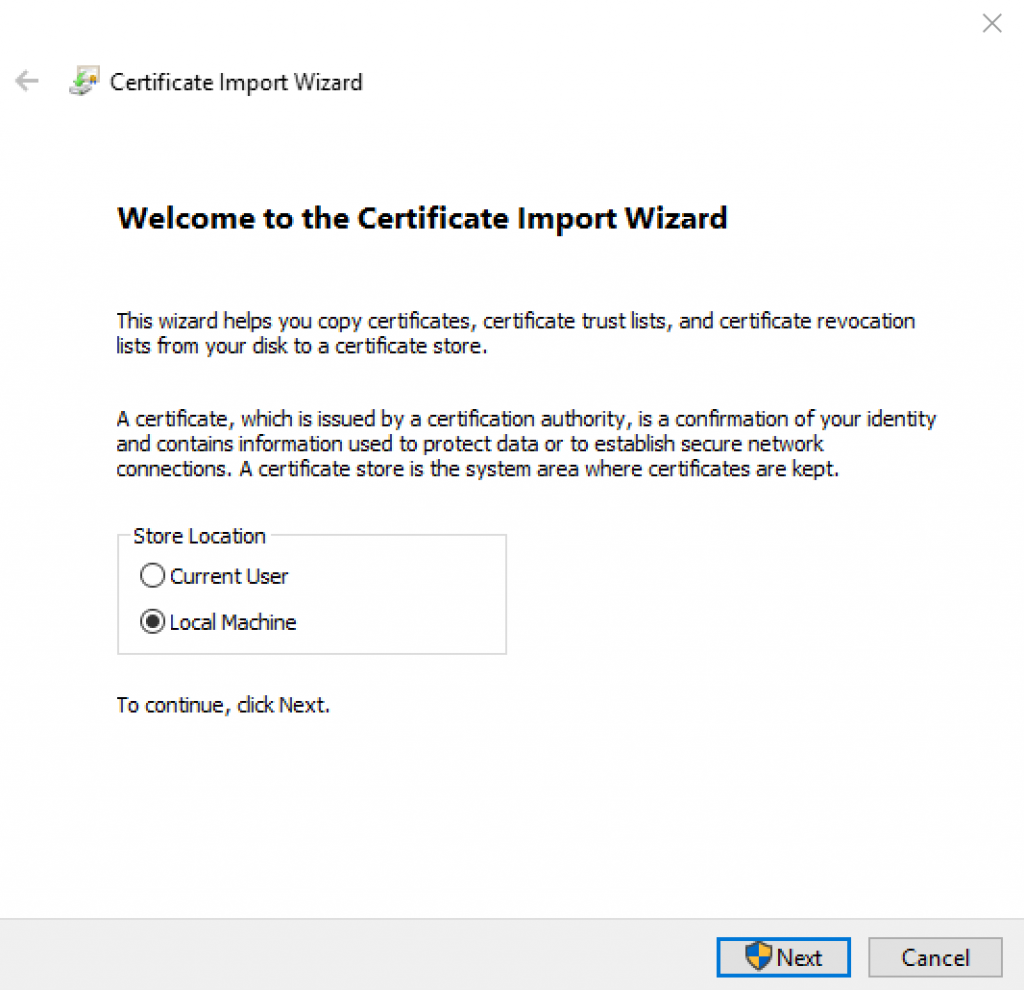
- Select "Local Machine", and click "Next"
- Select "Place all certificates in the following store", and "Browse"
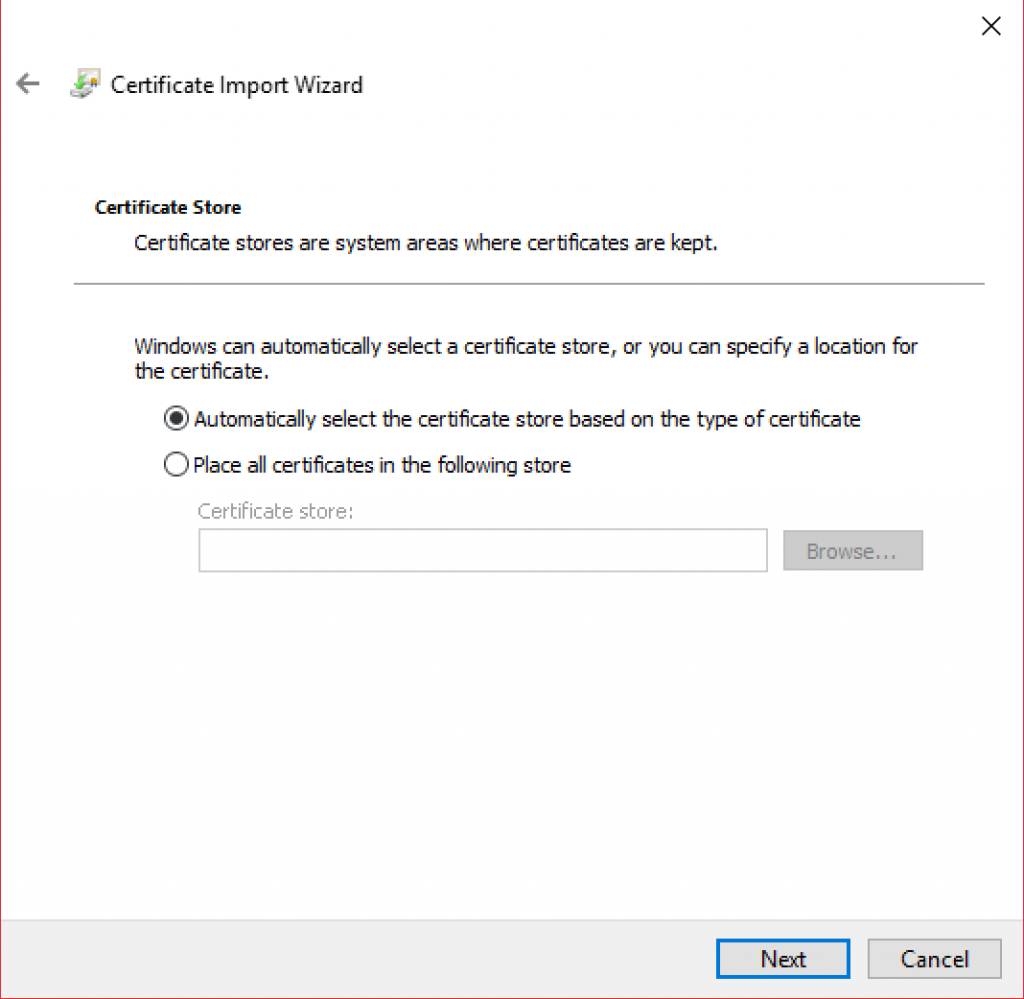
- Select "Trusted Root Certification Authorities", and click "Ok"
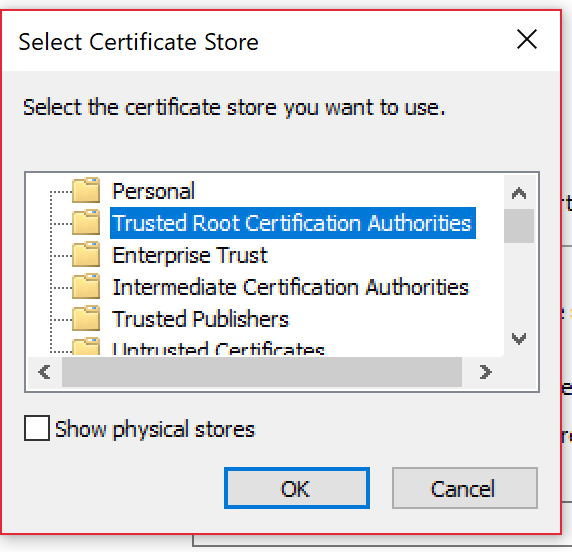
- Click "Next".
- Click "Finish".
-
Part 3 - Connect to your Postgres database with Power BI Desktop
Now that we've installed all the prerequisites I'm going to walk through all the steps necessary to connect to the database. Since this blog is largely about Power BI, I'm going to make the wild assumption that you already have Power BI Desktop installed. Once it's installed here are the steps:
-
-
- Let's go to the azure portal for a bit to grab and configure things, login to the portal if you don't still have it open, and navigate to the Postgres resource you created
- Take note of the "Server name" and "Server admin login name", you'll need these for the gateway config. Second, click on "Connection security", and add a firewall rule for the IP address of your machine running Power BI Desktop. The easiest way to do this is with "Add Client IP", then make sure you save your changes.
- Now launch Power BI Desktop.
- Use the "Get Data" menu to select a data source and select "More…"

- Select "Database" and "PostgreSQL Database" and click "Connect"
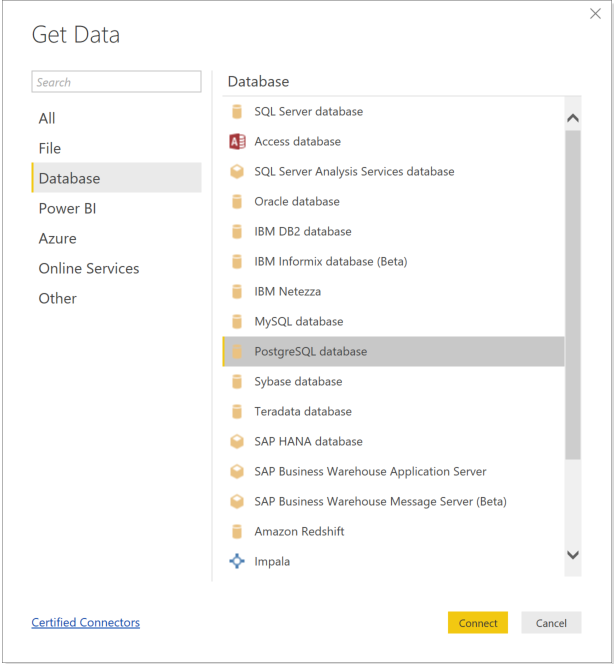
- Enter the server name you made note of in step 1, and the database name. (Note: for my purposes I'm just using the default database postgres as I'm only proving the scenario works).

- Enter your username and password, and click "Connect" (Note: the username needs to be in the format username@servername)

- In the data source navigator, select the tables you want to include in the model and click "Load".

- Check the "Fields" pane to ensure you've got some tables in your data model.

- You're done, save a local copy of the file for later publishing, or publish directly to Power BI using the "Publish" button.
-
Part 4 - Setup and configure the Power BI Gateway for cloud refresh
At this point all you have a Power BI model connected to Postgres, but most companies I talk to actually want to publish their models, share them with others, and most importantly do some sort of a scheduled refresh on the data. In order to do this you're going to have to setup the Power BI Gateway somewhere. This gateway can be installed on a Windows machine ranging from your personal desktop to a server. The most important things are that the machine should be on all the time, and it should have internet connectivity; therefore, installing it on your laptop is typically not a good idea. I chose to provision a Windows VM in my Azure subscription. Once you've decided where you're going to install the gateway here are the steps to get it running:
-
-
- Go through all the steps in "Part 2" again on the gateway host machine. (Pro Tip: You've already decrypted the certificate with OpenSSL on your Power BI Desktop machine, so you can bypass steps 2 & 3 by copying the root.cer file to the target machine).
- Download and install the Power BI Data Gateway from: https://powerbi.microsoft.com/en-us/gateway/ and click "DOWNLOAD GATEWAY"

- In the installer, you can accept all the defaults. In particular, make sure you select this option in the installer

- Once the install is complete you'll be taken through the configuration steps. First enter the email address you use to login to Power BI and click "Sign In"

- Next, select "Register New Gateway" (Note, the other option is useful if you need to migrate a gateway to another machine or are rebuilding a machine).
- Now you need to configure your gateway by giving it a unique name so you can find it in the Power BI Portal, and set your recovery password which is necessary if you ever need to move / restore your gateway. (Note: for more advanced install scenarios you can add your gateway to a gateway cluster enabling high availability for the gateway).

- Gateway installation and configuration is complete, you should see a screen like:

- Now that the gateway is installed, we need to register the datasource with the gateway. This is done in the Power BI portal.
- Login to www.powerbi.com, and on your main screen select manage gateways, you'll find this under the settings gear.

- This will take you to the Add Datasource page, select the gateway corresponding to the name you gave the gateway in step 6.

- Click the ellipsis (…) and select "ADD DATA SOURCE"

- Name your datasource and pick the appropriate type.
- Just like we did with Power BI Desktop, lets jump over to the azure portal for a bit to grab and configure things. First, take note of the "Server name" and "Server admin login name", you'll need these for the gateway config. Second, click on "Connection security", and add a firewall rule for the IP address of your gateway server.

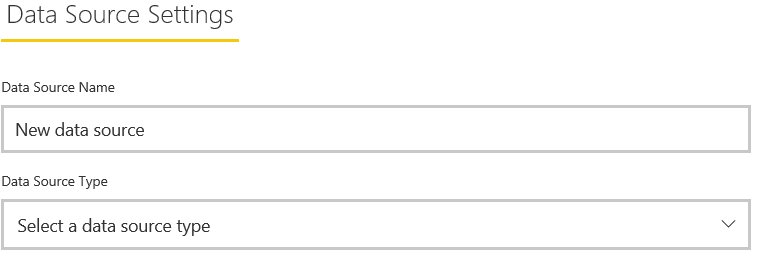
- Fill out the necessary server and database settings, for my purposes I just used the default database to prove it works. (Note: Pay close attention to the fact that the admin login is username@servername), and click "Add"

- Note, if you get the following error its typically because you entered your password wrong, or you didn't add a firewall rule:

-
Ok, you're all finished. Now when you decided to publish your Power BI Desktop file to the Power BI portal, you'll be able to manually refresh or setup a scheduled refresh on the data. At refresh time Power BI will use the gateway server to connect to the database and issue queries using the correct driver and feed the results back to the Power BI Service.