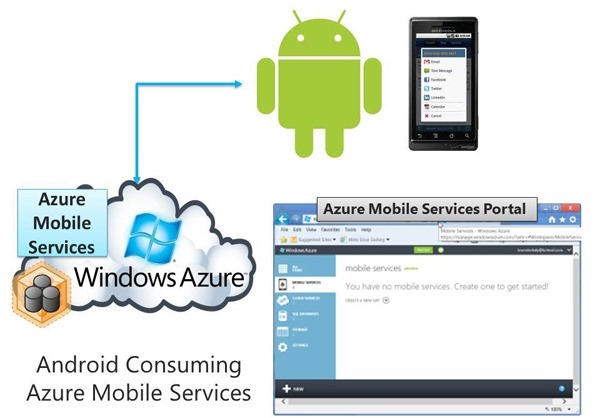
Part 2 of 4: Introduction to Consuming Azure Mobile Services from Android
Next steps
- The next post will cover the following:
- Adding data to a relational database
- Understanding the application key
- Creating a database and a table
- Managing the database through the portal
- Modifying table structures (adding columns)
- Inserting data into the table (TodoItem table)
Previous Posts
You will need a trial account for Windows Azure
- Please sign up for it here:
Note the name of our created service
- Service Name
- BrunoToDoService
- URL
- Next Steps
- Click on BrunoToDoService to prepare to have client applications connect to it.
Managing Our Service (brunotodoservice)
- Do the following:
- Click on CREATE A NEW WINDOWS STORE APP
- This will be just a way to see how data can be added
- It isn't the only way, but it will be the way for this post
- Click on CREATE A NEW WINDOWS STORE APP
- A future release will provide direct support for iOS and Android
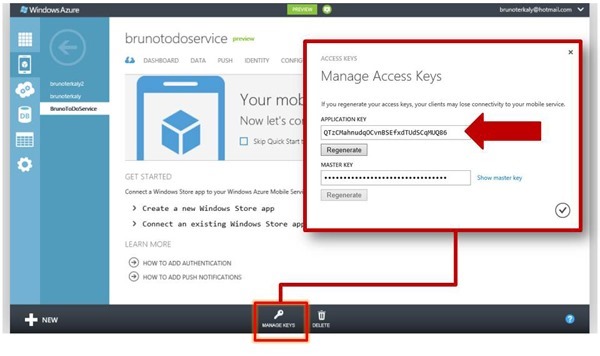
Getting the APPLICATION KEY
- You will need the application key and place it in your application.
- Perform the following:
- Click on MANAGE KEYS
- Copy the APPLICATION KEY somewhere safe
- Your application key will be different
- You will use it inside of Fiddler (Debugging tool) and inside your Android application.
Application Creation Wizard (will create a table in the previously created SQL Database)
- The screen presents 3 steps
- Step 1
- For Windows Devs (get the developer tools and SDK)
- Since we are writing code in Java for Android, this step isn't needed
- For Windows Devs (get the developer tools and SDK)
- Step 2
- This step creates a ToDoItem table in our previously created database
- This is the only step we will run
- Step 3
- This step creates a sample project for Visual Studio and Windows 8.
- Since we are writing code in Java for Android, this step isn't needed
- This step creates a sample project for Visual Studio and Windows 8.
- Step 1
- Do the following:
- Click on CREATE A TODOITEM TABLE
- The next step
- We should add some data to our TODOITEM table
Adding Data (the table and database already exist)
- On the left side of the screen you should see a database icon
- This will allow us to add some data
- Step 1
- Click on the DB icon
- Step 2
- Click on our recently created database and server
Preparing to add data to our TodoItem table
- You could use SQL Server Management Studio to manage the database
- But we will use the built in tools
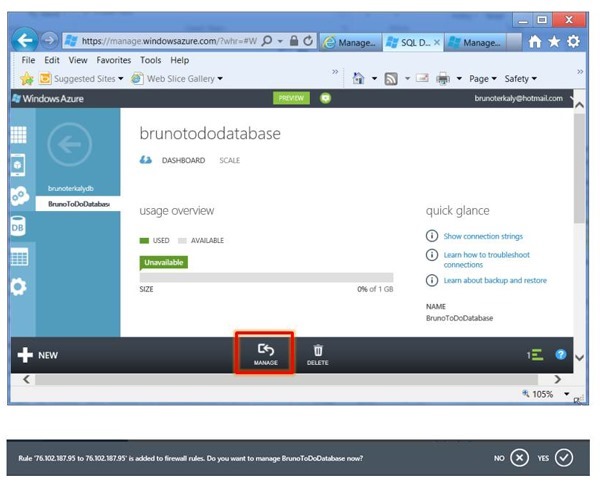
- Perform the following:
- Click on MANAGE
- You may be asked to add your current IP address to the firewall engine so that you can successfully connect.
- The firewall is one form of security you can use to protect your database.
- You can read more about that here:
- The firewall is one form of security you can use to protect your database.
- You may be asked to add your current IP address to the firewall engine so that you can successfully connect.
- Click on MANAGE
Looking at our table structure
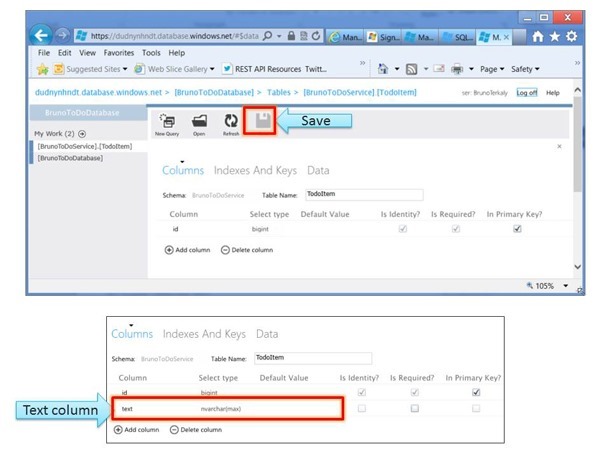
- We are going to add a column
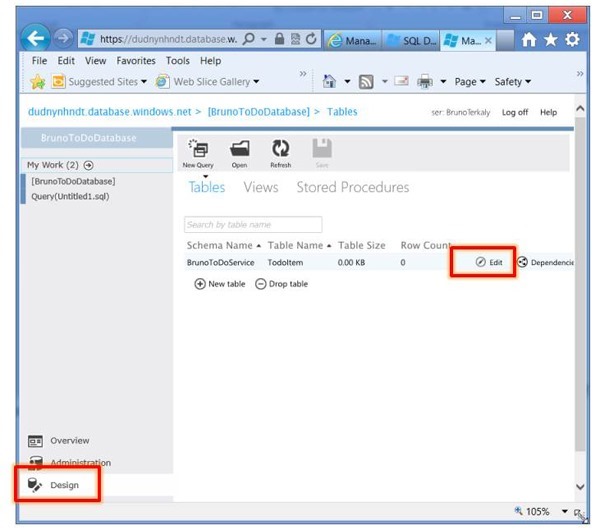
- There is just one column here now
- That column is the ID column
- We will add a TEXT column.
- Perform the following:
- Click on DESIGN
- Click on EDIT
Looking at our table structure
- We are going to add a column
- Perform the following:
- Click on ADD COLUMN
- Add a column called text
- Click SAVE at the top
- Next we will add some data.
Two rows have been added
- There will only be two rows for now
- But you can add as many as you like
- We added:
- Eat Lunch
- Finish Blog Post
Next Steps
- The next post will cover these topics:
- Interacting with Azure Mobile Services using a web proxy client
- This can give you an in-depth knowledge of REST and HTTP
- Downloading and configuring Fiddler
- Using Fiddler to issue GET requests
Thanks..
I appreciate that you took the time to read this post. I look forward to your comments.
