Visual Studio 2010 : How to deploy a Web application with Web Application Project Deployment (Part 3)
In all project it’s a real nightmare to manage configuration files. In Silverlight projects like in web application, you can take advantage of Web Application Project Deployment features of Visual Studio 2010. In this blog, I’ll explain you :
- How to create a new configuration (part 1);
- How to create package definition (part 1);
- How to create package (part 1);
- How to publish the application (part 1);
- How to use transformation with web.config files (part 2);
- Some more links on this subject (part 2).
- Installation of Web Deployment Tool (Part 3).
- How to deploy automatically the application (part 3).
- How to force the creation of the deployment package in a TFS Build (part 3).
- How to deploy automatically the application in a TFS Build (part 3).
In this post, I won’t explain SQL deployment.
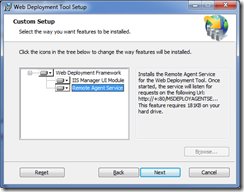
Installation of the Web Deployment Tool
The download is available at https://www.iis.net/download/WebDeploy.
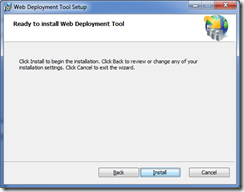
You just need to follow the steps to install it.
If you want to install it on a server, you will need to install the “Remote Application Service”.
How to deploy automatically the application
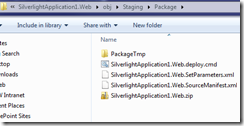
When you generate the deployment package, you have several files.
- <MyProject>.deploy.cmd : this script is really important, it contains the script to deplou the application;
- <MyProject>.SetParameters.xml : this file contains the parameters of the deployment, for exemple the name of the destination application (IIS)
- <MyProject>.zip : the package
All the parameters of the deployment are defined in the web application project. In Visual Studio, open the Properties Panel to update the parameters.
How to force the creation of the deployment package in a TFS Build
In your build definition, when you compile your solution, you should force MSBuild to use this parameter:
/p:DeployOnBuild=true
In this exemple, I’m using the DefaultTemplate.xaml, I just have to set the parameter in the MSBuild Arguments.
Automatically, the build will deploy in the define drop folder the generated package.
How to deploy automatically the application in a TFS Build (part 3).
First of all, you need to install the build server the Web Deployment Tool.
After that, in your build, once the build and the tests are completed, for example in the finally of “Try Compile, Test, and Associate Changesets and Work Items” , you can add the code for the deployment.
Create a new sequence for example called Deploy. Create a new variable called DeployCommandFiles with type IEnumerable<String>.
Find the project to deploy using FindMatchingFile Activity and store the result in DeployCommandFiles :
Create a Loop for each element of DeployCommandFiles and each element is a string (variable commandFile).
Excecute the script using InvokeProcess Activity:
This activity will deploy the package on the server using this command line:
<MyProject>.deploy.cmd /t /m:MyServer
Be care full, only administrator of the destination server can deploy application. You should grant admin privileges on the build service account.
Conclusion
Deployment of web application is really easy with Visual Studio 2010. It’s really helpfull to use TFS Build to deploy a web application.
You can also, when the application is deployed, run automated tests (UI Coded tests) to functionally validate the application.
Comments
- Anonymous
October 14, 2010
Hi,I've followed this procedure but my build doesn't generate the deployment package at all. I've got the MSBuild params set too.Anything else I should try?Thanks!


