Visual Studio Team Services - Creating a build pipeline (Part 1)
In a series of posts, some of the features available in Azure and Visual Studio Team Services will be explored. The posts will use an Azure Web App website as a practical illustration, and many of the features shown are relevant to other types of Web Apps and components in Azure.
VSTS Build is an excellent mechanism for enabling automation for a development team. It allow for teams to construct build pipelines to handle a variety of scenarios and technology. The service can run hosted or on-premises, and supports a large number of build steps ranging from Node.js and Gulp to MSBuild and Azure Deployment. Its flexibility extends to the ability to bring in tasks from the Marketplace and write custom build steps.
The solution used to build the build pipeline series has been uploaded to MSDN Sample Projects.
This post, Part 1, is concerned about:
- Creating an Azure Web App website using the Visual Studio Cloud template
- Enabling Application Insights
- Creating a local Git repository
- Creating a remote Visual Studio Test Services Git repository
- Creating a VSTS Build definition
Continuous Deployment, Continuous Delivery, Continuous Integration
There are many resources that do an excellent job of defining these terms:
- Continuous Delivery vs Continuous Deployment vs Continuous Integration - Wait huh?
- Continuous Integration
- Continuous Delivery
and describing the benefits:
MVC Template
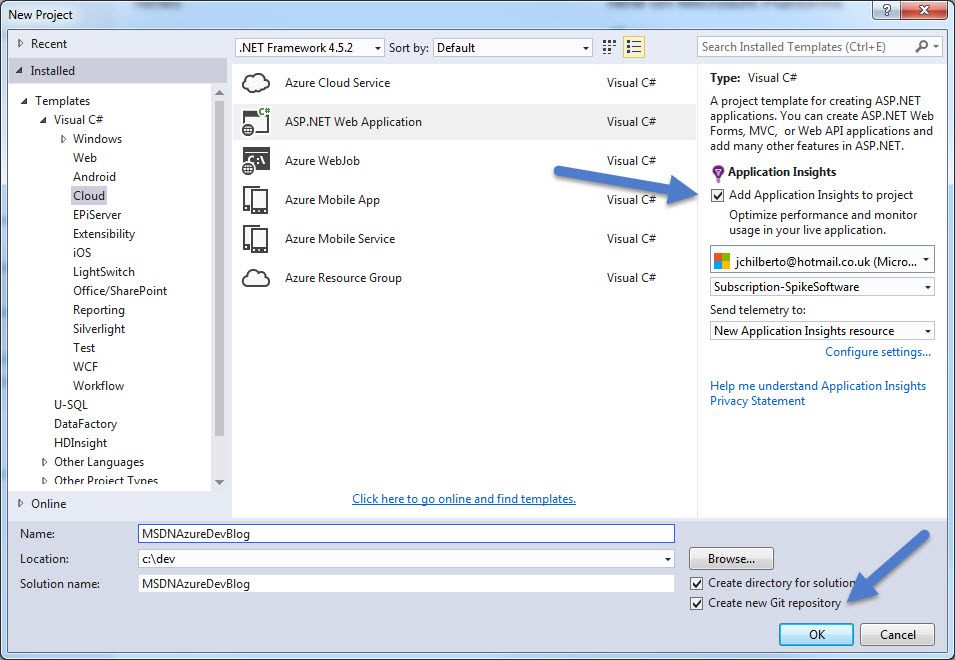
An ASP.Net Web Application will be used as base for the posts. Note that Application Insights and a local Git repository were created:
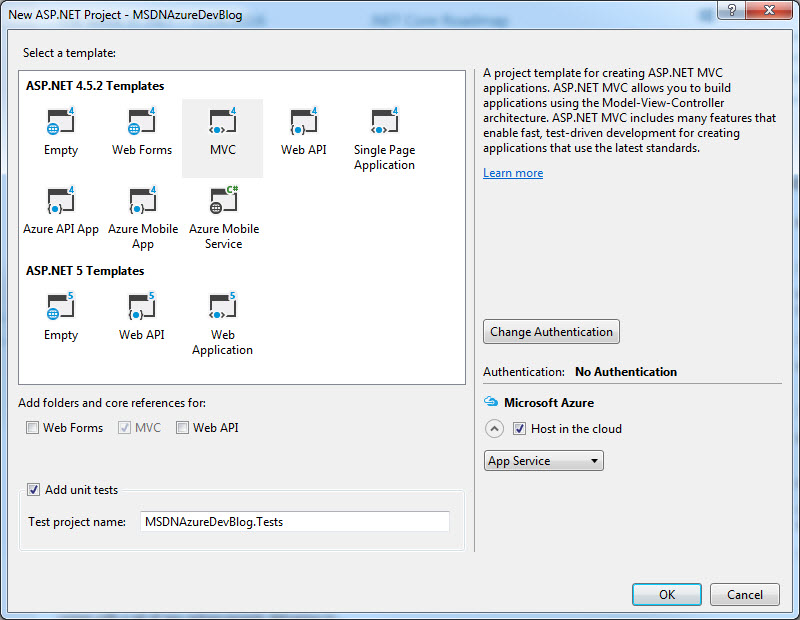
To keep the project simple, the MVC template without authentication was selected. Note that a Unit Test project and hosting in Azure were selected at creation time:
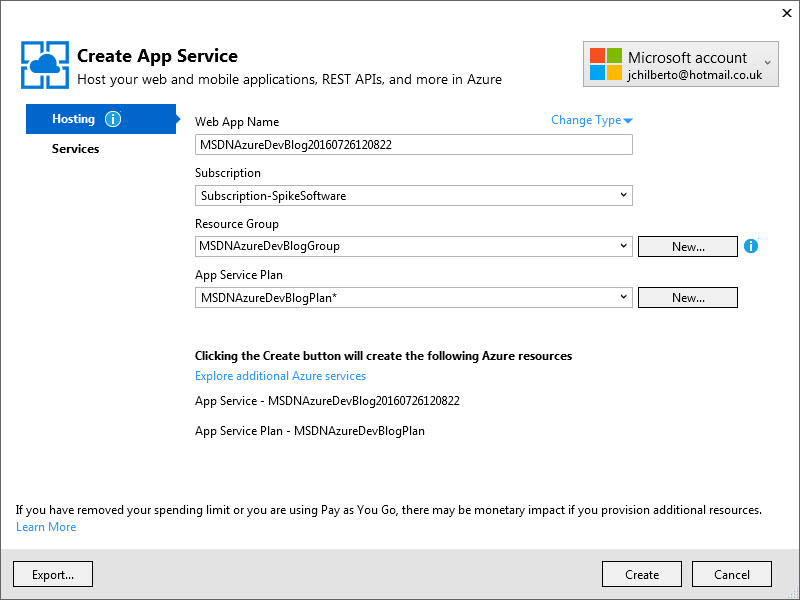
One nice feature of the setting up a project using the template is the creation of the initial App Service.
Once the project wizard completes we have:
- An empty Azure Web App website
- A local GIT repository
- An Application Insights resource in Azure
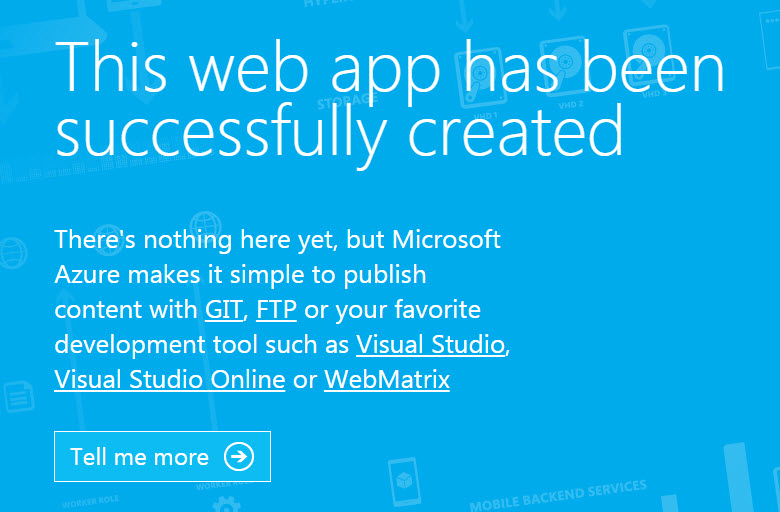
The project can be run locally and in Azure but the Azure project just states it is empty as nothing has been deployed yet:
References
Adding to Visual Studio Team Services GIT
To get the project into the hosted website, the following will be performed:
- Add the project to a VSTS Git project
- Create a build to deploy the project
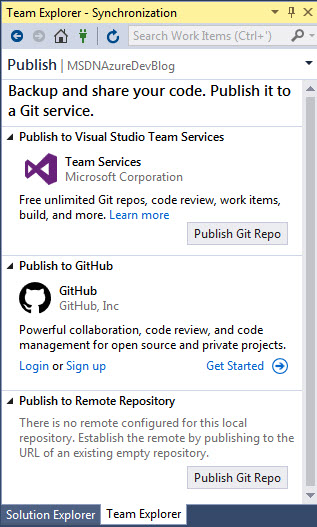
The Team Explorer window can be used to save the changes to your local repo. It also detects that the local repo is not connected to a external GIT service. Visual Studio allows the local repo to be saved to a VSTS, GitHub and other remote GIT services like BitBucket.
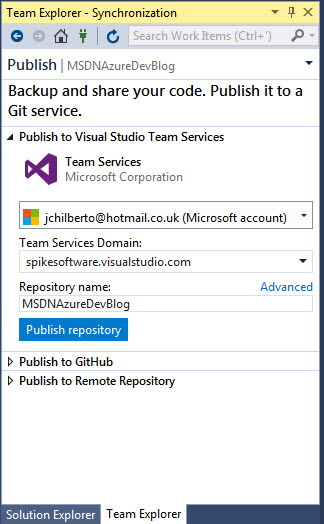
The following shows the settings for publishing to a VSTS Git repo:
References
- Develop and share using GIT
- Gettings started using GIT in Visual Studio
- Quickstart
- VSTS Getting Started
VSTS Build
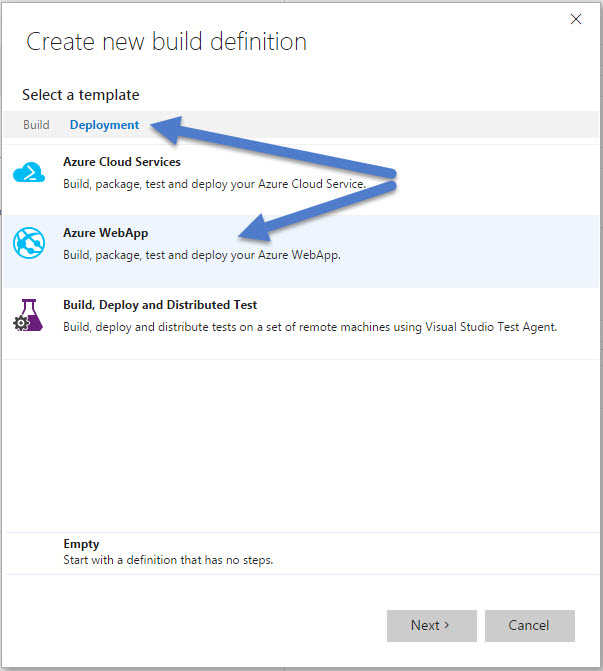
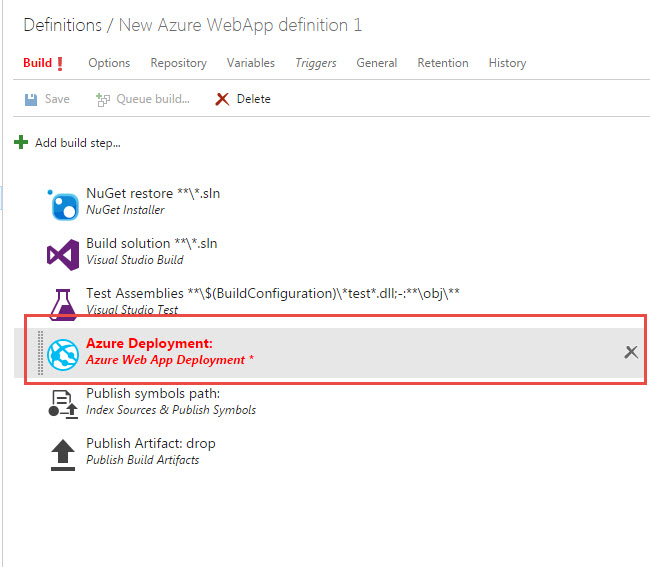
Now that the source has been published to GIT, a VSTS Build Definition can be defined. For this scenario, a Azure WebApp Deployment template will be used as a basis for the definition:
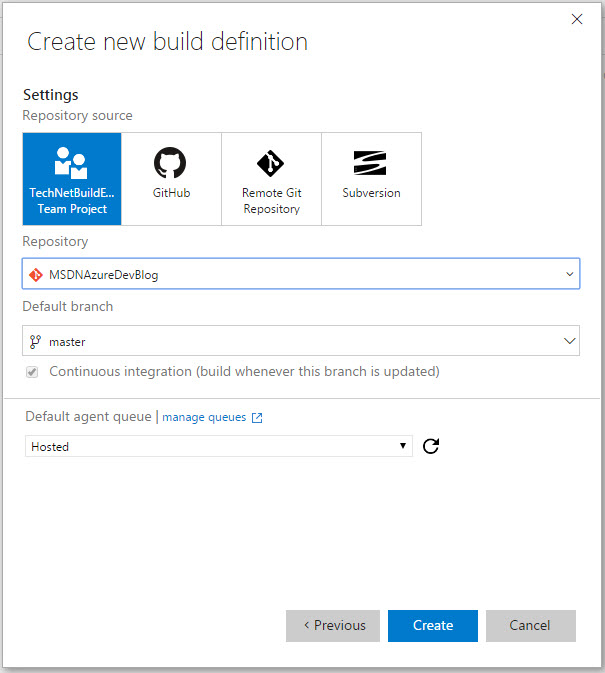
The template allows the repo to be specified:
The template creates a classic Azure Web App Deployment.
Note: the replacing of the Azure Web App Deployment task should only be done if the VSTS subscription has access to the AzureRM Web App Deployment task.
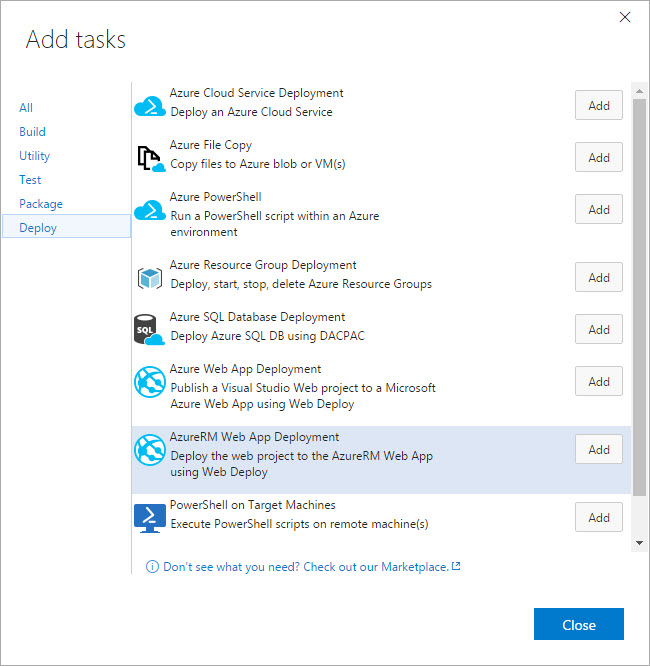
Though we could use this task to deploy to both classic and RM Azure web sites, I will replace it:
And instead create a AzureRM Web App Deployment by adding the following task:
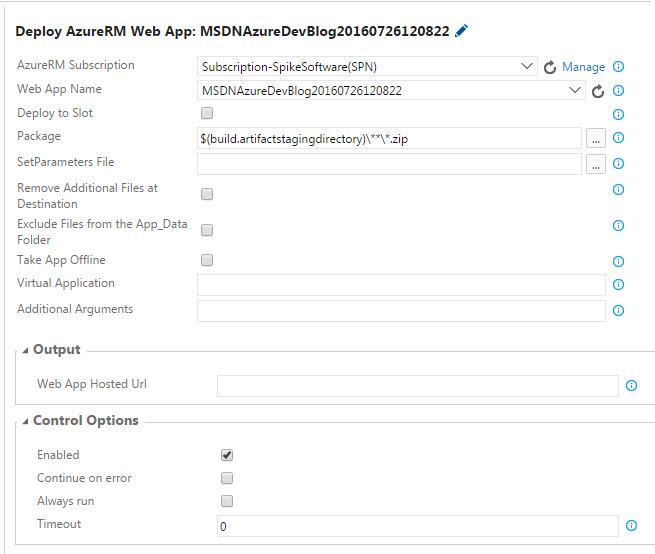
The configuration of the build step requires an AzureRM Subscription endpoint is defined in Services (click Manage) and requires the Web App Name and package is specified:
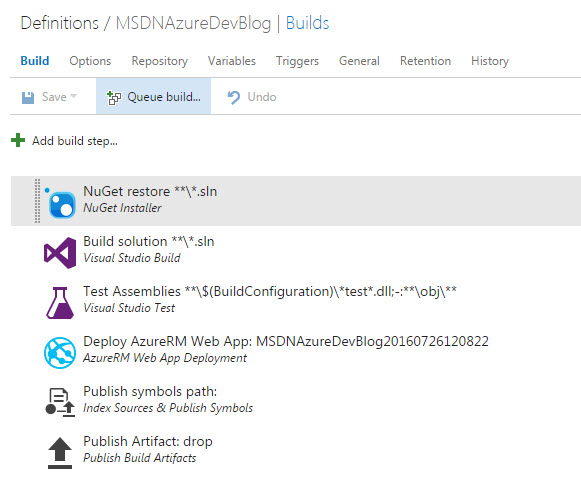
The rest of the steps ares suitable for the project. The final pipeline for Part 1 consists of retrieving the source from a GIT repo, restoring NuGet packages, building the solution, running the unit test project, publishing to Azure and saving the build artifacts. This is shown below:
The build can then be queued. If all goes well the build will complete including a deployment to Azure.
Note:
Unless the template is updated, the build will fail because of a missing file. By default the applicationinsights.config file is ignored and not added to GIT. Including the file will allow the build to succeed.
Next Steps
In Part 2, we will look at changing Application Insights settings in the build pipeline.
Comments
- Anonymous
August 04, 2016
Very good post Chilberto! - Anonymous
August 05, 2016
From this post there is a lot of steps go too fast which let the reader with open question:Why AzureRM and not AzureWebApp?Where did you get the package path in your settings?What if you have Azure deployment slot?What is the difference between doing this and using directly setting in Azure Deployment Slot and use in the source VSTS?- Anonymous
August 05, 2016
Good questions, Markus! We'll see if we can get them answered.Thanks for taking the time to write these out! - Anonymous
August 07, 2016
Thanks Markus. It is awesome to get feedback as it helps me to improve on the posts for the future.In past projects I have used both AzureRM and AzureWebApp. In most circumstances both should accomplish the same result and I chose AzureRM as it uses the resource APIs only. This means for classic webapps the AzureWebApp deployment task should be used. Only once did I require the Take App Offline feature only supported by the AzureRM due to a locked file preventing the deployment from succeeding. One nice feature of many of the build and release tasks is the ability to determine the path by using the ellipse, re. "...", next to some fields to determine the path. This uses information from the last run to provide a dialog to traverse the package contents.I will cover the deployment slots in another post but off-hand the big different between deploying directly from source is to gain greater control of the build process. I tend to rarely post directly from VSTS as usually a single source feeds multiple environments (DEV, TEST, PRODUCTION) so directly from source tends to not provide enough control of the build process.
- Anonymous
- Anonymous
August 05, 2016
I love how you unfold each step with each of these blog posts. Here is Part 2: https://blogs.msdn.microsoft.com/azuredev/2016/08/02/visual-studio-team-services-creating-a-build-pipeline-part-2 - Anonymous
September 29, 2016
Hi, I'm trying to complete this article, in my VSTS Deployment section i'm trying to add the AzureRM Web App Deployment , but I did not find that AzureRM Web App Deployment in my task, please tell me how to add the "AzureRM Web App Deployment" task in my task list.Thanks in advance,Sai Priya. C- Anonymous
September 29, 2016
Hello Sai Priya. C, Please take a look at https://github.com/Microsoft/vsts-tasks/blob/master/Tasks/AzureRmWebAppDeployment/README.md and the Overview states the "task is under development and is available to a limited set of accounts on Visual Studio Team Services (VSTS)." I did not see any explanation as to how the team determined access. They do give a means of contacting the team so I would be curious if you sent an email requesting access if they would add the task to your account.In the meantime, the Azure Web App Deployment task will also work. I will edit this post also to make a note of this as I new the task was new but I did not realize earlier that access was limited.Thanks for letting me know!
- Anonymous
- Anonymous
October 05, 2016
Hi, I’m trying to complete this article, in my VSTS Deployment section, I am build my account, one error is coming(Gulp File), this is Error “C:\NPM\Modules\gulp.cmd version --gulpfile C:\a\1\s\MSDNAzureDevBlog\gulpfile.js - - version 1.0.147.* Working directory changed to C:\a\1\s\MSDNAzureDevBlogmodule.js:341 throw err; ^Error: Cannot find module 'gulp-dotnet-assembly-info' at Function.Module._resolveFilename (module.js:339:15) at Function.Module._load (module.js:290:25) at Module.require (module.js:367:17) at require (internal/module.js:20:19) at Object. (C:\a\1\s\MSDNAzureDevBlog\gulpfile.js:2:20) at Module._compile (module.js:413:34) at Object.Module._extensions..js (module.js:422:10) at Module.load (module.js:357:32) at Function.Module._load (module.js:314:12) at Module.require (module.js:367:17)Gulp failed with error: C:\NPM\Modules\gulp.cmd failed with return code: 1”Can you please rectify This error.Thanks in advance,- Anonymous
October 05, 2016
Thank you Sekhar for finding this error. The screenshot in Part 3 was incorrect so I have corrected it. The issue was the argument "gulp" in the npm install task. This was installing gulp but not the modules specified in the packages.json file.
- Anonymous
- Anonymous
December 11, 2016
Hi, I have followed this really useful post as far as the build definition, after adding the AzureRM Web App Deployment, the AzureRM subscription picks up my developer program benefit subscription, but when I Authorize it, it comes up with the following error:A valid refresh token for identity could not be found. Any help would be appreciated. Dave - Anonymous
March 07, 2019
The comment has been removed- Anonymous
March 07, 2019
Hello Steve, good to hear you got some value from the post. My preferred way of managing this with either a git repo or a tfs repo is to use a branching strategy. So each environment could be tied to a branch. Azure DevOps (previously VSTFS) has great support for setting up CI/CD with a branching strategy. With the build process, it is a good idea to version each deployment. I understand how a lot of examples are Azure focus. The same strategies can be applied with a on-prem build service or you can build in the cloud and download the artifacts and install locally. DevOps does have support for remotely connecting to a server and installing so there are a lot of options depending on how sophisticated you want to get.Also, if possible - please visit our new home at https://techcommunity.microsoft.com/t5/Azure-Developer-Community-Blog/bg-p/AzureDevCommunityBlog
- Anonymous
