Part 4: Secure your Logic App using API Management – Validate JWT Access Restriction Policy
This is the fourth and last part in the series about securing your Logic Apps. In the previous post, I've described how to secure your logic app using Azure Active Directory. In this post, I'm going to show you how you can leverage the Validate JWT Access Restriction Policy for your Logic App inside the API Management Service.
In this series:
- Secure access to the trigger
- Secure your Logic App using API Management - Access Restriction Policies
- Secure your Logic App with Azure Active Directory using API Management
- Secure your Logic App using API Management - Validate JWT Access Restriction Policy (this post)
The Validate JWT policy enforces existence and validity of a JSON Web Token (JWT) extracted from either a specified HTTP Header or a specified query parameter. It is based on oAuth 2.0, which is basically the standard nowadays for API's.
If you use SDK's in your code, like the Facebook, Twitter or the Office 365 JavaScript API, they will all use oAuth 2.0 and the JWT token for authentication. This policy can also be used if you want your API to be secured using Azure Active Directory. And that is exactly what we have done in the previous post, so we can use this authentication method as an example for this post as well.
For this article, I've used the Logic App which is created in the first post of this series, the API Management service which is created in the second post and the Logic App uses Azure Active Directory for authentication, which is described step-by-step in my previous post.
Validate JWT Policy
In this example, we are going to add a Validate JWT policy which checks the audience inside the JWT token. When the audience is correct, then the call is made to Azure Active Directory to authenticate the user.
Retrieve JWT Token
The first step is to retrieve the JWT token when a call is made to the Logic App which is already registered inside Azure Active Directory. This way we can investigate what is inside of the JWT token and use certain claims from the token in our policy. This way we can reject calls that don't contain a certain claim right at the door without doing a request to Azure AD. For this example, we are going to use the "Audience"? claim. We can obtain the token using Fiddler and the API Management Developer portal.
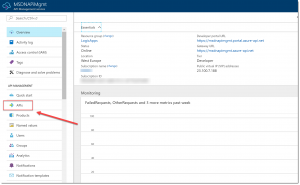
Open the Developer portal by navigating to the Azure API Management Service inside the Azure Portal. In there, click APIs in the left menu.
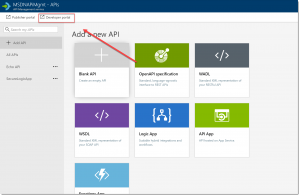
Click on the Developer Portal menu item.
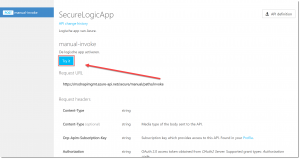
Then, click APIs in the top menu, click SecureLogicApp and click the Try It button under manual-invoke.
Open Fiddler.
Switch back to the API Management Portal where the test page for the API is opened now. Scroll down a bit and under Authorization, and from the dropdown select the OAuth 2.0 server which is configured in the previous article.
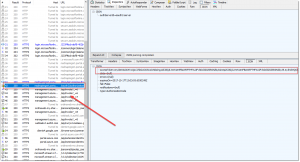
A login window pops up. Log in with your Azure AD credentials and switch back to Fiddler. Select the GET request to the Azure AD API from fiddler which contains the following URL: "/oauth2/authorizationcode/acquiretoken". Open the inspectors view and copy the Access Token which is returned from Azure AD after login in using your Azure AD credentials.
JWT Token Details
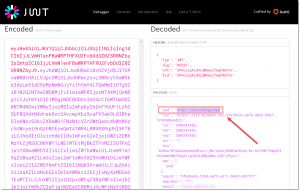
We now have obtained the Access Token and to look into it in further detail, we can use a site called "JWT"? (https://jwt.io). Click the Debugger menu item in the top menu and past the Access token inside the Encoded text box.
The token gets decoded and on the right side you can see all the claims that are inside of it. Like mentioned before, we are going to use the audience for this example, which is "https://SecureLogicApp"? in my case.
If you want more information about the JWT token and all the properties inside of it, you can refer to the home page of the JWT website.
Setting up the Validate JWT Token policy
Switch back to the Azure API Management Service inside the Azure Portal, and again, click APIs in the left menu.
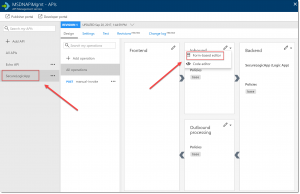
Select the SecureLogicApp and click on the arrow next to Inbound Processing. Select Form-based Editor.
Click Code View at the right side of the screen.
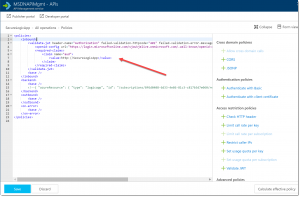
Add the below code inside the <inbound> tag to check the audience inside the JWT token from the caller of the endpoint. If the audience does not match, the API Management Service will simply block the request.
[sourcecode]
<validate-jwt header-name="Authorization" failed-validation-httpcode="401" failed-validation-error-message="Unauthorized. Access token is missing or invalid.">
<openid-config url="https://login.microsoftonline.com/<your-AzureAD-domain>.onmicrosoft.com/.well-known/openid-configuration" />
<required-claims>
<claim name="aud">
<value>https://SecureLogicApp</value>
</claim>
</required-claims>
</validate-jwt>
It will look like below image:
Click the Save button.
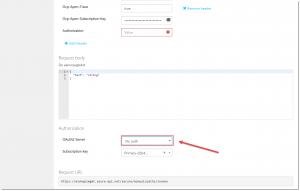
To test this policy, switch over to the Developer Portal of the API Management Service. Under the Authorization section, reset the OAuth2 Server to No auth, like show in the below image.
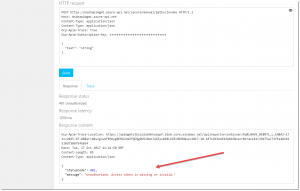
Click the Send button and you will get a 401 Unauthorized response with the response message which is specified in the policy:
Conclusion
This is the last Access Restriction Policy in this series, that you can use to secure your Logic App using API Management. The other ones are described in the second post of this series.
The JWT Validate Policy is, in my opinion, a very effective way of securing your API. Based on certain claims, or even certain permissions, you can block your API right at the door even without making a call to your authentication provider to check if the caller has permissions to access the API. This reduces unnecessary time and traffic, which will result in a better experience for the requestor of the API.
-Sjoukje
Comments
- Anonymous
October 18, 2017
I love how easy it is to set up this validation. While it has become easier to do this in your own code it´s not quite on this level yet :)- Anonymous
October 18, 2017
Thanks! I totally agree :-).
- Anonymous
