IaC on Azure - An introduction of Infrastructure as Code (IaC) with Azure Resource Manager (ARM) Template
What is Infrastructure as Code (IaC)?
Infrastructure as Code is a process of managing and provisioning computing infrastructure with some declarative approach while setting their configuration using definition files instead of traditional interactive configuration tools.
What are the benefits of IaC?
- Consistency
- Consistently achieve standardised provisioning or deployment
- Accelerating
- Accelerating provisioning or deployment rapidly
- Reusability
- Reusable JSON code for repeatable or similar provisioning or deployment
- Extensibility
- Extensible JSON code for incorporating with additional items
Have any developer ever waited for weeks or months to get a development environment delivered by their internal IT operations? This demand has driven IT industry to deliver new tool set to ensure that one can deliver on time and meet the standard requirement constantly.
How do we do that in Azure?
In this example, I will demonstrate on how we can apply IaC concept for a virtual network deployment in Azure using the Templates service that is still in Preview.
Getting Started with Azure Templates
1. Login to Azure portal
2. Search for the "Template" keyword
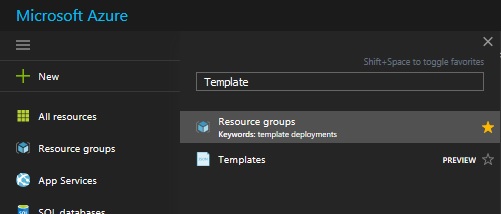
3. Select Templates
4. Select Add

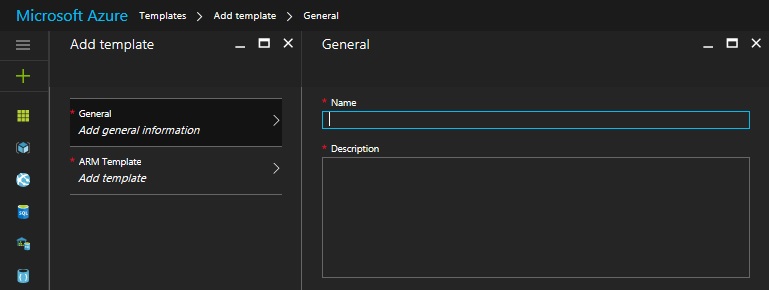
5. Input the Name for the template¹
6. Input the Description of this template
¹ In the General section, you will have to provide a name for the template, make sure that it is a name that is short and easily identifiable by anybody because the template name will not be modifiable once the template is created. You will also need to provide a description for the template where you will be able to add more details about what this template actually does.
7. Select OK
In the ARM Template section, you will be provided with the standard JSON syntax that includes the schema, content version, an empty parameters field and an empty resources field to get you started. In order to understand how to create your specific ARM template, you can refer to Authoring Azure Resource Manager templates documentation.
8. Edit the ARM Template
Because this is an example, I have created an ARM template for this tutorial that will create a virtual network with 3 subnets and a gateway subnet in Azure. You can simply copy the JSON code and paste into it.
{
    "$schema": "https://schema.management.azure.com/schemas/2015-01-01/deploymentTemplate.json#",
    "contentVersion": "1.0.0.0",
    "parameters": {
        "virtualNetworkName": {
            "type": "string",
            "metadata": {
                "description": "The name of the virtual network."
            }
        },
        "virtualNetworkAddressPrefixes": {
            "type": "string",
            "defaultValue": "10.1.0.0/16",
            "minLength": 9,
            "maxLength": 18,
            "metadata": {
                "description": "The IP addresses prefixes for the virtual network. (Eg. 10.1.0.0/16 )"
            }
        },
        "virtualNetworkSubnetName1":{
            "type": "string",
            "defaultValue": "Subnet1",
            "metadata": {
                "description": "The name of first virtual network subnet. (Eg. Subnet-Web )"
            }
        },
        "virtualNetworkSubnet1": {
            "type": "string",
            "defaultValue": "10.1.1.0/24",
            "minLength": 9,
            "maxLength": 18,
            "metadata": {
                "description": "The IP addresses prefixes for the virtual network. (Eg. 10.1.1.0/24 )"
            }
        },
        "virtualNetworkSubnetName2":{
            "type": "string",
            "defaultValue": "Subnet2",
            "metadata": {
                "description": "The name of first virtual network subnet. (Eg. Subnet-App )"
            }
        },
        "virtualNetworkSubnet2": {
            "type": "string",
            "defaultValue": "10.1.2.0/24",
            "minLength": 9,
            "maxLength": 18,
            "metadata": {
                "description": "The IP addresses prefixes for the virtual network. (Eg. 10.1.2.0/24 )"
            }
        },
        "virtualNetworkSubnetName3":{
            "type": "string",
            "defaultValue": "Subnet3",
            "metadata": {
                "description": "The name of first virtual network subnet. (Eg. Subnet-Data )"
            }
        },
        "virtualNetworkSubnet3": {
            "type": "string",
            "defaultValue": "10.1.3.0/24",
            "minLength": 9,
            "maxLength": 18,
            "metadata": {
                "description": "The IP addresses prefixes for the virtual network. (Eg. 10.1.3.0/24 )"
            }
        },
        "virtualNetworkGatewaySubnet": {
            "type": "string",
            "defaultValue": "10.1.255.224/27",
            "minLength": 9,
            "maxLength": 18,
            "metadata": {
                "description": "The gateway subnet for the virtual network. (Eg. 10.1.255.224/27 )"
            }
        },
        "businessUnitTag": {
            "type": "string",
            "defaultValue": "IT",
            "metadata": {
                "description": "The name of the department for the Business Unit tag."
            }
        },
        "costCenterTag": {
            "type": "string",
            "defaultValue": "000000",
            "metadata": {
                "description": "A cost identifier for the Cost Center tag."
            }
        },
        "environmentTag": {
            "allowedValues": [
                "Development",
                "Staging",
                "Production"
            ],
            "type": "string",
            "defaultValue": "Development",
            "metadata": {
                "description": "The name for the Environment tag."
            }
        }
    },
    "resources": [
        {
            "type": "Microsoft.Network/virtualNetworks",
            "apiVersion": "2016-03-30",
            "name": "[parameters('virtualNetworkName')]",
            "location": "[resourceGroup().location]",
            "properties": {
                "addressSpace": {
                    "addressPrefixes": [
                        "[parameters('virtualNetworkAddressPrefixes')]"
                    ]
                },
                "subnets": [
                    {
                        "name": "GatewaySubnet",
                        "properties": {
                            "addressPrefix": "[parameters('virtualNetworkGatewaySubnet')]"
                        }
                    },
                    {
                        "name": "[parameters('virtualNetworkSubnetName1')]",
                        "properties": {
                            "addressPrefix": "[parameters('virtualNetworkSubnet1')]"
                        }
                    },
                    {
                        "name": "[parameters('virtualNetworkSubnetName2')]",
                        "properties": {
                            "addressPrefix": "[parameters('virtualNetworkSubnet2')]"
                        }
                    },
                    {
                        "name": "[parameters('virtualNetworkSubnetName3')]",
                        "properties": {
                            "addressPrefix": "[parameters('virtualNetworkSubnet3')]"
                        }
                    }
                ]
            },
            "tags": {
                "BusinessUnit": "[parameters('businessUnitTag')]",
                "CostCenter": "[parameters('costCenterTag')]",
                "Environment": "[parameters('environmentTag')]"
            },
            "comments": "Create a standard virtual network with 3 subnets and a gateway subnet."
        }
    ]
}
9. Select Save
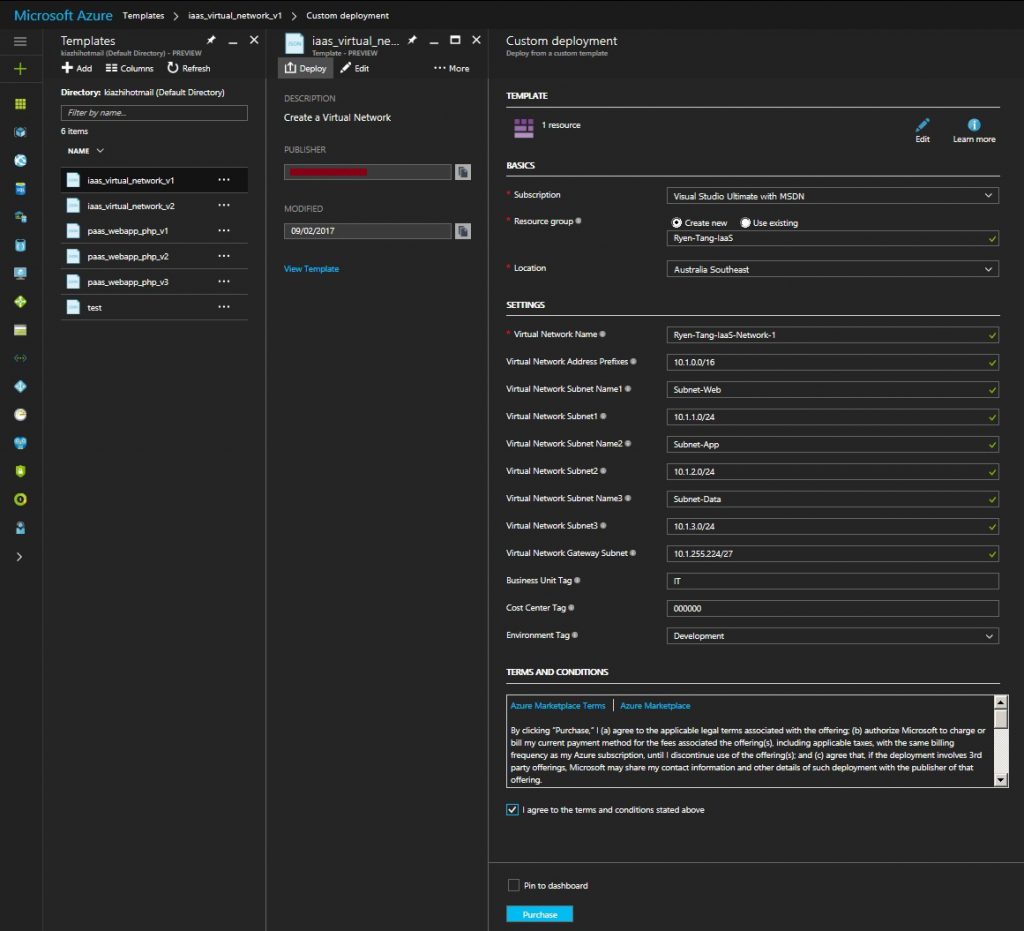
Now this is the fun part where you deploy the Virtual Network using the ARM Template and it is really easy for anyone by filling up the form.
10. Select the ARM Template
11. Select Deploy
12. Fill in the fields² and agree to the terms and conditions
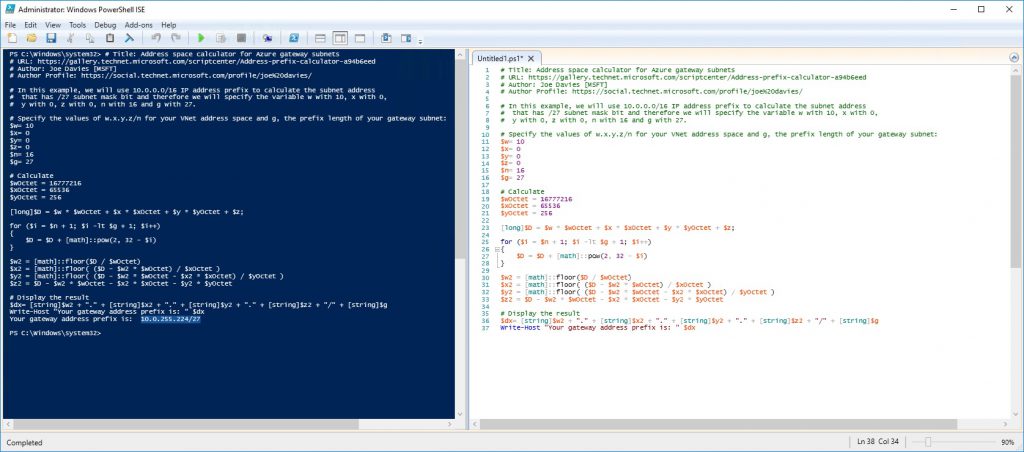
² If it happen that you need to change the IP address prefix but wonder what you require to input for the gateway subnet, you refer to Hybrid Network Architecture with Azure and On-Premises VPN as a guide and use the Address Prefix Calculator by Joe Davies to calculate the gateway subnet as below.
Once you are comfortable with all your configuration inputs, you can begin the deployment by selecting the Purchase button.
13. Select Purchase
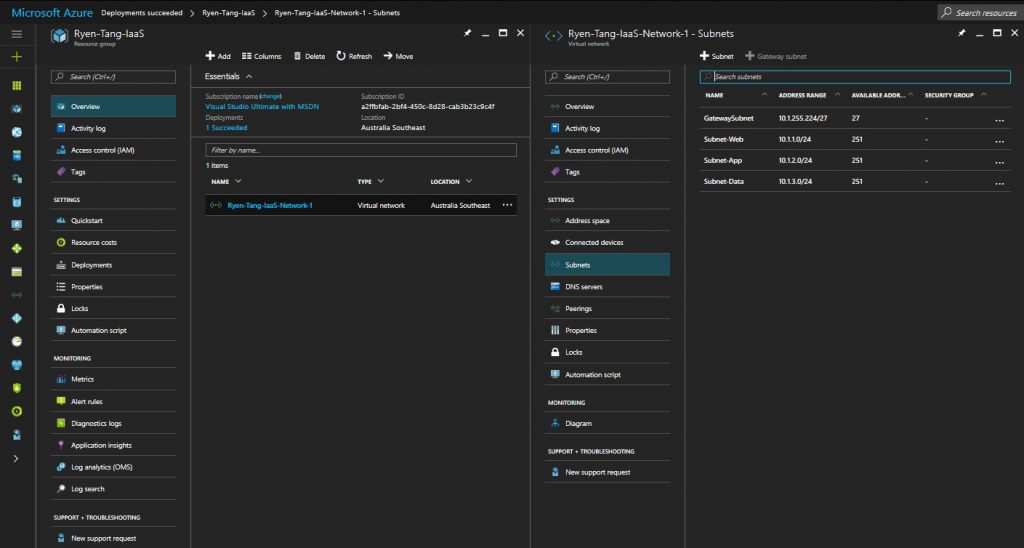
Once you selected Purchase, Azure will validate and start the provisioning. You can check your deployment by selecting your virtual network within the resource manager group.
In short, you have achieve in creating an Azure Resource Manager (ARM) Template that can consistently deliver a virtual network environment, accelerate your virtual network deployment, enable the ARM template to be reusable for provisioning other environment and allow the ARM template to be extensible to include other items such as a virtual machine to be included by modifying the current existing template.
Additional Resources
See Also
- An introduction of Infrastructure as Code (IaC) with Azure Resource Manager (ARM) Template
- Windows Server Virtual Machine Deployment made easy with ARM Template
- Linux Virtual Machine Deployment in a breeze with ARM Template
- Developing ARM Template using VSCode efficiently
- How to get started with ARM Template
Comments
- Anonymous
February 11, 2017
Great article, Ryen!- Anonymous
February 11, 2017
Thank you, @Ken Cenerelli
- Anonymous
- Anonymous
February 12, 2017
Hi Ryen, great way of deploying Azure Infrastructure Artifacts! Maybe a sample on how to deploy a dev VM in the future? I prefer this method over sysprepping a vhd and uploading it into Azure.- Anonymous
February 13, 2017
Sure, @Sjoukje Zaal. It is in the pipeline of the schedule. Stay tune... :)
- Anonymous
