Build clustered MSMQ role on a Windows Server 2012 R2 Failover Cluster
In this blog post, we will go through the steps to quickly setup clustered MSMQ role on a Windows Server 2012 R2 Failover cluster on virtual machines in test lab.
Assumptions
· 2 nodes cluster
· The DC will also be used as shared storage provider (iSCSI target).
Basic Setup
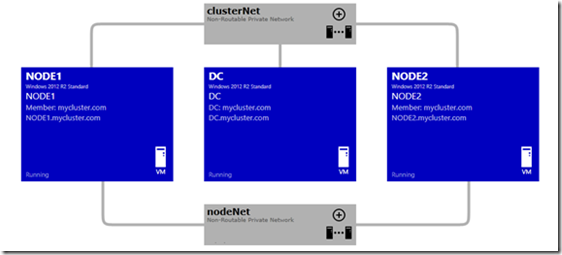
3 Windows Server 2012 R2 virtual machines (DC, Node1, Node2). All the nodes of the cluster should have the same components/sub-components installed.
Establish Private Network 1 (clusterNet)
This will be a private network between DC, Node1 and Node2. It provides connectivity for DC/DNS communication (eg: DC - 1.2.3.1/24, Node1 - 1.2.3.2/24, Node2 1.2.3.3/24)
Establish Private Network 2 (nodeNet)
This will be a private network between Node1 and Node2. This network provides connectivity for sync up between the cluster nodes (eg: Node1 - 2.1.1.2/24, Node2 - 2.1.1.3/24)
Steps
1. Setup a test domain for testing and DC as DNS server as well. Reboot 2 nodes and login as the domain administrator.
Add extra disks for quorum operations and shared storage for MSMQ on DC.
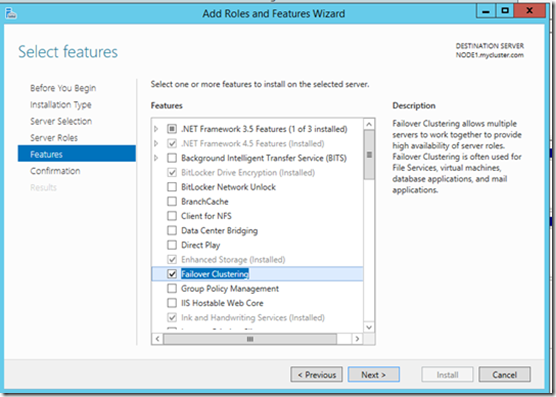
2. Install Failover Cluster manager component on both the cluster nodes (Node1 and Node2).
3. Configure iSCSI target.
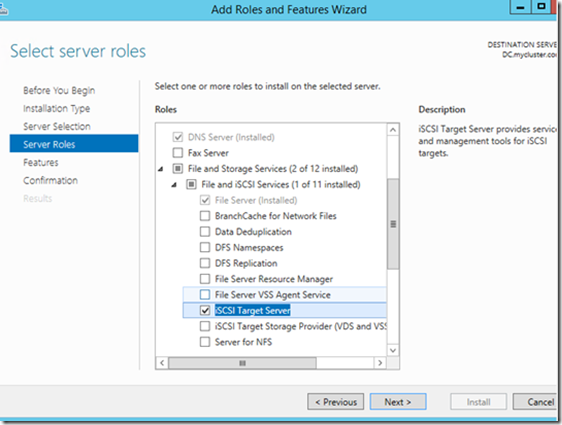
1) Install the iSCSI Target Server feature on DC. Restart the virtual machine to complete the feature installation.
2) Start iSCSI Initiator on 2 Cluster nodes.
· Server Manager -> Tools -> iSCSI Initiator. Click on yes to start the iSCSI service and then click on OK on iSCSI Initiator property window.
3) Configure iSCSI target.
· Server Manager -> File and Storage Services -> iSCSI.
· Click on “To Create an iSCSI virtual disk, start the new iSCSI virtual Disk Wizard”. This disk will be used as a quorum disk on 2 cluster nodes.
· Select the storage location (eg E:) and click Next.
· Provide the name for this iSCSI virtual disk
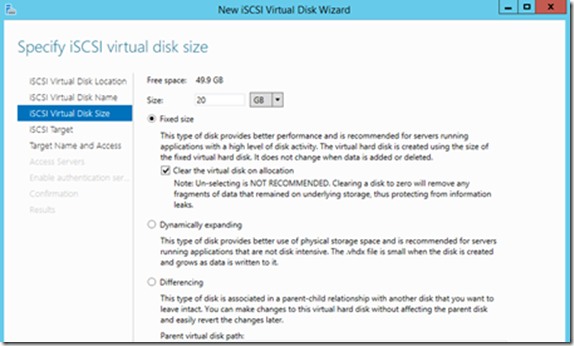
· Specify iSCSI virtual disk size
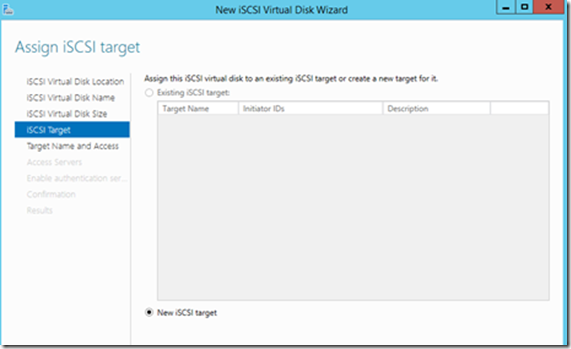
· Create the iSCSI target
· Provide the suitable name for iSCSI target
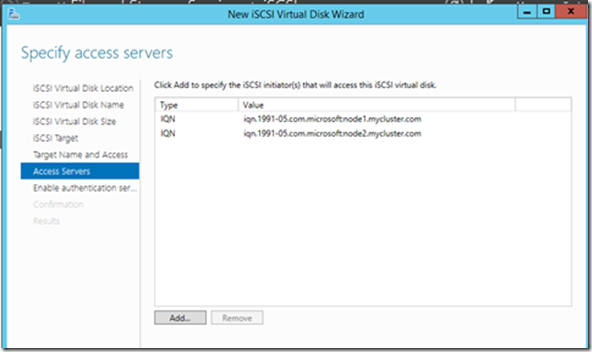
· Add the servers who can access this iSCSI storage
· Click Next on Enable Authentication
· Click Create on Confirmation tab to finish configuring
· TSAKS-> New iSCSI Virtual Disk for MSMQ storage.
· Select the storage location, provide the name for this iSCSI virtual disk (msmq) and Specify iSCSI virtual disk size as we have done for Quorum.
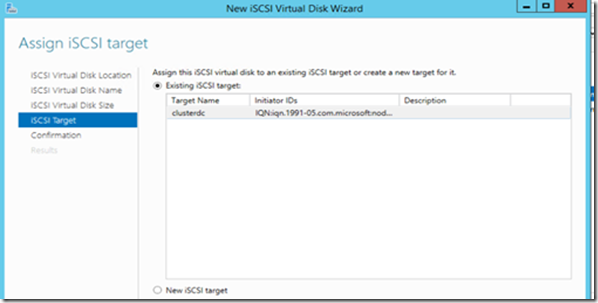
· Assign to the existing iSCSI target
4. Configure iSCSI initiator on 2 nodes
· Server Manager -> Tools -> iSCSI initiator, enter the target server name and click on Quick Connect. If connection successful, you will see below screen.
5. Initialize the virtual disks.
· On one of the nodes, open the Disk Management snap-in. Apart from the physical partitions present on the machine, some new partitions would be visible
· On each partition, right click -> Online
· On each partition, right click -> Initialize
· On each partition, right click -> Create Volume
6. Validating Failover Cluster Configuration and create cluster
1) Administrator Tools->Failover Cluster Manager on one node.
2) Right click on Failover Cluster manager and click Validate Configuration. Enter the names of 2 nodes to be made part of cluster.
3) Click Next to start the validation tests. Verify the test report to identify any major failures/warnings for cluster configuration. On the successful completion, you will see the following screen.
4) Check “Create the cluster now using the validated nodes…” and Finish. Enter Cluster Name. You may need to manually add static IP address for this cluster as below.
5) Click Next and Finish to create the cluster.
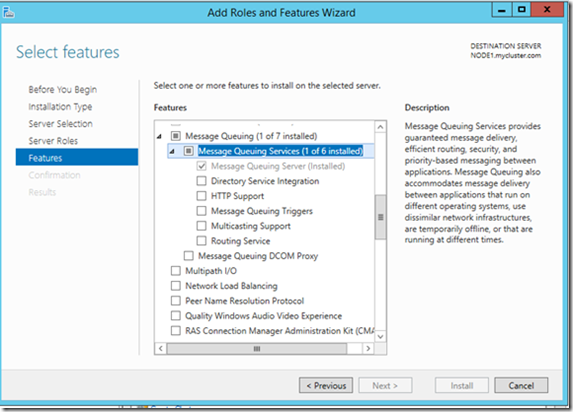
7. MSMQ Component Install. Install Message Queuing Services on both the nodes of the cluster with same subcomponents.
8. Add MSMQ Roles to the Cluster
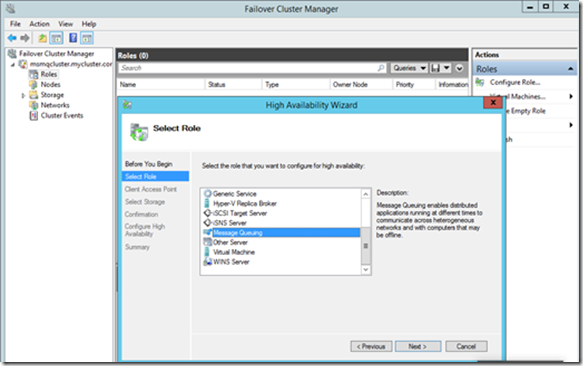
1) Open Failover Cluster Manager and expand the subtree for cluster to be configured
2) Select Roles and click on Configure Role… in Actions panel
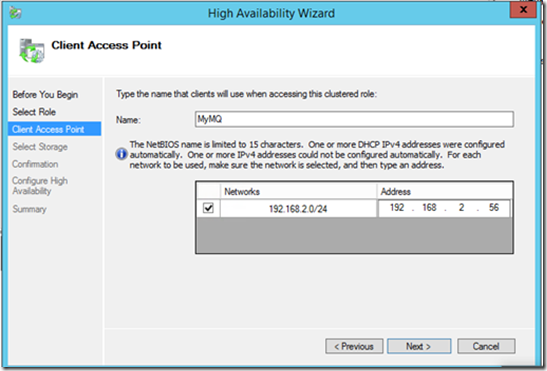
3) Provide an appropriate name to the clustered MSMQ role.
Note: The name assigned to the role is visible throughout the domain.
You may need to manually add static IP address for this clustered MSMQ role as below.
4) Choose the created MSMQ storage disks to be associated with the role (if required). Click Finish to complete the configuration.
5) Right click on the clustered role and Start Role.
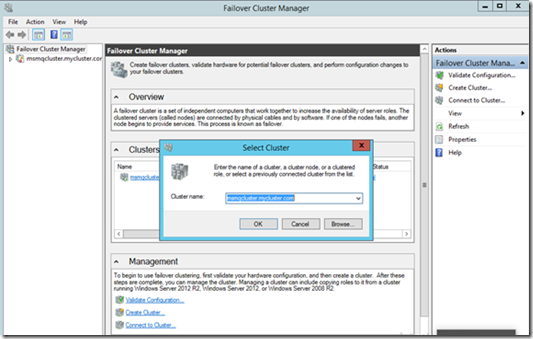
6) On another node, open Failover Cluster Manager and click Connect to Cluster… in Actions panel.
7) Try failover to see if the clustered MSMQ role works well.
Access the Cluster MSMQ snap-in from the Failover Cluster Manager snap-in.
1. Open Failover Cluster Manager.
2. Expand the subtree for cluster where MSMQ role is configured.
3. Select and Right-click the MSMQ role and choose "Manage Message Queuing…".
Note: The MSMQ snap-in which opens is different from the standard MSMQ snap-in and queue configurations visible in Cluster
Troubleshooting logs:
1. Cluster log
1) Open a cmd prompt
2) cmd:> cluster log /g
By default, the logs will be generated at \windows\cluster\reports\cluster.log
2. System and Application event logs
Thanks,
-Yingjie Shi from APGC DSI Team
