Windows Containers - How to Containerize an ASP.NET Web API Application in Windows using Docker
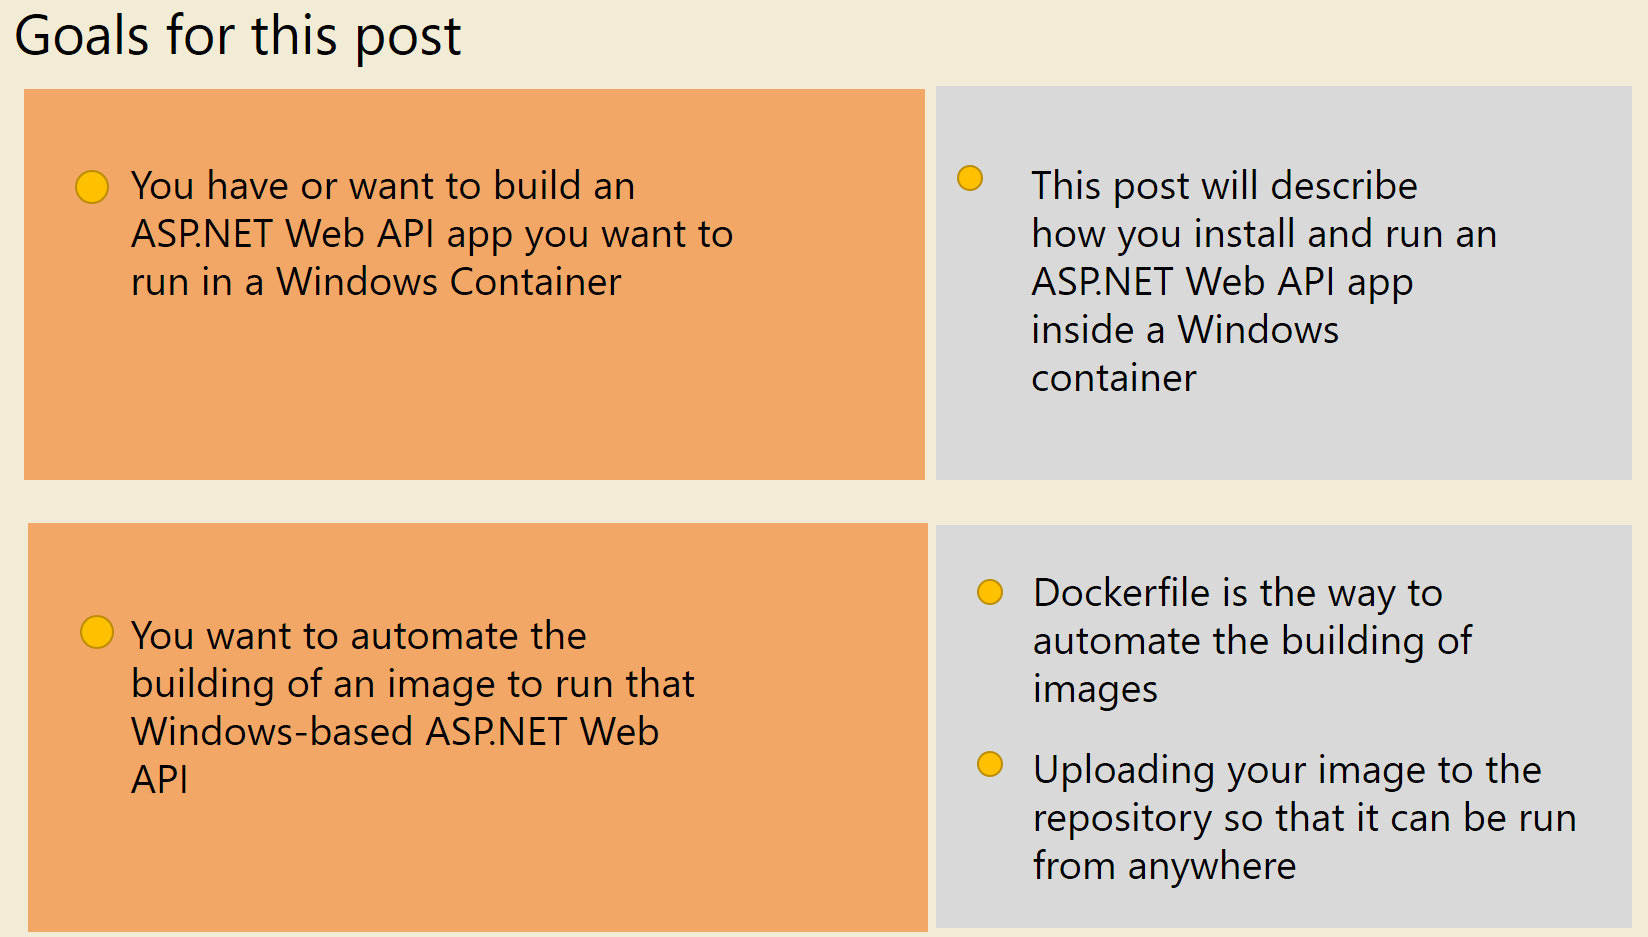
This post is about:
- You have or want to build an ASP.NET Web API app you want to run in a Windows Container
- You want to automate the building of an image to run that Windows-based ASP.NET Web API
Click image for full size
Figure 1: How this post can help you
Prerequisite Post
This post can give you some background that I will assume you know for this post:
Background for APIs
Building APIs
Hardly a day goes by where you don't learn of some business opening up there offerings as a web service application programming interface (API). this is a hot topic among developers these days, regardless of whether you're a startup or large enterprise. These APIs are typically offered as a series of interdependent web services.
Exposing an API through a Windows Container
So in this post I would like to get into the significance of the modern API and then get into a technical discussion about how you might build that out. In addition, I would like to address the use of a Docker container for hosting and running our API in the cloud.
The Programmable Web
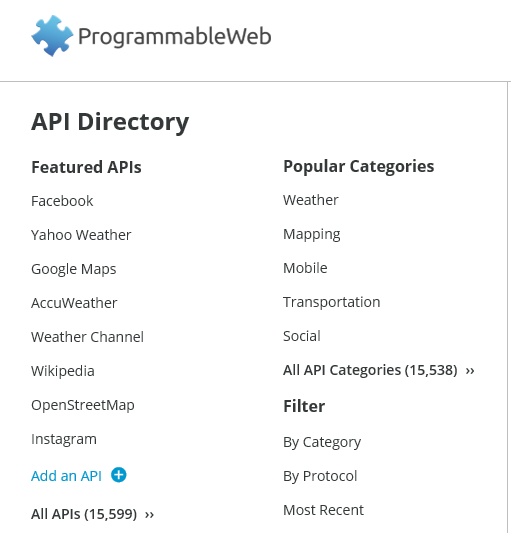
The programmable web acts as a directory to all of the various APIs that are available.
https://www.programmableweb.com/category/all/apis
Click image for full size
Figure 2: The Programmable Web
Build and test locally - deploy to cloud and container
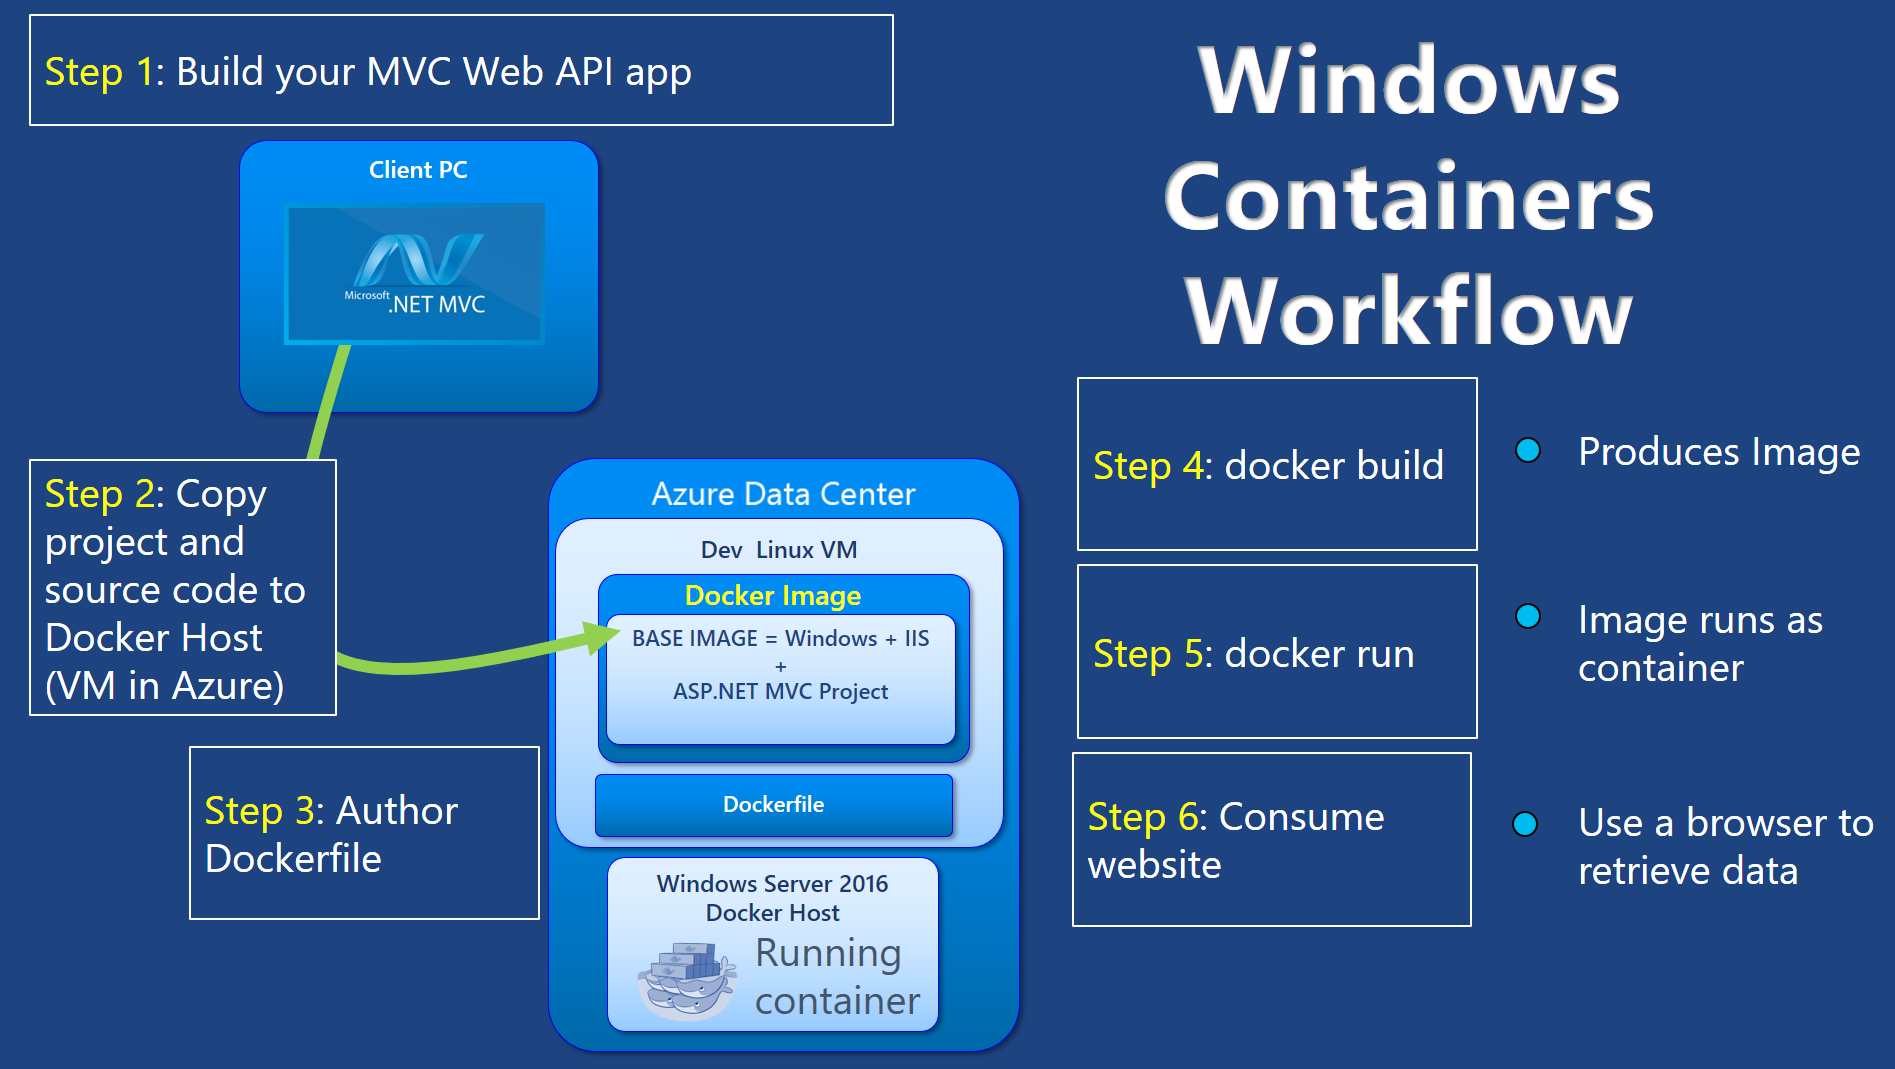
Windows Container Workflow
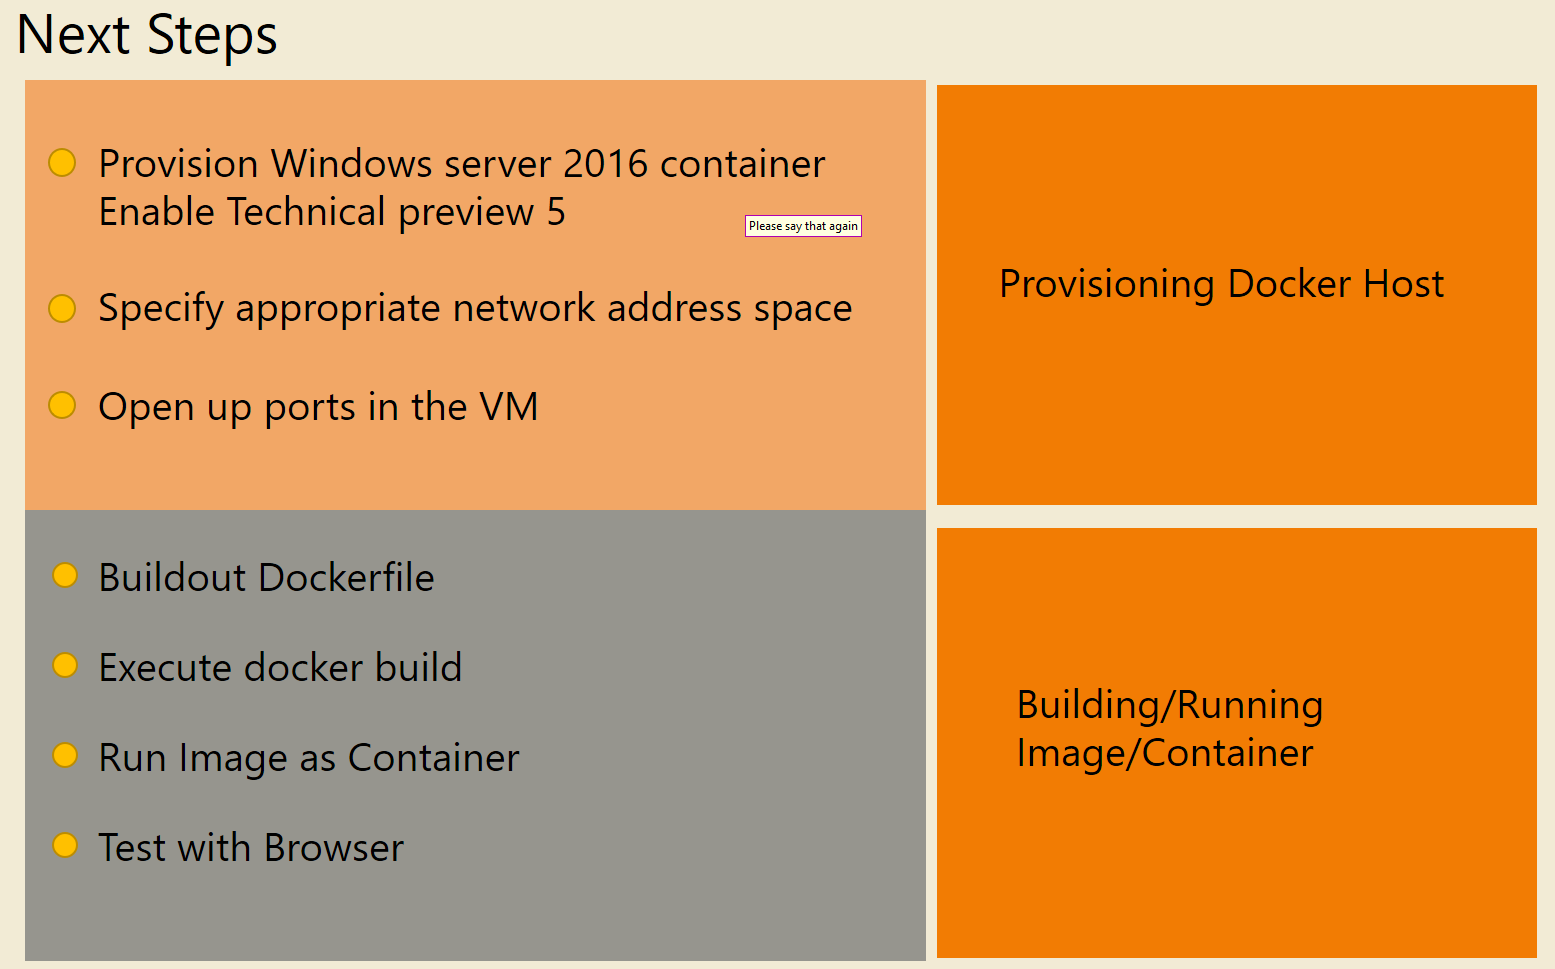
These will be the general steps we follow in this post.
Click image for full size
Figure 3: Workflow for building and running Windows containers
Why containers are important
Perhaps the most important reason why containerization is interesting, is the fact that it can increase deployment velocity. The main reason this happens with the help of containerization is that all of an application's dependencies are bundled up with the application itself.
Delivering the application with all its dependencies
Oftentimes dependencies are installed in a virtual machine. That means when applications are deployed to that virtual machine, there might be an impedance mismatch between the dependency in the virtual machine and the container. Bundling up the dependency along with the container minimizes this risk.
Our web application will be deployed with all its dependencies in a container
In our example we will bundle up a specific version of IIS and a specific version of the ASP.net framework. Once we roll this out as a container, we have a very high degree of confidence that our web application will run as expected, since we will be developing and debugging with the same version of IIS and ASP.net.
We will use the ASP.NET MVC Web API to build out our HTTP-based service.
We will use Visual Studio to do so.
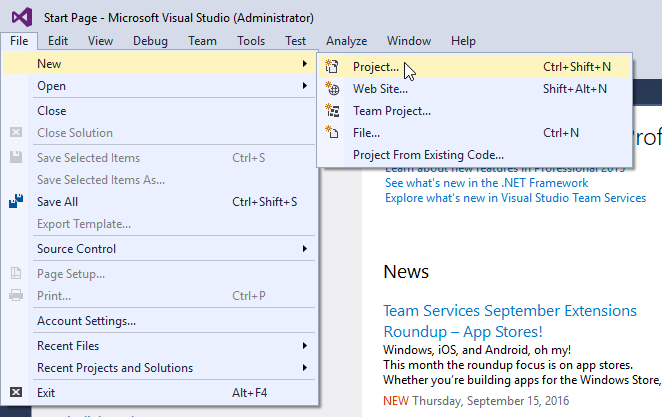
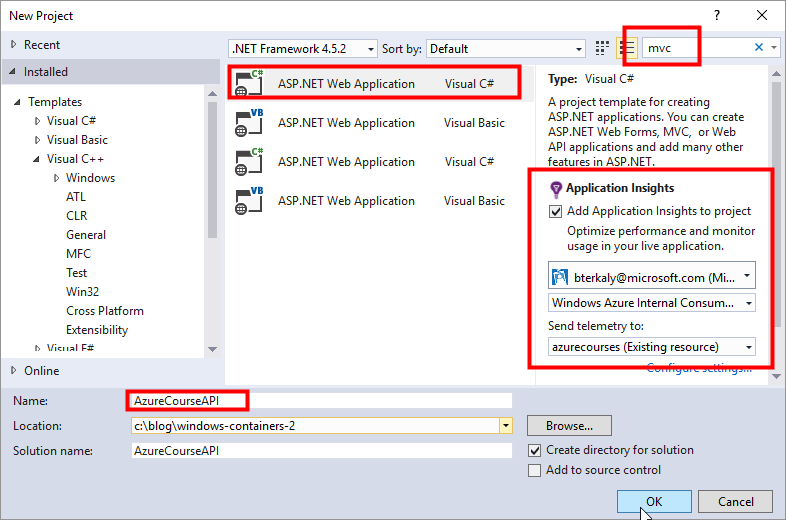
Starting with the new project in Visual Studio
We will use the ASP.net MVC web API to build out our restful API service.
Click image for full size
Figure 4: Creating a new project with Visual Studio
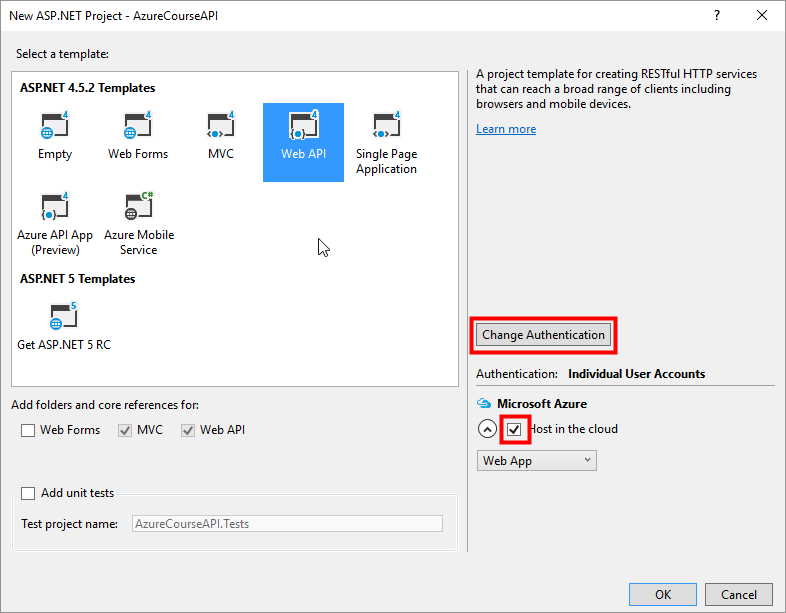
Our API will leverage ASP.NET MVC Web API as you see below. Somewhat tangential, we will choose to store our diagnostic information up in the cloud, but that is orthogonal to this post.
Click image for full size
Figure 5: Choosing ASP.NET Web Application
We will need to select a template below, which defines the type of application we wish to create.
- Web API
- Do NOT host in the cloud
- No Authentication
Click image for full size
Figure 6: Choosing Web API, No Authentication, Do NOT Host in the cloud
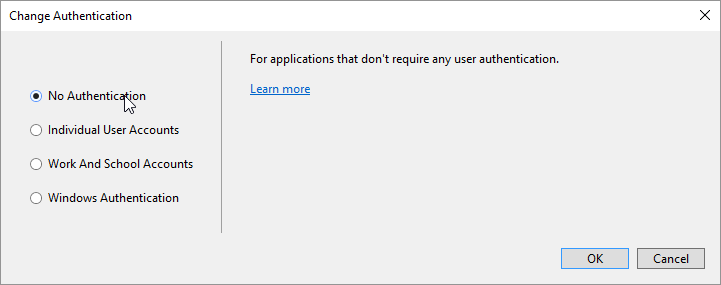
We will ignore the notion of authentication for the purposes of this post.
Click image for full size
Figure 7: No authentication
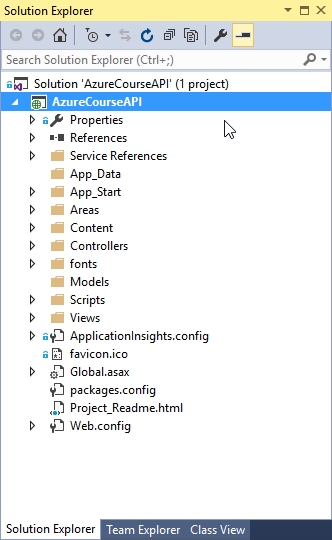
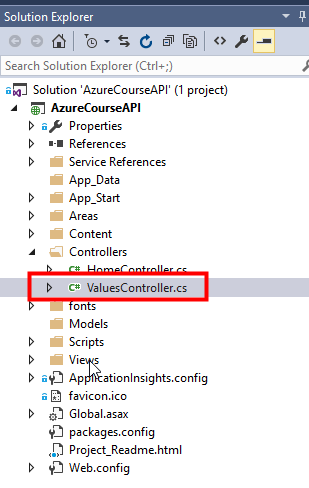
Our Visual Studio Solution Explorer should look like the following. You may choose a different solution name but you'll need to keep this in mind with later parts of the code, particularly with the Dockerfile.
Click image for full size
Figure 8: Visual Studio Solution Explorer
The ValuesController.cs file is contains the code that gets executed automatically when HTTP requests come in.
Notice that in the code snippet below that the various HTTP verbs (GET, POST, PUT, DELETE), map to code or functions.
When we issue "https://your web server/api/values", for example, you will see that because the get method below in return an array of strings, { "Run this ", "from a container" }.
 public class ValuesController : ApiController
{

    public IEnumerable<string> Get()
    {
        return new string[] { "Run this ", "from a container" };
    }

    // GET api/values/5
    public string Get(int id)
    {
        return "value";
    }

    // POST api/values
    public void Post([FromBody]string value)
    {
    }

    // PUT api/values/5
    public void Put(int id, [FromBody]string value)
    {
    }

    // DELETE api/values/5
    public void Delete(int id)
    {
    }
}
Click image for full size
Figure 9: Opening thne ValuesController.cs file
Code to modify
Modify the strings you see in the red box to match. These will be this to stream they get returned back to the browser based on the http request.
Click image for full size
Figure 10: modifying the Get() method
Running the solution locally
Get the F5 key or go to the debug menu and select Start Debugging.
In this case we are running locally on my laptop and that is why you see https://localhost:61532 . when I ran the project within Visual Studio it automatically routed me to localhost with the corresponding port.
Click image for full size
Figure 11: The view from inside the browser
Provisioning a Windows Server Docker host, Building the image, and running image as container in cloud
Click image for full size
Figure 12: Remaining Work
There are a few things that we need to do before we are finished. The first thing is we will need a host for our container application. The host and the main purpose of this post will be to demonstrate how we will host a Windows application. So we will need to provision a Windows server 2016 container-capable Docker host.
From there we will begin the work of building an image that contains our web application that we just finished building. To do this there will be a few artifacts that are required, such as a Dockerfile, some Powershell, and a docker build command.
Let's get started and go to the Azure portal and provision a Windows 2016 virtual machine that is capable of running docker containers. It is currently in Technical Preview 6.
Provision Winows 2016 Docker Host at Portal
Navigate to the Azure portal. this is where we will provision a Windows server virtual machine that is capable of hosting our Docker containers.
Click image for full size
Figure 13: Provisioning Windows server 2016
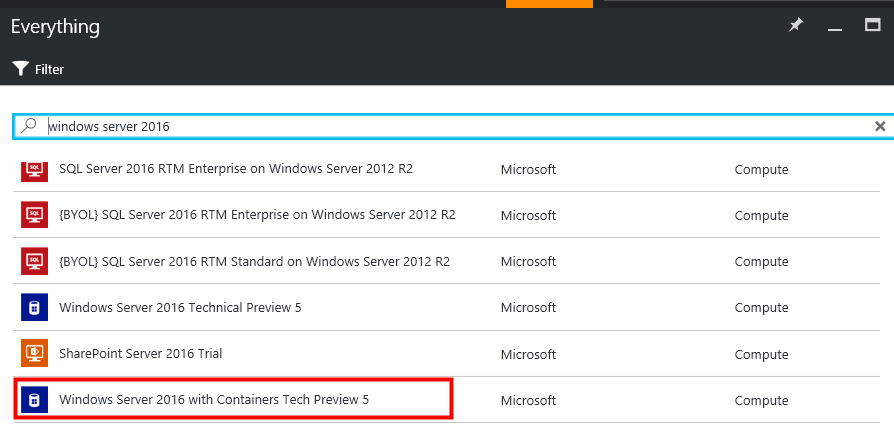
Be sure to select the version that can support containers.
Click image for full size
Figure 14: Containerized Windows server
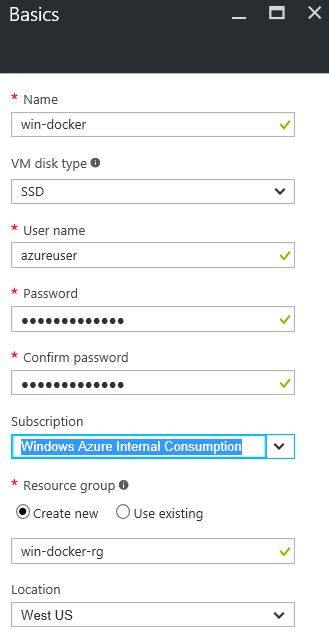
Entering the basic information about your Windows virtual machine.
Click image for full size
Figure 15: Naming your VM
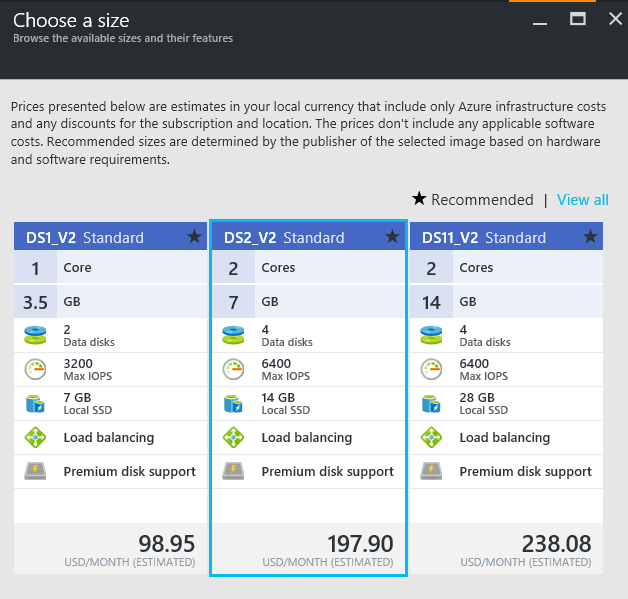
Selecting a virtual machine with two cores and seven GBs of RAM.
Click image for full size
Figure 16: Choosing the hardware footprint
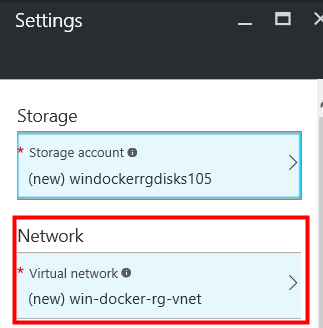
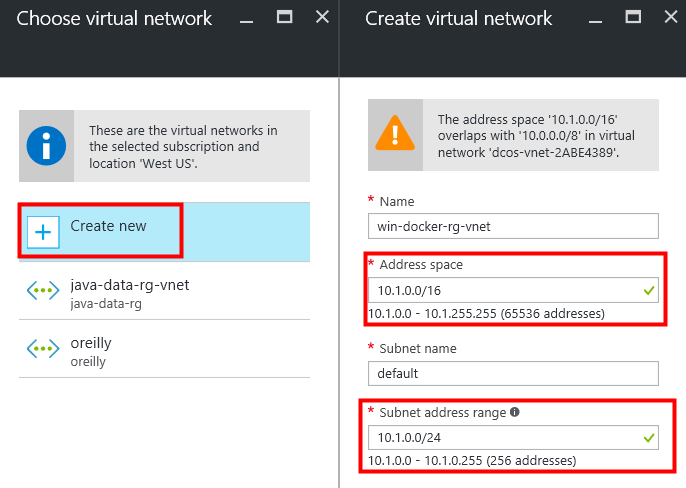
It's important to remember to modify the virtual network configuration. Two addresses only are supported for Docker functionality for Windows server 2016 technical preview 5. The two supported subnets include:
- 192.x.x.x
- 10.x.x.x.x
Click image for full size
Figure 17: Specifying network configuration
Notice that in this case I selected the 10.1.x.x network.
Click image for full size
Figure 18: Entering the address space for the subnet
Dockerfile and Docker Build
Once we create this virtual machine in Azure, we will connect to it. From there we will create a "Dockerfile," which is nothing more than a text file that contains instructions on how we wish to build our image. The instructions inside of the Docker will begin by downloading a base image from Docker Hub, which is a central repository for both Linux and Windows-based images. The Dockerfile will then continue by the deployment process for our MVC App. The process will install some compilation tools. It will also compile our MVC app yet again and then copy it over to the Web server directory of the image (c:\inetpub\wwwroot). After the build process is done, we will have an image that contains all the necessary binaries to run our MVC Web API app.
Additional Guidance
I borrowed some of the guidelines from Anthony Chu:
https://anthonychu.ca/post/dockerizing-aspnet-4x-windows-containers/
Fixing some bugs
I also ran into some bugs that could be easily fixed. Once your container is running, it may not be reachable by client browsers outside of Azure. To fix this problem we will use the following Powershell command,"Get-NetNatStaticMapping."
Get-NetNatStaticMapping | ? ExternalPort -eq 80 | Remove-NetNatStaticMapping
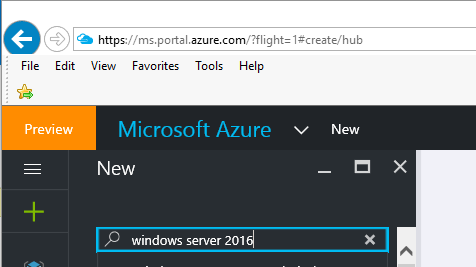
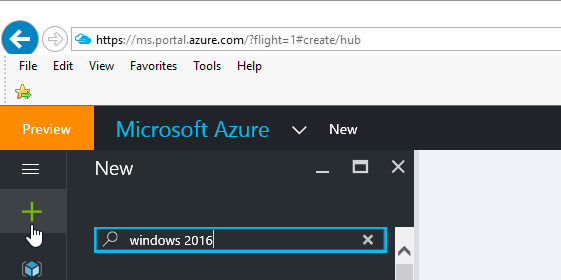
So now we will begin the process of provisioning a container enabled version of Windows server 2016. Begin by going to the Azure portal and clicking on the + . From there, type in Windows 2016 into the search text box.
Click image for full size
Figure 19: Provisioning a Windows virtual machine in Azure
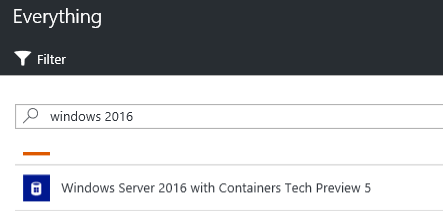
You will then see the ability to choose Windows server 2016 with containers tech preview 5
Click image for full size
Figure 20: Searching for the appropriate image
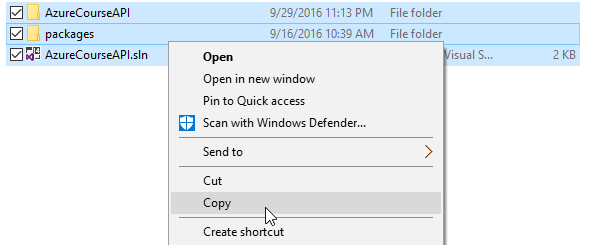
It is now time to copy our source code to our Windows server 2016 virtual machine running in Azure. so go to your local directory for your laptop on which you are developing your ASP.net MVC Web API application.
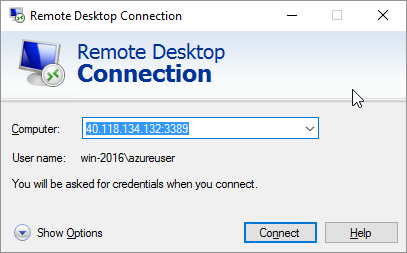
From there we will remotely connect to the virtual machine running an Azure. the next goal will be to copy over our MVC application, along with all of its source code, to this running Windows Server virtual machine an Azure.
Click image for full size
Figure 21: Remotely connecting to the Windows 2116 server
Click image for full size
Figure 22: Copying our entire project from the local laptop used to develop the MVC web app
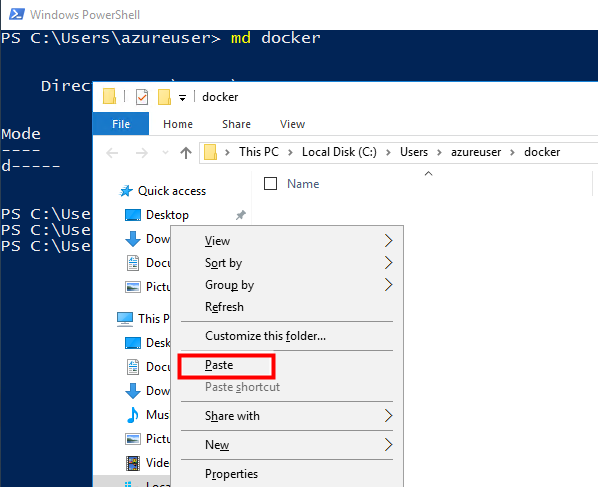
Now that we have the project in the clipboard, the next step is to go back to our Windows server running in the cloud and paste into a folder we create. We will call that folder docker for simplicity's sake.
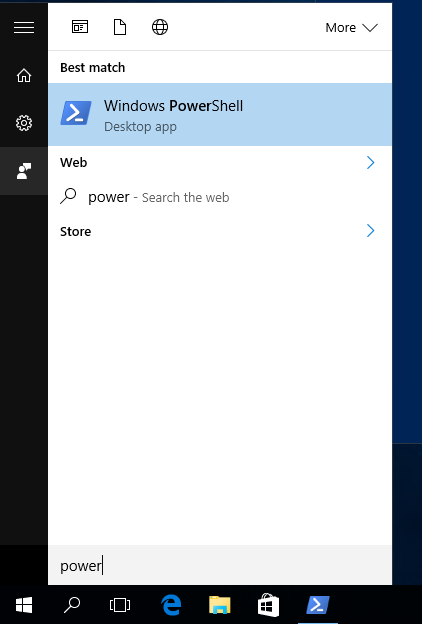
When working with docker and containerization, most of your work is achieved at the command line. In the Linux world, we typically work in a bash environment, while in the Windows will will just simply use either a command prompt or Powershell.
So let's navigate into Powershell.
Click image for full size
Figure 23: Start the Powershell Command Line
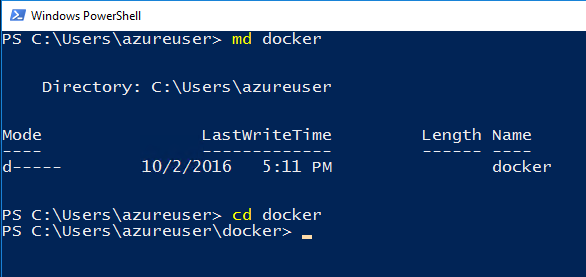
We will create a docker directory in which we will place our work.
Click image for full size
Figure 24: Command line to make a directory
Let's be clear that you are pasting into the Windows server 2016 virtual machine running in Azure.
Click image for full size
Figure 25: Paste in your application and supporting code
The code below provides some interesting ways for us to deploy our MVC Application.
- The base image will be a Windows Image with IIS pre-installed. starting with this base image saves the time of us installing Internet Information Server.
- We install the Chocolatey tools, which lets you install Windows programs from the command line very easily
- Because we will compile our MVC application prior to deploying into the image, the next section requires us to install the build tooling
- A bill directory is created and files are copied into it so that the build process can take place in its own directory
- Nuget packages are installed, a build takes place in the files are copied to c:\inetpub\wwwroot
You will need to pay particular attention to the application name below, AzureCourseAPI.sln, and the related dependencies. You will obviously need to modify this for the name of your project.
 # TP5 for technology preview (will not be needed when we go GA)
# FROM microsoft/iis
FROM microsoft/iis:TP5

# Install Chocolatey (tools to automate commandline compiling)
ENV chocolateyUseWindowsCompression false
RUN @powershell -NoProfile -ExecutionPolicy unrestricted -Command "(iex ((new-object net.webclient).DownloadString('https://chocolatey.org/install.ps1'))) >$null 2>&1" && SET PATH=%PATH%;%ALLUSERSPROFILE%\chocolatey\bin

# Install build tools
RUN powershell add-windowsfeature web-asp-net45 \
&& choco install microsoft-build-tools -y --allow-empty-checksums -version 14.0.23107.10 \
&& choco install dotnet4.6-targetpack --allow-empty-checksums -y \
&& choco install nuget.commandline --allow-empty-checksums -y \
&& nuget install MSBuild.Microsoft.VisualStudio.Web.targets -Version 14.0.0.3 \
&& nuget install WebConfigTransformRunner -Version 1.0.0.1

RUN powershell remove-item C:\inetpub\wwwroot\iisstart.*

# Copy files (temporary work folder)
RUN md c:\build
WORKDIR c:/build
COPY . c:/build

# Restore packages, build, copy
RUN nuget restore \
&& "c:\Program Files (x86)\MSBuild\14.0\Bin\MSBuild.exe" /p:Platform="Any CPU" /p:VisualStudioVersion=12.0 /p:VSToolsPath=c:\MSBuild.Microsoft.VisualStudio.Web.targets.14.0.0.3\tools\VSToolsPath AzureCourseAPI.sln \
&& xcopy c:\build\AzureCourseAPI\* c:\inetpub\wwwroot /s

# NOT NEEDED ANYMORE –> ENTRYPOINT powershell .\InitializeContainer
Dockerfile
InitializeContainer gets executed at the and. The web.config file needs to be transformed once our app gets deployed.
 If (Test-Path Env:\ASPNET_ENVIRONMENT)
{
    \WebConfigTransformRunner.1.0.0.1\Tools\WebConfigTransformRunner.exe \inetpub\wwwroot\Web.config "\inetpub\wwwroot\Web.$env:ASPNET_ENVIRONMENT.config" \inetpub\wwwroot\Web.config
}

# prevent container from exiting
powershell
InitializeContainer
Docker Build
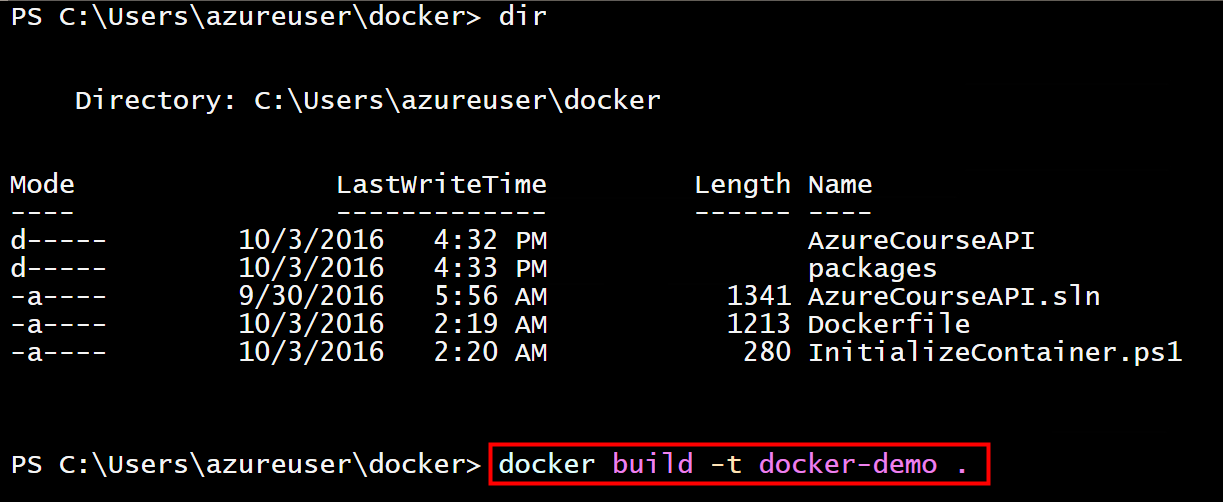
At this point we are ready to begin the building of our image.
docker build -t docker-demo .
Docker build
The syntax for the docker build commamd.
Click image for full size
Figure 26: The docker build command
The next step is to build the image using the doctor build command as seen below.
Click image for full size
Figure 27: The docker build command continued...
The docker run takes the name of our image and runs it as a container.
Docker Run
docker run -d -p 80:80 docker-demo
Docker run
Getting ready to test our running container
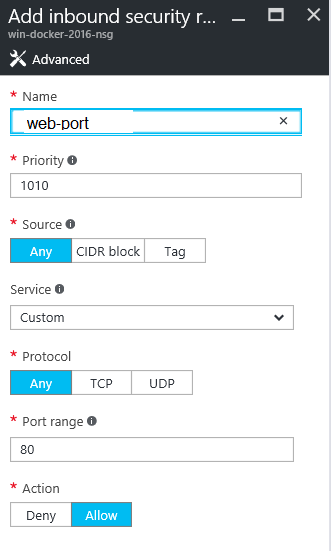
Is a few more things to do before we can test our container properly. The first thing we need to do is open up port 80 on the Windows server virtual machine running in Azure. By default everything is locked down.
Click image for full size
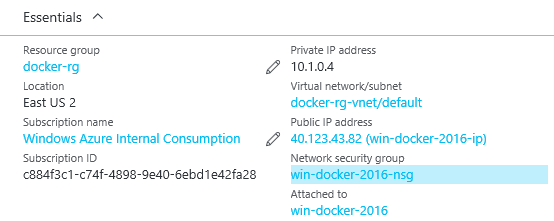
Figure 28: Public IP address from the portal
Network security groups are the mechanism by which we can open and close ports. A network security group can contain one or more rules. We are adding a rule to open up port 80 below.
Click image for full size
Figure 29: Opening up Port 80
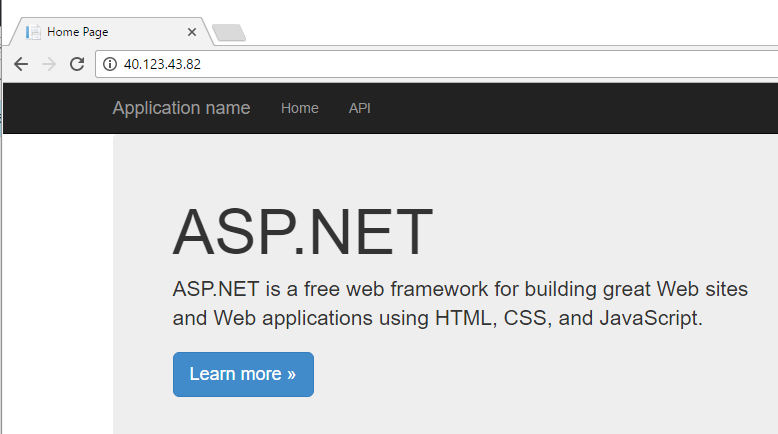
We are now ready to navigate to the public IP address, as indicated in the figure, Public IP address from the portal. the default homepage is displayed.
Click image for full size
Figure 30: Home Page for Web Site
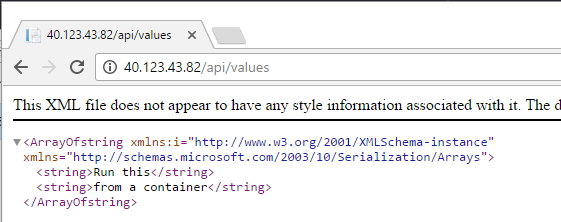
The real goal of this exercise is to make an API called to a restful endpoint that will return some JSON data. Notice that in the browser we can see the appropriate JSON data being returned.
Click image for full size
Figure 31: JSON Data from API Call
Conclusion
This post demonstrated the implementation of an ASP.net MVC Web Api application running in their Windows container. Interestingly, there is support for this type of an application in a Linux-based container, but that is reserved for a future post. In addition, there will be a forthcoming Windows Nano implementation, which will be a much lighter version than what we saw here in this post.
Hopefully, this post provided some value as some of this was difficult to discover and write about. I welcome your comments below.
Troubleshooting Guidance (orthogonal to this post)
below are some command to help you better troubleshoot issues that might arise.
https://github.com/docker/docker/issues/21558
docker inspect docker-demo
This command can tell you about your running container.
 [
    {
        "Id": "sha256:27cdd74ae5d66bb59306c62cdd63cd629da4c7fd77d7a9efbf240d0b4882ead7",
        "RepoTags": [
            "docker-demo:latest"
        ],
        "RepoDigests": [],
        "Parent": "sha256:50fcbe5e3653b3ea65d4136957b4d06905ddcb37bf46c4440490f885b99c38dd",
        "Comment": "",
        "Created": "2016-10-04T03:36:32.8079573Z",
        "Container": "98190701562a0a70b100e470f8244d203afaa68cb4ccb64c42ba5bee10817934",
        "ContainerConfig": {
            "Hostname": "2ac70997c0f2",
            "Domainname": "",
            "User": "",
            "AttachStdin": false,
            "AttachStdout": false,
            "AttachStderr": false,
            "Tty": false,
            "OpenStdin": false,
            "StdinOnce": false,
            "Env": [
                "chocolateyUseWindowsCompression=false"
            ],
            "Cmd": [
                "cmd",
                "/S",
                "/C",
                "#(nop) ",
                "ENTRYPOINT [\"cmd\" \"/S\" \"/C\" \"powershell .\\\\InitializeContainer\"]"
            ],
            "ArgsEscaped": true,
            "Image": "sha256:50fcbe5e3653b3ea65d4136957b4d06905ddcb37bf46c4440490f885b99c38dd",
            "Volumes": null,
            "WorkingDir": "C:\\build",
            "Entrypoint": [
                "cmd",
                "/S",
                "/C",
                "powershell .\\InitializeContainer"
            ],
            "OnBuild": [],
            "Labels": {}
        },
        "DockerVersion": "1.12.1",
        "Author": "",
        "Config": {
            "Hostname": "2ac70997c0f2",
            "Domainname": "",
            "User": "",
            "AttachStdin": false,
            "AttachStdout": false,
            "AttachStderr": false,
            "Tty": false,
            "OpenStdin": false,
            "StdinOnce": false,
            "Env": [
                "chocolateyUseWindowsCompression=false"
            ],
            "Cmd": null,
            "ArgsEscaped": true,
            "Image": "sha256:50fcbe5e3653b3ea65d4136957b4d06905ddcb37bf46c4440490f885b99c38dd",
            "Volumes": null,
            "WorkingDir": "C:\\build",
            "Entrypoint": [
                "cmd",
                "/S",
                "/C",
                "powershell .\\InitializeContainer"
            ],
            "OnBuild": [],
            "Labels": {}
        },
        "Architecture": "amd64",
        "Os": "windows",
        "Size": 8650981554,
        "VirtualSize": 8650981554,
        "GraphDriver": {
            "Name": "windowsfilter",
            "Data": {
                "dir": "C:\\ProgramData\\docker\\windowsfilter\\498f5114b4972b7a19e00c3e7ac1303ad28addd774d6c7b949e9955e2147950e"
            }
        },
        "RootFS": {
            "Type": "layers",
            "Layers": [
                "sha256:72f30322e86c1f82bdbdcfaded0eed9554188374b2f7f8aae300279f1f4ca2cb",
                "sha256:23adcc284270a324a01bb062ac9a6f423f6de9a363fcf54a32e3f82e9d022fc4",
                "sha256:fbb9343bb3906680e5f668b4c816d04d1befc7e56a284b76bc77c050dfb04f1f",
                "sha256:ad000fd14864d0700d9b0768366e124dc4c661a652f0697f194cdb5285a5272c",
                "sha256:8b6bfce4717823dfde8bde9624f8192c83445a554adaec07adf80dc6401890ba",
                "sha256:8ff4edf470318e6d6bce0246afc6b4cb6826982cd7ef3625ee928a24be048ad8",
                "sha256:1852364f9fd5c7f143cd52d6103e3eec5ed9a0e909ff0fc979b8250d42cf56bd",
                "sha256:08325b3804786236045a8979b3575fd8dcd501ff9ca22d9c8fc82699d2c045ad",
                "sha256:7a7f406dcbae5fffbbcd31d90e86be62618e4657fdf9ef6d1af75e86f29fcd19",
                "sha256:d2d8dc7b30514f85991925669c6f829e909c5634204f2eaa543dbc5ceb811d29",
                "sha256:da0607f92811e97e941311b3395bb1b9146d91597ab2f21b2e34e503ad57e73f",
                "sha256:0937ca7b5cbb9ec4a34394c4342f7700d97372ea85cec6006555f96eada4d8c3"
            ]
        }
    }
]
netstat -ab | findstr ":80"
Displays information about network connections for the Transmission Control Protocol (both incoming and outgoing), routing tables, and a number of network interface (network interface controller or software-defined network interface) and network protocol statistics.
| Flag | Meaning |
|---|---|
| -a | Displays all active connections and the TCP and UDP ports on which the computer is listening. |
| -b | (Windows) Displays the binary (executable) program's name involved in creating each connection or listening port |
Click image for full size
Figure 32: snap32.png
Comments
- Anonymous
January 25, 2017
I'm interested in this technology, but I have a point of confusion... your example shows a single container, which takes over port 80 from the host OS. How does this scale with multiple containers? How would you suggest assigning different IPs, or at least ports, to each container?Thanks!- Anonymous
January 27, 2017
This is where something like IIS Application Request Routing or another reverse proxy / load balancer such as NGINX will help. They can split up requests based on URL across multiple containers.Networking modes other than NAT can also provide containers with separate public IPs- Anonymous
January 28, 2017
Bruno,Can you PLEASE point me to such an example that is based on native Windows Containers ( and not Linux ). I have searched quite a bit but don't see any examples. Thanks- Anonymous
January 28, 2017
This is native Windows containers. This is not a Linux example.
- Anonymous
- Anonymous
- Anonymous
