My Take on an Azure Open Source Cross-Platform DevOps Toolkit–Part 9
| My Take on an Azure Open Source Cross-Platform DevOps Toolkit–Part 1 | Click Here |
| My Take on an Azure Open Source Cross-Platform DevOps Toolkit–Part 2 | Click Here |
| My Take on an Azure Open Source Cross-Platform DevOps Toolkit–Part 3 | Click Here |
| My Take on an Azure Open Source Cross-Platform DevOps Toolkit–Part 4 | Click Here |
| My Take on an Azure Open Source Cross-Platform DevOps Toolkit–Part 5 | Click Here |
| My Take on an Azure Open Source Cross-Platform DevOps Toolkit–Part 6 | Click Here |
| My Take on an Azure Open Source Cross-Platform DevOps Toolkit–Part 7 | Click Here |
| My Take on an Azure Open Source Cross-Platform DevOps Toolkit–Part 8 | Click Here |
| My Take on an Azure Open Source Cross-Platform DevOps Toolkit–Part 9 | Click Here |
| My Take on an Azure Open Source Cross-Platform DevOps Toolkit–Part 10 | Click Here |
| My Take on an Azure Open Source Cross-Platform DevOps Toolkit–Part 11 | Click Here |
| My Take on an Azure Open Source Cross-Platform DevOps Toolkit–Part 12 | Click Here |
Setting up a tunnel
Before we can talk to our DC/OS cluster running in Azure, we need to setup a tunnel. This tunnel will leverage the SSH keys. This is explained here: https://blogs.msdn.microsoft.com/allthingscontainer/2016/08/25/containerizing-java-applications-in-azure-using-dcos-and-the-azure-container-service/
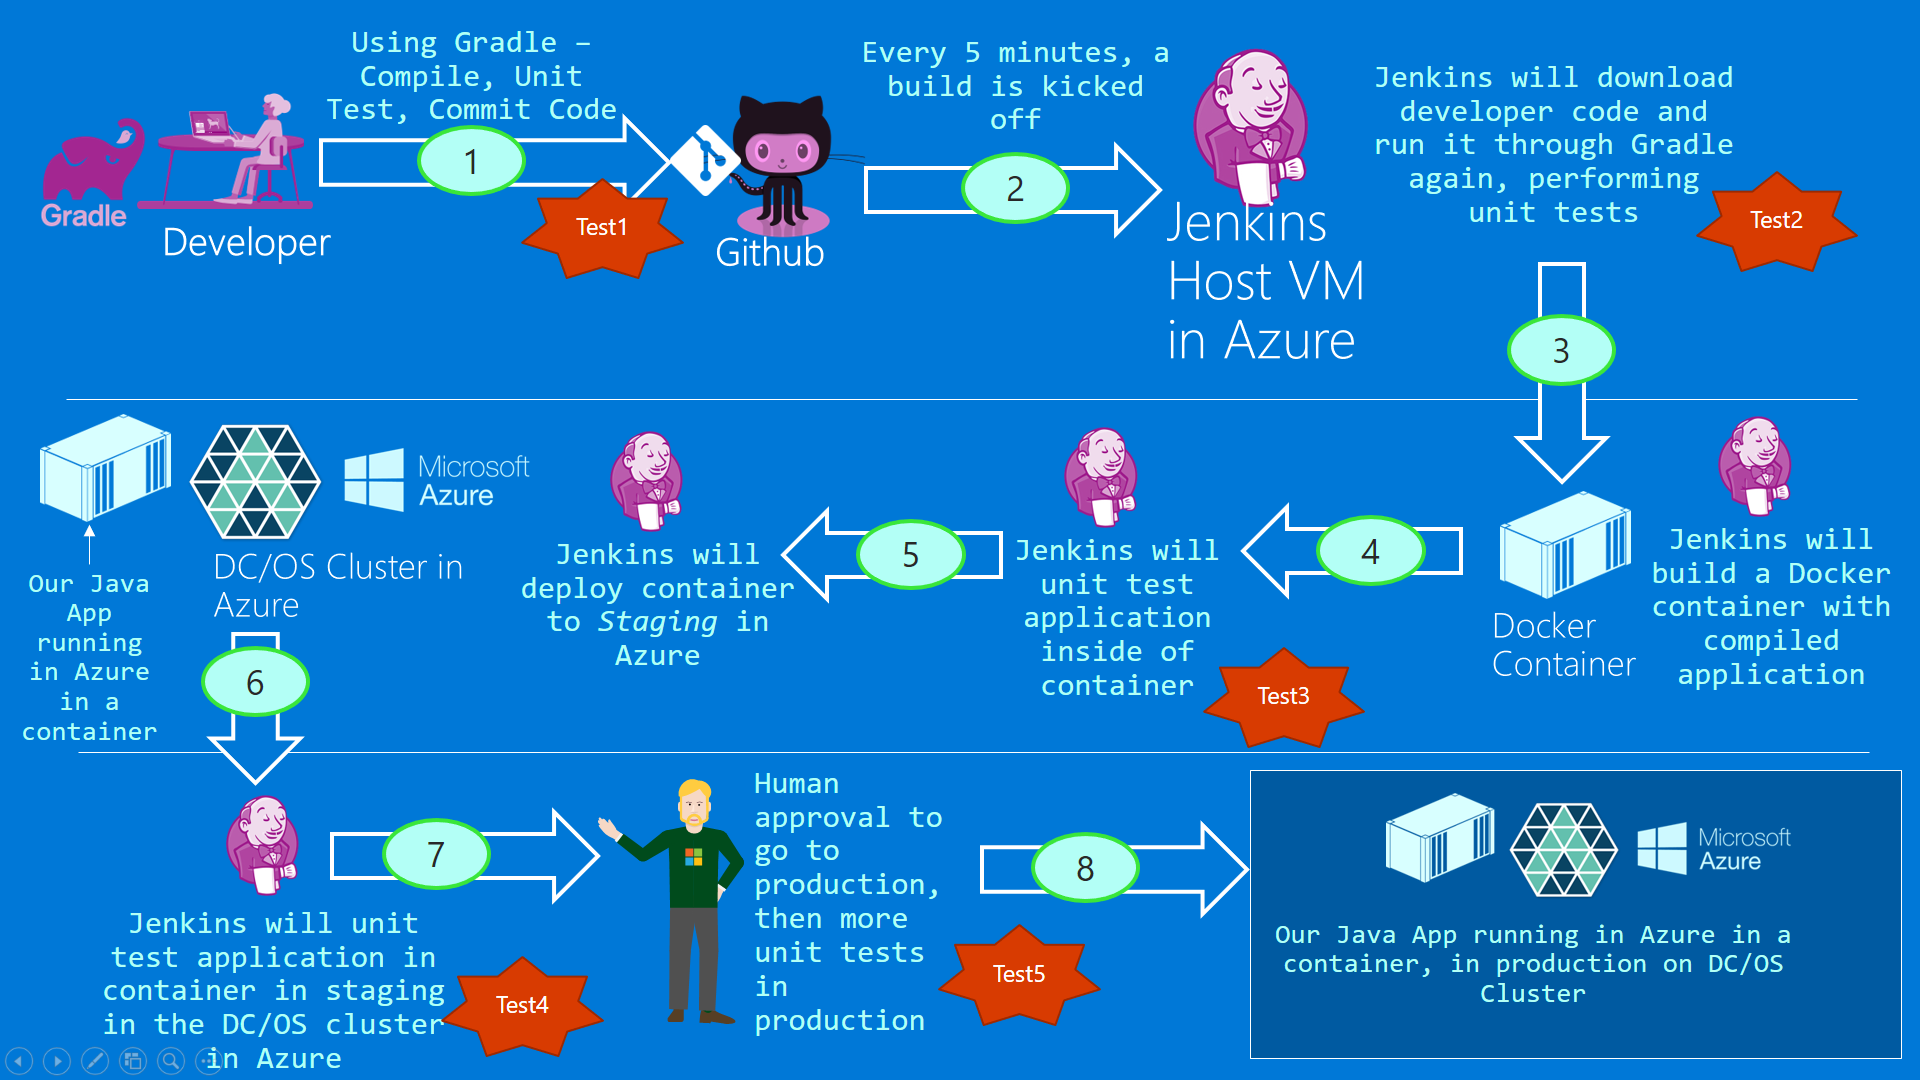
Between steps 5 and 6 we need to setup a tunnel to communicate with the master node of our DC/OS cluster.
This post is about setting up that tunnel. This is often called port forwarding as well.
The master nodes control the running of containers in the cluster.
Figure 1: The big picture
Setting up the tunnel. Running our myapp in the DC/OS cluster
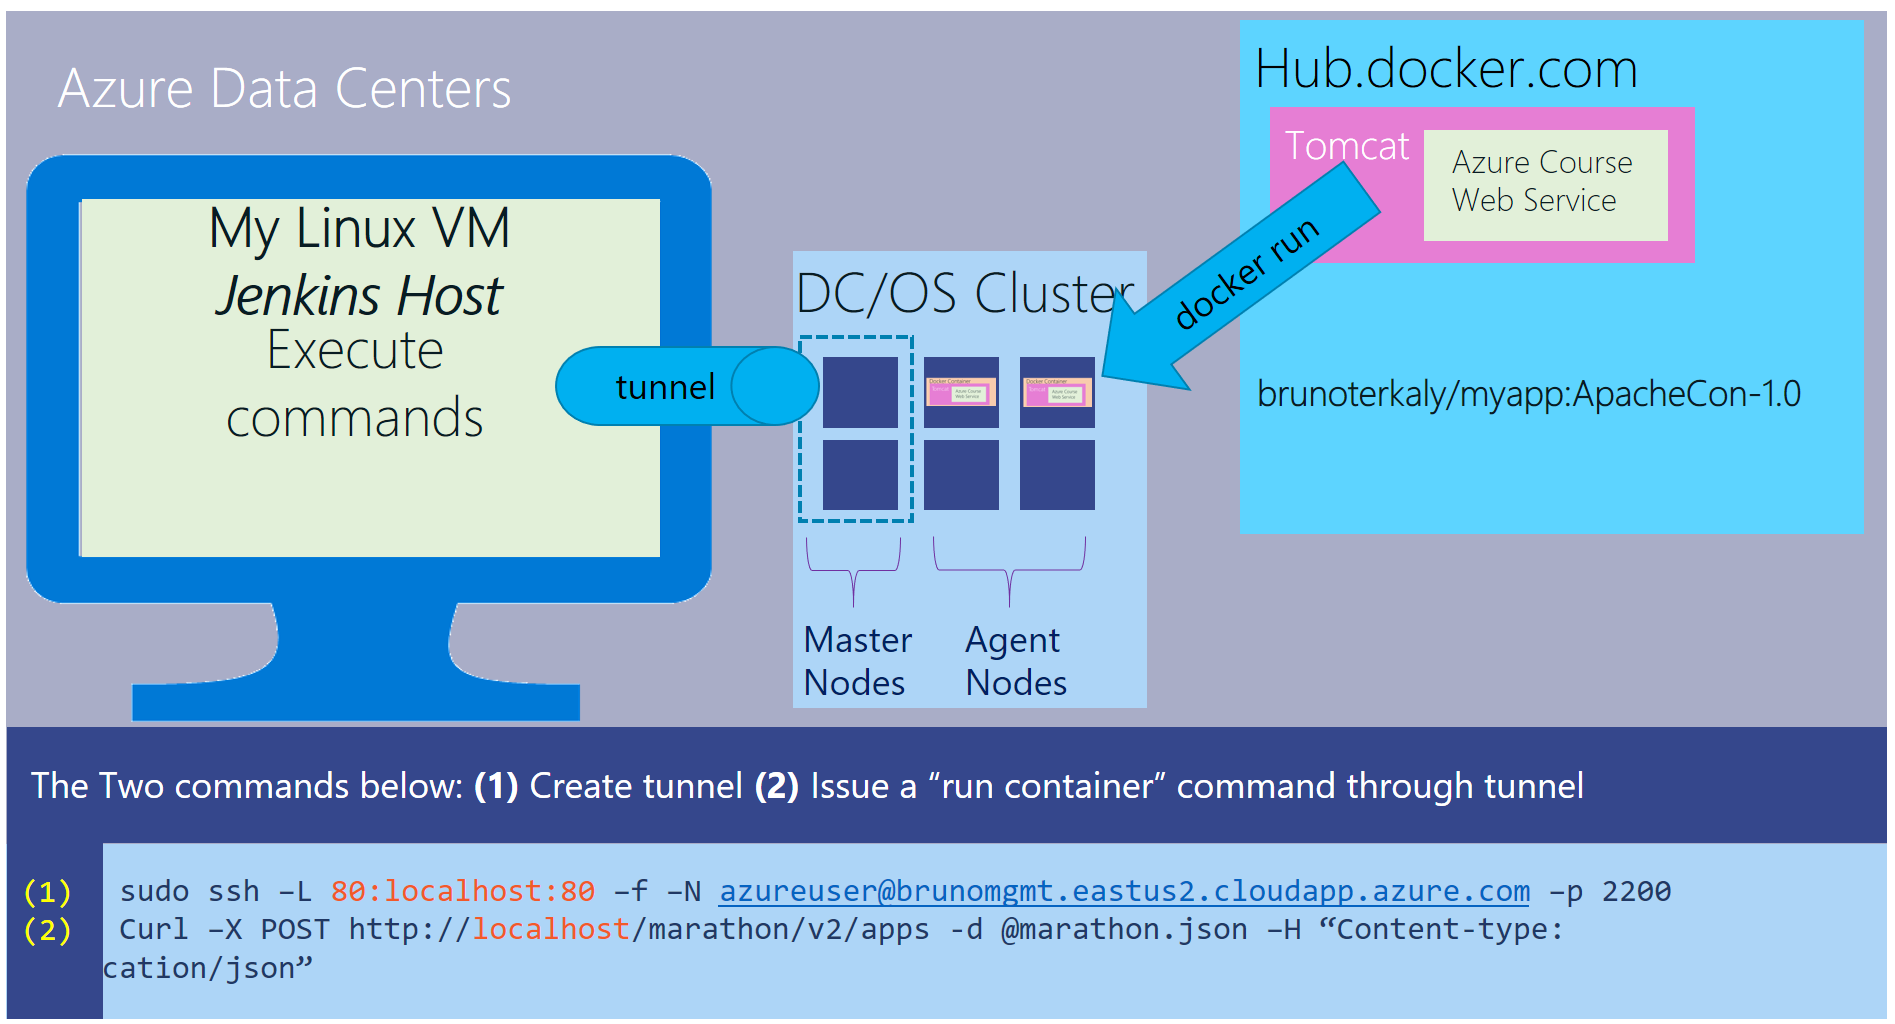
As mentioned, our Jenkins host needs a tunnel to connect up to the DC/OS cluster running in Azure.
Notice the tunnel connects the Jenkins host to the master nodes of the DC/OS cluster.
You can see the ssh command to create the tunnel. You can also see the curl command. The curl command is used to run our containerized application. We'll cover that in the next post.
Figure 2: Setting up tunnels
Creating a DC/OS cluster
I illustrate how to do this here:
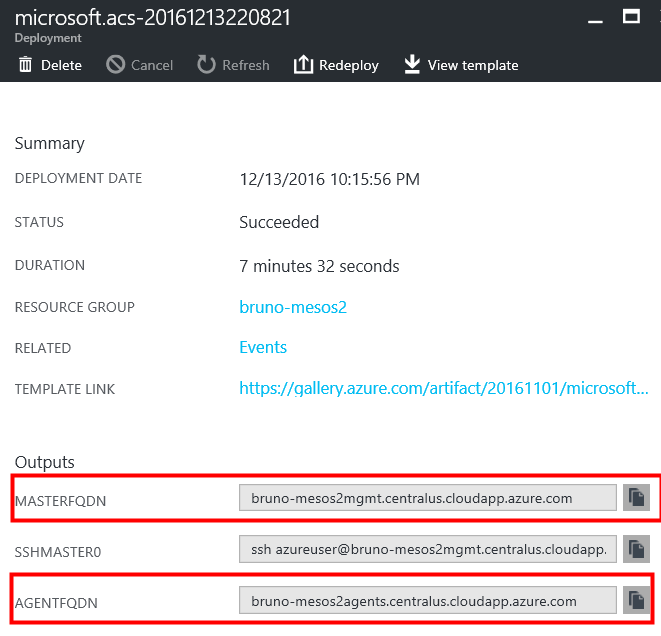
The key takeaway is getting the MASTERFQDN and AGENTFQDN.
The master nodes are used to run, view, delete applications in/from the cluster. The agents are what will actually run the containers (myapp).
| Developer (go to master) | Communicates with the Master nodes |
| End users (go to agents) | Get access to running applications in Agents |
Figure 3: The Azure portal showing our cluster details (DC/OS)
Python code to setup tunnel - SetupTunnelToStaging.py
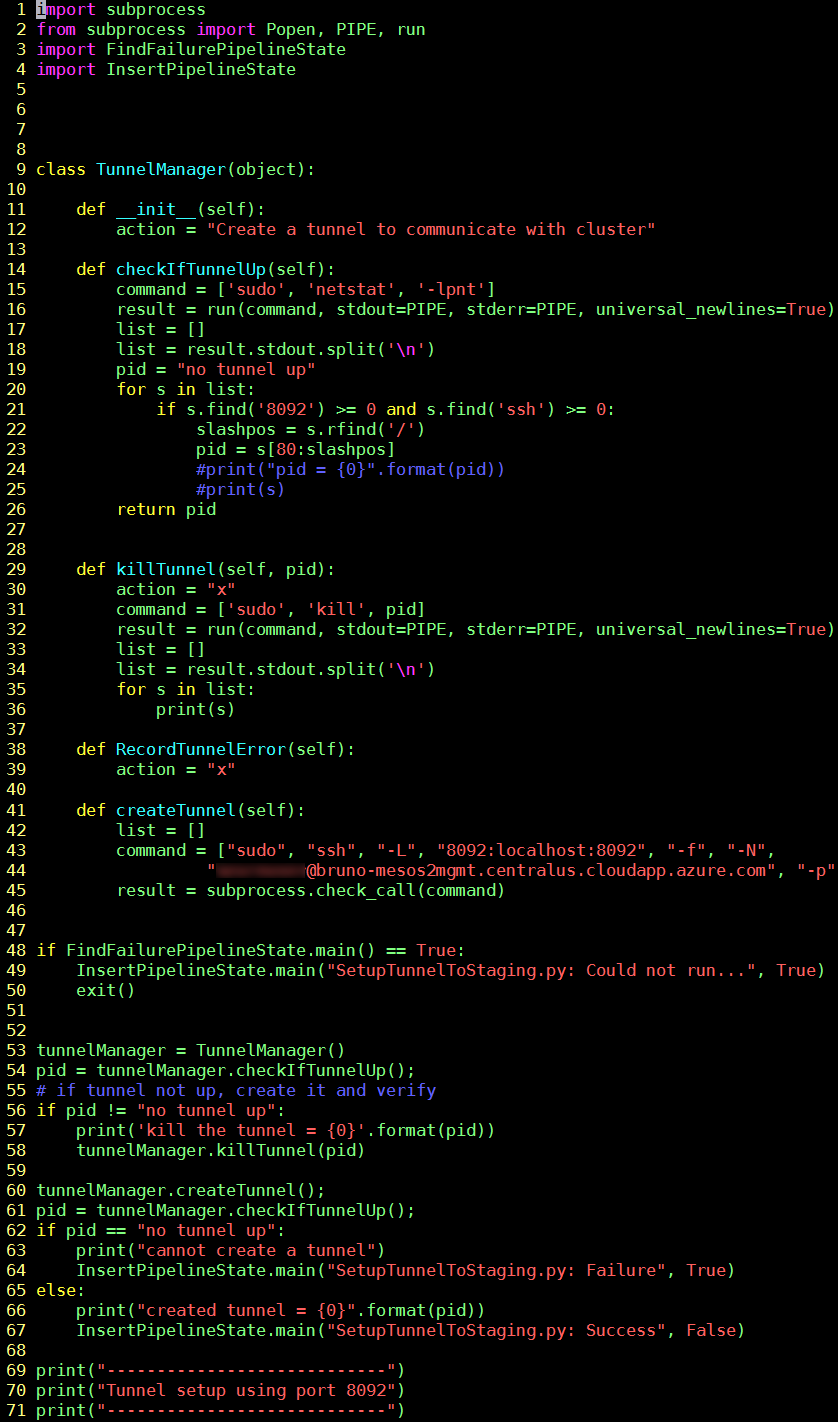
The code below sets up a tunnel from our Jenkins host to a DC/OS cluster in Azure.
| 9-45 | The class TunnelManager which allows us to manage the tunnel/port forwarding |
| 14-26 | The netstat command which can look for tunnels already defined. We are working with port 8092. It will retrieve the process id of the ssh process which manages the tunnel. We will kill this process as we will always re-establish the tunnel, removing the old one if necessary. |
| 29-36 | Kill the process which controls the tunnel for port 8092 |
| 41-45 | Establish the tunnel. That means if the Jenkins host sends http commands to local host, they will end up going through the local port of 8092 on the Jenkins host and connecting to port 2200 (the listening port of the master node in the DC/OS cluster) |
Figure 4: Source code for SetupTunnelToStaging.py
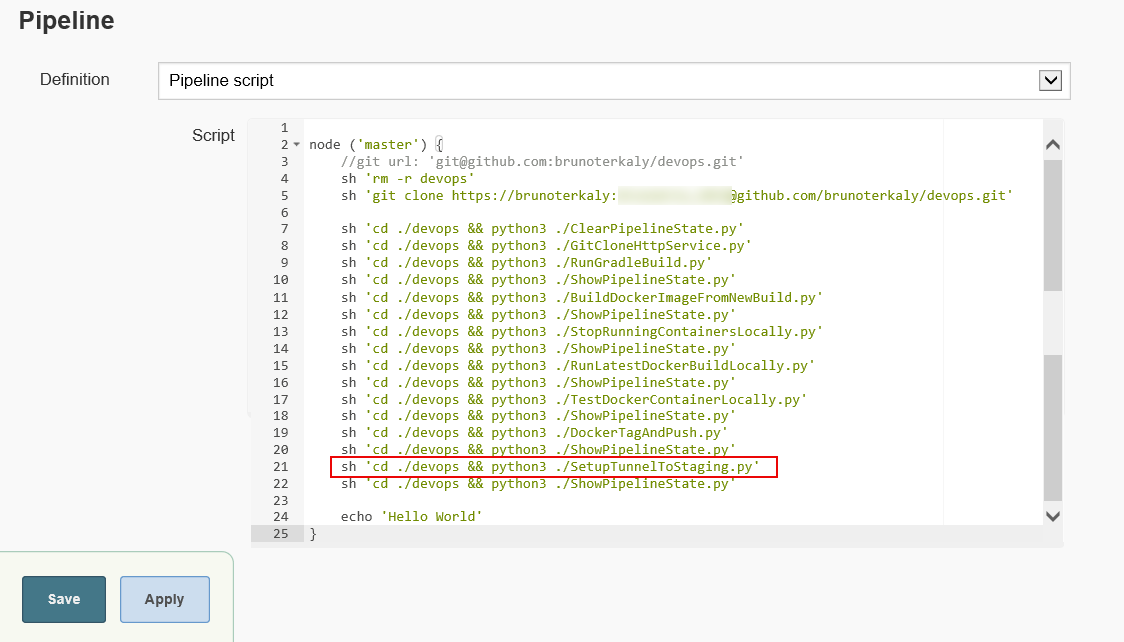
Notice we are setting up the tunnel in Jenkins. Special note is that we had to use "sudo" to be able to have enough privileges to setup the tunnel.
Figure 5: The current pipeline
Successful run of the current pipeline
This is the Jenkins pipeline console output.
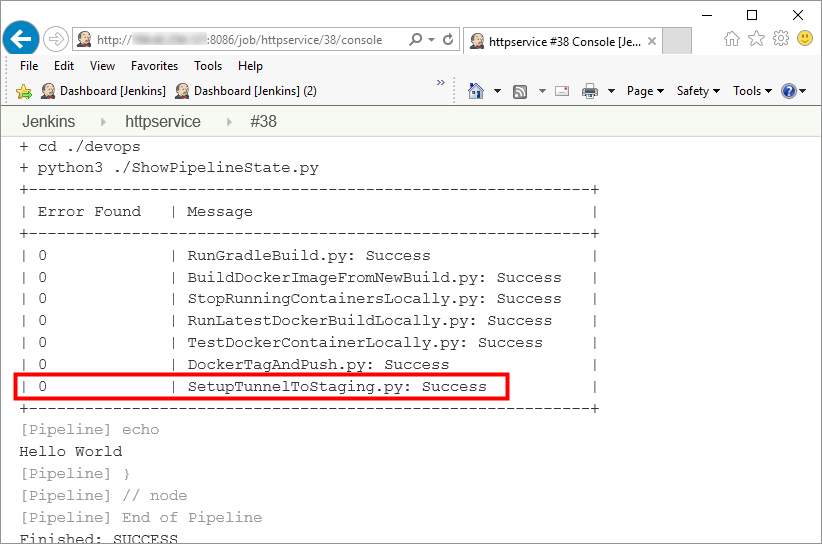
Figure 6: Console output of the Jenkins Pipeline
Conclusion
In order for us to run containers on the DC/OS cluster, we need to setup a tunnel or port forwarding, so that we can communicate with the master nodes. The code above solves some of these difficult problems.
