教學課程:從 Azure 入口網站使用匯出的範本
在此教學課程系列中,您會建立範本來部署 Azure 儲存體帳戶。 在接下來的兩個教學課程中,您將會新增「App Service 方案」和「網站」。 您不需要從頭開始建立範本,而是要了解如何從 Azure 入口網站匯出範本,以及如何使用來自 Azure 快速入門範本的範例範本。 您可以基於自己的用途來自訂那些範本。 此教學課程著重於匯出範本,以及自訂範本的結果。 完成此指示需要 14 分鐘的時間。
必要條件
我們建議您完成有關輸出的教學課程,但並非必要。
您必須具有 Visual Studio Code 並搭配 Resource Manager 工具延伸模組,以及 Azure PowerShell 或 Azure 命令列介面 (CLI)。 如需詳細資訊,請參閱範本工具。
檢閱範本
在上一個教學課程結束時,您的範本會具有下列 JSON 檔案:
{
  "$schema": "https://schema.management.azure.com/schemas/2019-04-01/deploymentTemplate.json#",
  "contentVersion": "1.0.0.0",
  "parameters": {
    "storagePrefix": {
      "type": "string",
      "minLength": 3,
      "maxLength": 11
    },
    "storageSKU": {
      "type": "string",
      "defaultValue": "Standard_LRS",
      "allowedValues": [
        "Standard_LRS",
        "Standard_GRS",
        "Standard_RAGRS",
        "Standard_ZRS",
        "Premium_LRS",
        "Premium_ZRS",
        "Standard_GZRS",
        "Standard_RAGZRS"
      ]
    },
    "location": {
      "type": "string",
      "defaultValue": "[resourceGroup().location]"
    }
  },
  "variables": {
    "uniqueStorageName": "[concat(parameters('storagePrefix'), uniqueString(resourceGroup().id))]"
  },
  "resources": [
    {
      "type": "Microsoft.Storage/storageAccounts",
      "apiVersion": "2021-09-01",
      "name": "[variables('uniqueStorageName')]",
      "location": "[parameters('location')]",
      "sku": {
        "name": "[parameters('storageSKU')]"
      },
      "kind": "StorageV2",
      "properties": {
        "supportsHttpsTrafficOnly": true
      }
    }
  ],
  "outputs": {
    "storageEndpoint": {
      "type": "object",
      "value": "[reference(variables('uniqueStorageName')).primaryEndpoints]"
    }
  }
}
此範本適用於部署儲存體帳戶,但您可能想要在其中新增更多資源。 您可以從現有資源匯出範本,以快速取得該資源的 JSON。
建立 App Service 方案
登入 Azure 入口網站。
選取 [建立資源]。
在 [搜尋服務和 Marketplace] 中,輸入 App Service 方案,然後選取 [App Service 方案]。
選取 建立。
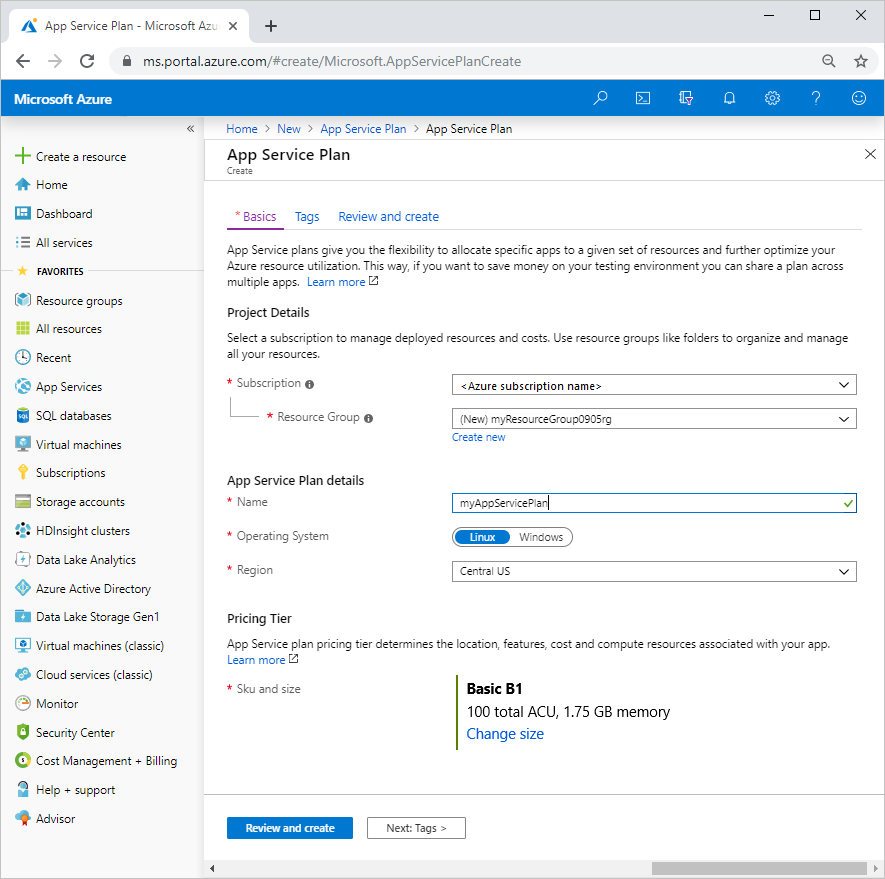
在 [建立 App Service 方案] 頁面上,輸入下列項目:
- 訂用帳戶:從下拉式功能表選取您的 Azure 訂用帳戶。
- 資源群組:選取 [新建],然後指定一個名稱。 提供與您在此教學課程系列中所使用名稱不同的資源群組名稱。
- 名稱:輸入 App Service 方案的名稱。
- 作業系統:選取 [Linux]。
- 區域:從下拉式功能表選取 Azure 位置,例如 [美國中部]。
- 定價層:若要節省成本,請在 [開發/測試] 底下針對需求較小的工作負載,選取 [變更大小] 以將 [SKU 和大小] 變更為第一個 [基本 (B1)]。

選取 [檢閱和建立]。
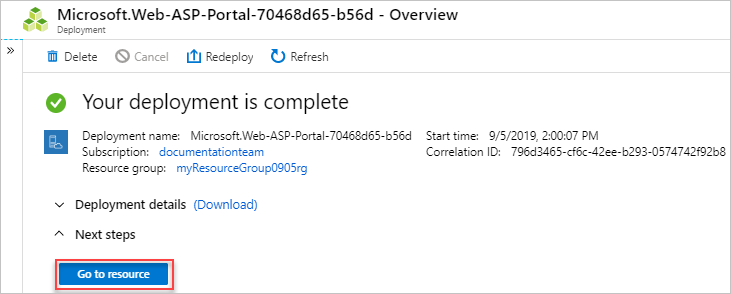
選取 建立。 建立資源需要一些時間。
匯出範本
選取 [前往資源] 。

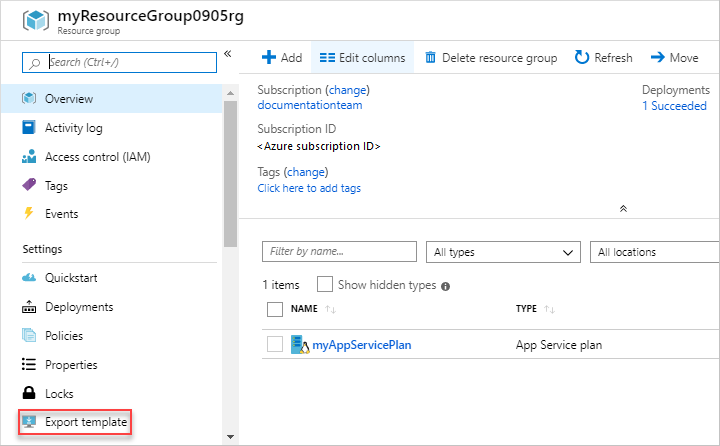
從左側功能表中,選取位於 [自動化] 下方的 [匯出範本]。

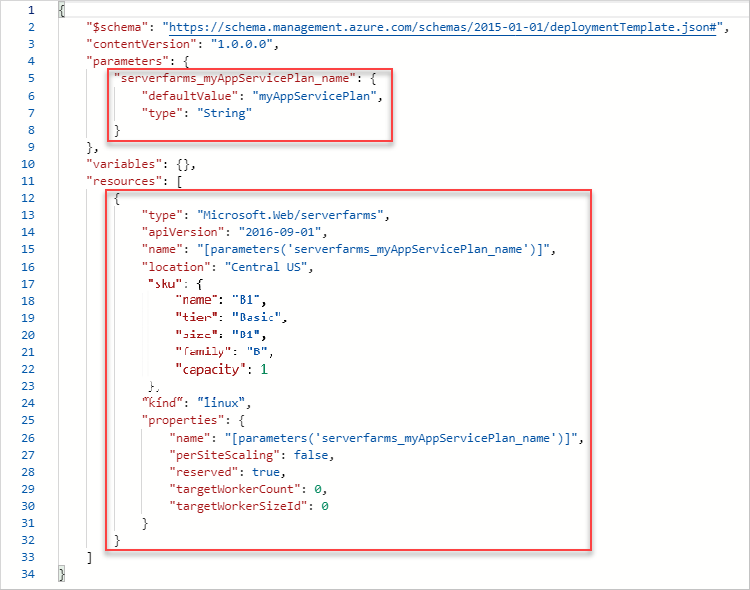
匯出範本功能會取得資源的目前狀態,並產生範本來進行部署。 匯出範本是快速取得部署資源所需之 JSON 的實用方式。
在匯出的範本中尋找
Microsoft.Web/serverfarms定義和參數定義。 您不需要複製這些區段。 您可以只使用此匯出的範本作為要如何將此資源新增至範本的範例。
重要
通常,匯出的範本會比您在建立範本時所需的更詳細。 例如,匯出範本中的 SKU 物件具有五個屬性。 此範本可以運作,但您只能使用 name 屬性。 您可以從匯出的範本開始,然後視需要進行修改以符合您的需求。
修訂現有範本
匯出的範本會提供您所需的大部分 JSON,但您需要針對範本進行自訂。 請特別注意您的範本與匯出範本間參數和變數的差異。 很明顯地,匯出程式並不知道您已定義於範本中的參數和變數。
下列範例會反白顯示範本的新增項目。 其中包含匯出的程式碼加上一些變更。 首先,它會變更參數的名稱,以符合您的命名慣例。 其次,它會使用您的 location 參數來取得 App Service 方案的位置。 第三,其會移除預設值正常的部分屬性。
複製整個檔案,並以其內容取代您的範本。
{
  "$schema": "https://schema.management.azure.com/schemas/2019-04-01/deploymentTemplate.json#",
  "contentVersion": "1.0.0.0",
  "parameters": {
    "storagePrefix": {
      "type": "string",
      "minLength": 3,
      "maxLength": 11
    },
    "storageSKU": {
      "type": "string",
      "defaultValue": "Standard_LRS",
      "allowedValues": [
        "Standard_LRS",
        "Standard_GRS",
        "Standard_RAGRS",
        "Standard_ZRS",
        "Premium_LRS",
        "Premium_ZRS",
        "Standard_GZRS",
        "Standard_RAGZRS"
      ]
    },
    "location": {
      "type": "string",
      "defaultValue": "[resourceGroup().location]"
    },
    "appServicePlanName": {
      "type": "string",
      "defaultValue": "exampleplan"
    }
  },
  "variables": {
    "uniqueStorageName": "[concat(parameters('storagePrefix'), uniqueString(resourceGroup().id))]"
  },
  "resources": [
    {
      "type": "Microsoft.Storage/storageAccounts",
      "apiVersion": "2021-09-01",
      "name": "[variables('uniqueStorageName')]",
      "location": "[parameters('location')]",
      "sku": {
        "name": "[parameters('storageSKU')]"
      },
      "kind": "StorageV2",
      "properties": {
        "supportsHttpsTrafficOnly": true
      }
    },
    {
      "type": "Microsoft.Web/serverfarms",
      "apiVersion": "2021-03-01",
      "name": "[parameters('appServicePlanName')]",
      "location": "[parameters('location')]",
      "sku": {
        "name": "B1",
        "tier": "Basic",
        "size": "B1",
        "family": "B",
        "capacity": 1
      },
      "kind": "linux",
      "properties": {
        "perSiteScaling": false,
        "reserved": true,
        "targetWorkerCount": 0,
        "targetWorkerSizeId": 0
      }
    }
  ],
  "outputs": {
    "storageEndpoint": {
      "type": "object",
      "value": "[reference(variables('uniqueStorageName')).primaryEndpoints]"
    }
  }
}
部署範本
使用 Azure CLI 或 Azure PowerShell 來部署範本。
如果您尚未建立資源群組,請參閱建立資源群組。 此範例會假設您已將 templateFile 變數設為範本檔案的路徑,如第一個教學課程中所示。
New-AzResourceGroupDeployment `
  -Name addappserviceplan `
  -ResourceGroupName myResourceGroup `
  -TemplateFile $templateFile `
  -storagePrefix "store" `
  -storageSKU Standard_LRS
注意
如果部署失敗,請使用 verbose 參數來取得所建立資源的相關資訊。 使用 debug 參數來取得更多資訊以進行偵錯。
驗證部署
您可以從 Azure 入口網站探索資源群組,藉以確認部署。
- 登入 Azure 入口網站。
- 從左側功能表中,選取 [資源群組]。
- 選取您已部署的目標資源群組。
- 資源群組會包含儲存體帳戶和 App Service 方案。
清除資源
如果您要繼續進行下一個教學課程,則不需要刪除資源群組。
如果您現在要停止,則可能想要刪除資源群組。
- 在 Azure 入口網站中,選取左側功能表中的 [資源群組]。
- 在 [篩選任何欄位...] 文字欄位中輸入資源群組名稱。
- 核取 myResourceGroup 旁的方塊,然後選取 myResourceGroup 或資源群組名稱。
- 從頂端功能表中選取 [刪除資源群組]。
下一步
您已了解如何從 Azure 入口網站匯出範本,以及如何使用匯出的範本來進行範本開發。 您也可以使用 Azure 快速入門範本來簡化範本開發。