Web 帐户管理器
本文介绍如何使用 AccountsSettingsPane 通过 Windows 10 和 Windows 11 Web 帐户管理器 API 将通用 Windows 平台(UWP)应用连接到外部标识提供者,例如Microsoft或 Facebook。 你将了解如何请求用户使用其Microsoft帐户的权限、获取访问令牌以及使用它来执行基本操作(例如获取配置文件数据或将文件上传到其 OneDrive 帐户)。 使用支持 Web 帐户管理器的任何标识提供者获取用户权限和访问权限的步骤类似。
注意
有关完整的代码示例,请参阅 GitHub 上的 WebAccountManagement 示例。
准备工作
首先,在 Visual Studio 中创建新的空白应用。
其次,若要连接到标识提供者,需要将应用与应用商店相关联。 若要执行此操作,请右键单击你的项目、依次选择“应用商店/发布”>“将应用与应用商店关联”,然后按照向导的说明进行操作。
第三,创建一个非常基本的 UI,其中包含一个简单的 XAML 按钮和两个文本框。
<StackPanel HorizontalAlignment="Center" VerticalAlignment="Center">
	<Button x:Name="LoginButton" Content="Log in" Click="LoginButton_Click" />
	<TextBlock x:Name="UserIdTextBlock"/>
	<TextBlock x:Name="UserNameTextBlock"/>
</StackPanel>
代码隐藏中附加到按钮的事件处理程序:
private void LoginButton_Click(object sender, RoutedEventArgs e)
{
}
最后,添加以下命名空间,以便以后无需担心任何引用问题:
using System;
using Windows.Security.Authentication.Web.Core;
using Windows.System;
using Windows.UI.ApplicationSettings;
using Windows.UI.Xaml;
using Windows.UI.Xaml.Controls;
using Windows.Data.Json;
using Windows.UI.Xaml.Navigation;
using Windows.Web.Http;
显示“帐户设置”窗格
系统提供一个内置用户界面,用于管理名为 AccountsSettingsPane 的标识提供者和 Web 帐户。 可以如下所示显示:
private void LoginButton_Click(object sender, RoutedEventArgs e)
{
	AccountsSettingsPane.Show();
}
如果运行应用并单击“登录”按钮,它应显示一个空窗口。
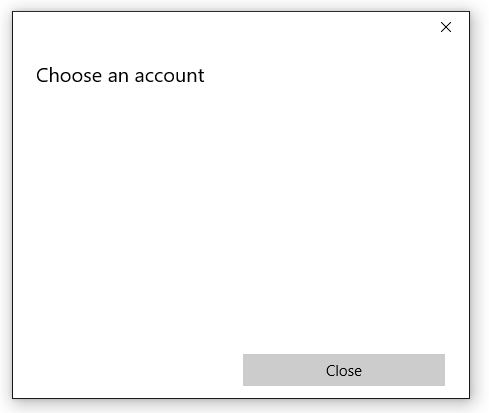
窗格为空,因为系统仅提供 UI shell - 由开发人员以编程方式使用标识提供者填充窗格。
提示
或者,可以使用 ShowAddAccountAsync 而不是 Show,这会返回 IAsyncAction,用于查询操作的状态。
注册 AccountCommandsRequested
若要将命令添加到窗格中,首先注册 AccountCommandsRequested 事件处理程序。 当用户要求查看窗格时(例如,单击 XAML 按钮),此事件处理程序将告知系统来运行生成逻辑。
在代码隐藏中,重写 OnNavigatedTo 和 OnNavigatedFrom 事件,并向其添加以下代码:
protected override void OnNavigatedTo(NavigationEventArgs e)
{
	AccountsSettingsPane.GetForCurrentView().AccountCommandsRequested += BuildPaneAsync;
}
protected override void OnNavigatedFrom(NavigationEventArgs e)
{
	AccountsSettingsPane.GetForCurrentView().AccountCommandsRequested -= BuildPaneAsync;
}
用户不会经常与帐户交互,因此,以这种方式注册和取消注册事件处理程序有助于防止内存泄漏。 这样一来,自定义窗格仅在用户可能要求它时处于内存中(例如,因为它们位于“设置”或“登录”页面上)。
生成帐户设置窗格
每当 显示 AccountsSettingsPane 时,将调用 BuildPaneAsync 方法。 我们将在此处放置代码来自定义窗格中显示的命令。
首先获取延迟。 这告知系统延迟显示 AccountsSettingsPane ,直到我们完成生成它。
private async void BuildPaneAsync(AccountsSettingsPane s,
	AccountsSettingsPaneCommandsRequestedEventArgs e)
{
	var deferral = e.GetDeferral();

	deferral.Complete();
}
接下来,使用 WebAuthenticationCoreManager.FindAccountProviderAsync 方法获取提供程序。 提供程序的 URL 因提供程序而异,可在提供程序的文档中找到。 对于 Microsoft 帐户和 Azure Active Directory,应为 "https://login.microsoft.com"。
private async void BuildPaneAsync(AccountsSettingsPane s,
	AccountsSettingsPaneCommandsRequestedEventArgs e)
{
	var deferral = e.GetDeferral();

	var msaProvider = await WebAuthenticationCoreManager.FindAccountProviderAsync(
		"https://login.microsoft.com", "consumers");

	deferral.Complete();
}
请注意,我们还将字符串“consumers”传递给可选的 颁发机构 参数。 这是因为Microsoft为“使用者”提供两种不同类型的身份验证-Microsoft帐户(MSA),为“组织”提供 Azure Active Directory (AAD)。 “使用者”机构指示我们想要 MSA 选项。 如果要开发企业应用,请改用字符串“组织”。
最后,通过创建新的 WebAccountProviderCommand 将提供程序添加到 AccountsSettingsPane,如下所示:
private async void BuildPaneAsync(AccountsSettingsPane s,
	AccountsSettingsPaneCommandsRequestedEventArgs e)
{
	var deferral = e.GetDeferral();

	var msaProvider = await WebAuthenticationCoreManager.FindAccountProviderAsync(
		"https://login.microsoft.com", "consumers");

	var command = new WebAccountProviderCommand(msaProvider, GetMsaTokenAsync);

	e.WebAccountProviderCommands.Add(command);

	deferral.Complete();
}
我们传递给新 WebAccountProviderCommand 的 GetMsaToken 方法尚不存在(我们将在下一步中生成该方法),因此可以随意将其添加为空方法。
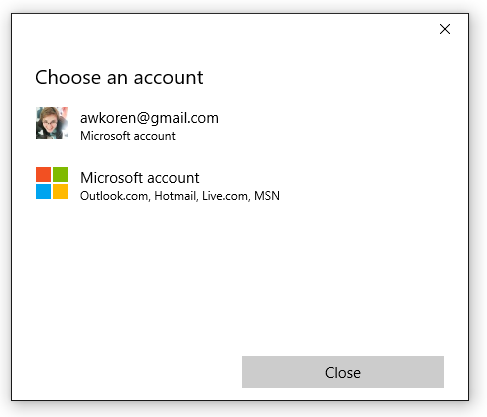
运行上述代码,窗格应如下所示:
请求令牌
在 AccountsSettingsPane 中显示Microsoft帐户选项后,我们需要处理用户选择它时发生的情况。 我们注册了 GetMsaToken 方法,以便在用户选择使用其Microsoft帐户登录时触发,因此我们将在那里获取令牌。
若要获取令牌,请使用 RequestTokenAsync 方法,如下所示:
private async void GetMsaTokenAsync(WebAccountProviderCommand command)
{
	WebTokenRequest request = new WebTokenRequest(command.WebAccountProvider, "wl.basic");
	WebTokenRequestResult result = await WebAuthenticationCoreManager.RequestTokenAsync(request);
}
在此示例中,我们向作用域参数传递字符串“wl.basic”。 范围表示从特定用户提供服务中请求的信息类型。 某些范围仅提供对用户的基本信息(如名称和电子邮件地址)的访问权限,而其他范围可能会授予对敏感信息(如用户照片或电子邮件收件箱)的访问权限。 通常,你的应用应使用实现其功能所需的最低宽松范围。 服务提供商将提供获取令牌以供其服务使用的令牌所需的范围的文档。
- 有关 Microsoft 365 和 Outlook.com 作用域,请参阅使用 Outlook REST API(版本 2.0)。
- 对于 OneDrive 范围,请参阅 OneDrive 身份验证和登录。
提示
或者,如果应用程序使用登录提示(以使用默认电子邮件地址填充用户字段)或其他与登录体验相关的特殊属性,请将其列在 WebTokenRequest.AppProperties 属性中。 这将导致系统在缓存 Web 帐户时忽略该属性,进而避免缓存中的帐户不匹配。
如果要开发企业应用,则可能需要连接到 Azure Active Directory (AAD) 实例,并使用 Microsoft 图形 API 而不是常规 MSA 服务。 在此方案中,请改用以下代码:
private async void GetAadTokenAsync(WebAccountProviderCommand command)
{
	string clientId = "your_guid_here"; // Obtain your clientId from the Azure Portal
	WebTokenRequest request = new WebTokenRequest(provider, "User.Read", clientId);
	request.Properties.Add("resource", "https://graph.microsoft.com");
	WebTokenRequestResult result = await WebAuthenticationCoreManager.RequestTokenAsync(request);
}
本文的其余部分继续介绍 MSA 方案,但 AAD 的代码非常相似。 有关 AAD/Graph 的详细信息(包括 GitHub 上的完整示例),请参阅 Microsoft Graph 文档。
使用令牌
RequestTokenAsync 方法返回一个 WebTokenRequestResult 对象,该对象包含请求的结果。 如果请求成功,它将包含令牌。
private async void GetMsaTokenAsync(WebAccountProviderCommand command)
{
	WebTokenRequest request = new WebTokenRequest(command.WebAccountProvider, "wl.basic");
	WebTokenRequestResult result = await WebAuthenticationCoreManager.RequestTokenAsync(request);

	if (result.ResponseStatus == WebTokenRequestStatus.Success)
	{
		string token = result.ResponseData[0].Token;
	}
}
注意
如果在请求令牌时收到错误,请确保已将应用与应用商店相关联,如步骤 1 中所述。 如果跳过此步骤,你的应用将无法获取令牌。
获得令牌后,可以使用它调用提供程序的 API。 在下面的代码中,我们将调用 用户信息Microsoft Live API ,以获取有关用户的基本信息,并将其显示在 UI 中。 但请注意,在大多数情况下,建议在获取令牌后存储令牌,然后在单独的方法中使用它。
private async void GetMsaTokenAsync(WebAccountProviderCommand command)
{
	WebTokenRequest request = new WebTokenRequest(command.WebAccountProvider, "wl.basic");
	WebTokenRequestResult result = await WebAuthenticationCoreManager.RequestTokenAsync(request);

	if (result.ResponseStatus == WebTokenRequestStatus.Success)
	{
		string token = result.ResponseData[0].Token;

		var restApi = new Uri(@"https://apis.live.net/v5.0/me?access_token=" + token);

		using (var client = new HttpClient())
		{
			var infoResult = await client.GetAsync(restApi);
			string content = await infoResult.Content.ReadAsStringAsync();

			var jsonObject = JsonObject.Parse(content);
			string id = jsonObject["id"].GetString();
			string name = jsonObject["name"].GetString();

			UserIdTextBlock.Text = "Id: " + id;
			UserNameTextBlock.Text = "Name: " + name;
		}
	}
}
调用各种 REST API 的方式因提供程序而异;有关如何使用令牌的信息,请参阅提供程序的 API 文档。
存储帐户以供将来使用
令牌可用于立即获取有关用户的信息,但它们通常具有不同的生命周期 - 例如,MSA 令牌仅在几个小时内有效。 幸运的是,每次令牌过期时都不需要重新显示 AccountsSettingsPane 。 用户授权应用一次后,可以存储用户的帐户信息以供将来使用。
为此,请使用 WebAccount 类。 WebAccount 由用于请求令牌的相同方法返回:
private async void GetMsaTokenAsync(WebAccountProviderCommand command)
{
	WebTokenRequest request = new WebTokenRequest(command.WebAccountProvider, "wl.basic");
	WebTokenRequestResult result = await WebAuthenticationCoreManager.RequestTokenAsync(request);

	if (result.ResponseStatus == WebTokenRequestStatus.Success)
	{
		WebAccount account = result.ResponseData[0].WebAccount;
	}
}
拥有 WebAccount 实例后,可以轻松存储它。 在以下示例中,我们使用 LocalSettings。 有关使用 LocalSettings 和其他方法来存储用户数据的详细信息,请参阅 “存储和检索应用设置和数据”。
private async void StoreWebAccount(WebAccount account)
{
	ApplicationData.Current.LocalSettings.Values["CurrentUserProviderId"] = account.WebAccountProvider.Id;
	ApplicationData.Current.LocalSettings.Values["CurrentUserId"] = account.Id;
}
然后,可以使用如下所示的异步方法尝试使用存储 的 WebAccount 在后台获取令牌。
private async Task<string> GetTokenSilentlyAsync()
{
	string providerId = ApplicationData.Current.LocalSettings.Values["CurrentUserProviderId"]?.ToString();
	string accountId = ApplicationData.Current.LocalSettings.Values["CurrentUserId"]?.ToString();

	if (null == providerId || null == accountId)
	{
		return null;
	}

	WebAccountProvider provider = await WebAuthenticationCoreManager.FindAccountProviderAsync(providerId);
	WebAccount account = await WebAuthenticationCoreManager.FindAccountAsync(provider, accountId);

	WebTokenRequest request = new WebTokenRequest(provider, "wl.basic");

	WebTokenRequestResult result = await WebAuthenticationCoreManager.GetTokenSilentlyAsync(request, account);
	if (result.ResponseStatus == WebTokenRequestStatus.UserInteractionRequired)
	{
		// Unable to get a token silently - you'll need to show the UI
		return null;
	}
	else if (result.ResponseStatus == WebTokenRequestStatus.Success)
	{
		// Success
		return result.ResponseData[0].Token;
	}
	else
	{
		// Other error
		return null;
	}
}
将上述方法放在生成 AccountsSettingsPane 的代码之前。 如果在后台获取令牌,则无需显示窗格。
private void LoginButton_Click(object sender, RoutedEventArgs e)
{
	string silentToken = await GetMsaTokenSilentlyAsync();

	if (silentToken != null)
	{
		// the token was obtained. store a reference to it or do something with it here.
	}
	else
	{
		// the token could not be obtained silently. Show the AccountsSettingsPane
		AccountsSettingsPane.Show();
	}
}
由于以无提示方式获取令牌非常简单,因此应使用此过程在会话之间刷新令牌,而不是缓存现有令牌(因为该令牌可能随时过期)。
注意
上面的示例仅涵盖基本成功和失败案例。 你的应用还应考虑异常情况(例如,用户撤销应用的权限或从 Windows 中删除其帐户),并正常处理它们。
删除存储的帐户
如果保留 Web 帐户,你可能希望让用户能够将其帐户与你的应用取消关联。 这样,他们可以有效地“注销”应用:他们的帐户信息将不再在启动时自动加载。 为此,请先从存储中删除任何已保存的帐户和提供程序信息。 然后调用 SignOutAsync 清除缓存并使应用可能拥有的任何现有令牌失效。
private async Task SignOutAccountAsync(WebAccount account)
{
	ApplicationData.Current.LocalSettings.Values.Remove("CurrentUserProviderId");
	ApplicationData.Current.LocalSettings.Values.Remove("CurrentUserId");
	account.SignOutAsync();
}
添加不支持 WebAccountManager 的提供程序
如果你想要将身份验证从某个服务集成到你的应用中,但该服务不支持 WebAccountManager(例如 Google+ 或 Twitter),你仍可以将该提供程序手动添加到 AccountsSettingsPane。 为此,请创建新的 WebAccountProvider 对象,并提供自己的名称和.png图标,然后将其添加到 WebAccountProviderCommands 列表。 下面是一些存根代码:
private async void BuildPaneAsync(AccountsSettingsPane s, AccountsSettingsPaneCommandsRequestedEventArgs e)
{
	// other code here

	var twitterProvider = new WebAccountProvider("twitter", "Twitter", new Uri(@"ms-appx:///Assets/twitter-auth-icon.png"));
	var twitterCmd = new WebAccountProviderCommand(twitterProvider, GetTwitterTokenAsync);
	e.WebAccountProviderCommands.Add(twitterCmd);

	// other code here
}

private async void GetTwitterTokenAsync(WebAccountProviderCommand command)
{
	// Manually handle Twitter login here
}
注意
这只会向 AccountsSettingsPane 添加一个图标,并运行在单击图标时指定的方法(在本例中为 GetTwitterTokenAsync)。 必须提供处理实际身份验证的代码。 有关详细信息,请参阅 Web 身份验证代理,它提供了使用 REST 服务进行身份验证的帮助程序方法。
添加自定义标头
可以使用 HeaderText 属性自定义帐户设置窗格,如下所示:
private async void BuildPaneAsync(AccountsSettingsPane s, AccountsSettingsPaneCommandsRequestedEventArgs e)
{
	// other code here

	args.HeaderText = "MyAwesomeApp works best if you're signed in.";

	// other code here
}

不要过度使用标题文本;保持它短和甜。 如果登录过程很复杂,并且需要显示更多信息,请使用自定义链接将用户链接到单独的页面。
添加自定义链接
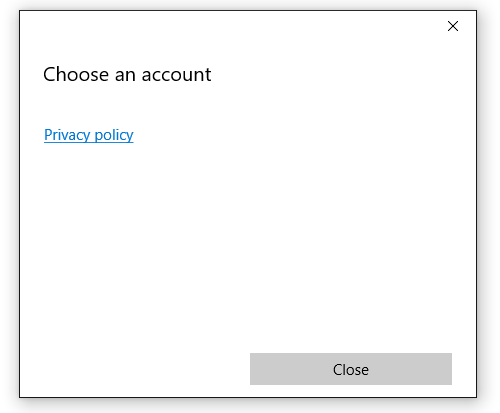
可以将自定义命令添加到 AccountsSettingsPane,这些命令显示为受支持的 WebAccountProviders 下方的链接。 自定义命令非常适合与用户帐户相关的简单任务,例如显示隐私策略或为遇到问题的用户启动支持页。
下面是一个示例:
private async void BuildPaneAsync(AccountsSettingsPane s, AccountsSettingsPaneCommandsRequestedEventArgs e)
{
	// other code here

	var settingsCmd = new SettingsCommand(
		"settings_privacy",
		"Privacy policy",
		async (x) => await Launcher.LaunchUriAsync(new Uri(@"https://privacy.microsoft.com/en-US/")));

	e.Commands.Add(settingsCmd);

	// other code here
}
从理论上讲,你可以对任何内容使用设置命令。 但是,我们建议将其用途限制为直观、与帐户相关的方案,如上述方案。
另请参阅
Windows.Security.Authentication.Web.Core 命名空间