HoloLens (第一代) 和 Azure 309:Application Insights
注意
混合现实学院教程的设计考虑到了 HoloLens (第一代) 和混合现实沉浸式头戴显示设备。 因此,我们认为,对于仍在为这些设备进行开发指南的开发人员来说,保留这些教程非常重要。 这些教程不会使用用于HoloLens 2的最新工具集或交互进行更新。 它们将得到维护,以继续在受支持的设备上工作。 将来将发布一系列新的教程,演示如何针对HoloLens 2进行开发。 发布这些教程时,将更新此通知,其中包含指向这些教程的链接。

本课程介绍如何使用 Azure 应用程序 Insights API 收集有关用户行为的分析,将 Application Insights 功能添加到混合现实应用程序。
Application Insights 是一项Microsoft服务,允许开发人员从其应用程序收集分析,并从易于使用的门户对其进行管理。 分析可以是任何内容,从性能到要收集的自定义信息。 有关详细信息,请访问 Application Insights 页。
完成本课程后,你将拥有一个混合现实沉浸式头戴显示设备应用程序,该应用程序将能够执行以下作:
- 允许用户凝视和移动场景。
- 通过使用对场景内对象的凝视和邻近感应,触发将分析发送到 Application Insights 服务。
- 该应用还将调用服务,获取有关用户在过去 24 小时内最接近的对象的信息。 该对象将将其颜色更改为绿色。
本课程将介绍如何将 Application Insights 服务的结果获取到基于Unity的示例应用程序中。 这些概念由你来决定将这些概念应用到你可能正在构建的自定义应用程序。
设备支持
| 课程 | HoloLens | 沉浸式头戴显示设备 |
|---|---|---|
| MR 和 Azure 309:Application Insights | ✔️ | ✔️ |
注意
虽然本课程主要侧重于Windows Mixed Reality沉浸式 (VR) 头戴显示设备,但你也可以将本课程中学到的知识应用于Microsoft HoloLens。 随着课程的学习,你将看到有关可能需要采用以支持 HoloLens 的任何更改的说明。 使用 HoloLens 时,你可能会在语音捕获过程中注意到一些回声。
先决条件
注意
本教程面向具有 Unity 和 C# 基本经验的开发人员。 另请注意,本文档中的先决条件和书面说明表示在撰写本文时已测试和验证的内容 (2018 年 7 月) 。 你可以自由使用最新软件(如 安装工具 一文中所述),但不应假定本课程中的信息与你在较新的软件中找到的信息与下面列出的软件完全匹配。
对于本课程,建议使用以下硬件和软件:
- 与Windows Mixed Reality兼容的开发电脑,用于沉浸式 (VR) 头戴显示设备开发
- 启用了开发人员模式的Windows 10 Fall Creators Update (或更高版本)
- 最新Windows 10 SDK
- Unity 2017.4
- Visual Studio 2017
- 启用了开发人员模式的Windows Mixed Reality沉浸式 (VR) 头戴显示设备或Microsoft HoloLens
- 如果头戴显示设备没有内置麦克风和扬声器,则 (一组带内置麦克风的耳机)
- 用于 Azure 安装和 Application Insights 数据检索的 Internet 访问
准备工作
为了避免在生成此项目时出现问题,强烈建议在本教程中在根文件夹或近根文件夹中创建项目, (长文件夹路径可能会导致生成时) 出现问题。
警告
请注意,将数据转到 Application Insights 需要时间,因此请耐心等待。 如果要检查服务是否收到了你的数据,检查第 14 章,其中将介绍如何导航门户。
第 1 章 - Azure 门户
若要使用 Application Insights,需要在Azure 门户中创建并配置 Application Insights 服务。
登录到 Azure 门户。
注意
如果还没有 Azure 帐户,则需要创建一个。 如果在课堂或实验室环境中遵循本教程,请向讲师或监考人员请求设置新帐户的帮助。
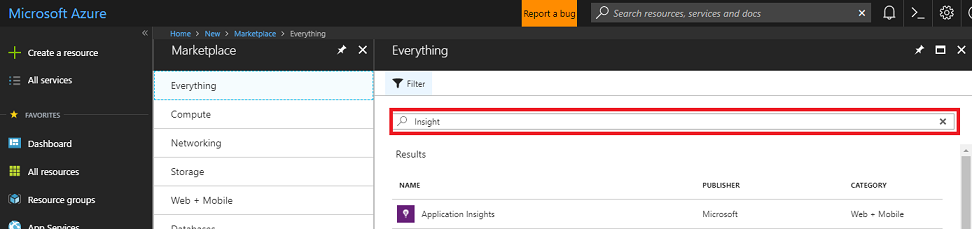
登录后,单击左上角的“ 新建 ”,搜索 “Application Insights”,然后单击“ Enter”。
注意
在较新的门户中,“ 新建 ”一词可能已替换为 “创建资源”。
右侧的新页面将提供 Azure 应用程序 Insights 服务的说明。 在此页的左下角,选择“ 创建 ”按钮,以创建此服务的关联。
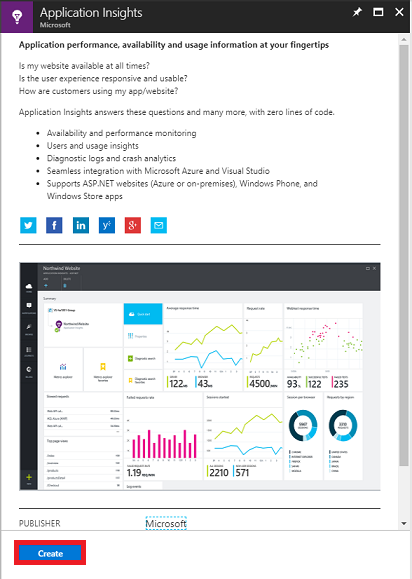
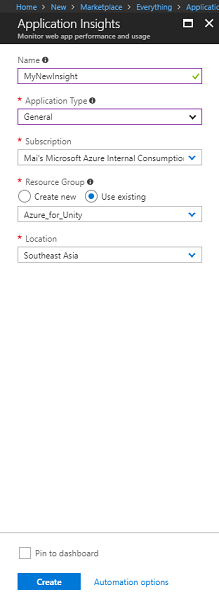
单击“ 创建”后:
为此服务实例插入所需的 名称 。
对于 “应用程序类型”,选择“ 常规”。
选择适当的 订阅。
选择资源组或创建新 资源组 。 资源组提供了一种监视、控制访问、预配和管理 Azure 资产集合计费的方法。 例如,建议将与单个项目关联的所有 Azure 服务保留 (,例如,这些课程) 在通用资源组) 下。
若要详细了解 Azure 资源组, 请访问资源组一文。
选择 位置。
你还需要确认你已了解适用于此服务的条款和条件。
选择“创建”。
单击“ 创建”后,必须等待创建服务,这可能需要一分钟时间。
创建服务实例后,门户中将显示一条通知。

选择通知以浏览新的服务实例。
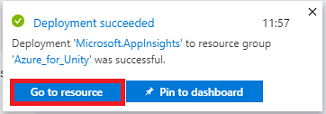
单击通知中的“ 转到资源 ”按钮,浏览新的服务实例。 你将访问新的 Application Insights 服务 实例。
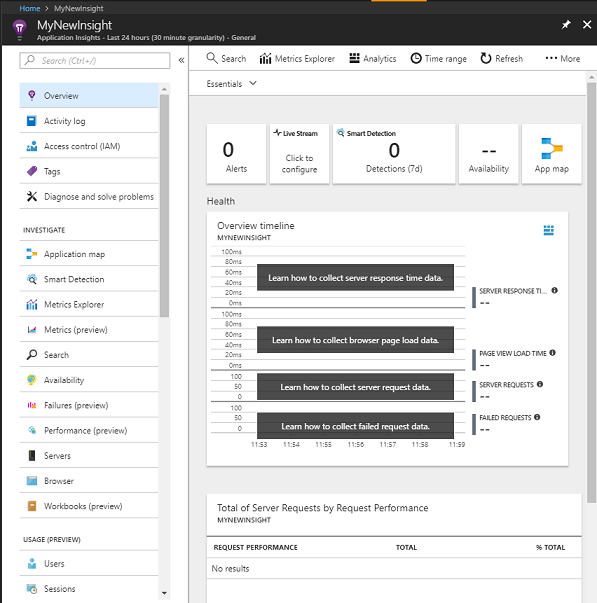
注意
保持此网页打开且易于访问,你将经常返回此处查看收集的数据。
重要
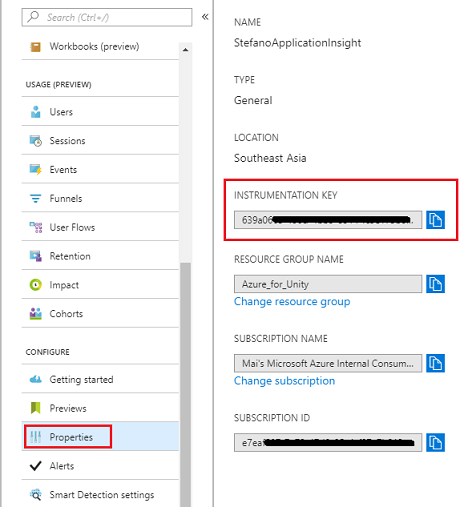
若要实现 Application Insights,需要使用三个 (3 个) 特定值: 检测密钥、 应用程序 ID 和 API 密钥。 下面将介绍如何从服务检索这些值。 请确保在空白 记事本 页上记下这些值,因为很快就会在代码中使用它们。
若要查找 检测密钥,需要向下滚动服务函数列表,然后选择 “属性”,显示的选项卡将显示 服务密钥。
在 “属性”下方,你将找到需要单击的 API 访问。 右侧的面板将提供应用 的应用程序 ID 。
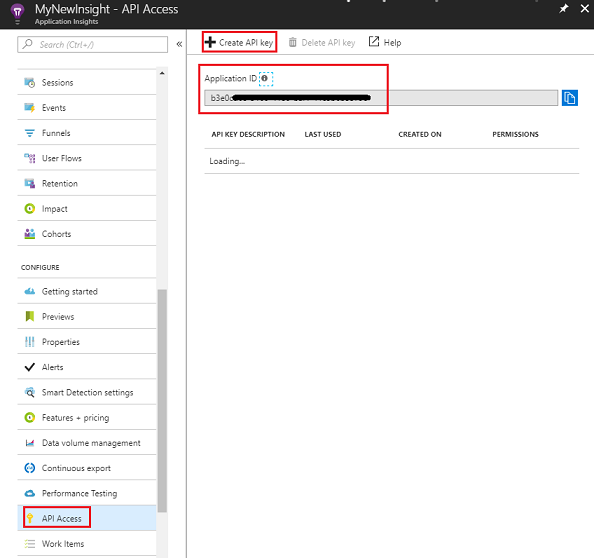
在“ 应用程序 ID ”面板仍处于打开状态的情况下,单击“ 创建 API 密钥”,这将打开 “创建 API 密钥 ”面板。
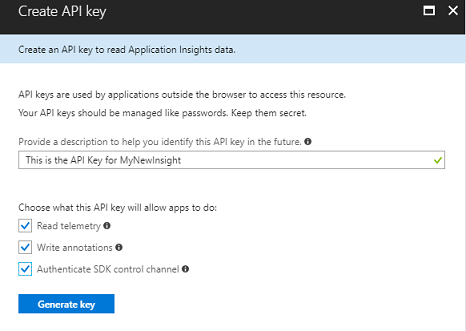
在现在打开的 “创建 API 密钥 ”面板中,键入说明,然后 勾选三个框。
单击“ 生成密钥”。 将创建并显示 API 密钥 。
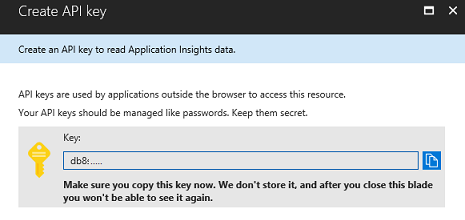
警告
这是唯一一次显示 服务密钥 ,因此请确保立即创建它的副本。
第 2 章 - 设置Unity项目
下面是使用混合现实进行开发的典型设置,因此,它是其他项目的良好模板。
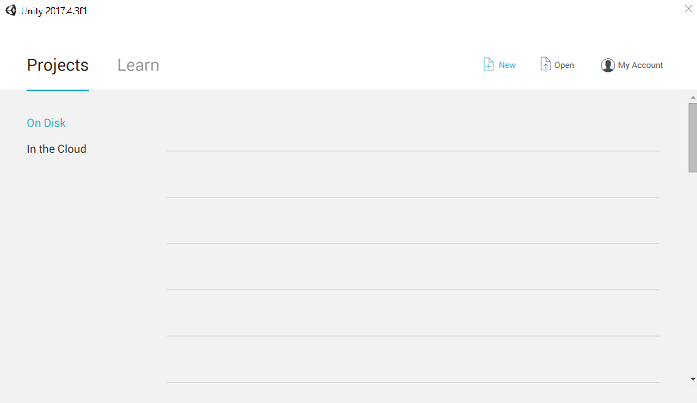
打开Unity并单击“新建”。
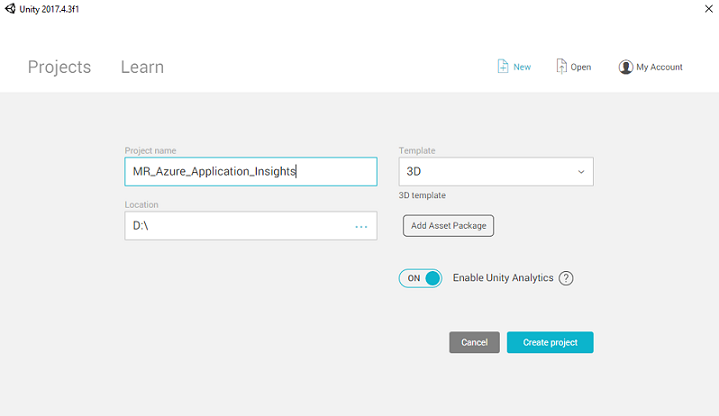
现在需要提供Unity项目名称,插入MR_Azure_Application_Insights。 确保 模板 设置为 3D。 将 “位置” 设置为适合你 (记住,离根目录更近更) 。 然后,单击“ 创建项目”。
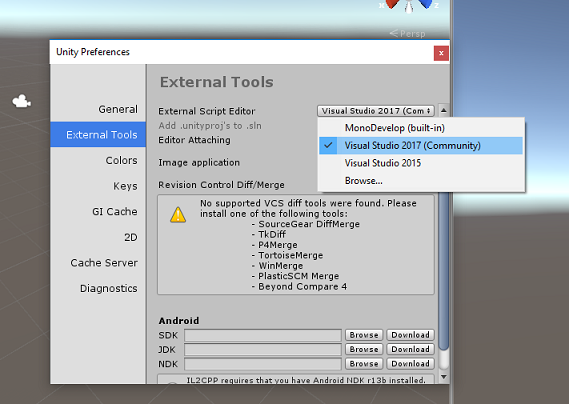
打开Unity后,可以检查默认脚本编辑器设置为 Visual Studio。 转到 “编辑 > 首选项” ,然后从新窗口中导航到“ 外部工具”。 将外部脚本编辑器更改为 Visual Studio 2017。 关闭 “首选项” 窗口。
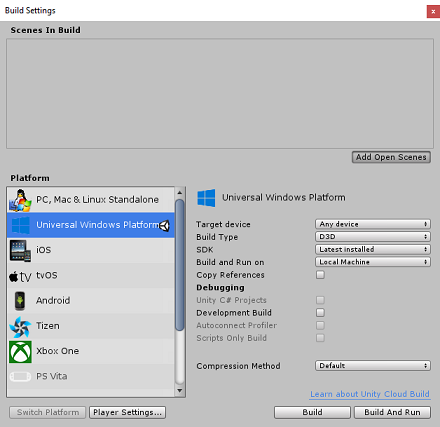
接下来,转到“文件>生成设置”,并通过单击“切换平台”按钮将平台切换为通用 Windows 平台。
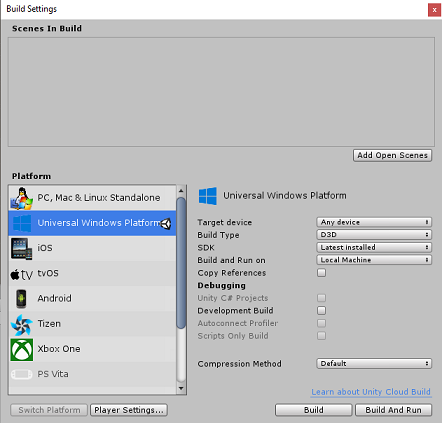
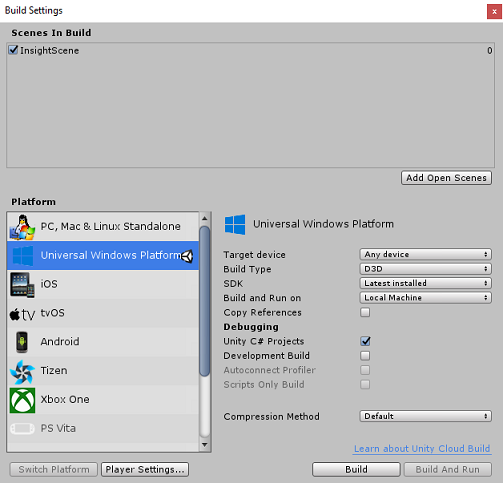
转到 “文件 > 生成设置” ,并确保:
目标设备 设置为 “任何设备”
对于Microsoft HoloLens,请将“目标设备”设置为“HoloLens”。
生成类型 设置为 D3D
SDK 设置为 “最新安装”
“生成和运行” 设置为 “本地计算机”
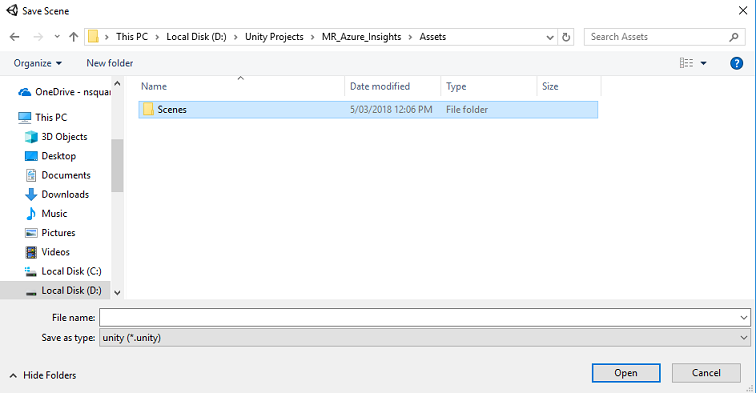
保存场景并将其添加到生成。
为此,请选择“ 添加开放场景”。 将显示一个保存窗口。
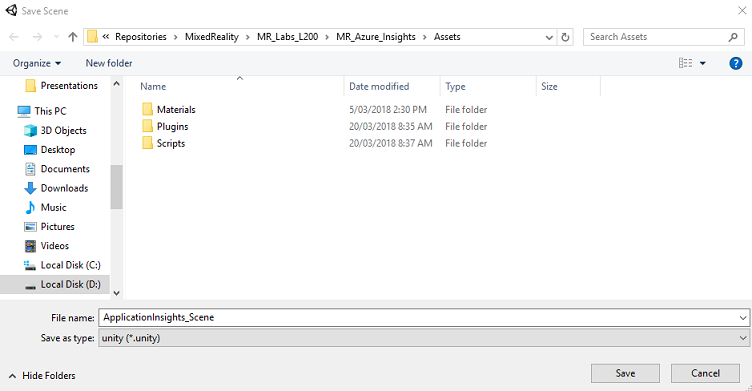
为此和任何未来场景创建一个新文件夹,然后单击“ 新建文件夹 ”按钮,创建一个新文件夹,将其命名为 Scenes。
打开新创建的 Scenes 文件夹,然后在 “文件名: 文本” 字段中,键入 ApplicationInsightsScene,然后单击“ 保存”。
生成设置中的其余设置目前应保留为默认值。
在 “生成设置” 窗口中,选择“ 播放器设置”,这将在 检查器 所在的空间中打开相关面板。
在此面板中,需要验证一些设置:
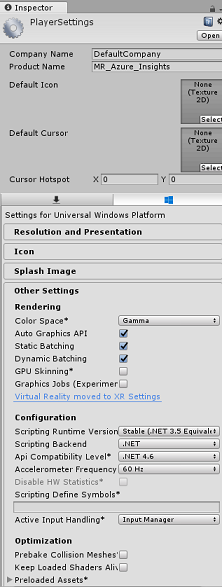
在 “其他设置” 选项卡中:
脚本运行时版本应为实验 (.NET 4.6 等效) ,这将触发重启编辑器的需要。
脚本后端 应为 .NET
API 兼容级别 应为 .NET 4.6

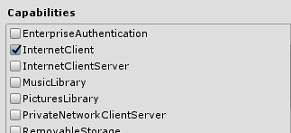
在“发布设置”选项卡的“功能”下,检查:
InternetClient
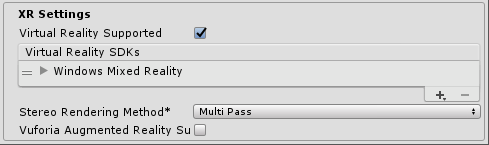
在面板下,在“发布设置”) 下方找到的“XR设置” (中,勾选“支持虚拟现实”,确保已添加Windows Mixed Reality SDK。
返回到“生成设置”,Unity C# 项目不再灰显;勾选此旁边的复选框。
关闭“生成设置”窗口。
保存场景和项目 (文件>保存场景/文件>保存项目) 。
第 3 章 - 导入Unity包
重要
如果想要跳过本课程Unity设置组件,并直接进入代码,请随意下载此 Azure-MR-309.unitypackage,将其作为自定义包导入项目中。 这还将包含下一章中的 DLL。 导入后,请继续 第 6 章。
重要
若要在 Unity中使用 Application Insights,需要导入它的 DLL 以及 Newtonsoft DLL。 Unity当前存在一个已知问题,需要在导入后重新配置插件。 本部分中 (4 - 7 中的这些步骤) 在 bug 解决后将不再是必需的。
若要将 Application Insights 导入自己的项目,请确保已下载包含插件的“.unitypackage”。 然后执行下列操作:
使用“资产>导入>包自定义包”菜单选项将.unitypackage 添加到Unity。
在弹出的“导入Unity包”框中,确保选中“ (”下的所有内容,包括) 插件。
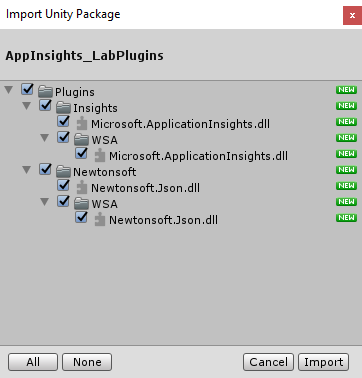
单击“ 导入 ”按钮,将项添加到项目中。
在“项目”视图中转到“插件”下的“见解”文件夹,仅选择以下插件:
- Microsoft.ApplicationInsights
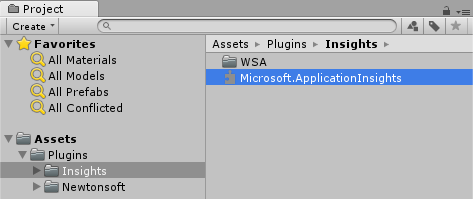
选中此插件后,请确保取消选中“任何平台”,然后确保 WSAPlayer 也处于未选中状态,然后单击“应用”。 这样做只是为了确认文件配置正确。
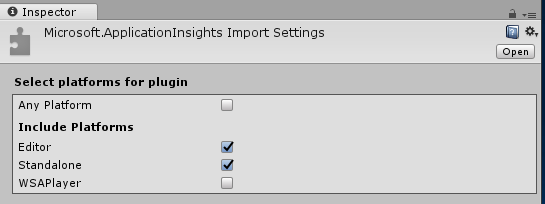
注意
按如下所示标记插件,将其配置为仅在Unity 编辑器中使用。 WSA 文件夹中有一组不同的 DLL,将在从 Unity 导出项目后使用。
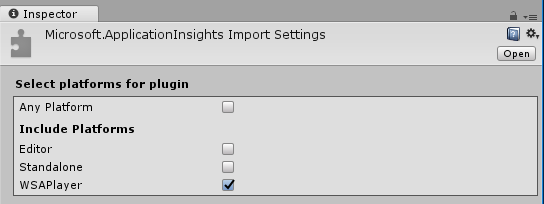
接下来,需要在 Insights 文件夹中打开 WSA 文件夹。 你将看到配置的同一文件的副本。 选择此文件,然后在检查器中,确保取消选中“任何平台”,然后确保仅选中WSAPlayer。 单击“应用”。
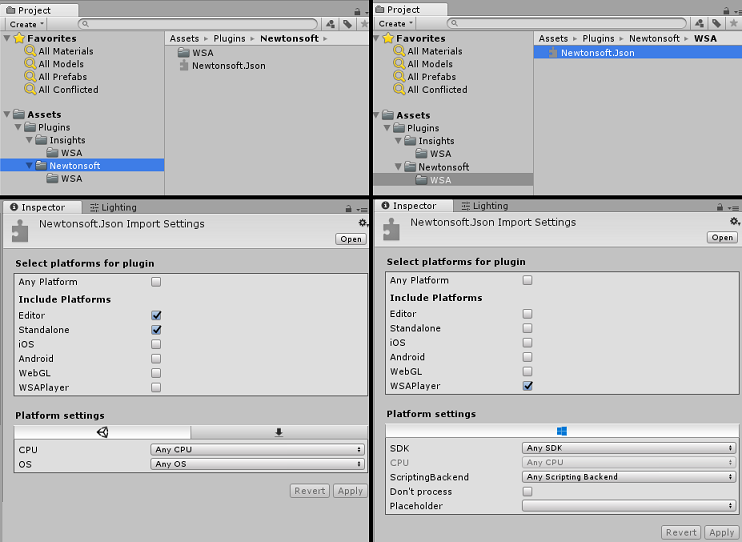
现在需要遵循 步骤 4-6,但对于 Newtonsoft 插件, 有关结果的外观,请参阅以下屏幕截图。
第 4 章 - 设置相机和用户控件
在本章中,你将设置相机和控件,以允许用户在场景中查看和移动。
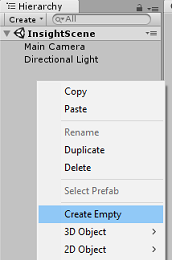
右键单击层次结构面板中的空白区域,然后在 “创建>空”上。
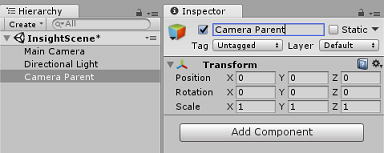
将新的空 GameObject 重命名为 “相机父级”。
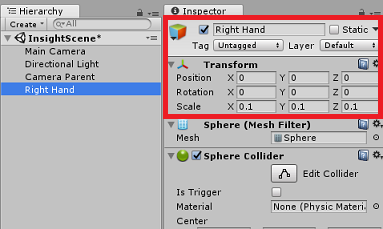
右键单击层次结构面板中的空白区域,然后在 3D 对象上单击,然后在 Sphere 上单击。
将 Sphere 重命名为 “右手”。
将右手的 转换比例 设置为 0.1、0.1、0.1
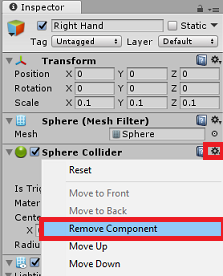
单击“球体碰撞体”组件中的“齿轮”,然后单击“删除组件”,从右手删除 Sphere 碰撞体组件。
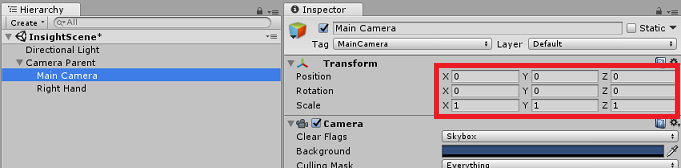
在“层次结构”面板中,将 “主相机 ”和“ 右手 ”对象拖动到 “相机父 ”对象上。
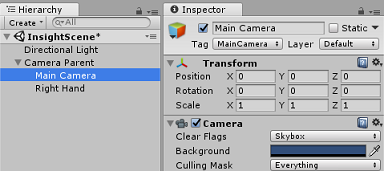
将主相机和右手对象的转换位置设置为 0、0、0。

第 5 章 - 在Unity场景中设置对象
现在,你将为场景创建一些基本形状,用户可以与之交互。
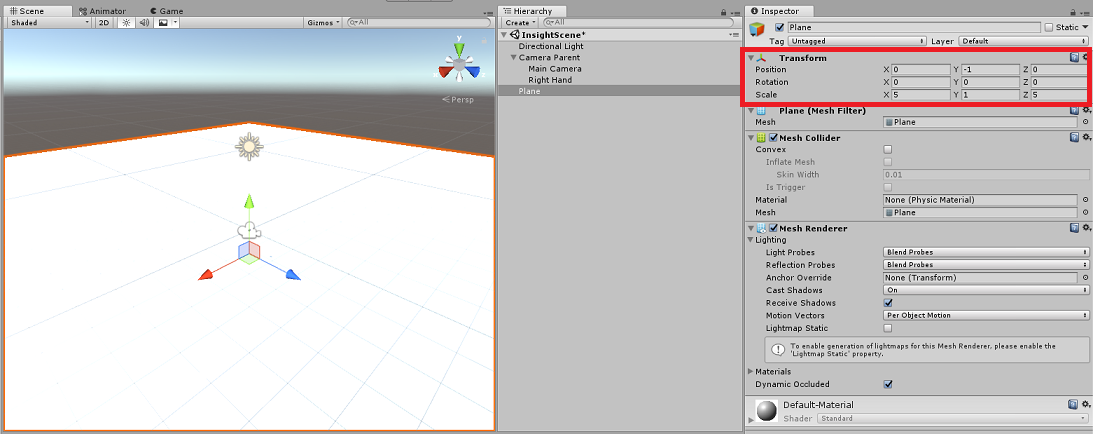
右键单击 层次结构面板中的空白区域,然后在 3D 对象上单击,然后选择“ 平面”。
将“平面 转换位置 ”设置为 0、-1、0。
将“平面 转换比例 ”设置为 5、1、5。
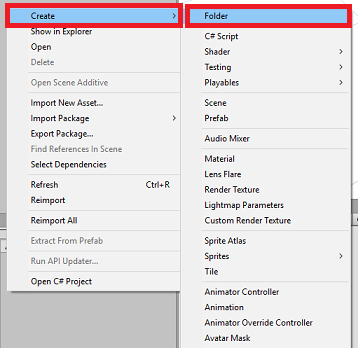
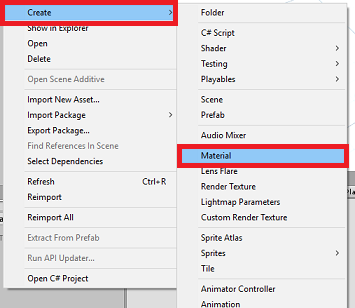
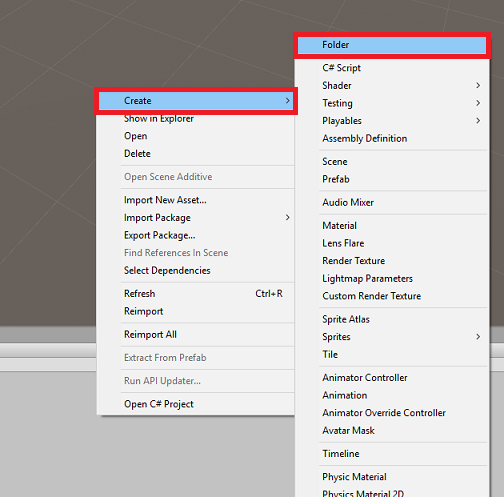
创建与 Plane 对象一起使用的基本材料,以便更易于查看其他形状。 导航到 项目面板,右键单击,然后单击 “创建”,然后导航到 “文件夹”以创建新文件夹。 将其命名 为“材料”。
“

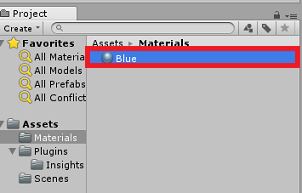
打开 “材料” 文件夹,然后右键单击,单击“ 创建”,然后单击“ 材料”以创建新材料。 将其命名为 蓝色。
“
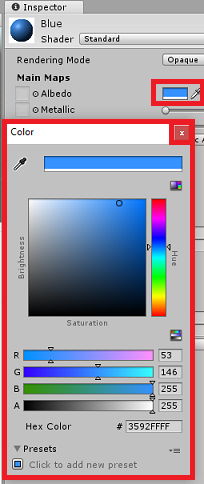
选择新的 蓝色 材料后,查看 检查器,然后单击“ 反照”旁边的矩形窗口。 选择蓝色 (下图为 “十六进制颜色:#3592FFFF) ”。 选择后,单击“关闭”按钮。
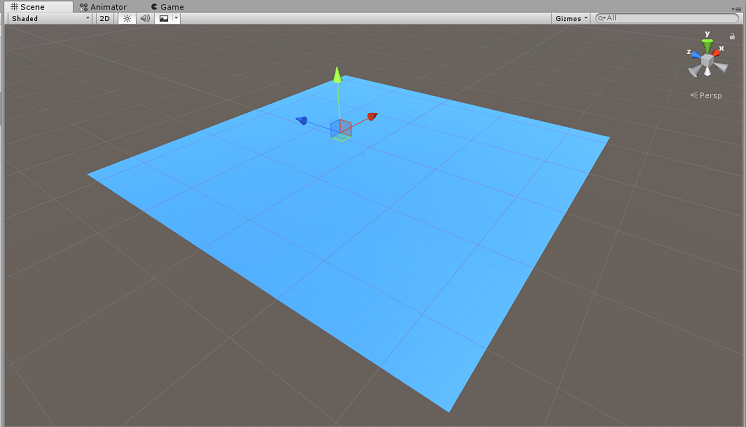
将新材料从“材料”文件夹拖到场景中新创建的平面 (,或将其拖放到“层次结构”) 中的 Plane 对象上。
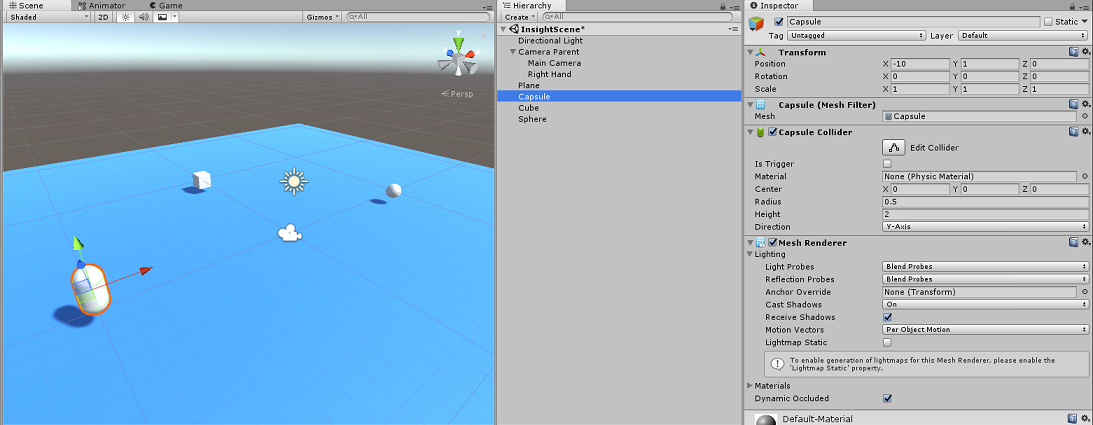
右键单击 层次结构面板中的空白区域,然后在 3D 对象上单击“胶囊”。
- 选中 “胶囊 ”后,将其 “转换位置 ”更改为 :-10、1、0。
右键单击 层次结构面板中的空白区域,然后在 3D 对象、多维数据集上单击。
- 选中 多维数据集 后,将其 转换位置 更改为: 0、0、10。
右键单击 层次结构面板中的空白区域,然后在 3D 对象、Sphere 上单击。
- 选择 “球体” 后,将其 “转换位置 ”更改为: 10、0、0。
注意
这些 Position 值是 建议。 你可以随意将对象的位置设置为所需的任何位置,但如果对象距离不是太远,则应用程序的用户会更容易。
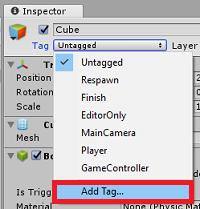
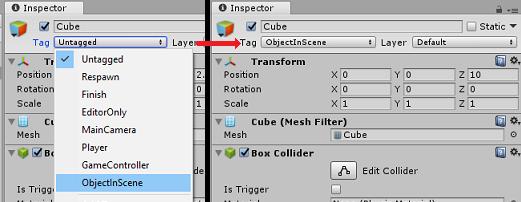
当应用程序运行时,它需要能够识别场景中的对象,为此,需要标记它们。 选择其中一个对象,然后在 “检查器 ”面板中单击“ 添加标记...”,这将交换 检查器 与“ 标记 & 层 ”面板。
 “
“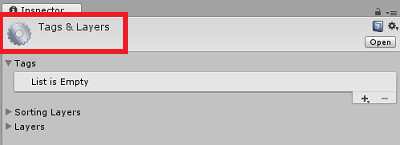
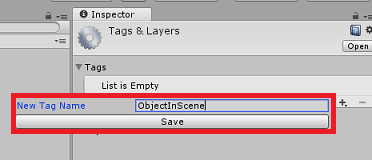
单击 “+ (加) 符号,然后键入 ”ObjectInScene“作为标记名称。
警告
如果对标记使用不同的名称,则需要确保稍后还会对 DataFromAnalytics、 ObjectTrigger 和 Gaze 进行此更改,以便在场景中找到并检测到对象。
创建标记后,现在需要将其应用于所有三个对象。 在 “层次结构”中,按住 Shift 键,单击“ 胶囊”、“ 多维数据集”和“ Sphere”对象,然后在 “检查器”中,单击“ 标记”旁边的下拉菜单,然后单击创建的 ObjectInScene 标记。
第 6 章 - 创建 ApplicationInsightsTracker 类
需要创建的第一个脚本是 ApplicationInsightsTracker,它负责:
基于要提交到 Azure 应用程序 Insights 的用户交互创建事件。
根据用户交互创建适当的事件名称。
将事件提交到 Application Insights 服务实例。
若要创建此类,请:
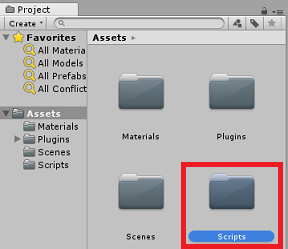
右键单击 “项目面板”,然后单击“ 创建>文件夹”。 将文件夹命名为 “脚本”。
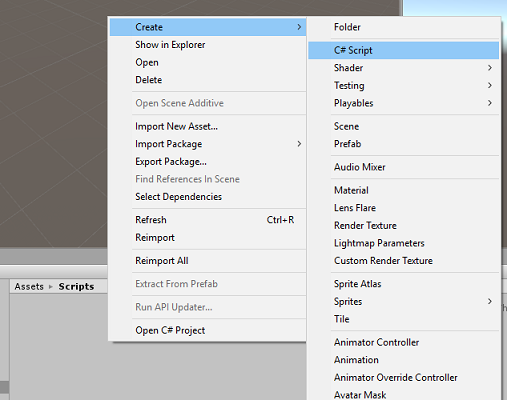
创建 “脚本” 文件夹后,双击该文件夹将其打开。 然后,在该文件夹中,右键单击“ 创建>C# 脚本”。 将脚本命名为 ApplicationInsightsTracker。
双击新的 ApplicationInsightsTracker 脚本,使用 Visual Studio 将其打开。
将脚本顶部的命名空间更新为如下所示:
    using Microsoft.ApplicationInsights;
    using Microsoft.ApplicationInsights.DataContracts;
    using Microsoft.ApplicationInsights.Extensibility;
    using UnityEngine;
在 类中插入以下变量:
    /// <summary>
    /// Allows this class to behavior like a singleton
    /// </summary>
    public static ApplicationInsightsTracker Instance;

    /// <summary>
    /// Insert your Instrumentation Key here
    /// </summary>
    internal string instrumentationKey = "Insert Instrumentation Key here";

    /// <summary>
    /// Insert your Application Id here
    /// </summary>
    internal string applicationId = "Insert Application Id here";

    /// <summary>
    /// Insert your API Key here
    /// </summary>
    internal string API_Key = "Insert API Key here";

    /// <summary>
    /// Represent the Analytic Custom Event object
    /// </summary>
    private TelemetryClient telemetryClient;

    /// <summary>
    /// Represent the Analytic object able to host gaze duration
    /// </summary>
    private MetricTelemetry metric;
注意
使用 Azure 门户中的服务密钥适当设置 instrumentationKey、applicationId 和 API_Key 值,如第 1 章步骤 9 后所述。
然后添加 Start () 和 Awake () 方法,这些方法将在类初始化时调用:
    /// <summary>
    /// Sets this class instance as a singleton
    /// </summary>
    void Awake()
    {
        Instance = this;
    }

    /// <summary>
    /// Use this for initialization
    /// </summary>
    void Start()
    {
        // Instantiate telemetry and metric
        telemetryClient = new TelemetryClient();

        metric = new MetricTelemetry();

        // Assign the Instrumentation Key to the Event and Metric objects
        TelemetryConfiguration.Active.InstrumentationKey = instrumentationKey;

        telemetryClient.InstrumentationKey = instrumentationKey;
    }
添加负责发送应用程序注册的事件和指标的方法:
/// <summary> /// Submit the Event to Azure Analytics using the event trigger object /// </summary> public void RecordProximityEvent(string objectName) { telemetryClient.TrackEvent(CreateEventName(objectName)); } /// <summary> /// Uses the name of the object involved in the event to create /// and return an Event Name convention /// </summary> public string CreateEventName(string name) { string eventName = $"User near {name}"; return eventName; } /// <summary> /// Submit a Metric to Azure Analytics using the metric gazed object /// and the time count of the gaze /// </summary> public void RecordGazeMetrics(string objectName, int time) { // Output Console information about gaze. Debug.Log($"Finished gazing at {objectName}, which went for <b>{time}</b> second{(time != 1 ? "s" : "")}"); metric.Name = $"Gazed {objectName}"; metric.Value = time; telemetryClient.TrackMetric(metric); }在返回到Unity之前,请务必将更改保存在 Visual Studio 中。
第 7 章 - 创建凝视脚本
要创建的下一个脚本是 Gaze 脚本。 此脚本负责创建将从主相机向前投影的 Raycast,以检测用户正在查看的对象。 在这种情况下, Raycast 需要确定用户是否正在查看具有 ObjectInScene 标记的对象,然后计算用户 凝视 该对象的时间。
双击“ 脚本” 文件夹将其打开。
右键单击“ 脚本” 文件夹,单击“ 创建>C# 脚本”。 将脚本命名为 Gaze。
双击脚本以使用 Visual Studio 将其打开。
将现有代码替换为以下内容:
    using UnityEngine;

    public class Gaze : MonoBehaviour
    {
        /// <summary>
        /// Provides Singleton-like behavior to this class.
        /// </summary>
        public static Gaze Instance;

        /// <summary>
        /// Provides a reference to the object the user is currently looking at.
        /// </summary>
        public GameObject FocusedGameObject { get; private set; }

        /// <summary>
        /// Provides whether an object has been successfully hit by the raycast.
        /// </summary>
        public bool Hit { get; private set; }

        /// <summary>
        /// Provides a reference to compare whether the user is still looking at
        /// the same object (and has not looked away).
        /// </summary>
        private GameObject _oldFocusedObject = null;

        /// <summary>
        /// Max Ray Distance
        /// </summary>
        private float _gazeMaxDistance = 300;

        /// <summary>
        /// Max Ray Distance
        /// </summary>
        private float _gazeTimeCounter = 0;

        /// <summary>
        /// The cursor object will be created when the app is running,
        /// this will store its values.
        /// </summary>
        private GameObject _cursor;
    }
现在需要添加 Awake () 和 Start () 方法的代码。
    private void Awake()
    {
        // Set this class to behave similar to singleton
        Instance = this;
        _cursor = CreateCursor();
    }

    void Start()
    {
        FocusedGameObject = null;
    }

    /// <summary>
    /// Create a cursor object, to provide what the user
    /// is looking at.
    /// </summary>
    /// <returns></returns>
    private GameObject CreateCursor()
    {
        GameObject newCursor = GameObject.CreatePrimitive(PrimitiveType.Sphere);

        // Remove the collider, so it does not block raycast.
        Destroy(newCursor.GetComponent<SphereCollider>());

        newCursor.transform.localScale = new Vector3(0.1f, 0.1f, 0.1f);

        newCursor.GetComponent<MeshRenderer>().material.color =
        Color.HSVToRGB(0.0223f, 0.7922f, 1.000f);

        newCursor.SetActive(false);
        return newCursor;
    }
在 Gaze 类中,在 Update () 方法中添加以下代码,以投影 Raycast 并检测目标命中:
    /// <summary>
    /// Called every frame
    /// </summary>
    void Update()
    {
        // Set the old focused gameobject.
        _oldFocusedObject = FocusedGameObject;

        RaycastHit hitInfo;

        // Initialize Raycasting.
        Hit = Physics.Raycast(Camera.main.transform.position, Camera.main.transform.forward, out hitInfo, _gazeMaxDistance);

        // Check whether raycast has hit.
        if (Hit == true)
        {
            // Check whether the hit has a collider.
            if (hitInfo.collider != null)
            {
                // Set the focused object with what the user just looked at.
                FocusedGameObject = hitInfo.collider.gameObject;

                // Lerp the cursor to the hit point, which helps to stabilize the gaze.
                _cursor.transform.position = Vector3.Lerp(_cursor.transform.position, hitInfo.point, 0.6f);

                _cursor.SetActive(true);
            }
            else
            {
                // Object looked on is not valid, set focused gameobject to null.
                FocusedGameObject = null;

                _cursor.SetActive(false);
            }
        }
        else
        {
            // No object looked upon, set focused gameobject to null.
            FocusedGameObject = null;

            _cursor.SetActive(false);
        }

        // Check whether the previous focused object is this same object. If so, reset the focused object.
        if (FocusedGameObject != _oldFocusedObject)
        {
            ResetFocusedObject();
        }
        // If they are the same, but are null, reset the counter.
        else if (FocusedGameObject == null && _oldFocusedObject == null)
        {
            _gazeTimeCounter = 0;
        }
        // Count whilst the user continues looking at the same object.
        else
        {
            _gazeTimeCounter += Time.deltaTime;
        }
    }
添加 ResetFocusedObject () 方法,以在用户查看对象时将数据发送到 Application Insights 。
    /// <summary>
    /// Reset the old focused object, stop the gaze timer, and send data if it
    /// is greater than one.
    /// </summary>
    public void ResetFocusedObject()
    {
        // Ensure the old focused object is not null.
        if (_oldFocusedObject != null)
        {
            // Only looking for objects with the correct tag.
            if (_oldFocusedObject.CompareTag("ObjectInScene"))
            {
                // Turn the timer into an int, and ensure that more than zero time has passed.
                int gazeAsInt = (int)_gazeTimeCounter;

                if (gazeAsInt > 0)
                {
                    //Record the object gazed and duration of gaze for Analytics
                    ApplicationInsightsTracker.Instance.RecordGazeMetrics(_oldFocusedObject.name, gazeAsInt);
                }
                //Reset timer
                _gazeTimeCounter = 0;
            }
        }
    }
现已完成 Gaze 脚本。 在返回到Unity之前,请在 Visual Studio 中保存更改。
第 8 章 - 创建 ObjectTrigger 类
需要创建的下一个脚本是 ObjectTrigger,它负责:
- 将冲突所需的组件添加到主相机。
- 检测相机是否靠近标记为 ObjectInScene 的对象。
若要创建脚本,请执行以下作:
双击“ 脚本” 文件夹将其打开。
右键单击“ 脚本” 文件夹,单击“ 创建>C# 脚本”。 将脚本命名 为 ObjectTrigger。
双击脚本以使用 Visual Studio 将其打开。 将现有代码替换为以下内容:
using UnityEngine; public class ObjectTrigger : MonoBehaviour { private void Start() { // Add the Collider and Rigidbody components, // and set their respective settings. This allows for collision. gameObject.AddComponent<SphereCollider>().radius = 1.5f; gameObject.AddComponent<Rigidbody>().useGravity = false; } /// <summary> /// Triggered when an object with a collider enters this objects trigger collider. /// </summary> /// <param name="collision">Collided object</param> private void OnCollisionEnter(Collision collision) { CompareTriggerEvent(collision, true); } /// <summary> /// Triggered when an object with a collider exits this objects trigger collider. /// </summary> /// <param name="collision">Collided object</param> private void OnCollisionExit(Collision collision) { CompareTriggerEvent(collision, false); } /// <summary> /// Method for providing debug message, and sending event information to InsightsTracker. /// </summary> /// <param name="other">Collided object</param> /// <param name="enter">Enter = true, Exit = False</param> private void CompareTriggerEvent(Collision other, bool enter) { if (other.collider.CompareTag("ObjectInScene")) { string message = $"User is{(enter == true ? " " : " no longer ")}near <b>{other.gameObject.name}</b>"; if (enter == true) { ApplicationInsightsTracker.Instance.RecordProximityEvent(other.gameObject.name); } Debug.Log(message); } } }在返回到Unity之前,请务必将更改保存在 Visual Studio 中。
第 9 章 - 创建 DataFromAnalytics 类
现在需要创建 DataFromAnalytics 脚本,该脚本负责:
- 提取有关相机最接近哪个对象的分析数据。
- 使用允许与 Azure 应用程序 Insights 服务实例通信的服务密钥。
- 对场景中的对象进行排序,根据该对象具有最高的事件计数。
- 将最接近的对象的材料颜色更改为 绿色。
若要创建脚本,请执行以下作:
双击“ 脚本” 文件夹将其打开。
右键单击“ 脚本” 文件夹,单击“ 创建>C# 脚本”。 将脚本命名为 DataFromAnalytics。
双击脚本以使用 Visual Studio 将其打开。
插入以下命名空间:
    using Newtonsoft.Json;
    using System;
    using System.Collections;
    using System.Collections.Generic;
    using System.Linq;
    using UnityEngine;
    using UnityEngine.Networking;
在脚本中,插入以下内容:
    /// <summary>
    /// Number of most recent events to be queried
    /// </summary>
    private int _quantityOfEventsQueried = 10;

    /// <summary>
    /// The timespan with which to query. Needs to be in hours.
    /// </summary>
    private int _timepspanAsHours = 24;

    /// <summary>
    /// A list of the objects in the scene
    /// </summary>
    private List<GameObject> _listOfGameObjectsInScene;

    /// <summary>
    /// Number of queries which have returned, after being sent.
    /// </summary>
    private int _queriesReturned = 0;

    /// <summary>
    /// List of GameObjects, as the Key, with their event count, as the Value.
    /// </summary>
    private List<KeyValuePair<GameObject, int>> _pairedObjectsWithEventCount = new List<KeyValuePair<GameObject, int>>();

    // Use this for initialization
    void Start()
    {
        // Find all objects in scene which have the ObjectInScene tag (as there may be other GameObjects in the scene which you do not want).
        _listOfGameObjectsInScene = GameObject.FindGameObjectsWithTag("ObjectInScene").ToList();

        FetchAnalytics();
    }
在 DataFromAnalytics 类的 Start () 方法后面,添加以下名为 FetchAnalytics 的方法 () 。 此方法负责使用 GameObject 和占位符事件计数编号填充键值对列表。 然后,它会初始化 GetWebRequest () 协同例程。 还可以在此方法中找到 对 Application Insights 的 调用的查询结构,作为 查询 URL 终结点。
    private void FetchAnalytics()
    {
        // Iterate through the objects in the list
        for (int i = 0; i < _listOfGameObjectsInScene.Count; i++)
        {
            // The current event number is not known, so set it to zero.
            int eventCount = 0;

            // Add new pair to list, as placeholder, until eventCount is known.
            _pairedObjectsWithEventCount.Add(new KeyValuePair<GameObject, int>(_listOfGameObjectsInScene[i], eventCount));

            // Set the renderer of the object to the default color, white
            _listOfGameObjectsInScene[i].GetComponent<Renderer>().material.color = Color.white;

            // Create the appropriate object name using Insights structure
            string objectName = _listOfGameObjectsInScene[i].name;

 		    // Build the queryUrl for this object.
 		    string queryUrl = Uri.EscapeUriString(string.Format(
                "https://api.applicationinsights.io/v1/apps/{0}/events/$all?timespan=PT{1}H&$search={2}&$select=customMetric/name&$top={3}&$count=true",
 			    ApplicationInsightsTracker.Instance.applicationId, _timepspanAsHours, "Gazed " + objectName, _quantityOfEventsQueried));


            // Send this object away within the WebRequest Coroutine, to determine it is event count.
            StartCoroutine("GetWebRequest", new KeyValuePair<string, int>(queryUrl, i));
        }
    }
在 FetchAnalytics () 方法的正下方,添加一个名为 GetWebRequest () 的方法,该方法返回 IEnumerator。 此方法负责在 Application Insights 中请求与特定 GameObject 对应的事件调用次数。 返回所有发送的查询后,将调用 DetermineWinner () 方法。
    /// <summary>
    /// Requests the data count for number of events, according to the
    /// input query URL.
    /// </summary>
    /// <param name="webQueryPair">Query URL and the list number count.</param>
    /// <returns></returns>
    private IEnumerator GetWebRequest(KeyValuePair<string, int> webQueryPair)
    {
        // Set the URL and count as their own variables (for readability).
        string url = webQueryPair.Key;
        int currentCount = webQueryPair.Value;

        using (UnityWebRequest unityWebRequest = UnityWebRequest.Get(url))
        {
            DownloadHandlerBuffer handlerBuffer = new DownloadHandlerBuffer();

            unityWebRequest.downloadHandler = handlerBuffer;

            unityWebRequest.SetRequestHeader("host", "api.applicationinsights.io");

            unityWebRequest.SetRequestHeader("x-api-key", ApplicationInsightsTracker.Instance.API_Key);

            yield return unityWebRequest.SendWebRequest();

            if (unityWebRequest.isNetworkError)
            {
                // Failure with web request.
                Debug.Log("<color=red>Error Sending:</color> " + unityWebRequest.error);
            }
            else
            {
                // This query has returned, so add to the current count.
                _queriesReturned++;

                // Initialize event count integer.
                int eventCount = 0;

                // Deserialize the response with the custom Analytics class.
                Analytics welcome = JsonConvert.DeserializeObject<Analytics>(unityWebRequest.downloadHandler.text);

                // Get and return the count for the Event
                if (int.TryParse(welcome.OdataCount, out eventCount) == false)
                {
                    // Parsing failed. Can sometimes mean that the Query URL was incorrect.
                    Debug.Log("<color=red>Failure to Parse Data Results. Check Query URL for issues.</color>");
                }
                else
                {
                    // Overwrite the current pair, with its actual values, now that the event count is known.
                    _pairedObjectsWithEventCount[currentCount] = new KeyValuePair<GameObject, int>(_pairedObjectsWithEventCount[currentCount].Key, eventCount);
                }

                // If all queries (compared with the number which was sent away) have
                // returned, then run the determine winner method.
                if (_queriesReturned == _pairedObjectsWithEventCount.Count)
                {
                    DetermineWinner();
                }
            }
        }
    }
下一种方法是 DetermineWinner () ,它根据最高事件计数对 GameObject 和 Int 对列表进行排序。 然后,它将 GameObject 的材料颜色更改为 绿色 (作为具有最高计数) 的反馈。 这将显示一条消息,其中包含分析结果。
    /// <summary>
    /// Call to determine the keyValue pair, within the objects list,
    /// with the highest event count.
    /// </summary>
    private void DetermineWinner()
    {
        // Sort the values within the list of pairs.
        _pairedObjectsWithEventCount.Sort((x, y) => y.Value.CompareTo(x.Value));

        // Change its colour to green
        _pairedObjectsWithEventCount.First().Key.GetComponent<Renderer>().material.color = Color.green;

        // Provide the winner, and other results, within the console window.
        string message = $"<b>Analytics Results:</b>\n " +
            $"<i>{_pairedObjectsWithEventCount.First().Key.name}</i> has the highest event count, " +
            $"with <i>{_pairedObjectsWithEventCount.First().Value.ToString()}</i>.\nFollowed by: ";

        for (int i = 1; i < _pairedObjectsWithEventCount.Count; i++)
        {
            message += $"{_pairedObjectsWithEventCount[i].Key.name}, " +
                $"with {_pairedObjectsWithEventCount[i].Value.ToString()} events.\n";
        }

        Debug.Log(message);
    }
添加类结构,该结构将用于反序列化从 Application Insights 接收的 JSON 对象。 将这些类添加到 DataFromAnalytics 类文件最底部的类定义 之外 。
/// <summary> /// These classes represent the structure of the JSON response from Azure Insight /// </summary> [Serializable] public class Analytics { [JsonProperty("@odata.context")] public string OdataContext { get; set; } [JsonProperty("@odata.count")] public string OdataCount { get; set; } [JsonProperty("value")] public Value[] Value { get; set; } } [Serializable] public class Value { [JsonProperty("customMetric")] public CustomMetric CustomMetric { get; set; } } [Serializable] public class CustomMetric { [JsonProperty("name")] public string Name { get; set; } }在返回到Unity之前,请务必将更改保存在 Visual Studio 中。
第 10 章 - 创建 Movement 类
移动脚本是需要创建的下一个脚本。 它负责:
- 根据相机正朝的方向移动主相机。
- 将所有其他脚本添加到场景对象。
若要创建脚本,请执行以下作:
双击“ 脚本” 文件夹将其打开。
右键单击“ 脚本” 文件夹,单击“ 创建>C# 脚本”。 将脚本命名为 “移动”。
双击脚本以使用 Visual Studio 将其打开。
将现有代码替换为以下内容:
    using UnityEngine;
    using UnityEngine.XR.WSA.Input;

    public class Movement : MonoBehaviour
    {
        /// <summary>
        /// The rendered object representing the right controller.
        /// </summary>
        public GameObject Controller;

        /// <summary>
        /// The movement speed of the user.
        /// </summary>
        public float UserSpeed;

        /// <summary>
        /// Provides whether source updates have been registered.
        /// </summary>
        private bool _isAttached = false;

        /// <summary>
        /// The chosen controller hand to use.
        /// </summary>
        private InteractionSourceHandedness _handness = InteractionSourceHandedness.Right;

        /// <summary>
        /// Used to calculate and proposes movement translation.
        /// </summary>
        private Vector3 _playerMovementTranslation;

        private void Start()
        {
            // You are now adding components dynamically
            // to ensure they are existing on the correct object

            // Add all camera related scripts to the camera.
            Camera.main.gameObject.AddComponent<Gaze>();
            Camera.main.gameObject.AddComponent<ObjectTrigger>();

            // Add all other scripts to this object.
            gameObject.AddComponent<ApplicationInsightsTracker>();
            gameObject.AddComponent<DataFromAnalytics>();
        }

        // Update is called once per frame
        void Update()
        {

        }
    }
在 Movement 类中,在空 Update () 方法下面插入以下方法,以允许用户使用手部控制器在虚拟空间中移动:
    /// <summary>
    /// Used for tracking the current position and rotation of the controller.
    /// </summary>
    private void UpdateControllerState()
    {
#if UNITY_WSA && UNITY_2017_2_OR_NEWER
        // Check for current connected controllers, only if WSA.
        string message = string.Empty;

        if (InteractionManager.GetCurrentReading().Length > 0)
        {
            foreach (var sourceState in InteractionManager.GetCurrentReading())
            {
                if (sourceState.source.kind == InteractionSourceKind.Controller && sourceState.source.handedness == _handness)
                {
                    // If a controller source is found, which matches the selected handness,
                    // check whether interaction source updated events have been registered.
                    if (_isAttached == false)
                    {
                        // Register events, as not yet registered.
                        message = "<color=green>Source Found: Registering Controller Source Events</color>";
                        _isAttached = true;

                        InteractionManager.InteractionSourceUpdated += InteractionManager_InteractionSourceUpdated;
                    }

                    // Update the position and rotation information for the controller.
                    Vector3 newPosition;
                    if (sourceState.sourcePose.TryGetPosition(out newPosition, InteractionSourceNode.Pointer) && ValidPosition(newPosition))
                    {
                        Controller.transform.localPosition = newPosition;
                    }

                    Quaternion newRotation;

                    if (sourceState.sourcePose.TryGetRotation(out newRotation, InteractionSourceNode.Pointer) && ValidRotation(newRotation))
                    {
                        Controller.transform.localRotation = newRotation;
                    }
                }
            }
        }
        else
        {
            // Controller source not detected.
            message = "<color=blue>Trying to detect controller source</color>";

            if (_isAttached == true)
            {
                // A source was previously connected, however, has been lost. Disconnected
                // all registered events.

                _isAttached = false;

                InteractionManager.InteractionSourceUpdated -= InteractionManager_InteractionSourceUpdated;

                message = "<color=red>Source Lost: Detaching Controller Source Events</color>";
            }
        }

        if(message != string.Empty)
        {
            Debug.Log(message);
        }
#endif
    }
/// <summary> /// This registered event is triggered when a source state has been updated. /// </summary> /// <param name="obj"></param> private void InteractionManager_InteractionSourceUpdated(InteractionSourceUpdatedEventArgs obj) { if (obj.state.source.handedness == _handness) { if(obj.state.thumbstickPosition.magnitude > 0.2f) { float thumbstickY = obj.state.thumbstickPosition.y; // Vertical Input. if (thumbstickY > 0.3f || thumbstickY < -0.3f) { _playerMovementTranslation = Camera.main.transform.forward; _playerMovementTranslation.y = 0; transform.Translate(_playerMovementTranslation * UserSpeed * Time.deltaTime * thumbstickY, Space.World); } } } }/// <summary> /// Check that controller position is valid. /// </summary> /// <param name="inputVector3">The Vector3 to check</param> /// <returns>The position is valid</returns> private bool ValidPosition(Vector3 inputVector3) { return !float.IsNaN(inputVector3.x) && !float.IsNaN(inputVector3.y) && !float.IsNaN(inputVector3.z) && !float.IsInfinity(inputVector3.x) && !float.IsInfinity(inputVector3.y) && !float.IsInfinity(inputVector3.z); } /// <summary> /// Check that controller rotation is valid. /// </summary> /// <param name="inputQuaternion">The Quaternion to check</param> /// <returns>The rotation is valid</returns> private bool ValidRotation(Quaternion inputQuaternion) { return !float.IsNaN(inputQuaternion.x) && !float.IsNaN(inputQuaternion.y) && !float.IsNaN(inputQuaternion.z) && !float.IsNaN(inputQuaternion.w) && !float.IsInfinity(inputQuaternion.x) && !float.IsInfinity(inputQuaternion.y) && !float.IsInfinity(inputQuaternion.z) && !float.IsInfinity(inputQuaternion.w); }最后,在 Update () 方法中添加方法调用。
// Update is called once per frame void Update() { UpdateControllerState(); }在返回到Unity之前,请务必将更改保存在 Visual Studio 中。
第 11 章 - 设置脚本引用
在本章中,你需要将 移动 脚本置于 相机父级 并设置其引用目标。 然后,该脚本将处理将其他脚本放在所需位置的位置。
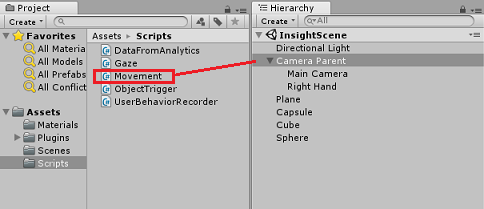
从“项目面板”中的“脚本”文件夹中,将“移动”脚本拖动到“层次结构”面板中的“相机父级”对象。
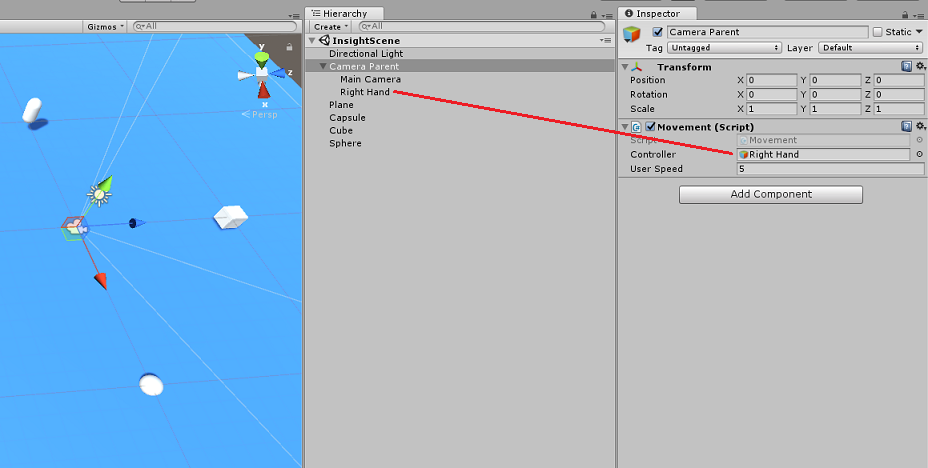
单击 “相机父级”。 在“层次结构面板”中,将“右手”对象从“层次结构面板”拖动到“检查器”面板中的引用目标“控制器”。 将 “用户速度 ”设置为 5,如下图所示。
第 12 章 - 生成Unity项目
此项目的“Unity”部分所需的一切现已完成,因此是时候从Unity生成它了。
导航到 “生成设置”, (“文件>生成设置”) 。
在 “生成设置” 窗口中,单击“ 生成”。
此时会弹出一个文件资源管理器窗口,提示你输入生成的位置。 单击) 左上角的“ 新建文件夹 ”, (新建文件夹,并将其命名为 “BUILDS”。
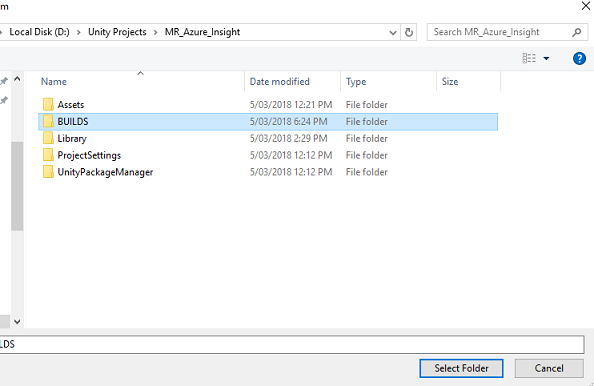
打开新的 BUILDS 文件夹,) 再次使用 “新建 文件夹”创建另一个文件夹 (,并将其 命名为MR_Azure_Application_Insights。
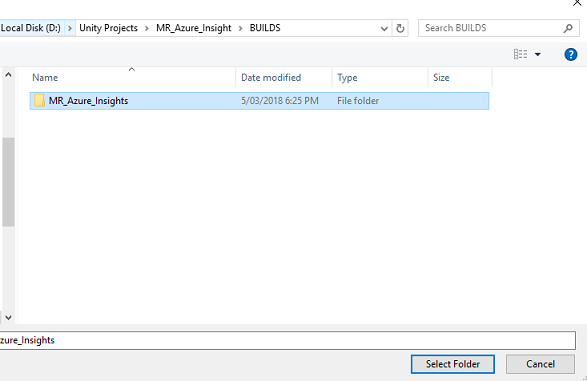
选中 “MR_Azure_Application_Insights 文件夹”后,单击“ 选择文件夹”。 生成项目需要一分钟左右的时间。
生成后,将显示文件资源管理器,显示新项目的位置。
第 13 章 - 将MR_Azure_Application_Insights应用部署到计算机
若要在本地计算机上部署 MR_Azure_Application_Insights 应用,请执行以下作:
在 Visual Studio 中打开MR_Azure_Application_Insights应用的解决方案文件。
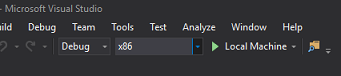
在 “解决方案平台”中,选择“ x86、本地计算机”。
在 “解决方案配置” 中,选择“ 调试”。
转到 “生成”菜单 ,然后单击“ 部署解决方案 ”,将应用程序旁加载到计算机。
你的应用现在应显示在已安装的应用列表中,这些应用已准备好启动。
启动混合现实应用程序。
在场景中移动,接近对象并查看它们,当 Azure Insight Service 收集到足够的事件数据时,它会将已接近最多的对象设置为绿色。
重要
虽然服务收集 的事件和指标 的平均等待时间大约需要 15 分钟,但在某些情况下,可能需要长达 1 小时。
第 14 章 - Application Insights 服务门户
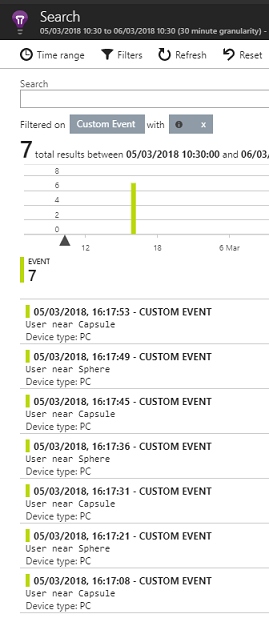
在场景中漫游并凝视多个对象后,可以在 Application Insights 服务 门户中看到收集的数据。
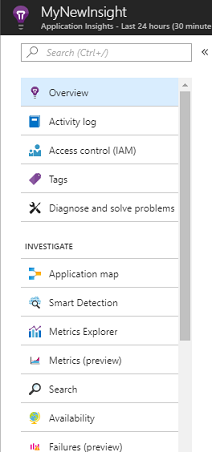
返回 Application Insights 服务门户。
选择“ 指标资源管理器”。
它将在包含图形的选项卡中打开,该图表示与应用程序相关的 事件和指标 。 如上所述,可能需要一些时间 (长达 1 小时) 才能在图形中显示数据
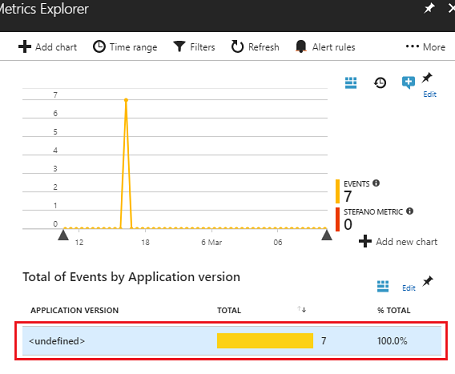
选择“按应用程序版本划分的事件总数”中的“事件”栏,以查看事件及其名称的详细细分。
已完成 Application Insights 服务应用程序
恭喜,你构建了一个混合现实应用,该应用利用 Application Insights 服务监视应用中的用户活动。
奖励练习
练习 1
尝试生成 ObjectInScene 对象,而不是手动创建 ObjectInScene 对象,并在脚本中的平面上设置其坐标。 通过这种方式,可以询问 Azure 从凝视或邻近感应结果 () 的最常用对象是什么,并生成 这些对象中的一 个。
练习 2
按时间对 Application Insights 结果进行排序,以便获取最相关的数据,并在应用程序中实现该时间敏感数据。