练习:使用 SQLite 在本地存储数据
在本练习中,你将在应用程序中使用 SQLite 以本地存储的方式存储信息。 在示例场景中,你决定缓存社交媒体应用的数据以改善响应能力。 本练习将创建并使用一个本地 SQLite 数据库来存储有关人员的信息。 你将在本地存储中保存物理数据库文件。
本模块使用 .NET 9.0 SDK。 通过在首选命令终端中运行以下命令,确保你已安装 .NET 9.0:
dotnet --list-sdks
将显示类似于以下示例的输出:
8.0.100 [C:\Program Files\dotnet\sdk]
9.0.100 [C:\Program Files\dotnet\sdk]
确保列出了以 9 开头的版本。 如果未列出任何版本或未找到命令,请安装最新的 .NET 9.0 SDK。
打开初学者解决方案
克隆或下载练习存储库。
注意
最好将练习内容克隆到较短的文件夹路径,例如 C:\dev,以避免生成进程生成的文件超过最大路径长度。
使用 Visual Studio 打开 People.sln 解决方案,你可在“mslearn-dotnetmaui-store-local-data”>“人员”或 Visual Studio Code 的初学者文件夹中找到该解决方案。
注意
暂时不要尝试运行应用程序,代码不完整,并且会引发异常,请根据本练习的后面部分添加缺少的元素之后再运行。
定义 SQLite 实体
在“Models”文件夹中打开“Person.cs”文件。
将名为
Id的int属性添加到Person类。添加名为
Name的string属性。 此类应如下所示:namespace People.Models; public class Person { public int Id { get; set; } public string Name { get; set; } }保存 Person.cs 文件。
添加 SQLite 库
在 Visual Studio 的“解决方案资源管理器”中右键单击“People”项目节点。
在显示的上下文菜单中,选择“管理 NuGet 包”。
搜索并选择“sqlite-net-pcl”,然后选择“安装”。

如果使用 Visual Studio Code,请使用以下命令打开终端和这些包:
dotnet add package sqlite-net-pcl
添加 SQLite 属性
在 Person.cs 文件中,将
SQLite命名空间的using指令添加到Person类的文件。 借助此指令,可使用 SQLite 特性。using SQLite; namespace People.Models; public class Person { ... }使用
[Table]特性对Person类进行批注,并将表名指定为people。将
Id属性指定为主键。 使用[PrimaryKey]和[AutoIncrement]特性对其进行批注。向
Name属性添加注释。 将其MaxLength指定为 250。 指定列中的每个值都应为Unique。完成的类应如下所示:
using SQLite;

namespace People.Models;

[Table("people")]
public class Person
{
    [PrimaryKey, AutoIncrement]
    public int Id { get; set; }

    [MaxLength(250), Unique]
    public string Name { get; set; }
}
保存 Person.cs 文件。
连接到数据库
打开 PersonRepository.cs 文件。
检查
PersonRepository类。 此类包含带TODO标记的不完整主干代码,你将在其中添加用于访问数据库的功能。将
SQLite和People.Models命名空间的using指令添加到PersonRepository.cs类的文件。将名为
conn的专用SQLiteConnection字段添加到Init函数上方的类。在
Init函数中,检查conn是否不等于null。 如果是,则立即返回。if (conn != null) return;这样,SQLite 数据库的初始化代码仅运行一次。
使用
_dbPath变量初始化conn字段以连接到数据库。使用
conn.CreateTable方法创建一个表以存储Person数据。 完成的Init函数应如下所示:using SQLite; using People.Models; ... private SQLiteConnection conn; ... private void Init() { if (conn != null) return; conn = new SQLiteConnection(_dbPath); conn.CreateTable<Person>(); }
向数据库中插入行
在
PersonRepository类中找到AddNewPerson方法。将此方法中的
TODO注释替换为用于插入新Person对象的代码。 代码首先调用Init以验证数据库已初始化,然后使用SQLiteConnection对象的Insert方法。 将result变量设置为Insert方法返回的值,如以下代码所示:public void AddNewPerson(string name) { int result = 0; try { // enter this line Init(); // basic validation to ensure a name was entered if (string.IsNullOrEmpty(name)) throw new Exception("Valid name required"); // enter this line result = conn.Insert(new Person { Name = name }); ... } ... }
检索数据库中的行
在
PersonRepository类中找到GetAllPeople方法。调用
Init以验证是否已初始化数据库。使用泛型
Table\<T>方法检索表中的所有行。 将Person指定为类型参数。使用
ToList()扩展方法将结果转换为List\<Person>集合,并返回此集合。通过将代码包装在
try-catch块中来添加错误处理。 如果出现错误,请将StatusMessage属性设置为异常的Message属性并返回一个空集合。 完整的方法应如下所示:public List<Person> GetAllPeople() { try { Init(); return conn.Table<Person>().ToList(); } catch (Exception ex) { StatusMessage = string.Format("Failed to retrieve data. {0}", ex.Message); } return new List<Person>(); }保存 PersonRepository.cs 文件。
将存储库集成到 UI 中
打开 MauiProgram.cs 文件。
在
CreateMauiApp函数中用于将MainPage页面作为单一实例服务添加到应用的语句后面,添加用于执行以下任务的代码:创建名为
dbPath的字符串变量。 使用表达式FileAccessHelper.GetLocalFilePath("people.db3")初始化此字符串。 应用使用的数据库文件名为“people.db3”,应用会将此文件保存在设备上的本地存储中。使用依赖项注入将
PersonRepository类作为单一实例服务添加到应用。PersonRepository类公开一个构造函数,该构造函数将数据库文件的路径用作字符串参数。
CreateMauiApp函数的已完成代码应如下所示:public static MauiApp CreateMauiApp() { var builder = MauiApp.CreateBuilder(); builder .UseMauiApp<App>() .ConfigureFonts(fonts => { fonts.AddFont("OpenSans-Regular.ttf", "OpenSansRegular"); fonts.AddFont("OpenSans-Semibold.ttf", "OpenSansSemibold"); }); // Add this code string dbPath = FileAccessHelper.GetLocalFilePath("people.db3"); builder.Services.AddSingleton<PersonRepository>(s => ActivatorUtilities.CreateInstance<PersonRepository>(s, dbPath)); return builder.Build(); }保存 MauiProgram.cs 文件。
在解决方案资源管理器中展开“App.xaml”,然后打开 App.xaml.cs 文件。
添加一个名为
PersonRepo的publicstatic属性。 此属性将保存App类的PersonRepository对象。通过将
PersonRepository参数添加到构造函数并将“PersonRepo”属性设置为此参数中的值,初始化构造函数中的PersonRepo属性。 完成的App类应如下所示:public partial class App : Application { public static PersonRepository PersonRepo { get; private set; } public App(PersonRepository repo) { InitializeComponent(); PersonRepo = repo; } }
注意
依赖项注入过程自动将 repo 参数填充到构造函数。
测试应用程序
按 Ctrl+Shift+B 生成解决方案。
生成完成后,按 F5 开始调试。 UI 出现时,请输入你的姓名并选择“添加人员”。

选择“获取所有人员”,然后检查你的姓名是否出现。
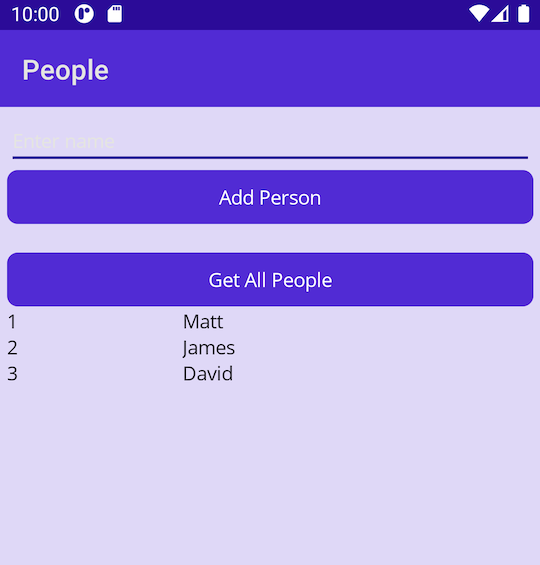
通过添加更多姓名并检索存储的人员列表进行试验。
返回到 Visual Studio 或 Visual Studio Code,并使用 Shift+F5 停止调试。
重启应用并选择“获取所有人员”。 检查先前存储的姓名是否仍然存储在数据库中。 完成后关闭应用。