练习 - 调用翻译器服务
随着我们在 Azure 上创建的后端翻译器服务以及存储的变量已准备就绪,我们将重点转移到如何向应用程序添加必要逻辑和模板来翻译文本。 我们将执行以下步骤:
- 添加代码以调用服务
- 创建模板以显示结果
- 测试应用程序
添加代码以调用服务
app.py 包含应用程序的逻辑。 我们将为将要使用的库添加几项必需导入内容,然后添加响应用户的新路由。
在 app.py 的最顶端,添加以下代码行:
import requests, os, uuid, json
from dotenv import load_dotenv
load_dotenv()
第一行将导入我们稍后在调用翻译器服务时使用的库。 我们还从 dotenv 导入 load_dotenv 并执行函数,该函数将从 .env 加载值。
在 app.py 的底部,添加以下代码行,创建用于翻译文本的路由和逻辑:
@app.route('/', methods=['POST'])
def index_post():
    # Read the values from the form
    original_text = request.form['text']
    target_language = request.form['language']

    # Load the values from .env
    key = os.environ['KEY']
    endpoint = os.environ['ENDPOINT']
    location = os.environ['LOCATION']

    # Indicate that we want to translate and the API version (3.0) and the target language
    path = '/translate?api-version=3.0'
    # Add the target language parameter
    target_language_parameter = '&to=' + target_language
    # Create the full URL
    constructed_url = endpoint + path + target_language_parameter

    # Set up the header information, which includes our subscription key
    headers = {
        'Ocp-Apim-Subscription-Key': key,
        'Ocp-Apim-Subscription-Region': location,
        'Content-type': 'application/json',
        'X-ClientTraceId': str(uuid.uuid4())
    }

    # Create the body of the request with the text to be translated
    body = [{ 'text': original_text }]

    # Make the call using post
    translator_request = requests.post(constructed_url, headers=headers, json=body)
    # Retrieve the JSON response
    translator_response = translator_request.json()
    # Retrieve the translation
    translated_text = translator_response[0]['translations'][0]['text']

    # Call render template, passing the translated text,
    # original text, and target language to the template
    return render_template(
        'results.html',
        translated_text=translated_text,
        original_text=original_text,
        target_language=target_language
    )
代码添加有注释,说明正在执行的步骤。 大致来看,我们的代码将执行以下操作:
- 读取用户输入的文本,以及用户在表单上选择的语言
- 从“.env”文件读取之前创建的环境变量
- 创建调用翻译器服务所需的路径,该服务包括目标语言(自动检测源语言)
- 创建标头信息,包括翻译器服务的密钥、服务的位置和翻译的任意 ID
- 创建请求的正文,其中包括要翻译的文本
- 在
requests上调用post以调用翻译器服务 - 从服务器检索 JSON 响应,其中包括翻译后的文本
- 检索翻译后的文本(请参阅以下注释)
- 调用
render_template以显示响应页
备注
调用翻译器服务时,可以在一次调用中将多个语句翻译成多种语言。 因此,服务返回的 JSON 包含很多信息,我们只需要其中一小部分。 因此,我们需要往下细分才能获得翻译的文本。
具体而言,我们需要读取第一个结果,然后读取到 translations 的集合(第一次翻译),然后读取到 text。 这是通过调用完成的:translator_response[0]['translations'][0]['text']
[
  {
    "detectedLanguage": {
      "language": "en",
      "score": 1.0
    },
    "translations": [
      {
        "text": "これはテストです",
        "to": "ja"
      }
    ]
  }
]
创建模板以显示结果
让我们为“结果”页创建 HTML 模板。
在 Visual Studio Code 中的“Explorer”工具中选择“模板”,在“模板”中新建一个文件。 然后选择“新建文件”
将文件命名为 results.html
将以下 HTML 添加到 results.html 中
<!DOCTYPE html>
<html lang="en">
<head>
    <meta charset="UTF-8">
    <meta name="viewport" content="width=device-width, initial-scale=1.0">
    <link rel="stylesheet" href="https://cdn.jsdelivr.net/npm/bootstrap@4.5.3/dist/css/bootstrap.min.css"
        integrity="sha384-TX8t27EcRE3e/ihU7zmQxVncDAy5uIKz4rEkgIXeMed4M0jlfIDPvg6uqKI2xXr2" crossorigin="anonymous">
    <title>Result</title>
</head>
<body>
    <div class="container">
        <h2>Results</h2>
        <div>
            <strong>Original text:</strong> {{ original_text }}
        </div>
        <div>
            <strong>Translated text:</strong> {{ translated_text }}
        </div>
        <div>
            <strong>Target language code:</strong> {{ target_language }}
        </div>
        <div>
            <a href="{{ url_for('index') }}">Try another one!</a>
        </div>
    </div>
</body>
</html>
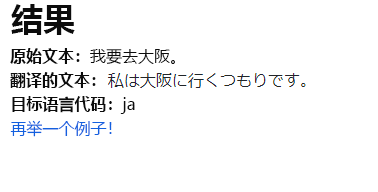
你会注意到,我们访问了 original_text、translated_text 和 target_language,这些均使用 {{ }} 在 render_template 中作为命名参数传递。 此操作告知 Flask 将内容呈现为纯文本。 我们还要使用 url_for('index') 创建返回默认页面的链接。 虽然从技术上讲,我们可以键入原始页面的路径,但是使用 url_for 会告知 Flask 使用我们提供的名称(本例中为 index)读取函数的路径。 如果我们重新排列站点,则为链接生成的 URL 将始终有效。
测试页面
返回到 Visual Studio Code 中的集成终端(在 Mac 上可使用 Ctrl- 或 Cmd- 重新将其打开)。 如果站点当前正在运行,则我们需要停止并重启该站点,以便应用程序读取环境变量。
使用 Ctrl-C 停止 Flask 应用程序
执行命令
flask run以重启服务浏览到 http://localhost:5000 以测试应用程序
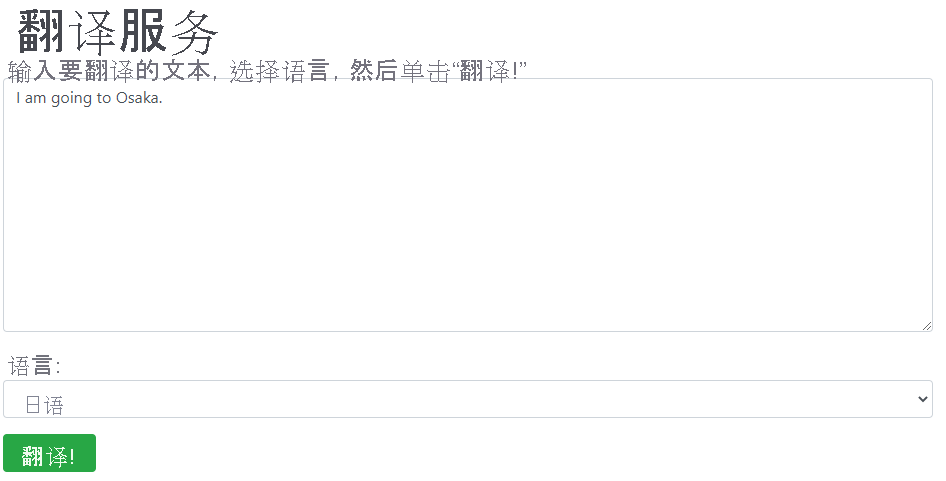
在文本区域输入文本,选择一种语言,然后选择“翻译”

你将看到结果!

祝贺
你现在已成功创建使用翻译器来实现翻译的网站! 由于语言和交流依赖于上下文,而计算机并不一定清楚这一点,因此你可能会发现结果并不完美。 但翻译结果通常完全准确或足够接近,可实现有效沟通,这正是目标所在!
此处提供的代码可以合并到你喜欢的任何应用程序中。 可以继续在我们创建的网站上进行构建,甚至可以将其部署到 Azure 应用服务!