练习 - 发布模板规格
你的团队已经拥有一些符合贵公司新治理模型的安全强化 Bicep 文件。 其中一个强化的 Bicep 文件部署了一个基于 Linux 的 Azure 应用服务应用。 在本练习中,你将使用部署管道将 Bicep 文件发布为模板规格。
在此过程中,你将:
- 向管道添加一个 Lint 分析阶段。
- 添加管道阶段以发布模板规格。
- 验证管道是否启动并成功完成。
- 在 Azure 中检查已发布的模板规格。
向管道添加一个 Lint 分析阶段
存储库包含管道定义的草稿,你可以从该草稿入手。
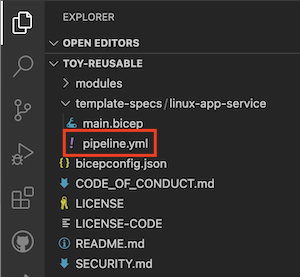
在 Visual Studio Code 中,展开存储库根目录中的 template-specs/linux-app-service 文件夹。
打开 pipeline.yml 文件。

在文件的底部,将
# To be added替换为以下 lint 阶段定义:stages: - stage: Lint jobs: - job: LintCode displayName: Lint code steps: - script: | az bicep build --file $(TemplateSpecFilePath) name: LintBicepCode displayName: Run Bicep linter存储库中有一个“bicepconfig.json”文件,该文件将 Linter 配置为发出错误而不是警告。 Lint 分析阶段发生的任何失败都将导致管道失败。
提示
YAML 文件对缩进敏感。 无论是键入还是粘贴此代码,都请确保缩进正确。 在此练习的后续部分,你将看到完整的 YAML 管道定义,使你可验证文件是否匹配。
向管道添加发布阶段
现在,可以添加第二个阶段,以将模板规格发布到 Azure。
将下面的代码添加到 pipeline.yml 文件末尾:
- stage: Publish
  jobs:
  - job: Publish
    steps:
      - task: AzureCLI@2
        name: Publish
        displayName: Publish template spec
        inputs:
          azureSubscription: $(ServiceConnectionName)
          scriptType: 'bash'
          scriptLocation: 'inlineScript'
          inlineScript: |
            az ts create \
              --resource-group $(AzureResourceGroupName) \
              --name $(TemplateSpecName) \
              --version $(Build.BuildNumber) \
              --template-file $(TemplateSpecFilePath) \
              --location $(AzureRegion) \
              --yes
此阶段从存储库中签出代码并使用你创建的服务连接登录到 Azure。 然后它会运行
az ts create命令将模板规格发布到 Azure。提示
为简单起见,管道将使用管道的生成号作为模板规格的版本号。 下一单元将介绍更复杂的版本控制方案。
保存对该文件所做的更改。
验证并提交管道定义
验证 pipeline.yml 文件是否类似于以下示例:
trigger:
  batch: true
  branches:
    include:
    - main
  paths:
    include:
    - 'template-specs/linux-app-service/**'

variables:
- name: ServiceConnectionName
  value: ToyReusable
- name: AzureResourceGroupName
  value: ToyReusable
- name: AzureRegion
  value: westus3
- name: TemplateSpecName
  value: linux-app-service
- name: TemplateSpecFilePath
  value: template-specs/linux-app-service/main.bicep

pool:
  vmImage: ubuntu-latest

stages:

- stage: Lint
  jobs:
  - job: LintCode
    displayName: Lint code
    steps:
      - script: |
          az bicep build --file $(TemplateSpecFilePath)
        name: LintBicepCode
        displayName: Run Bicep linter

- stage: Publish
  jobs:
  - job: Publish
    steps:
      - task: AzureCLI@2
        name: Publish
        displayName: Publish template spec
        inputs:
          azureSubscription: $(ServiceConnectionName)
          scriptType: 'bash'
          scriptLocation: 'inlineScript'
          inlineScript: |
            az ts create \
              --resource-group $(AzureResourceGroupName) \
              --name $(TemplateSpecName) \
              --version $(Build.BuildNumber) \
              --template-file $(TemplateSpecFilePath) \
              --location $(AzureRegion) \
              --yes
如果不是,请更新它以匹配此示例,然后保存。
通过在 Visual Studio Code 终端中运行以下命令来提交更改并将其推送到 Git 存储库:
git add .
git commit -m "Add lint and publish stages to Linux App Service template spec pipeline"
git push
推送后,Azure Pipelines 会立即启动新的管道运行。
监视管道
在浏览器中,选择“Pipelines”>“管道”。

选择活动管道运行。
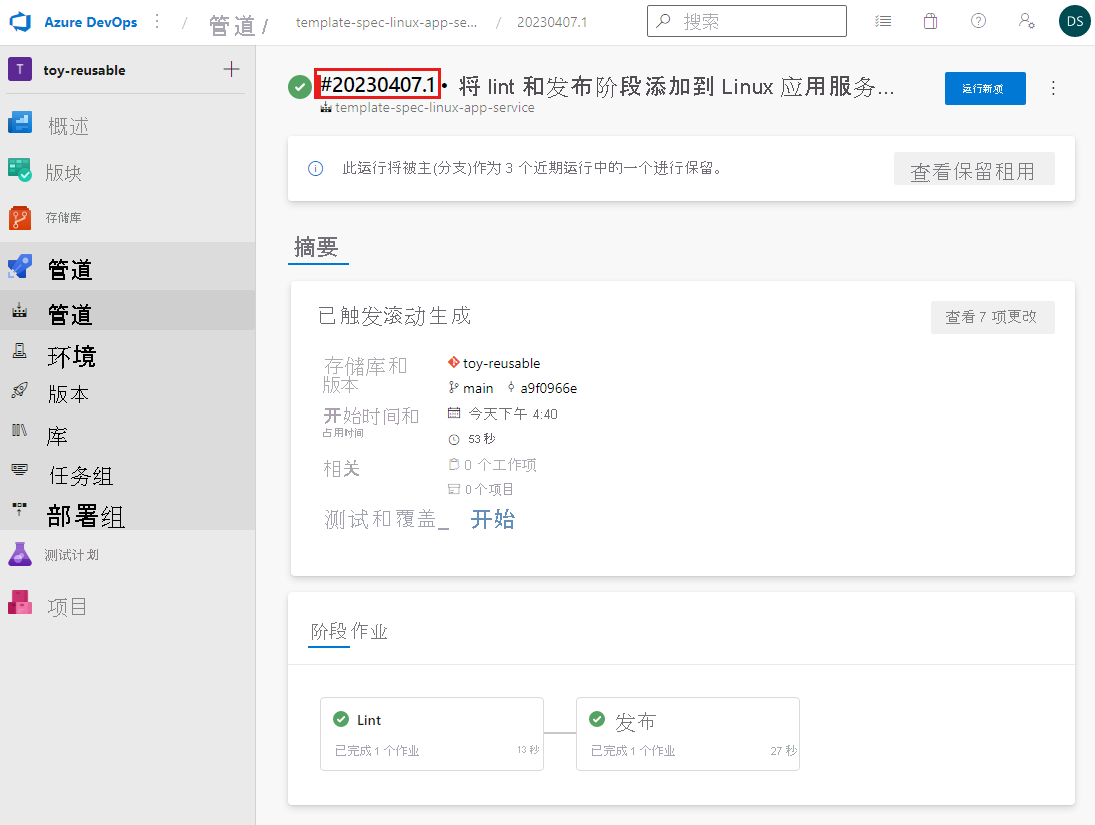
管道运行随即显示。
等待管道运行完成。 完成后,模板规格将发布到 Azure。

请记下管道的生成号,其中包括今天的日期和唯一的修订号。 在示例屏幕截图中,生成号为 20230407.1。
查看 Azure 中的模板规格
还可以在 Azure 门户中查看已发布的模板规格。
在浏览器中转到 Azure 门户。
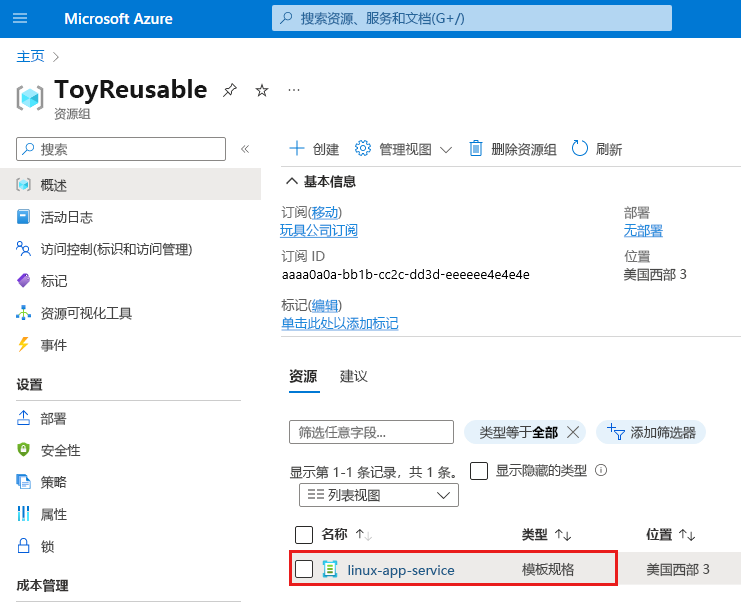
转到 ToyReusable 资源组,然后选择 linux-app-service 模板规格。

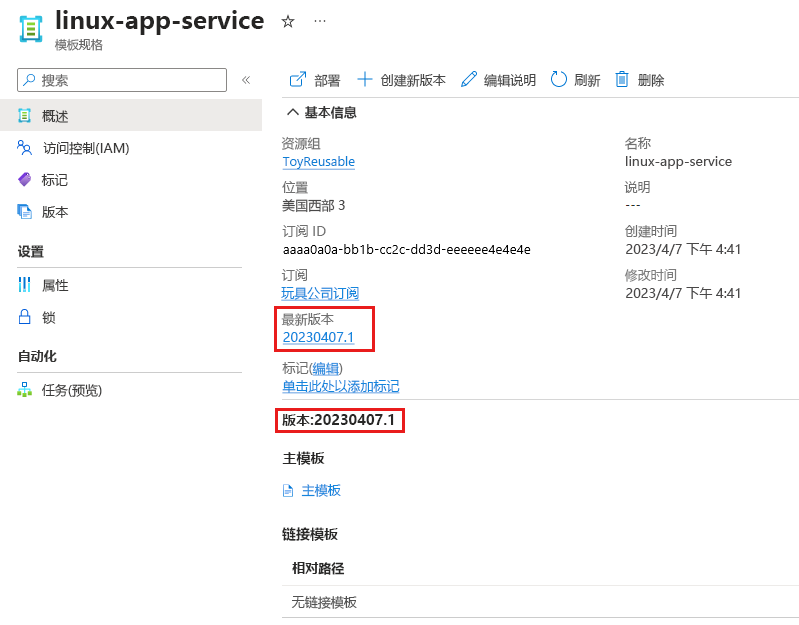
检查模板规格的详细信息。

请注意,最新版本和版本号与管道的生成号相同。 管道使用生成号作为模板规格的版本号。