部署和安装 VMware HCX

已完成

请记住,在 Azure 中部署 Azure VMware 解决方案时,会默认部署 VMware HCX Advanced。 在为迁移配置站点配对之前,请通过后续步骤在本地部署和配置 VMware HCX 连接器。

要完成练习,需要有权访问有参与者权限且能够配置 Azure VMware 解决方案环境的 Azure 订阅。

下载 VMware HCX 连接器

在本地 vCenter 中部署 VMware HCX 连接器之前,需先从 Microsoft Azure 门户下载 VMware HCX 连接器 OVA 文件。

  1. Azure 门户中搜索并选择 Azure VMware 解决方案私有云。

  2. 在“管理”下,选择“加载项”。

  3. 选择“使用 HCX 迁移”选项卡,勾选“我同意条款和条件”旁边的复选标记,然后选择“启用和部署”。
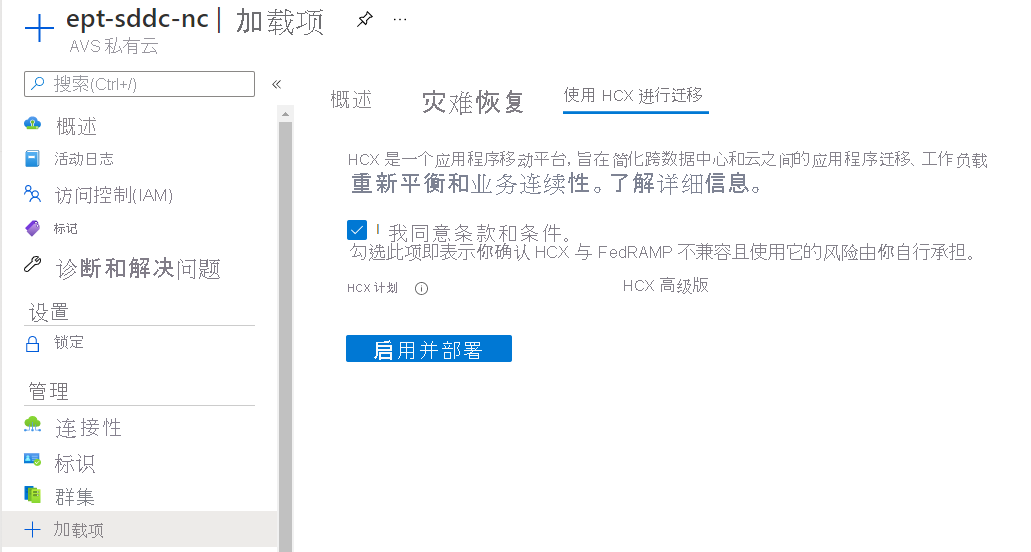
    Screenshot displaying how to enable the VMware HCX add-on within the Azure portal.

  4. 此操作会在 Azure VMware 解决方案私有云中触发生成 VMware HCX 高级版。

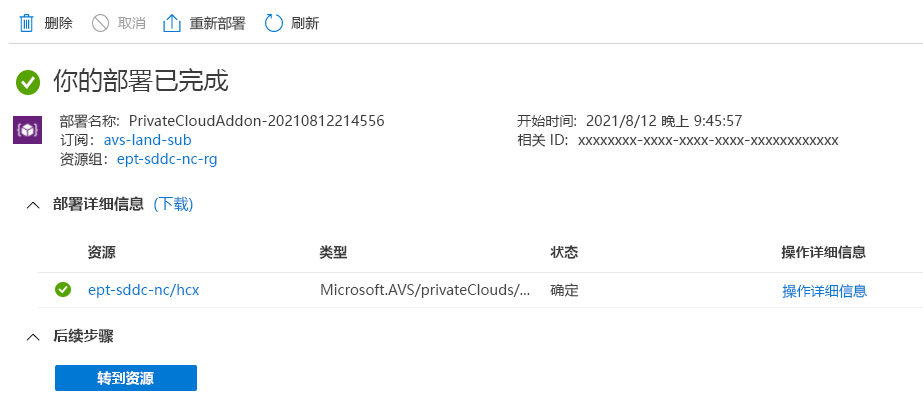
  5. 生成完成后,应会看到类似于以下图像的屏幕:

    Screenshot displaying that the VMware HCX add-on installed after enabling the service within the Azure VMware Solution private cloud.

  6. 在 Azure VMware 解决方案资源的“管理”下,再次选择“加载项”。

  7. 在“使用 HCX 迁移”选项卡中,现在应会看到“HCX 计划”、“配置 HCX 设备”和“使用 HCX 密钥与本地连接”。 所有这些新配置选项都是在私有云上的 HCX 高级版部署期间构建的。
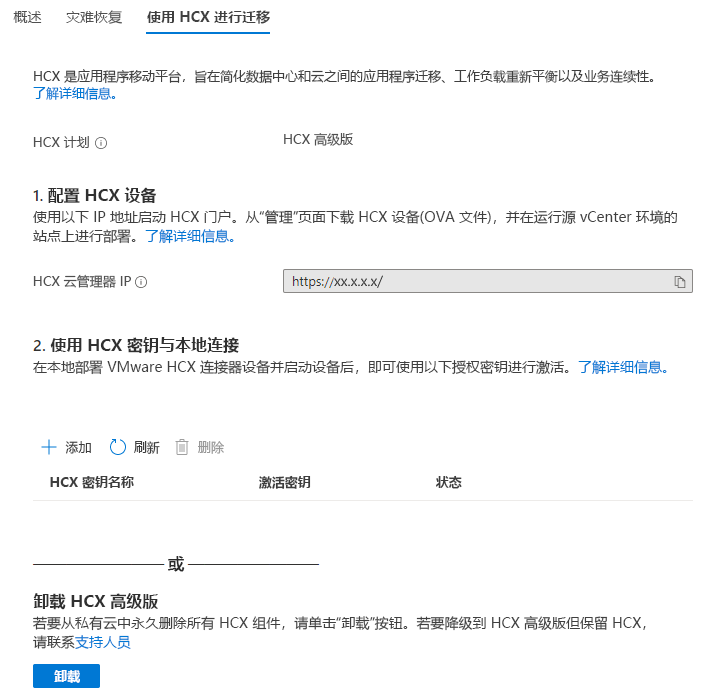
    Screenshot showing that the VMware HCX add-on is enabled and that there are more options to configure after the add-on finishes installing.

  8. 在“使用 HCX 密钥与本地连接”下方,选择“+ 添加”以生成用于本地 HCX 连接器安装的密钥。

  9. 提供 VMware HCX 密钥名称,你将在此窗格中看到激活密钥。 此密钥用于激活本地 VMware HCX 连接器设备。
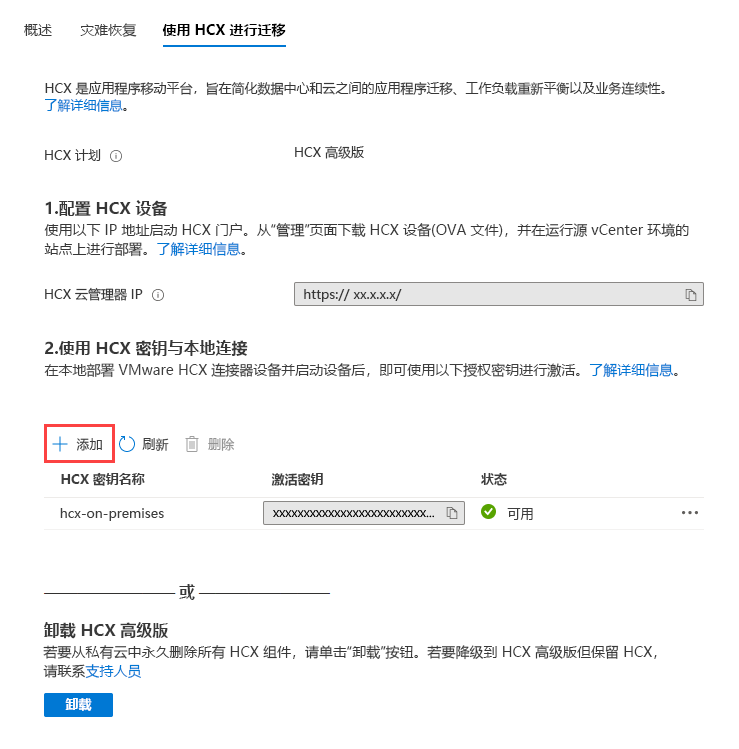
    Screenshot that shows where to add the VMware HCX key in the Azure portal for use on-premises.

  10. 接下来,在 Azure VMware 解决方案私有云上的“管理”下,选择“标识”。

  11. 随即显示 Azure VMware 解决方案 vCenter 和 NSX-T Manager 的 URL 和用户凭据。 使用复制功能将凭据信息粘贴到跳板机 VM 上的 Web 浏览器中。
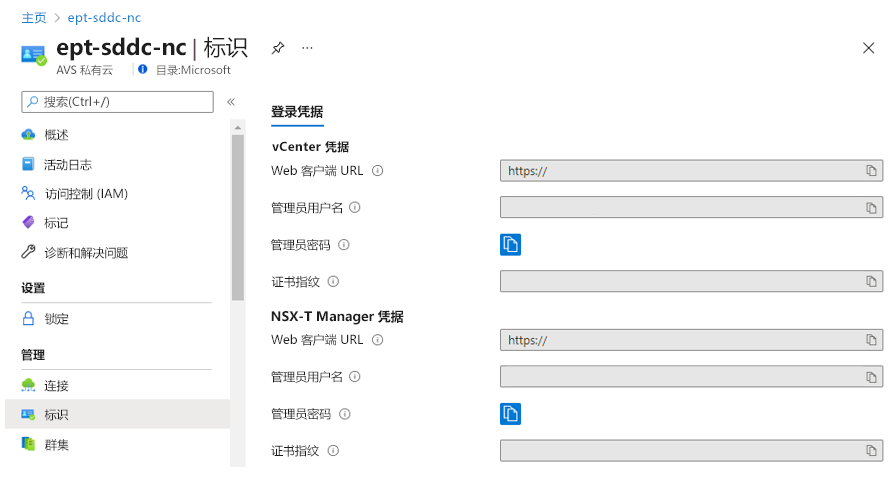
    Screenshot of where to find the vCenter and NSX sign-in information in the Azure portal.

  12. 在 Azure Bastion 后的跳板机内打开浏览器窗口。 通过端口 443 在 https://x.x.x.9 上登录 Azure VMware 解决方案 VMware HCX 管理器。 将 x 替换为用于配置 Azure VMware 解决方案的 CIDR 地址块。

  13. 使用 cloudadmin@vsphere.local 用户凭据进行登录。

  14. 在 VMware HCX 云管理器中,选择“管理”>“系统更新”>“检查更新”。

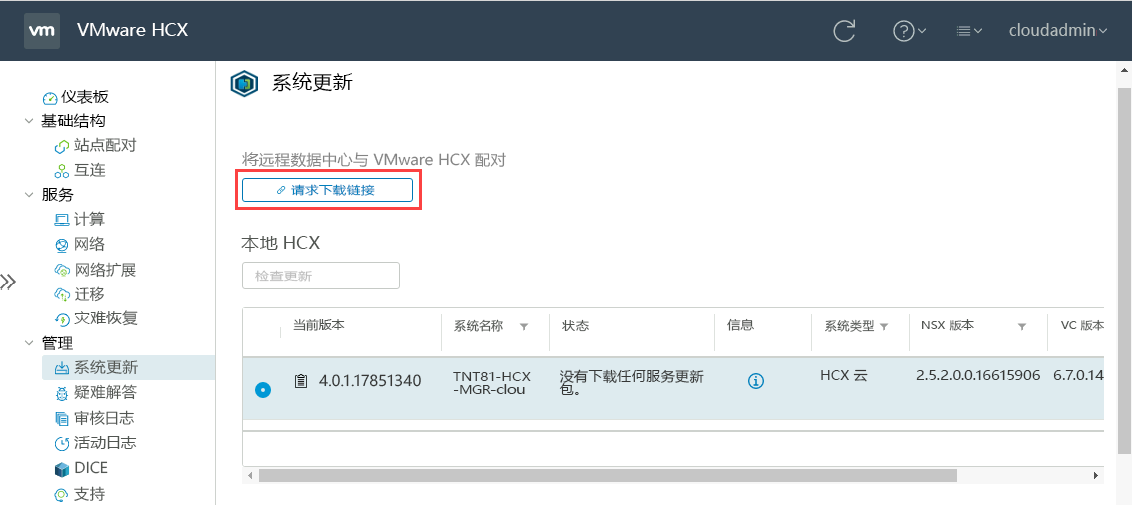
  15. VMware HCX 检查软件更新后,选择“请求下载链接”。

    Screenshot of where to request a download link to the VMware HCX Connector OVA file for the on-premises VMware environment.

  16. 选择“VMware HCX”下载 VMware HCX 连接器 OVA 文件。
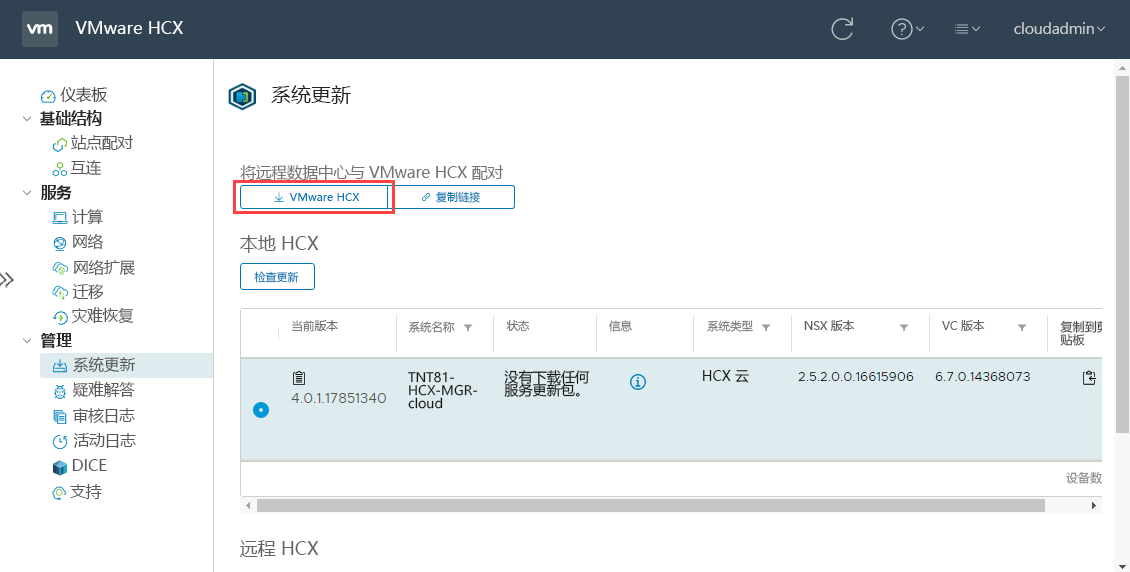
    Screenshot of selecting VMware HCX, which downloads the OVA file for deployment on-premises.

  17. 在你选择使用的 Web 浏览器中,将显示状态栏。 此状态栏突出显示下载 OVA 文件所需的时间。
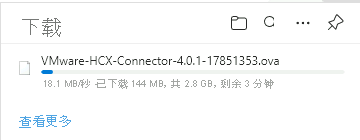
    Screenshot displaying the status of downloading the OVA file for deployment.

在本地部署 VMware HCX 连接器 OVA

接下来,需要在本地 VMware 环境中安装 VMware HCX 连接器 OVA 文件。 登录到 vCenter 的 Web GUI,并开始在本地部署 OVA 文件。

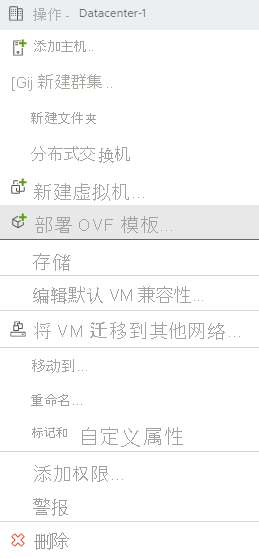
  1. 右键单击 vCenter 数据中心,然后选择“部署 OVF 模板”。

    Screenshot that shows how to deploy the OVA file downloaded for VMware HCX Connector on-premises in vCenter.

  2. 选择已从 Microsoft Azure 门户下载的本地 VMware HCX 连接器 OVA 文件。
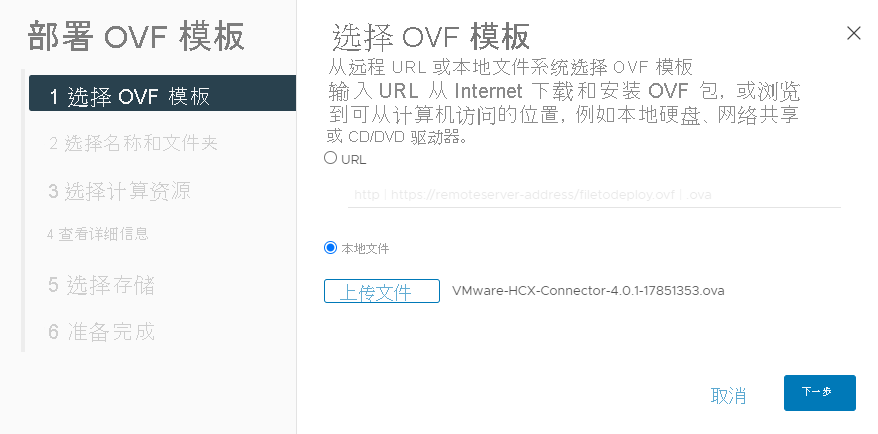
    Screenshot that shows how to select a local file when prompted, during the VMware HCX Connector deployment within vCenter on-premises.

  3. 在“选择名称和文件夹”中,为 VMware HCX 连接器设备命名,选择数据中心资源,然后选择“下一步”。
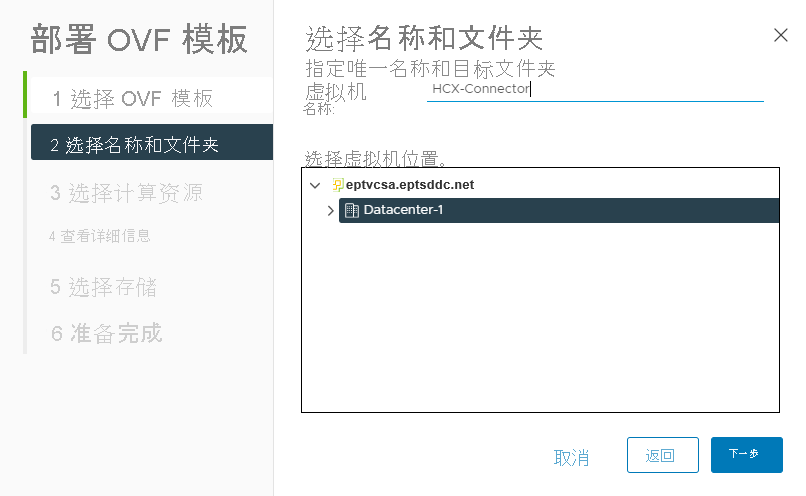
    Screenshot of where to name the VMware HCX Connector appliance and where to select the datacenter within vCenter on-premises.

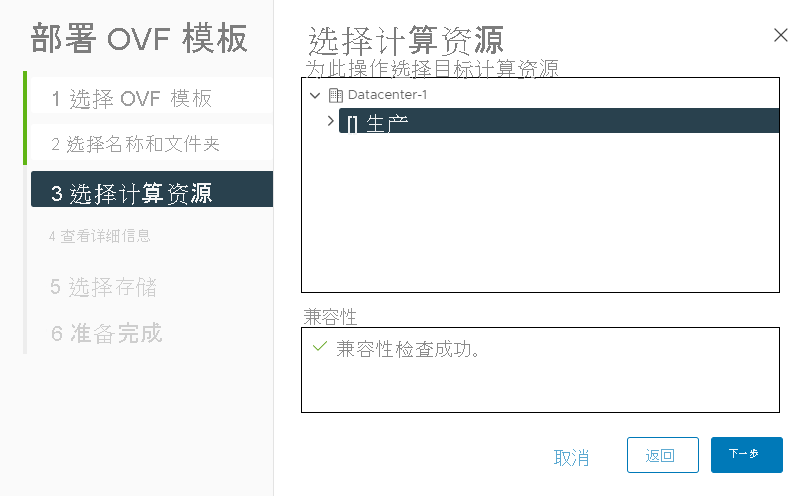
  4. 在“选择计算资源”中,选择 vSphere 群集,然后选择“下一步”。

    Screenshot that selects the vSphere cluster to deploy the VMware HCX Connector appliance to during deployment on-premises.

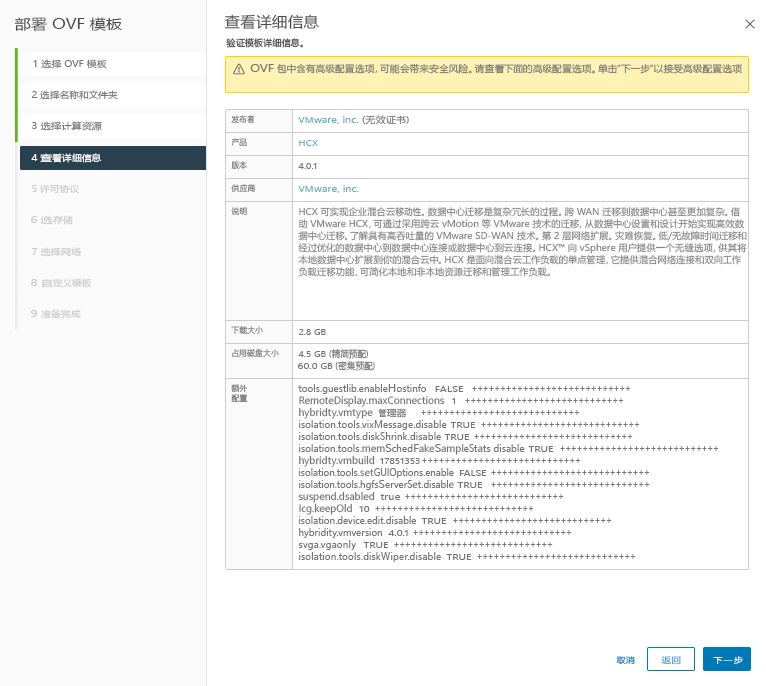
  5. 查看高级配置选项,然后选择“下一步”。

    Screenshot to review advanced configuration details of the VMware HCX Connector appliance.

  6. 对于“许可证协议”,如果同意协议内容,选择“我接受所有许可证协议”,然后选择“下一步”。
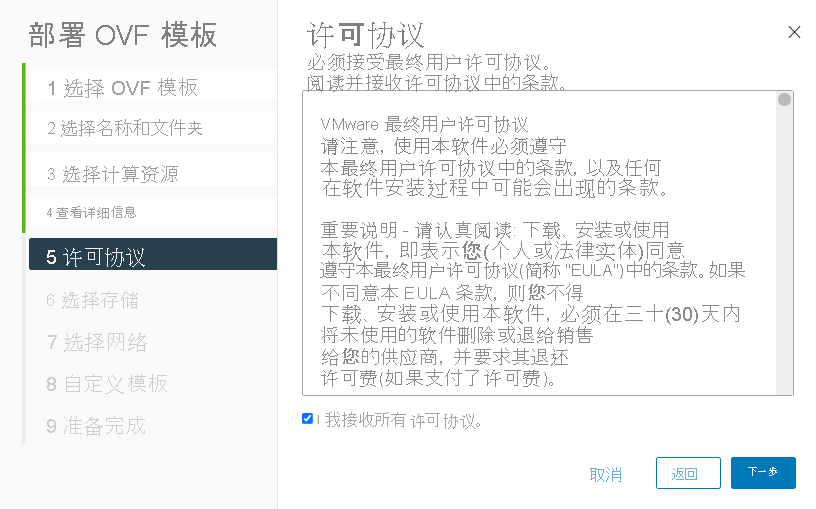
    Screenshot of accepting all license agreements during VMware HCX Connector deployment on-premises.

  7. 选择用于部署 VMware HCX 连接器的合适存储,然后选择“下一步”。
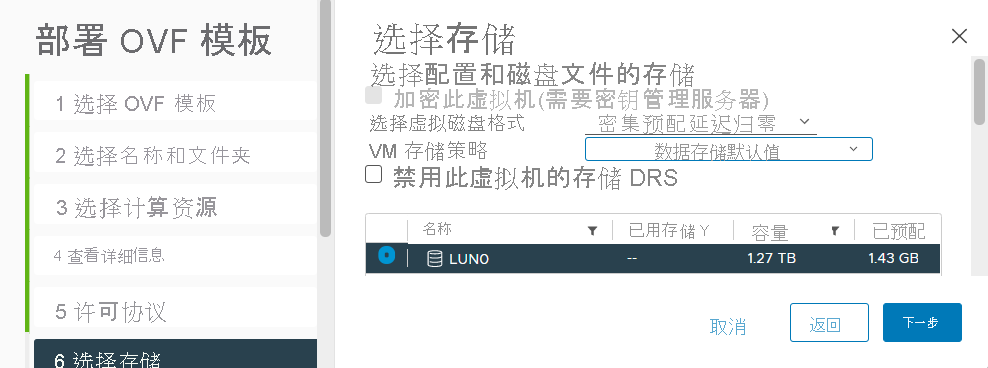
    Screenshot of selecting storage for the VMware HCX Connector appliance on-premises.

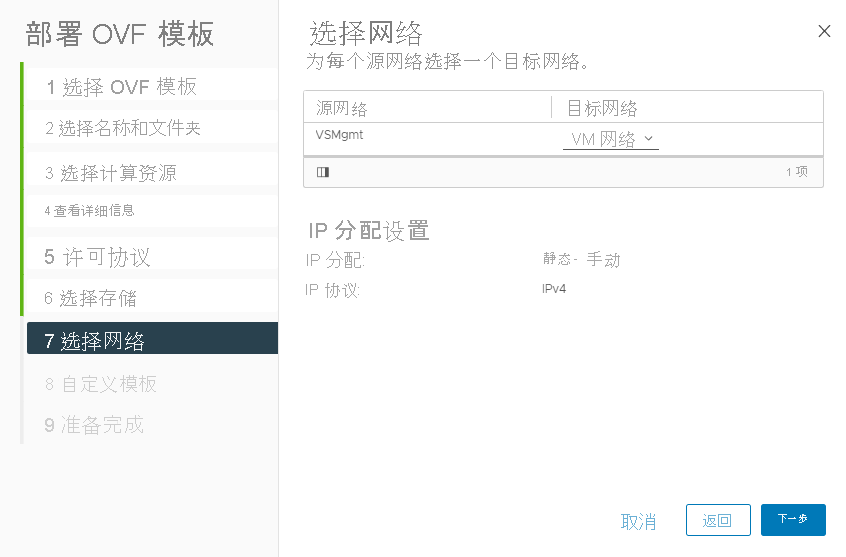
  8. 选择 VMware HCX 管理网段,然后选择“下一步”。

    Screenshot of selecting the right management network on-premises.

  9. 在“自定义模板”中,请注意用于配置 VMware HCX 连接器的用户帐户是管理员。输入所有必需信息,然后选择“下一步”。
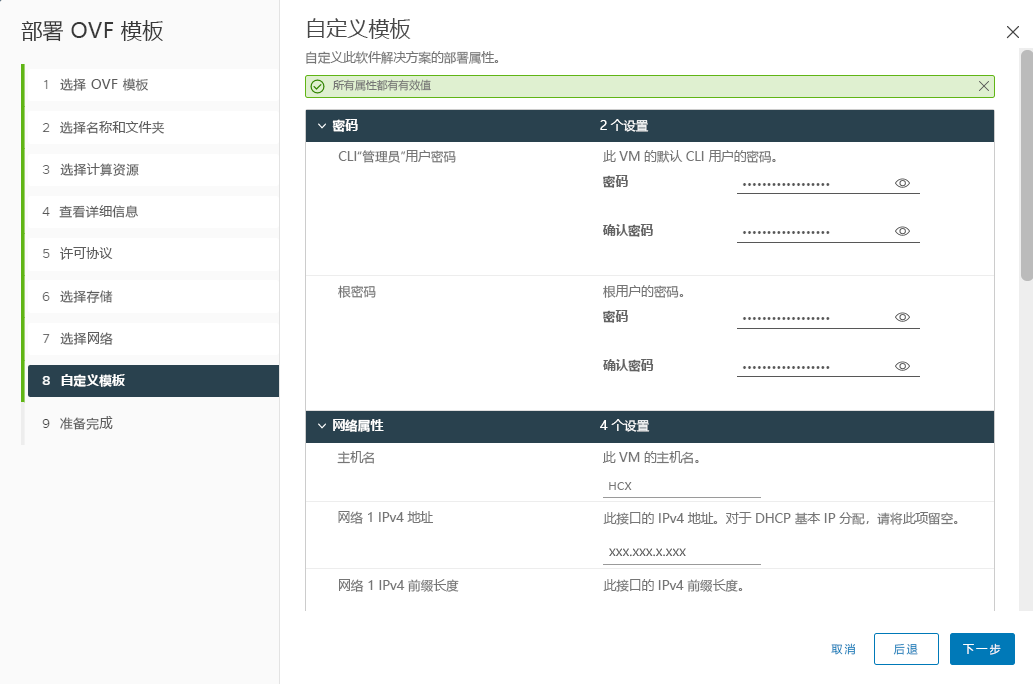
    Screenshot of customizing the OVA template file for the VMware HCX Connector deployment on-premises.

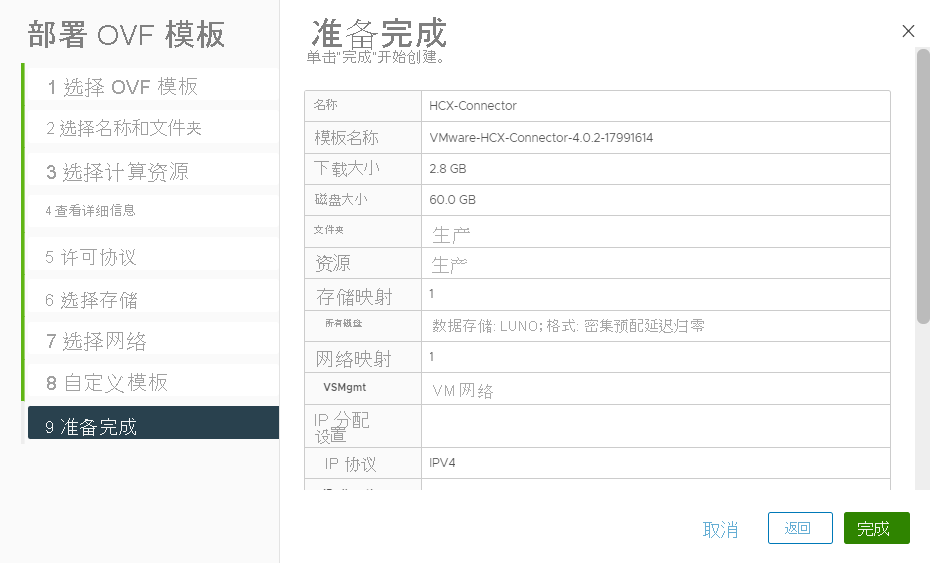
  10. 在“已可完成”中,验证所有配置,然后选择“完成”。

    Screenshot that shows the appliance is ready to complete the installation on-premises.

  11. 部署设备后,需要在 vCenter 中手动打开虚拟设备。 等待 10-15 分钟,然后完成配置。

激活 VMware HCX

在本地部署和打开 VMware HCX 连接器设备后,需要激活 VMware HCX 连接器。 需要从 Azure 的 Azure VMware 解决方案环境中获取许可证密钥。

  1. 在“管理”>“连接”下,选择“HCX”选项卡,然后选择“+添加”。

    Screenshot to add the VMware HCX Advanced key in the Azure portal.

  2. 为密钥命名,并等待 Azure 生成 VMware HCX Advanced 密钥,以便在本地使用。
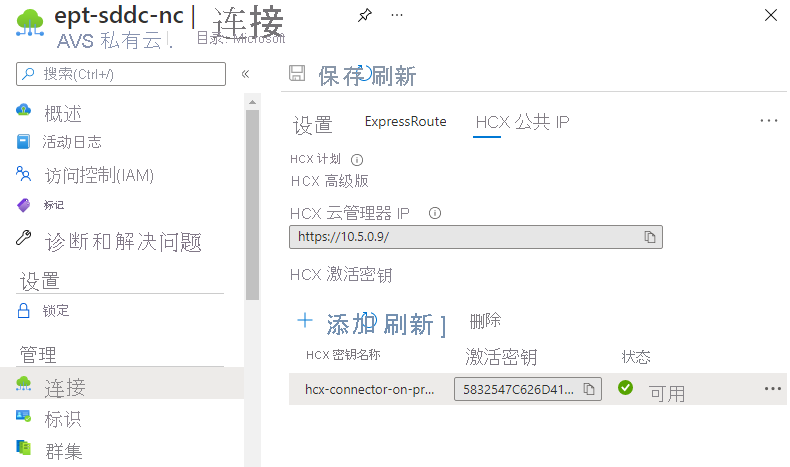
    Screenshot after the VMware HCX Advanced key is requested from the Azure portal.

  3. 使用之前配置的管理员凭据登录到位于 https://x.x.x.x:9443 的本地 VMware HCX 管理器。 将 x 替换为为本地设备配置的 IP 地址。

  4. 系统提示时,输入“HCX 许可证密钥”的密钥,然后选择“添加”。 如果在激活期间收到任何错误,则本地环境可能没有开放 Internet 访问权限,或者没有为激活配置代理。 如果本地 VMware HCX 连接器无法激活,请检查 Internet 连接。
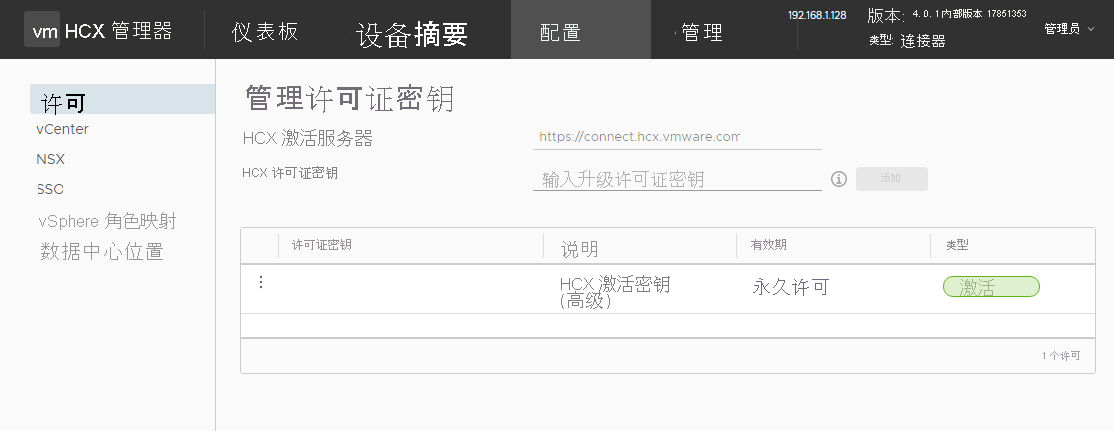
    Screenshot of where to enter the VMware HCX Connector license key on-premises.

  5. 在“数据中心位置”中,提供用于在本地安装 VMware HCX 连接器的最近位置,然后选择“继续”。
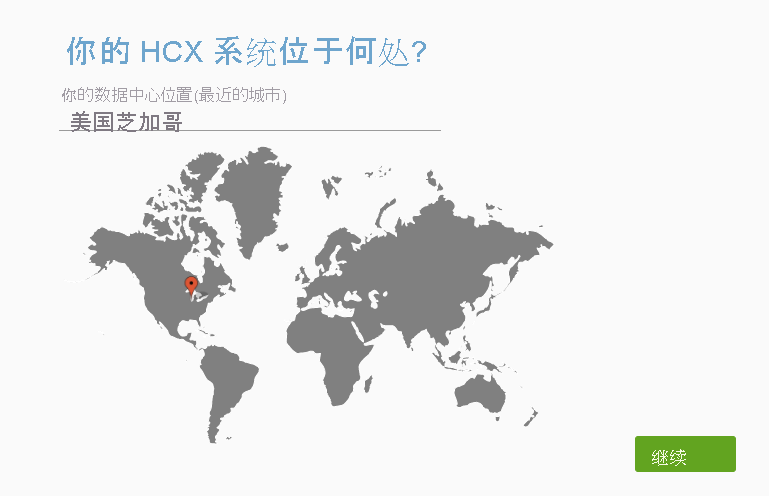
    Screenshot that specifies the location of VMware HCX Connector on-premises during deployment.

  6. 在“系统名称”中,修改 VMware HCX 连接器设备名称或接受默认名称,然后选择“继续”。
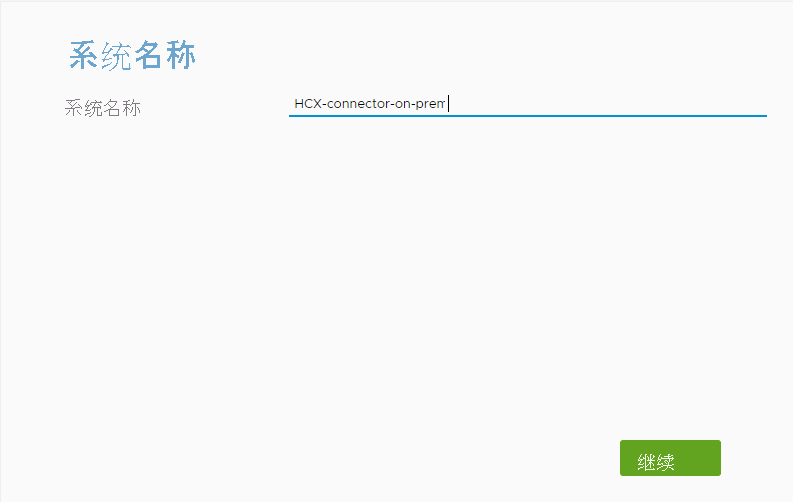
    Screenshot of where to provide a system name for VMware HCX Connector on-premises.

  7. 在下一个屏幕上,选择“是,继续”以继续设置本地 VMware HCX 连接器。

    Screenshot of VMware HCX being successfully activated in the on-premises vCenter environment.

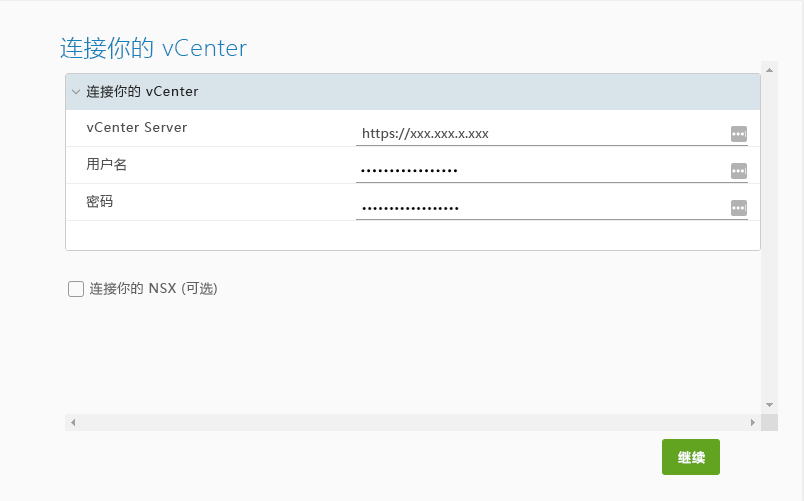
  8. 对于“连接你的 vCenter”,请提供本地 vCenter 服务器的 FQDN 或 IP 地址。

  9. 使用可以访问本地 vCenter 的帐户的用户名和密码,然后选择“继续”。

    Screenshot of where to configure a connection to the on-premises vCenter environment for the VMware HCX Connector appliance.

  10. 在“配置 SSO/PSC”中,提供你的 Platform Services Controller 的 FQDN 或 IP 地址,然后选择“继续”。
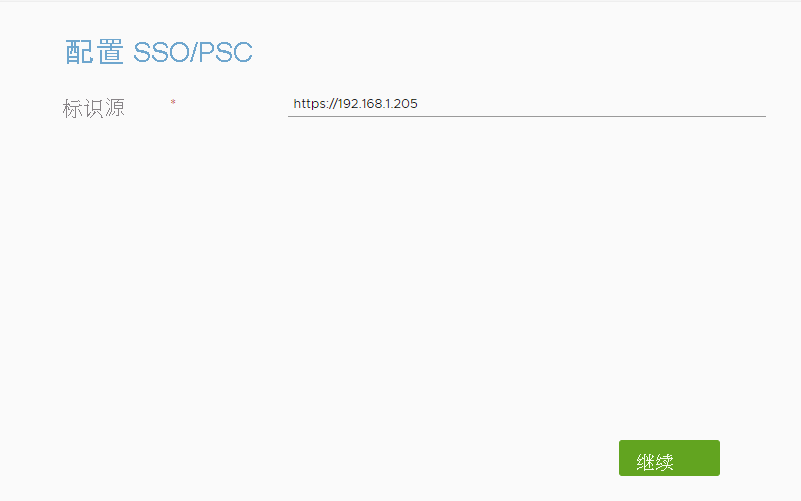
    Screenshot for the configuration of single sign-on and Platform Services Controller for VMware HCX Connector on-premises.

  11. 在下一个屏幕上,验证信息是否正确,然后选择“重启”。 重启可能需要一段时间才能完成。
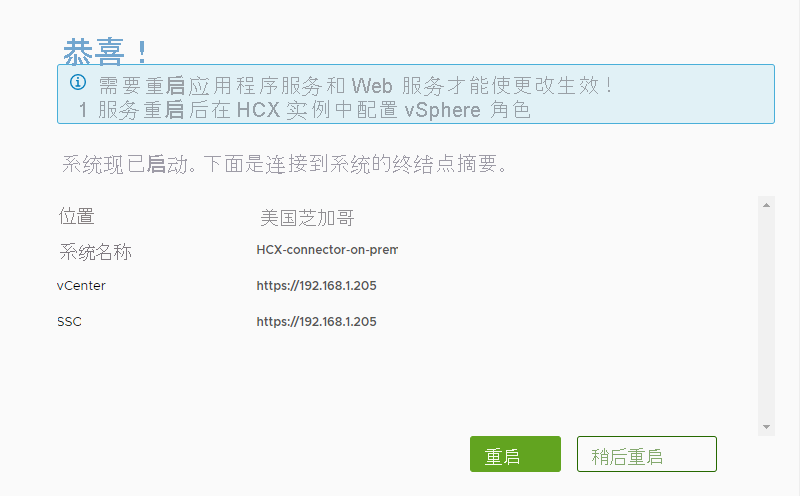
    Screenshot of the end of configuring VMware HCX Manager on-premises.

  12. 设备重启后,请重新登录本地 VMware HCX 管理器。

  13. 如果配置正确,则在登录后,vCenter 旁会显示绿色圆圈。

  14. 此外,SSO 指示 VMware HCX 连接器已配置为使用本地 Platform Services Controller。
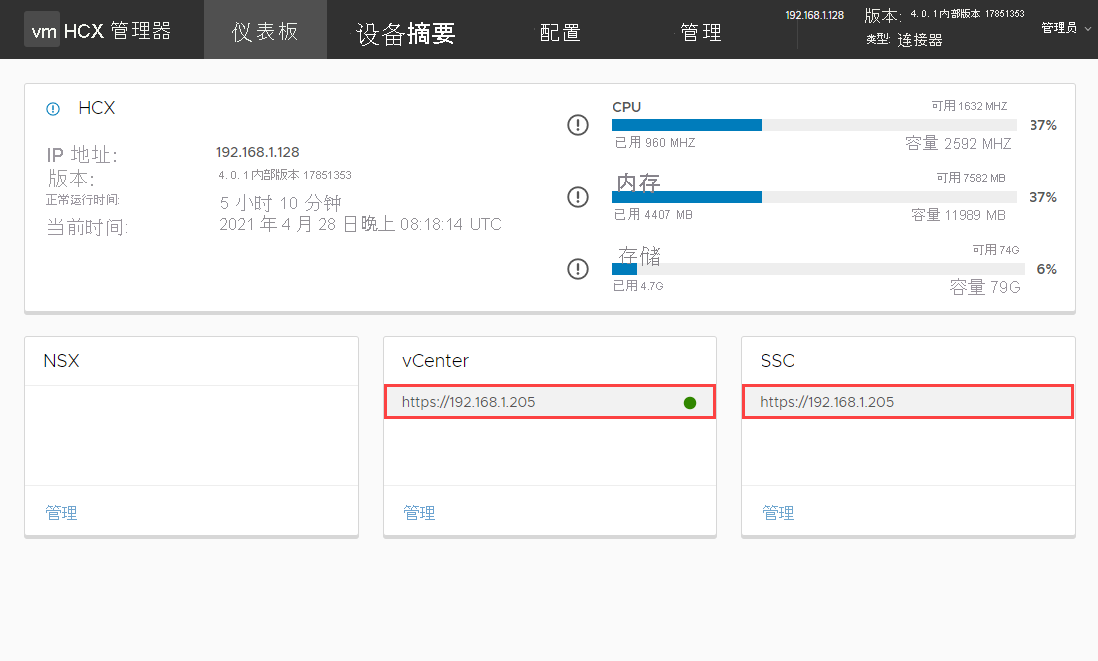
    Screenshot of vCenter and Platform Services Controller SSO configured correctly in the on-premises VMware HCX Connector appliance.

在下一个单元中,将介绍如何设置站点配对、添加网络配置文件以及添加计算配置文件。

知识检查

1.

哪个帐户通常用于访问本地 HCX 连接器?

2.

如果 Juan 无法在本地激活 HCX 高级密钥,可能是什么问题?