练习 - 将多个环境添加到管道
现在可以更新管道,以部署到测试和生产环境。 在本单元中,你将更新管道以使用模板,以便可以跨环境重用阶段。
在此过程中,你将:
- 为 Lint 分析阶段添加管道模板。
- 添加一个管道模板,用于定义部署到任何环境所需的阶段。
- 更新管道以使用模板。
- 运行管道并查看结果。
为 Lint 分析阶段添加管道模板
无论管道部署到多少个环境,Lint 分析阶段在管道运行期间只发生一次。 因此,实际上不需要为 Lint 分析阶段使用模板。 但是为了保持主管道定义文件简单易读,你决定在模板中定义 Lint 分析阶段。
在 Visual Studio Code 中,在 deploy 文件夹中创建一个名为 pipeline-templates 的新文件夹。
在 pipeline-templates 文件夹中创建一个名为 lint.yml 的新文件。
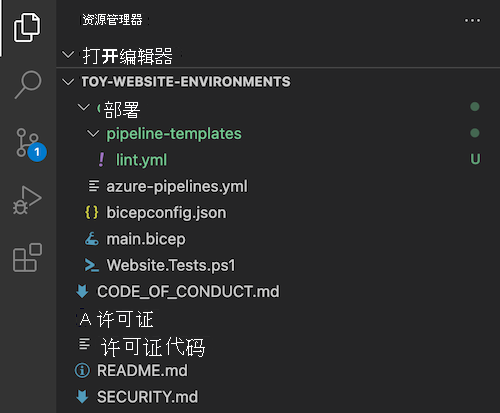
将以下管道模板定义粘贴到文件中:
jobs:
- job: LintCode
  displayName: Lint code
  steps:
    - script: |
        az bicep build --file deploy/main.bicep
      name: LintBicepCode
      displayName: Run Bicep linter
Lint 分析阶段与管道中已有的 Lint 分析阶段相同,但现在它位于单独的管道模板文件中。
保存更改并关闭该文件。
添加用于部署的管道模板
创建一个管道模板,用于定义部署每个环境所需的所有阶段。 你需要使用模板参数来指定环境之间可能不同的设置。
在 pipeline-templates 文件夹中创建一个名为 deploy.yml 的新文件。
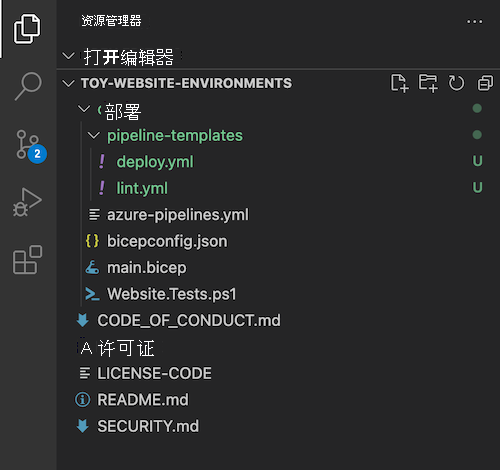
此文件代表针对每个环境运行的所有部署活动。
将以下管道模板参数粘贴到文件中:
parameters:
- name: environmentType
  type: string
- name: resourceGroupName
  type: string
- name: serviceConnectionName
  type: string
- name: deploymentDefaultLocation
  type: string
  default: westus3
注意
当你开始在 Visual Studio Code 中使用 YAML 文件时,可能会看到一些红色波浪线,指示存在问题。 这是因为 YAML 文件的 Visual Studio Code 扩展有时会错误地猜测文件的架构。
可以忽略扩展报告的问题。 或者,如果你愿意,可以将以下代码添加到文件顶部以禁用扩展的猜测:
# yaml-language-server: $schema=./deploy.yml在参数下方,粘贴验证阶段的定义:
stages:

- ${{ if ne(parameters.environmentType, 'Production') }}:
  - stage: Validate_${{parameters.environmentType}}
    displayName: Validate (${{parameters.environmentType}} Environment)
    jobs:
    - job: ValidateBicepCode
      displayName: Validate Bicep code
      steps:
        - task: AzureResourceManagerTemplateDeployment@3
          name: RunPreflightValidation
          displayName: Run preflight validation
          inputs:
            connectedServiceName: ${{parameters.serviceConnectionName}}
            location: ${{parameters.deploymentDefaultLocation}}
            deploymentMode: Validation
            resourceGroupName: ${{parameters.resourceGroupName}}
            csmFile: deploy/main.bicep
            overrideParameters: >
              -environmentType ${{parameters.environmentType}}
请注意,这个阶段应用了一个条件。 它仅针对非生产环境运行。
另请注意,阶段标识符包括
environmentType参数的值。 此参数可确保管道中的每个阶段都具有唯一标识符。 该阶段还有一个displayName属性,用于创建格式正确的名称供你阅读。在验证阶段下方,粘贴预览阶段的定义:
- ${{ if eq(parameters.environmentType, 'Production') }}:
  - stage: Preview_${{parameters.environmentType}}
    displayName: Preview (${{parameters.environmentType}} Environment)
    jobs:
    - job: PreviewAzureChanges
      displayName: Preview Azure changes
      steps:
        - task: AzureCLI@2
          name: RunWhatIf
          displayName: Run what-if
          inputs:
            azureSubscription: ${{parameters.serviceConnectionName}}
            scriptType: 'bash'
            scriptLocation: 'inlineScript'
            inlineScript: |
              az deployment group what-if \
                --resource-group ${{parameters.resourceGroupName}} \
                --template-file deploy/main.bicep \
                --parameters environmentType=${{parameters.environmentType}}
请注意,这个阶段也应用了一个条件,但它与验证阶段的条件相反。 预览阶段仅针对生产环境运行。
在预览阶段下方,粘贴部署阶段的定义:
- stage: Deploy_${{parameters.environmentType}}
  displayName: Deploy (${{parameters.environmentType}} Environment)
  jobs:
  - deployment: DeployWebsite
    displayName: Deploy website
    environment: ${{parameters.environmentType}}
    strategy:
      runOnce:
        deploy:
          steps:
            - checkout: self

            - task: AzureResourceManagerTemplateDeployment@3
              name: DeployBicepFile
              displayName: Deploy Bicep file
              inputs:
                connectedServiceName: ${{parameters.serviceConnectionName}}
                deploymentName: $(Build.BuildNumber)
                location: ${{parameters.deploymentDefaultLocation}}
                resourceGroupName: ${{parameters.resourceGroupName}}
                csmFile: deploy/main.bicep
                overrideParameters: >
                  -environmentType ${{parameters.environmentType}}
                deploymentOutputs: deploymentOutputs

            - bash: |
                echo "##vso[task.setvariable variable=appServiceAppHostName;isOutput=true]$(echo $DEPLOYMENT_OUTPUTS | jq -r '.appServiceAppHostName.value')"
              name: SaveDeploymentOutputs
              displayName: Save deployment outputs into variables
              env:
                DEPLOYMENT_OUTPUTS: $(deploymentOutputs)
在部署阶段下方,粘贴版本验收测试阶段的定义:
- stage: SmokeTest_${{parameters.environmentType}}
  displayName: Smoke Test (${{parameters.environmentType}} Environment)
  jobs:
  - job: SmokeTest
    displayName: Smoke test
    variables:
      appServiceAppHostName: $[ stageDependencies.Deploy_${{parameters.environmentType}}.DeployWebsite.outputs['DeployWebsite.SaveDeploymentOutputs.appServiceAppHostName'] ]
    steps:
      - task: PowerShell@2
        name: RunSmokeTests
        displayName: Run smoke tests
        inputs:
          targetType: inline
          script: |
            $container = New-PesterContainer `
              -Path 'deploy/Website.Tests.ps1' `
              -Data @{ HostName = '$(appServiceAppHostName)' }
            Invoke-Pester `
              -Container $container `
              -CI

      - task: PublishTestResults@2
        name: PublishTestResults
        displayName: Publish test results
        condition: always()
        inputs:
          testResultsFormat: NUnit
          testResultsFiles: 'testResults.xml'
请注意,
appServiceAppHostName变量定义在引用发布主机名的阶段时合并了environmentType参数。 此参数可确保每个版本验收测试阶段都针对正确的环境运行。验证 deploy.yml 文件是否如以下示例所示:
parameters:
- name: environmentType
  type: string
- name: resourceGroupName
  type: string
- name: serviceConnectionName
  type: string
- name: deploymentDefaultLocation
  type: string
  default: westus3

stages:

- ${{ if ne(parameters.environmentType, 'Production') }}:
  - stage: Validate_${{parameters.environmentType}}
    displayName: Validate (${{parameters.environmentType}} Environment)
    jobs:
    - job: ValidateBicepCode
      displayName: Validate Bicep code
      steps:
        - task: AzureResourceManagerTemplateDeployment@3
          name: RunPreflightValidation
          displayName: Run preflight validation
          inputs:
            connectedServiceName: ${{parameters.serviceConnectionName}}
            location: ${{parameters.deploymentDefaultLocation}}
            deploymentMode: Validation
            resourceGroupName: ${{parameters.resourceGroupName}}
            csmFile: deploy/main.bicep
            overrideParameters: >
              -environmentType ${{parameters.environmentType}}

- ${{ if eq(parameters.environmentType, 'Production') }}:
  - stage: Preview_${{parameters.environmentType}}
    displayName: Preview (${{parameters.environmentType}} Environment)
    jobs:
    - job: PreviewAzureChanges
      displayName: Preview Azure changes
      steps:
        - task: AzureCLI@2
          name: RunWhatIf
          displayName: Run what-if
          inputs:
            azureSubscription: ${{parameters.serviceConnectionName}}
            scriptType: 'bash'
            scriptLocation: 'inlineScript'
            inlineScript: |
              az deployment group what-if \
                --resource-group ${{parameters.resourceGroupName}} \
                --template-file deploy/main.bicep \
                --parameters environmentType=${{parameters.environmentType}}

- stage: Deploy_${{parameters.environmentType}}
  displayName: Deploy (${{parameters.environmentType}} Environment)
  jobs:
  - deployment: DeployWebsite
    displayName: Deploy website
    environment: ${{parameters.environmentType}}
    strategy:
      runOnce:
        deploy:
          steps:
            - checkout: self

            - task: AzureResourceManagerTemplateDeployment@3
              name: DeployBicepFile
              displayName: Deploy Bicep file
              inputs:
                connectedServiceName: ${{parameters.serviceConnectionName}}
                deploymentName: $(Build.BuildNumber)
                location: ${{parameters.deploymentDefaultLocation}}
                resourceGroupName: ${{parameters.resourceGroupName}}
                csmFile: deploy/main.bicep
                overrideParameters: >
                  -environmentType ${{parameters.environmentType}}
                deploymentOutputs: deploymentOutputs

            - bash: |
                echo "##vso[task.setvariable variable=appServiceAppHostName;isOutput=true]$(echo $DEPLOYMENT_OUTPUTS | jq -r '.appServiceAppHostName.value')"
              name: SaveDeploymentOutputs
              displayName: Save deployment outputs into variables
              env:
                DEPLOYMENT_OUTPUTS: $(deploymentOutputs)

- stage: SmokeTest_${{parameters.environmentType}}
  displayName: Smoke Test (${{parameters.environmentType}} Environment)
  jobs:
  - job: SmokeTest
    displayName: Smoke test
    variables:
      appServiceAppHostName: $[ stageDependencies.Deploy_${{parameters.environmentType}}.DeployWebsite.outputs['DeployWebsite.SaveDeploymentOutputs.appServiceAppHostName'] ]
    steps:
      - task: PowerShell@2
        name: RunSmokeTests
        displayName: Run smoke tests
        inputs:
          targetType: inline
          script: |
            $container = New-PesterContainer `
              -Path 'deploy/Website.Tests.ps1' `
              -Data @{ HostName = '$(appServiceAppHostName)' }
            Invoke-Pester `
              -Container $container `
              -CI

      - task: PublishTestResults@2
        name: PublishTestResults
        displayName: Publish test results
        condition: always()
        inputs:
          testResultsFormat: NUnit
          testResultsFiles: 'testResults.xml'
保存对该文件所做的更改。
更新管道定义以使用模板
打开“azure pipelines.yml”文件。
通过使用以下代码替换内容来更新文件以使用新模板:
trigger:
  batch: true
  branches:
    include:
    - main

pool:
  vmImage: ubuntu-latest

stages:

# Lint the Bicep file.
- stage: Lint
  jobs:
  - template: pipeline-templates/lint.yml

# Deploy to the test environment.
- template: pipeline-templates/deploy.yml
  parameters:
    environmentType: Test
    resourceGroupName: ToyWebsiteTest
    serviceConnectionName: ToyWebsiteTest

# Deploy to the production environment.
- template: pipeline-templates/deploy.yml
  parameters:
    environmentType: Production
    resourceGroupName: ToyWebsiteProduction
    serviceConnectionName: ToyWebsiteProduction
该管道运行一次 Lint 分析阶段。 然后它使用 deploy.yml 模板文件两次:每个环境一次。 这使得管道定义清晰易懂。 此外,注释还有助于解释发生的情况。
保存所做更改。
通过在 Visual Studio Code 终端中运行以下命令来提交更改并将其推送到 Git 存储库:
git add .
git commit -m "Add pipeline templates"
git push
查看管道运行
在浏览器中,转到“管道”。
选择管道的最新运行。
请注意,管道运行现在显示了你在 YAML 文件中定义的所有阶段。 可能需要水平滚动才能看到所有这些内容。
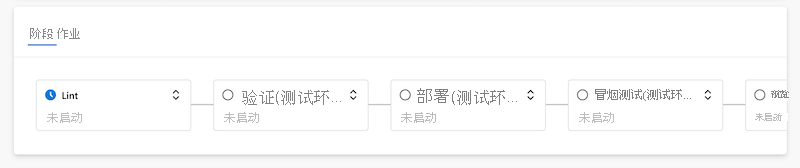
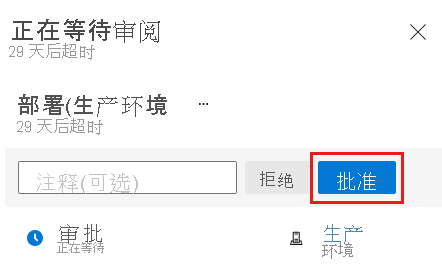
在部署(生产环境)阶段之前等待管道暂停。 管道可能需要几分钟时间才能达到这一点。
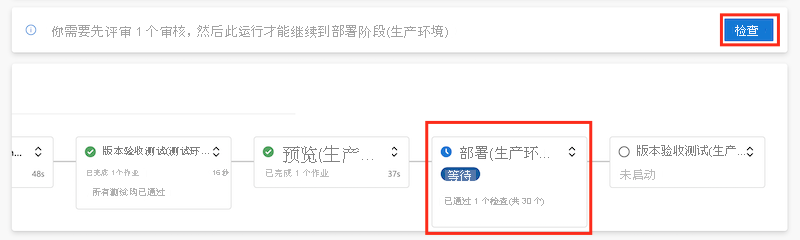
通过选择“审核”按钮批准部署到生产环境。
选择“批准”按钮。
等待管道完成运行。
选择“测试”选项卡以显示此管道运行的测试结果。
请注意,现在有四个测试结果。 版本验收测试会在测试和生产这两个环境中运行,因此你可以看到两组测试的结果。

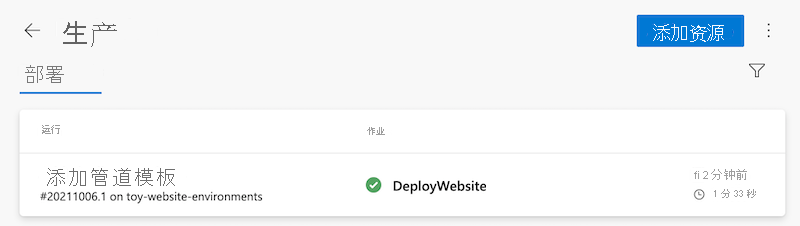
选择“管道”>“环境”。
选择生产环境。
请注意,在环境详细信息屏幕上,你会看到生产环境部署历史记录的概述。
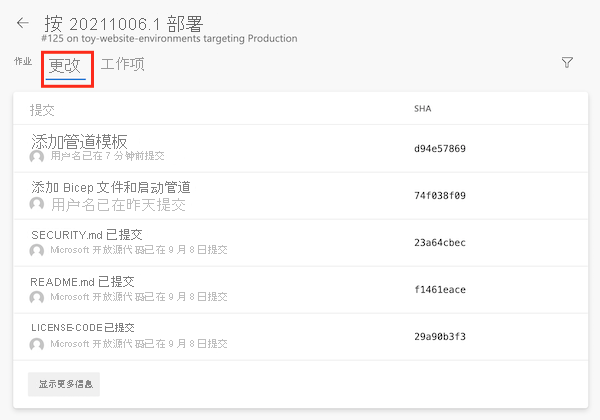
选择该部署,然后选择“更改”选项卡。
请注意,“更改”选项卡显示了部署中包含的提交列表。 此信息可帮助你准确了解环境中一段时间的变化。
在浏览器中转到 Azure 门户。
请转到 ToyWebsiteProduction 资源组。
在资源列表中,打开 Azure 应用服务应用。
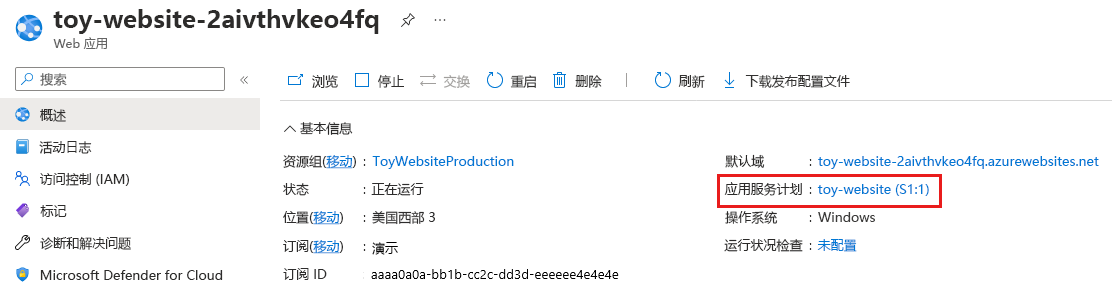
请注意,应用服务计划的类型为 S1。
转到 ToyWebsiteTest 资源组中的应用服务应用。
请注意,应用服务计划的类型为 F1。 正如你在 Bicep 文件中定义的那样,这两种环境使用不同的设置。