练习 - 设置环境
重要
需要自己的 Azure 订阅才能运行此练习,这可能会产生费用。 如果还没有 Azure 订阅,请在开始前创建一个免费帐户。
在你开始处理玩具公司的网站管道之前,需要配置环境。 在本单元中,请确保已设置好 Azure 和 Azure DevOps 环境,以完成本模块的其余操作。
若要满足这些目标,请执行以下任务:
- 设置一个 Azure DevOps 项目供本模块使用。
- 将项目的存储库克隆到计算机。
- 在 Azure 中创建两个资源组。
- 在 Azure Pipelines 中创建两个服务连接和环境。
获取 Azure DevOps 项目
在本部分中,需确保 Azure DevOps 组织已设置好,可完成本模块的其余操作。 你可运行在 Azure DevOps 中创建项目的模板来进行设置。
本学习路径中的模块是循序渐进的。 为便于学习,每个模块都有一个关联的 Azure DevOps 项目。
提示
即使已完成学习路径中的上一个模块,也请按照这些说明创建新项目。 请务必为项目提供一个新名称。
运行模板
运行一个模板来设置 Azure DevOps 项目。
请在 Azure DevOps Demo Generator 网站上执行以下步骤:
选择“登录”,然后选择“接受”以同意网站使用条款。
在“创建新项目”页上,选择你的 Azure DevOps 组织,然后在“新建项目名称”框中输入项目名称,例如 toy-website-end-to-end。
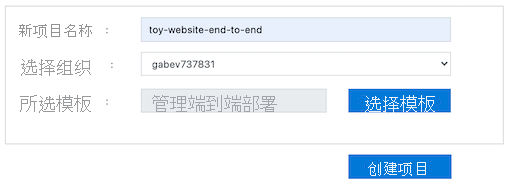
选择“创建项目”。
模板需要一些时间来运行。 它会自动创建一个管道和 Bicep 文件,供你在接下来的练习中使用。
选择“导航到项目”,转到你在 Azure DevOps 中的项目。
重要
本模块的最后一个练习包含重要的清理步骤。 即使未完成此模块,也务必要按照清理步骤操作。
克隆存储库
选择“Repos”>“文件”。
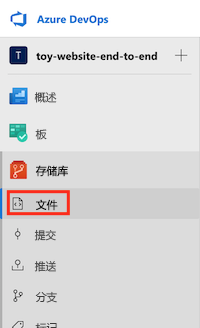
选择“克隆”。

如果使用的是 macOS,则需要提供特定密码才能克隆 Git 存储库。 选择“生成 Git 凭据”,然后将显示的用户名和密码复制到安全的位置。
选择“在 VS Code 中克隆”。 如果系统提示你允许打开 Visual Studio (VS) Code,请选择“打开”。
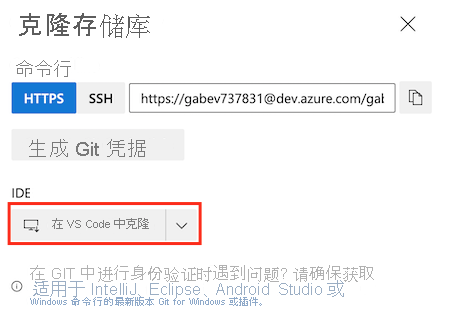
如果出现一个对话框,提示允许扩展打开存储库 URI,请选择“打开”。
创建用于存储库的文件夹,然后选择“选择存储库位置”。
如果这是你第一次使用此存储库,系统可能会提示你进行登录。
对于 Windows,请输入你在本练习前面用于登录 Azure DevOps 的相同凭据。
对于 macOS,请输入刚才生成的 Git 用户名和密码。
Visual Studio Code 会提示你打开存储库。 选择“打开” 。

登录 Azure
若要使用 Azure 中的资源组,请从 Visual Studio Code 终端登录到 Azure 帐户。 请确保已安装 Azure CLI 工具。
在“终端”菜单中,选择“新终端”。 终端窗口通常在屏幕的下半部分打开。
如果终端窗口右侧显示的 shell 为“bash”,则将打开正确的 shell,你可以跳到下一部分。

如果显示的 shell 并非 bash,请选择 shell 下拉列表,然后选择“Git Bash (默认)”。
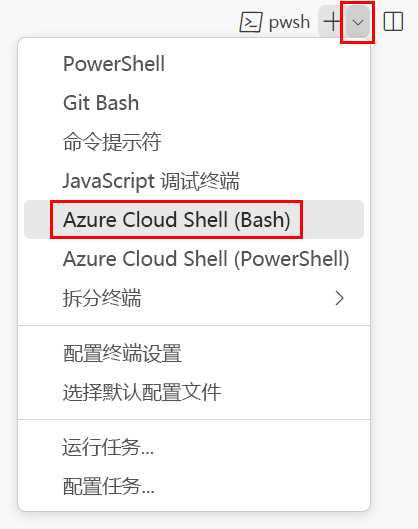
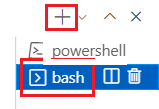
在终端 shell 列表中,选择“bash”,然后选择加号以打开使用 bash shell 的新终端。
使用 Azure CLI 登录到 Azure
在 Visual Studio Code 终端中,运行以下命令以登录到 Azure:
az login在打开的浏览器中,登录到 Azure 帐户。
若要使用 Azure 中的资源组,请从 Visual Studio Code 终端登录到 Azure 帐户。 确保已安装 Azure PowerShell。
在“终端”菜单中,选择“新终端”。 终端窗口通常在屏幕的下半部分打开。
如果终端窗口右侧显示的 shell 为“powershell”或“pwsh”,则将打开正确的 shell,你可以跳到下一部分。

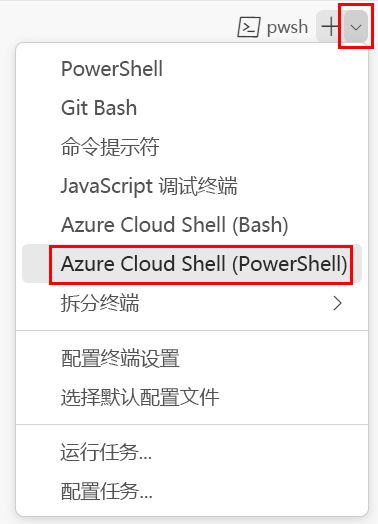
如果显示的 shell 并非 powershell 或 pwsh,请选择 shell 下拉列表,然后选择“PowerShell”。
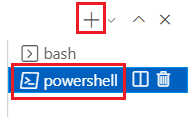
在终端 shell 列表中,选择“powershell”或“pwsh”,然后选择加号以打开使用 powershell 或 pwsh shell 的新终端。
使用 Azure PowerShell 登录到 Azure
在 Visual Studio Code 终端中,运行以下命令以登录到 Azure:
Connect-AzAccount在打开的浏览器中,登录到 Azure 帐户。
在 Azure 中创建两个资源组
若要创建两个新资源组,请在 Visual Studio Code 终端中运行以下 Azure CLI 命令:
az group create --name ToyWebsiteTest --location westus3
az group create --name ToyWebsiteProduction --location westus3
若要创建两个新资源组,请在 Visual Studio Code 终端中运行以下 Azure PowerShell 命令:
New-AzResourceGroup -Name ToyWebsiteTest -Location westus3
New-AzResourceGroup -Name ToyWebsiteProduction -Location westus3
在 Azure Pipelines 中创建服务连接
接下来,在 Azure Pipelines 中创建两个服务连接,一个用于测试环境,另一个用于生产环境。 此过程会在 Azure 中自动创建一个服务主体。 它还会向服务主体授予资源组的“参与者”角色,从而使管道可部署到该资源组。
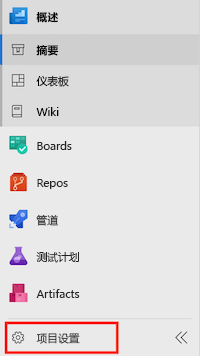
在浏览器中,选择“项目设置”。
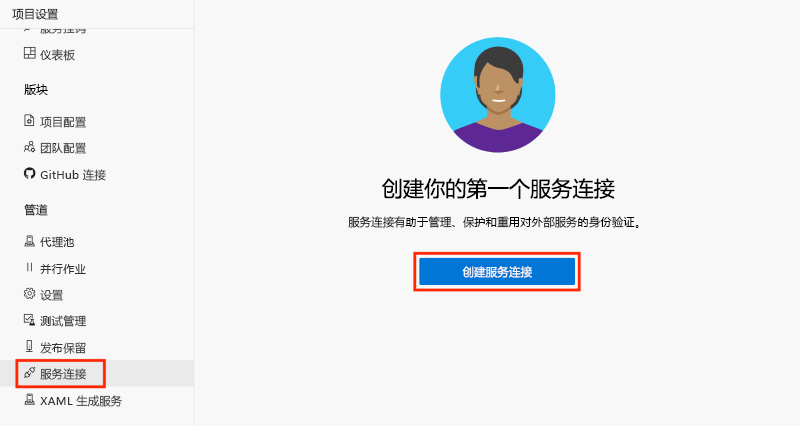
选择“服务连接”>“创建服务连接”。
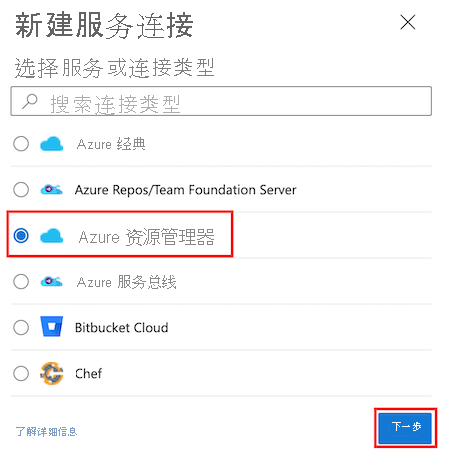
选择“Azure 资源管理器”>“下一步”。
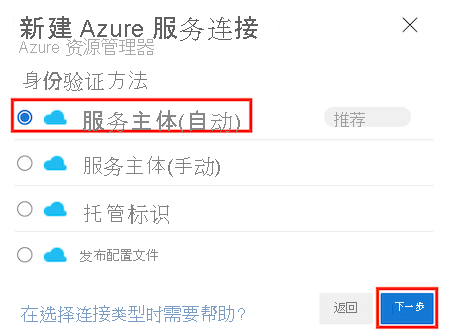
选择“服务主体(自动)”>“下一步”。
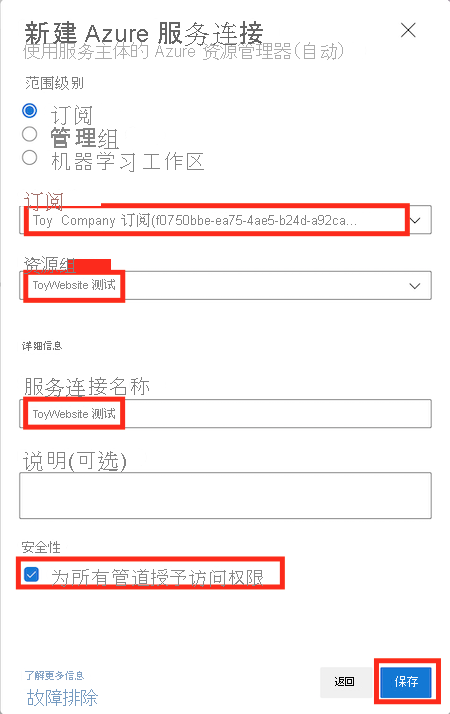
在“订阅”下拉列表中,选择自己的 Azure 订阅。
如果弹出窗口显示一条消息,要求你登录 Azure,请输入凭据并登录。
在“资源组”下拉列表中,选择“ToyWebsiteTest”。
在“服务连接名称”框中,输入“ToyWebsiteTest”。 请确保选中“为所有管道授予访问权限”复选框。
提示
在此练习中,为简单起见,允许每个管道访问服务连接。 创建使用生产资源的实际服务连接时,请考虑仅将访问权限提供给需要这些连接的管道。
选择“保存”。
重复步骤 1 到 8,创建另一个名为 ToyWebsiteProduction 的新服务连接,该连接部署到名为 ToyWebsiteProduction 的资源组:
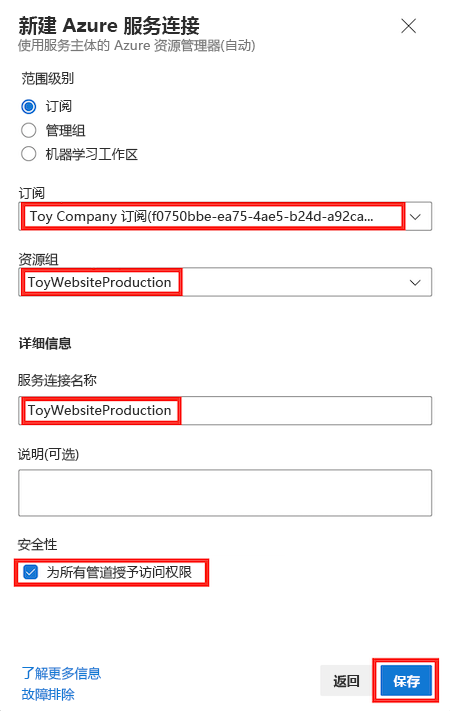
如果未显示资源组列表,请在浏览器中刷新页面,在出现提示时输入凭据,然后重试。
注意
在此学习路径前面的模块中,你向生产环境添加了审批检查。 在此模块中,为简单起见,将跳过审批检查。 但是,如果需要,可以自己添加审批检查。