练习 - 为包创建管道
接下来,获取团队的“Tailspin.SpaceGame.Web.Models”项目的新代码,该项目现在与“Tailspin.SpaceGame.Web”项目分离。 创建 Azure Pipelines 项目作为模型项目,并查看源中版本号为 1.0.0 的 Azure Artifacts 中的项目。
该项目有哪些更改?
请记住,Space Game 网站是 ASP.NET Core 应用。 它使用模型-视图-控制器 (MVC) 模式将数据与数据在用户界面中的显示方式分离。 Andy 和 Mara 想要将模型类移动到单独的库中,以便多个项目可以使用这些类。
为此,他们需创建一个名为“Tailspin.SpaceGame.Web.Models”的新 C# 项目,该项目仅包含模型类。 同时,还需从现有项目“Tailspin.SpaceGame.Web”中删除模型类。 他们使用对“Tailspin.SpaceGame.Web.Models”项目的引用替换现有项目中的模型类。
为了生成这些项目,Andy 和 Mara 使用两个管道,每个管道对应一个项目。 你已创建第一个项目及其关联的 Azure Pipelines 配置。 接下来,将在 GitHub 上为第二个项目创建分支,并创建 Azure Pipelines 配置来生成该分支。 将生成的包发布到 Azure Artifacts。
准备 Visual Studio Code
以前,将 Visual Studio Code 设置为使用“Tailspin.SpaceGame.Web”项目。 在此处打开 Visual Studio Code 的第二个实例,以便可以使用“Tailspin.SpaceGame.Web.Models”项目。
打开 Visual Studio Code 的第二个实例。
在 Visual Studio Code 中打开集成终端。
导航到“mslearn-tailspin-spacegame-web”项目所在的父目录。 下面是移动到主目录的示例:
cd ~
获取源代码
从 GitHub 获取“Tailspin.SpaceGame.Web.Models”项目的源代码并设置 Visual Studio Code,以便你可以使用这些文件。
创建分支
第一步是为“mslearn-tailspin-spacegame-web-models”存储库创建分支,以便你可以使用和修改源文件。 回想一下,Mara 将“模型”目录放在了一个新项目中,并从 Web 项目中删除了该目录。
将“mslearn-tailspin-spacegame-web-models”项目分支到 GitHub 帐户:
- 在 Web 浏览器中,转到 GitHub 并登录。
- 转到 mslearn-tailspin-spacegame-web-models 项目。
- 选择“Fork”。
- 按照说明在帐户中创建存储库分支。
在本地克隆分支
将“mslearn-tailspin-spacegame-web-models”项目克隆到计算机:
在 GitHub 上,转到“mslearn-tailspin-spacegame-web-models”项目的分支。
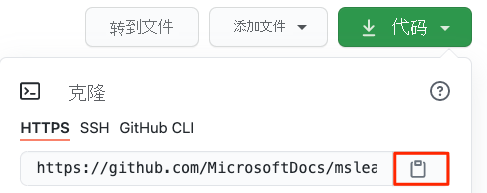
选择“代码”。 然后从“HTTPS”选项卡选择显示的 URL 旁边的按钮,将该 URL 复制到剪贴板。

从 Visual Studio Code 中,转到终端窗口并运行此
git clone命令。 将显示的 URL 替换为剪贴板中的内容。git clone https://github.com/your-name/mslearn-tailspin-spacegame-web-models.git移动到“mslearn-tailspin-spacegame-web-models”目录。 这是存储库的根目录。
cd mslearn-tailspin-spacegame-web-models
打开该项目并检查配置
在 Visual Studio Code 中,终端窗口指向“mslearn-tailspin-spacegame-web-models”项目的根目录。 从文件资源管理器中打开项目,以便查看其结构并使用文件。
打开项目最简单的方法是在当前目录中重新打开 Visual Studio Code。 为此,可在集成终端中运行以下命令:
code -r .可以在文件资源管理器中查看目录和文件树。
重新打开集成终端。 终端会将你带至 Web 项目的根目录。
打开“azure pipelines.yml”文件。
请参阅生成包、设置版本以及将包添加到 Azure Artifacts 的步骤。
此
DotNetCoreCLI@2任务生成项目:- task: DotNetCoreCLI@2 displayName: 'Build the project - $(buildConfiguration)' inputs: command: 'build' arguments: '--no-restore --configuration $(buildConfiguration)' projects: '**/*.csproj'此
DotNetCoreCLI@2任务将项目打包为 1.0.0 版本:- task: DotNetCoreCLI@2 displayName: 'Pack the project - $(buildConfiguration)' inputs: command: 'pack' projects: '**/*.csproj' arguments: '--no-build --configuration $(buildConfiguration)' versioningScheme: byPrereleaseNumber majorVersion: '1' minorVersion: '0' patchVersion: '0'在开发包时,通常使用
byPrereleaseNumber版本控制方案。 这会在版本号的末尾附加一个唯一预发布后缀,例如“-CI-20190621-042647”。 根据此示例,完整的版本号应为“1.0.0-CI-20190621-042647”。此
NuGetCommand@2任务将包推送到“Tailspin.SpaceGame.Web.Models”Azure Artifacts 源:- task: NuGetCommand@2 displayName: 'Publish NuGet package' inputs: command: push feedPublish: '$(System.TeamProject)/Tailspin.SpaceGame.Web.Models' allowPackageConflicts: true condition: succeeded()feedPublish指定要发布到的源的名称。 名称格式为<projectName>/<feedName>,其中:$(System.TeamProject)是指代项目名称的预定义变量;例如“Space Game - web - Dependencies”。Tailspin.SpaceGame.Web.Models是在前面的练习中提供的源名称。
设置权限
在设置并运行管道之前,需要为“生成”服务提供正确的权限。
- 在 Azure DevOps 中转到你的项目。
- 从左侧菜单中选择“项目”。
- 选择屏幕右上角的“设置”图标,然后选择“权限”选项卡。
- 选择“添加用户/组”按钮。
- 在“用户/组”字段中,输入“空间游戏 - Web - 依赖项生成服务”,选择“参与者”角色,然后选择“保存”。
在 Azure Pipelines 中创建管道
你了解了如何在早期模块中设置 Azure Pipelines。 如果需要提醒,请转到使用 Azure Pipelines 创建生成管道。
接下来介绍如何设置第二个管道,生成包并将该包上传到 Azure Artifacts。
从 Azure DevOps,转到“Space Game - web - Dependencies”项目。
从左侧菜单中,选择“Pipelines”。
选择“新建管道”。
从“连接”选项卡中,选择“GitHub” 。
在“Select”选项卡中,选择“mslearn-tailspin-spacegame-web-models”。
出现提示时,请输入 GitHub 凭据。 在显示的页面中,滚动到底部,然后选择“Approve and install”。
在“查看”选项卡中,可以看到新管道的“azure-pipelines.yml”文件。
选择“运行”。
监视管道运行。
转到“Artifacts”选项卡。
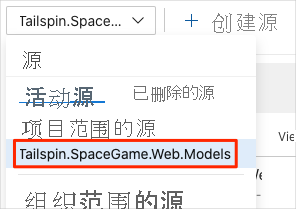
在顶部的下拉列表中,选择“Tailspin.SpaceGame.Web.Models”。

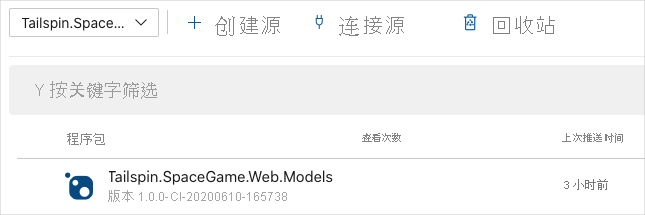
请参阅 Azure Artifacts 中生成的包“Tailspin.SpaceGame.Web.Models”。

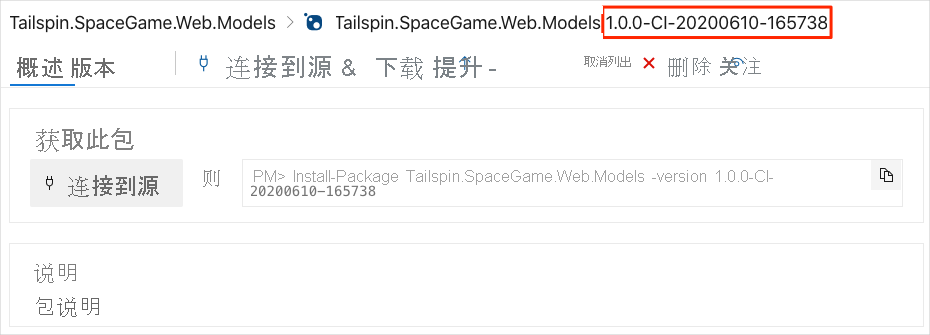
选择包以中转到详细信息页。 然后,将版本号复制到稍后可轻松访问的位置。

你将在下一单元中使用此版本号。