练习 - 查看并管理 Azure 自定义角色
在此单元中,你将查看、更新并删除在上一个练习中创建的 Azure 自定义角色。
查看门户中的自定义角色
使用 Azure 门户查看订阅中的自定义角色。
使用在上一个练习中所用的帐户登录 Azure 门户。
在 Azure 门户顶部搜索并选择“订阅”。
选择与自定义角色关联的订阅。
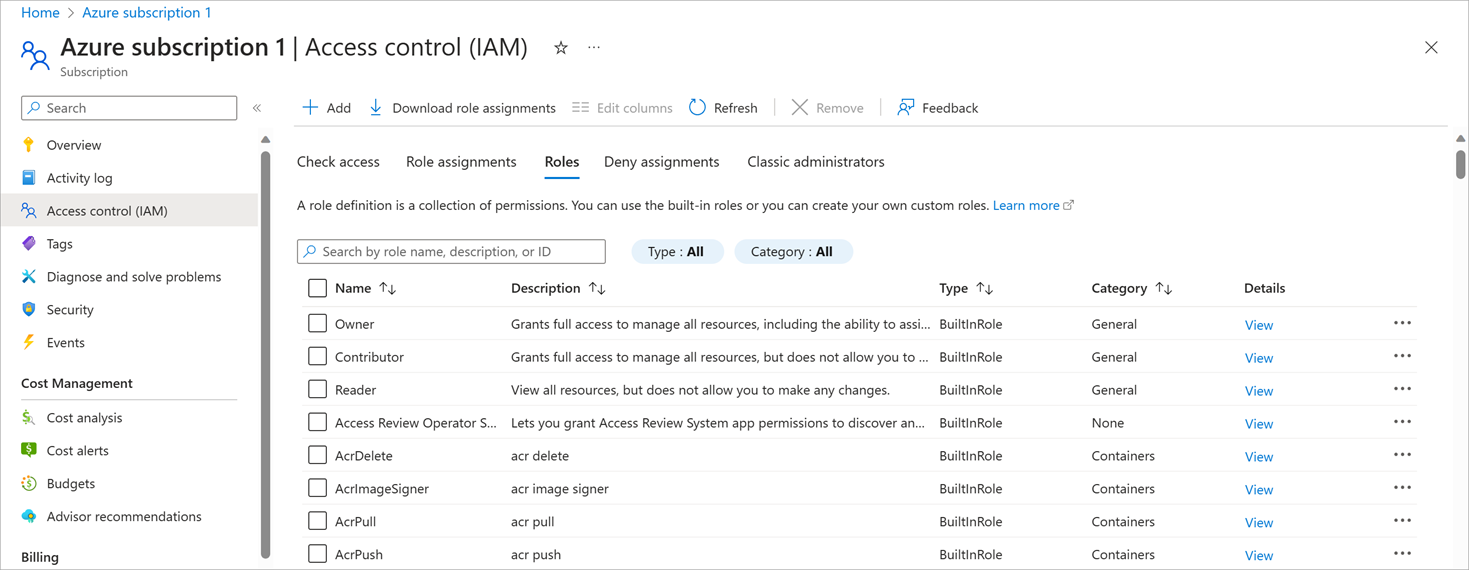
选择“访问控制(IAM)”>“角色”。

选择“类型”>“CustomRole”。

你将获得组织中所有自定义角色的列表。
更新自定义角色
我们需要更新“虚拟机操作员”角色才能添加监视操作的权限。 我们将使该自定义角色更新为包括 Microsoft.Insights/diagnosticSettings/ 操作。
从 Azure 门户的右上方选择“Cloud Shell”。
在 Cloud Shell 中键入“code”。
将下面的定义粘贴到编辑器中。
{
 "Name": "Virtual Machine Operator",
 "IsCustom": true,
 "Description": "Can monitor and restart virtual machines.",
 "Actions": [
   "Microsoft.Storage/*/read",
   "Microsoft.Network/*/read",
   "Microsoft.Compute/*/read",
   "Microsoft.Compute/virtualMachines/start/action",
   "Microsoft.Compute/virtualMachines/restart/action",
   "Microsoft.Authorization/*/read",
   "Microsoft.ResourceHealth/availabilityStatuses/read",
   "Microsoft.Resources/subscriptions/resourceGroups/read",
   "Microsoft.Insights/alertRules/*",
   "Microsoft.Insights/diagnosticSettings/*",
   "Microsoft.Support/*"
 ],
"NotActions": [],
"DataActions": [],
"NotDataActions": [],
"AssignableScopes": [
   "/subscriptions/subscriptionId1"
 ]
}
在
AssignableScopes部分中,将 subscriptionId1 替换为你的订阅 ID。 如果在上一个练习中未保存该值,请运行以下命令获取它:az account list --output json | jq '.[] | .id, .name'从 Cloud Shell 窗格右上角的三点菜单中,选择“保存”(或在 Windows 中按“CTRL + S”,在 macOS 中按“CMD + S”)。
输入“vm-operator-role-new.json”作为文件名,然后选择“保存”。
从 Cloud Shell 窗格右上角的三点菜单中,选择“关闭编辑器”(或在 Windows 中按“CTRL + Q”,在 macOS 中按“CMD + Q”)。
运行以下命令来更新“虚拟机操作员”自定义角色:
az role definition update --role-definition vm-operator-role-new.json运行以下命令验证是否已更新角色定义:
az role definition list --name "Virtual Machine Operator" --output json | jq '.[] | .permissions[0].actions'
删除自定义角色
如果确定不再需要自定义角色,需要先删除角色分配,再删除该角色。
运行以下命令删除自定义角色的角色分配:
az role assignment delete --role "Virtual Machine Operator"运行以下命令删除自定义角色定义:
az role definition delete --name "Virtual Machine Operator"运行以下命令验证角色是否已消失。 如果仍列出该角色,请稍等片刻,然后再次运行该命令:
az role definition list --custom-role-only true