练习 - 向 Azure 服务总线发送消息
在本单元,你将创建一个 Spring Boot 应用程序,以向 Azure 服务总线队列发送消息。 在本地完成以下步骤。
创建 Spring Boot 项目
为了创建 Spring Boot 项目,我们将在以下命令行中使用 Spring Initializr:
curl https://start.spring.io/starter.tgz -d type=maven-project -d dependencies=web -d baseDir=spring-sender-application -d bootVersion=3.3.0.RELEASE -d javaVersion=1.8 | tar -xzvf -
将消息发送到服务总线队列
现在,让我们将一些消息发送到服务总线队列。
为服务总线 Spring Boot Starter 添加 Maven 依赖项
在 spring-sender-application 的 pom.xml 文件中,在依赖项下添加以下命令:
		<!-- https://mvnrepository.com/artifact/com.azure.spring/spring-cloud-azure-starter-servicebus-jms -->
		<dependency>
		    <groupId>com.azure.spring</groupId>
		    <artifactId>spring-cloud-azure-starter-servicebus-jms</artifactId>
		    <version>5.18.0</version>
		</dependency>
添加配置参数
在
spring-sender-application\src\main\resources文件夹中,编辑application.properties文件,添加以下参数:spring.jms.servicebus.connection-string=<xxxxx> spring.jms.servicebus.idle-timeout=20000 spring.jms.servicebus.pricing-tier=premium将
spring.jms.servicebus.connection-string属性设置为前面保存的服务总线命名空间的连接字符串。
添加向服务总线发送消息的代码
接下来,我们将添加用于向服务总线队列发送消息的业务逻辑。
在 src/main/java/com/example/demo 目录中,创建一个具有以下内容的 SendController.java 文件:
package com.example.demo;

import org.springframework.beans.factory.annotation.Autowired;
import org.springframework.jms.core.JmsTemplate;
import org.springframework.web.bind.annotation.GetMapping;
import org.springframework.web.bind.annotation.RequestParam;
import org.springframework.web.bind.annotation.RestController;

@RestController
public class SendController {

    private static final String queue = "test-queue-jms";

    @Autowired
    private JmsTemplate jmsTemplate;

    @GetMapping("/messages")
    public String postMessage(@RequestParam String message) {
        jmsTemplate.send(queue, s -> s.createTextMessage(message));
        return message;
    }
}
在本地运行应用程序
切换回
pom.xml文件所在的示例spring-sender-application文件夹的根,然后运行以下命令以启动 Spring Boot 应用程序。 此步骤假定你已在 Windows 计算机上安装mvn,并且它位于PATH中。mvn spring-boot:run应用程序启成后,你可选择以下链接来将消息发送到服务总线队列。
http://localhost:8080/messages?message=Hellohttp://localhost:8080/messages?message=HelloAgainhttp://localhost:8080/messages?message=HelloOnceAgain可以更改消息查询参数中的字符串值,并向服务总线队列发送任何文本。
浏览器显示作为消息查询字符串参数传递的任何内容,这意味着服务总线正在接受该消息。
查看服务总线队列中的消息
备注
虽然查看消息有助于了解消息的发送端,但此步骤不是必须的。
本教程的下一个单元介绍这些消息的接收。
你可以前往 Azure 门户,在其中的 Service Bus Explorer 中查看消息:
返回 Azure 门户,在左侧菜单的“实体”下选择“队列”。
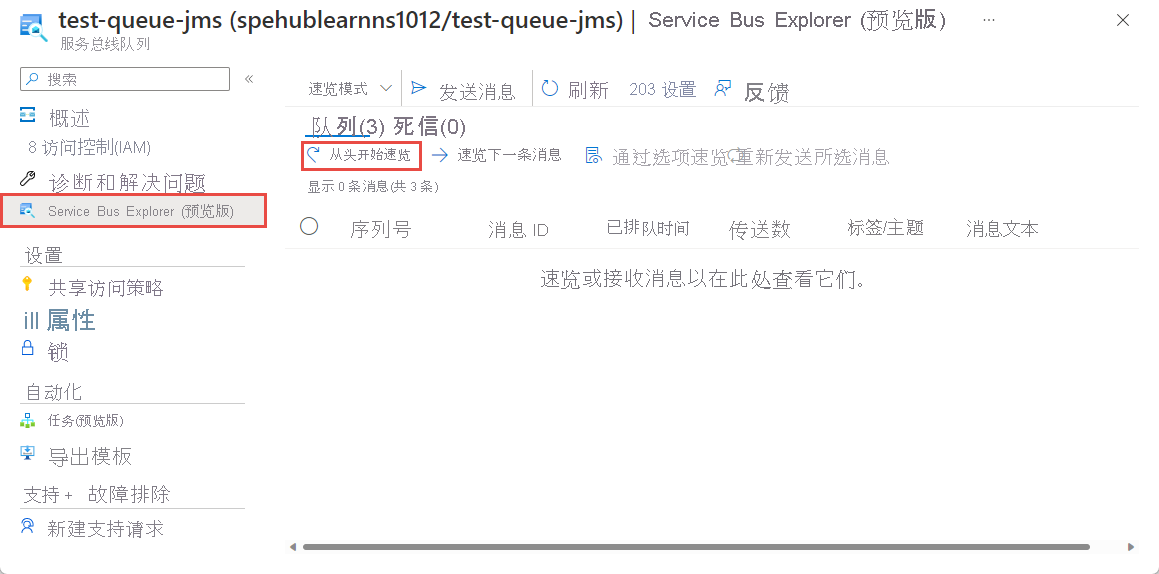
选择相应的队列。 例如,此演示的队列是 test-queue-jms。
在左窗格中,选择“服务总线资源管理器”。
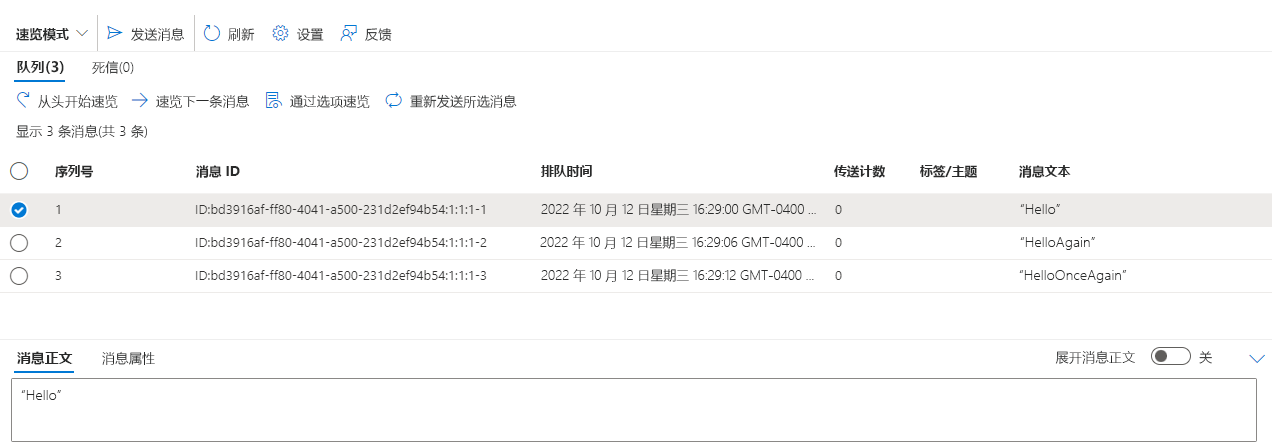
选择“从头开始速览”。 应会看到使用 HTTP 命令发送的所有三条消息。
选择一条消息以查看底部窗格中的消息正文。

