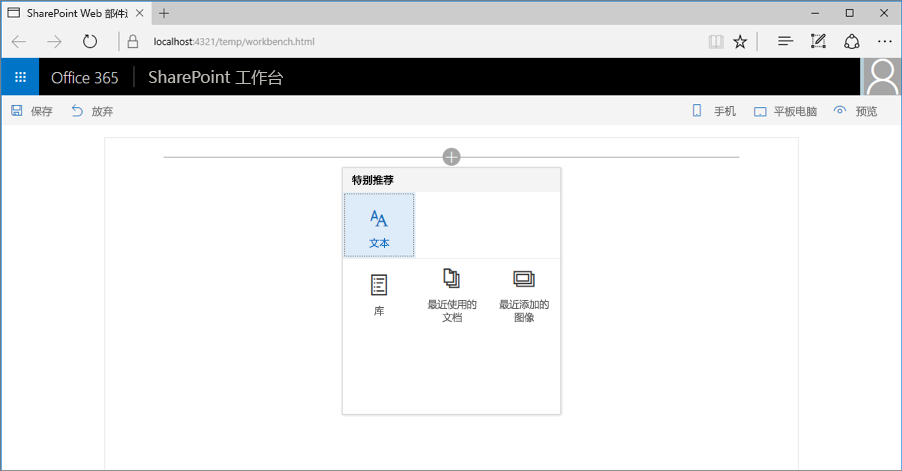
使用预配置项简化 Web 部件的添加
更复杂的 SharePoint 框架客户端 Web 部件可能有用户必须配置的大量属性。 可以通过添加特定方案的预配置属性项来帮助用户。 预配置项使用预设值初始化 Web 部件。
注意
执行本文中的步骤前,请务必先设置 SharePoint 客户端 Web 部件开发环境。
警告
面向 SharePoint Server 2016 的 SPFx 解决方案仅限于将单个 Web 部件属性设置为预配置的条目。 有关详细信息,请参阅问题 #5260。
Web 部件预配置项
每个 SharePoint 框架客户端 Web 部件均包含两个部分:
- 描述 Web 部件的清单
- Web 部件代码
Web 部件清单中指定的一个属性就是preconfiguredEntries属性。
{
  "$schema": "https://developer.microsoft.com/json-schemas/spfx/client-side-web-part-manifest.schema.json",

  "id": "6737645a-4443-4210-a70e-e5e2a219133a",
  "alias": "GalleryWebPart",
  "componentType": "WebPart",
  "version": "0.0.1",
  "manifestVersion": 2,

  "preconfiguredEntries": [{
    "groupId": "1edbd9a8-0bfb-4aa2-9afd-14b8c45dd489", // Discovery
    "group": { "default": "Under Development" },
    "title": { "default": "Gallery" },
    "description": { "default": "Shows items from the selected list" },
    "officeFabricIconFontName": "Page",
    "properties": {
      "description": "Gallery"
    }
  }]
}
preconfiguredEntries属性包含以供在 Web 部件工具箱中使用的 Web 部件的相关信息。 当用户在页面中添加 Web 部件时,preconfiguredEntries属性中的信息用于在工具箱中显示 Web 部件,并在将 Web 部件添加到页面时定义其默认设置。
如果已生成具有完全信任解决方案的经典 Web 部件,则可以将数组中的每个 preconfiguredEntries 条目视为对应于 *.webpart 文件。 与 *.webpart 文件一样,属性中的每个 preconfiguredEntries 条目都链接到 Web 部件代码,并指定有关 Web 部件的基本信息,例如其标题或说明,以及其属性的默认值。
preconfiguredEntries数组项的属性
preconfiguredEntries数组中的每一项包含多个属性。 下表说明了每个属性的用途。
| 属性名称 | 值类型 | 必需 | 用途 | 示例值 |
|---|---|---|---|---|
title |
ILocalizedString | 是 | 工具箱中显示的 Web 部件标题。 | "title": { "default": "Weather", "nl-nl": "Weerbericht" } |
description |
ILocalizedString | 是 | 工具箱工具提示中显示的 Web 部件说明。 | "description": { "default": "Shows weather in the given location", "nl-nl": "Toont weerbericht voor de opgegeven locatie" } |
officeFabricIconFontName |
string | 否 | 工具箱中显示的 Web 部件图标。 可取值必须是 Office UI Fabric 图标名称之一。 如果指定此属性的值,iconImageUrl属性会遭忽略。 |
"officeFabricIconFontName": "Sunny" |
iconImageUrl |
string | 否 | 工具箱中显示的 Web 部件图标,表示为图像 URL。 URL 中图像的尺寸必须是 40x28 像素。 如果没有指定officeFabricIconName属性的值,必须指定此属性的值。 |
"iconImageUrl": "https://cdn.contoso.com/weather.png" |
groupId |
string | 是 | 用于确定哪个新式组包含新式网站页面上 Web 部件的组 ID。 SharePoint 框架保留预定义组的组 ID。 开发人员可以从这些组中选取一个。 如果开发人员填写的 ID 不属于预定义组,则会回退到“其他”组。 | "groupId": "1edbd9a8-0bfb-4aa2-9afd-14b8c45dd489" |
group |
ILocalizedString | 否 | Web 部件选取器中包含经典页面上 Web 部件的组名。 如果未指定任何值,Web 部件显示在“杂项”组中。 | "group": { "default": "Content", "nl-nl": "Inhoud" } |
properties |
TProperties | 是 | 包含 Web 部件属性默认值的键值对对象。 | "properties": { "location": "Redmond", "numberOfDays": 3, "showIcon": true } |
一些 Web 部件属性的值类型为ILocalizedString。 这种类型就是键值对对象,可方便开发人员指定不同区域设置对应的字符串。 至少, ILocalizedString类型的值必须包含default值。
开发人员可以视情况向 Web 部件支持的不同区域设置添加相应值的翻译。 如果 Web 部件所在页面上的区域设置未在本地化字符串中列出,则会改用默认值。
有效ILocalizedString值:
"title": {
  "default": "Weather",
  "nl-nl": "Weerbericht"
}
"title": {
  "default": "Weather"
}
由于缺少default键,因此ILocalizedString值无效:
"title": {
  "en-us": "Weather"
}
预定义新式组
有 7 个现成组,如下表所示。 请使用 groupId 属性中的组 ID。
| 组名称 | ID | 组包括... |
|---|---|---|
| 文本、媒体和内容 | cf066440-0614-43d6-98ae-0b31cf14c7c3 |
显示文本、多媒体、文档、网上信息及其他丰富内容的 Web 部件。 |
| 发现 | 1edbd9a8-0bfb-4aa2-9afd-14b8c45dd489 |
为了有助于用户发现信息而对内容进行整理、分组和筛选的 Web 部件。 |
| 沟通和协作 | 75e22ed5-fa14-4829-850a-c890608aca2d |
促进信息共享、团队合作和社交互动的 Web 部件。 |
| 计划和流程 | 1bc7927e-4a5e-4520-b540-71305c79c20a |
通过计划和流程工具提高团队工作效率的 Web 部件。 |
| 业务和商业智能 | 4aca9e90-eff5-4fa1-bac7-728f5f157b66 |
用于跟踪与分析数据及将业务流程与页面相集成的 Web 部件。 |
| 网站工具 | 070951d7-94da-4db8-b06e-9d581f1f55b1 |
用于处理网站信息和网站管理的 Web 部件。 |
| 其他 | 5c03119e-3074-46fd-976b-c60198311f70 |
其他组不包括的 Web 部件。 |
如果上述列表中没有开发人员填写的 ID,那么 Web 部件会回退到“其他”组。
若要了解如何在生成 Web 部件时使用预配置项,请生成示例库 Web 部件。 使用多个属性,用户可以将此 Web 部件配置为显示选定列表中的特定项。 为简单起见,将略去 Web 部件的实际实现,而将重点放在如何使用preconfiguredEntries属性提供预配置版库 Web 部件。
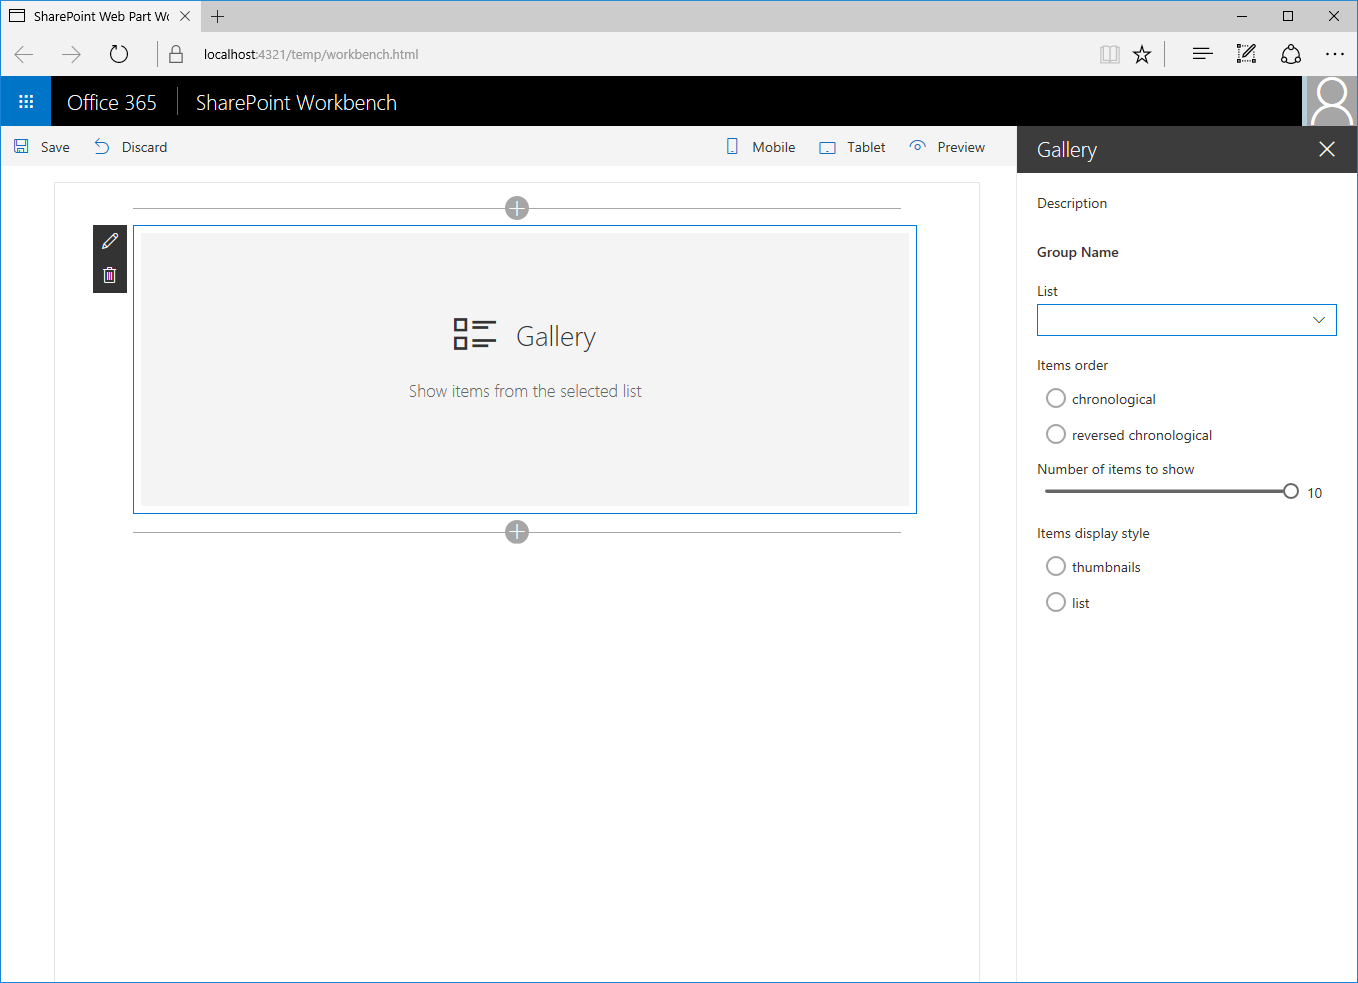
新建 Web 部件项目
首先,为项目新建文件夹。
md react-preconfiguredentries转到项目文件夹。
cd react-preconfiguredentries通过从你创建的新目录中运行 Yeoman SharePoint 生成器来创建新项目:
yo @microsoft/sharepointYeoman SharePoint 生成器将提示你一系列问题。 接受所有问题的默认选项,但以下问题除外:
- 要创建哪种类型的客户端组件? WebPart
- Web 部件名称是什么? 库
- 你想要使用哪个模板? React
在代码编辑器中,打开项目文件夹。 虽然本文中的步骤和屏幕截图使用的是 Visual Studio Code,但也可以使用所需的任何编辑器。
添加 Web 部件属性
在 Web 部件清单中,添加 Web 部件属性,以便用户可以配置库 Web 部件。
在代码编辑器中,打开“./src/webparts/gallery/GalleryWebPart.manifest.json”文件。
将
properties部分替换为以下 JSON:{ //... "preconfiguredEntries": [{ //... "properties": { "listName": "", "order": "", "numberOfItems": 10, "style": "" } }] }关于此代码,请注意以下几点:
listName:指定了应显示其列表项的列表名称。order:指定了应采用的项显示顺序,即按时间顺序或按时间倒序。numberOfItems:指定了应显示的项数量。style:指定了应采用的项显示方式,如可用于显示图像的缩略图,或更适用于显示文档的列表。
同时,还必须将清单中指定的 Web 部件属性添加到 Web 部件属性接口中。
在代码编辑器中,打开 ./src/webparts/gallery/IGalleryWebPartProps.ts 文件。 将代码更改为:
export interface IGalleryWebPartProps {
  listName: string;
  order: string;
  numberOfItems: number;
  style: string;
}
使用 React 生成 SharePoint 框架客户端 Web 部件时,更改 Web 部件属性接口后,必须更新 Web 部件中使用此接口创建主 React 组件实例的
render()方法。在代码编辑器中,打开./src/webparts/gallery/GalleryWebPart.ts文件。 将 Web 部件中
render()方法更改为:export default class GalleryWebPart extends BaseClientSideWebPart<IGalleryWebPartProps> { // ... public render(): void { const element: React.ReactElement<IGalleryProps> = React.createElement(Gallery, { listName: this.properties.listName, order: this.properties.order, numberOfItems: this.properties.numberOfItems, style: this.properties.style }); ReactDom.render(element, this.domElement); } // ... }将主 React 组件更新为显示属性值。 如果 Web 部件尚未配置,请显示标准 Web 部件占位符。 在代码编辑器中,打开“./src/webparts/gallery/components/Gallery.tsx”文件,并将它的代码更改为:
import * as React from 'react';
import styles from './Gallery.module.scss';
import { IGalleryProps } from './IGalleryProps';

export default class Gallery extends React.Component<IGalleryProps, void> {
  public render(): JSX.Element {
    if (this.needsConfiguration()) {
      return <div className="ms-Grid" style={{ color: "#666", backgroundColor: "#f4f4f4", padding: "80px 0", alignItems: "center", boxAlign: "center" }}>
        <div className="ms-Grid-row" style={{ color: "#333" }}>
          <div className="ms-Grid-col ms-u-hiddenSm ms-u-md3"></div>
          <div className="ms-Grid-col ms-u-sm12 ms-u-md6" style={{ height: "100%", whiteSpace: "nowrap", textAlign: "center" }}>
            <i className="ms-fontSize-su ms-Icon ms-Icon--ThumbnailView" style={{ display: "inline-block", verticalAlign: "middle", whiteSpace: "normal" }}></i><span className="ms-fontWeight-light ms-fontSize-xxl" style={{ paddingLeft: "20px", display: "inline-block", verticalAlign: "middle", whiteSpace: "normal" }}>Gallery</span>
          </div>
          <div className="ms-Grid-col ms-u-hiddenSm ms-u-md3"></div>
        </div>
        <div className="ms-Grid-row" style={{ width: "65%", verticalAlign: "middle", margin: "0 auto", textAlign: "center" }}>
          <span style={{ color: "#666", fontSize: "17px", display: "inline-block", margin: "24px 0", fontWeight: 100 }}>Show items from the selected list</span>
        </div>
        <div className="ms-Grid-row"></div>
      </div>;
    }
    else {
      return (
        <div className={styles.gallery}>
          <div className={styles.container}>
            <div className={`ms-Grid-row ms-bgColor-themeDark ms-fontColor-white ${styles.row}`}>
              <div className='ms-Grid-col ms-u-lg10 ms-u-xl8 ms-u-xlPush2 ms-u-lgPush1'>
                <span className="ms-font-xl ms-fontColor-white">
                  Welcome to SharePoint!
                </span>
                <p className='ms-font-l ms-fontColor-white'>
                  Customize SharePoint experiences using web parts.
                </p>
                <p className='ms-font-l ms-fontColor-white'>
                  List: {this.props.listName}<br />
                  Order: {this.props.order}<br />
                  Number of items: {this.props.numberOfItems}<br />
                  Style: {this.props.style}
                </p>
                <a href="https://aka.ms/spfx" className={styles.button}>
                  <span className={styles.label}>Learn more</span>
                </a>
              </div>
            </div>
          </div>
        </div>
      );
    }
  }

  private needsConfiguration(): boolean {
    return Gallery.isEmpty(this.props.listName) ||
      Gallery.isEmpty(this.props.order) ||
      Gallery.isEmpty(this.props.style);
  }

  private static isEmpty(value: string): boolean {
    return value === undefined ||
      value === null ||
      value.length === 0;
  }
}
将主 React 组件接口更新为与 Web 部件属性接口匹配,因为即将绕过此组件的所有 Web 部件属性。 在代码编辑器中,打开“./src/webparts/gallery/components/IGalleryProps.ts”文件,并将它的代码更改为:
import { IGalleryWebPartProps } from '../IGalleryWebPartProps';

export interface IGalleryProps extends IGalleryWebPartProps { }
在属性窗格中呈现 Web 部件属性
若要让用户可以使用新定义的属性配置 Web 部件,必须在 Web 部件属性窗格中显示这些属性。
在代码编辑器中,打开“./src/webparts/gallery/GalleryWebPart.ts”文件。 在此文件顶部,将“@microsoft/sp-webpart-base”导入语句更改为:
import {
  BaseClientSideWebPart
} from '@microsoft/sp-webpart-base';
import {
  IPropertyPaneConfiguration,
  PropertyPaneDropdown,
  PropertyPaneSlider,
  PropertyPaneChoiceGroup
} from '@microsoft/sp-property-pane';
将
propertyPaneSettings更改为:export default class GalleryWebPart extends BaseClientSideWebPart<IGalleryWebPartProps> { // ... protected getPropertyPaneConfiguration(): IPropertyPaneConfiguration { return { pages: [ { header: { description: strings.PropertyPaneDescription }, groups: [ { groupName: strings.BasicGroupName, groupFields: [ PropertyPaneDropdown('listName', { label: strings.ListNameFieldLabel, options: [{ key: 'Documents', text: 'Documents' }, { key: 'Images', text: 'Images' }] }), PropertyPaneChoiceGroup('order', { label: strings.OrderFieldLabel, options: [{ key: 'chronological', text: strings.OrderFieldChronologicalOptionLabel }, { key: 'reversed', text: strings.OrderFieldReversedOptionLabel }] }), PropertyPaneSlider('numberOfItems', { label: strings.NumberOfItemsFieldLabel, min: 1, max: 10, step: 1 }), PropertyPaneChoiceGroup('style', { label: strings.StyleFieldLabel, options: [{ key: 'thumbnails', text: strings.StyleFieldThumbnailsOptionLabel }, { key: 'list', text: strings.StyleFieldListOptionLabel }] }) ] } ] } ] }; } }
在实际情况下,将从当前 SharePoint 网站检索一组列表。 为简单起见,此示例改用固定列表。
添加本地化标签
在代码编辑器中,打开 ./src/webparts/gallery/loc/mystrings.d.ts 文件。 将代码更改为:
declare interface IGalleryStrings { PropertyPaneDescription: string; BasicGroupName: string; ListNameFieldLabel: string; OrderFieldLabel: string; OrderFieldChronologicalOptionLabel: string; OrderFieldReversedOptionLabel: string; NumberOfItemsFieldLabel: string; StyleFieldLabel: string; StyleFieldThumbnailsOptionLabel: string; StyleFieldListOptionLabel: string; } declare module 'galleryStrings' { const strings: IGalleryStrings; export = strings; }添加缺少的资源字符串,具体方法为打开“./src/webparts/gallery/loc/en-us.js”文件,并将它的代码更改为:
define([], function() {
  return {
    "PropertyPaneDescription": "Description",
    "BasicGroupName": "Group Name",
    "ListNameFieldLabel": "List",
    "OrderFieldLabel": "Items order",
    "OrderFieldChronologicalOptionLabel": "chronological",
    "OrderFieldReversedOptionLabel": "reversed chronological",
    "NumberOfItemsFieldLabel": "Number of items to show",
    "StyleFieldLabel": "Items display style",
    "StyleFieldThumbnailsOptionLabel": "thumbnails",
    "StyleFieldListOptionLabel": "list"
  }
});
运行以下命令,确认项目是否正在生成:
gulp serve在 Web 浏览器中,将 Web 部件添加到画布中,并打开它的属性窗格。 此时,应该会看到所有可供用户配置的属性。

由于没有为 Web 部件指定任何默认值,因此用户每次将 Web 部件添加到页面时都不得不先配置它。 为了简化此体验,可以提供最常见方案适用的默认值。
指定 Web 部件的默认值
假设用户经常使用库 Web 部件显示五个最近添加的图像。 与其要求用户每次都必须手动配置 Web 部件,不如向用户提供使用正确设置的预配置版本。
在代码编辑器中,打开./src/webparts/gallery/GalleryWebPart.manifest.json 文件。 将
preconfiguredEntries属性中的现有条目更改为:{ // ... "preconfiguredEntries": [{ "groupId": "6737645a-4443-4210-a70e-e5e2a219133a", "group": { "default": "Content" }, "title": { "default": "Recent images" }, "description": { "default": "Shows 5 most recent images" }, "officeFabricIconFontName": "Picture", "properties": { "listName": "Images", "order": "reversed", "numberOfItems": 5, "style": "thumbnails" } }] }运行以下命令,开始调试项目:
gulp serve注意
如果之前正在调试项目,请先停止调试,再重新启动它。 在调试期间对 Web 部件清单做出的更改不会自动反映到 Workbench 中。必须重新生成项目,才能反映相应更改。
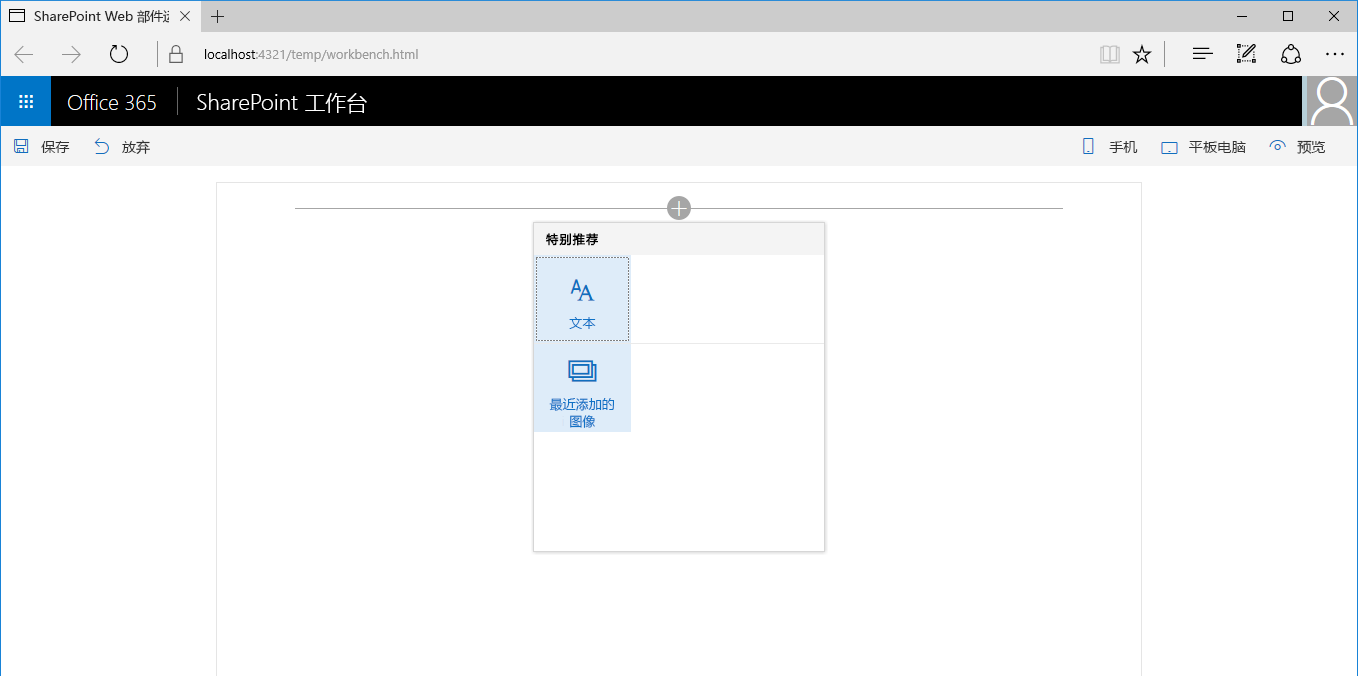
打开 Web 部件工具箱将 Web 部件添加到画布时,可以看到它的名称和图标均已更改,以反映预配置设置。
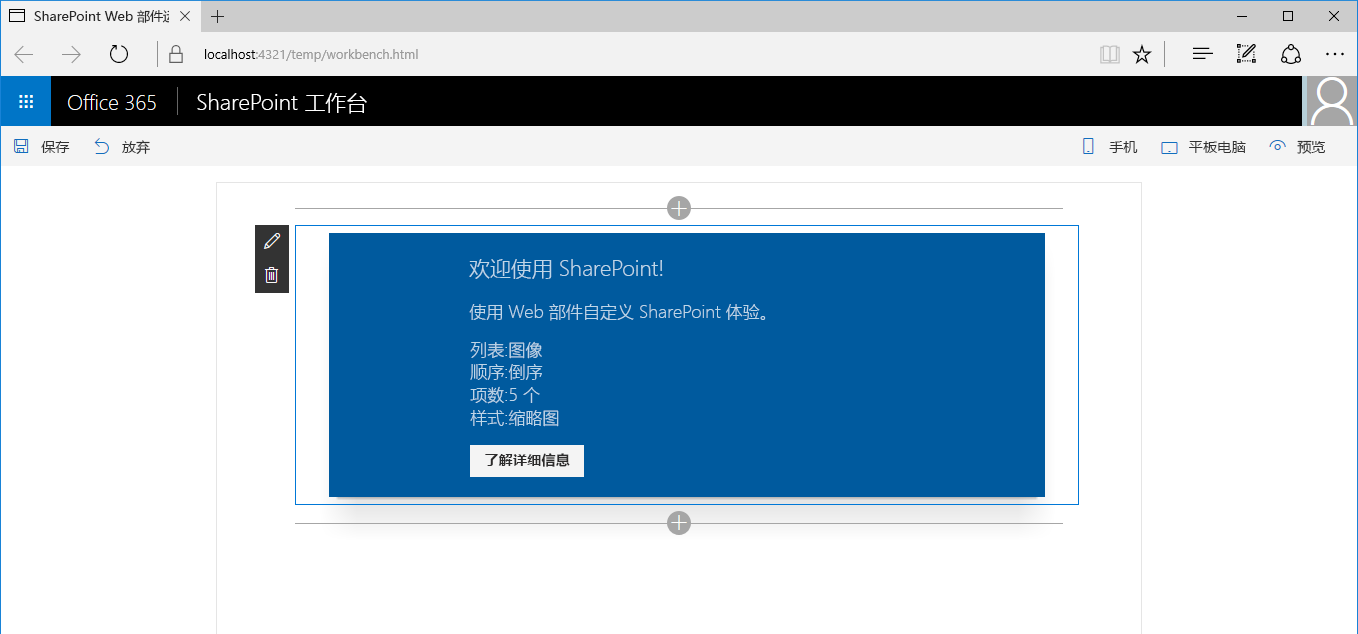
将 Web 部件添加到页面后,它便会立即使用预配置设置进行运行。
指定多个预配置 Web 部件项
假设另一组用户经常使用库 Web 部件来显示最近添加到其站点中的文档。 为了帮助他们使用 Web 部件,可以添加另一组预设来满足他们的配置需求。
在代码编辑器中,打开./src/webparts/gallery/GalleryWebPart.manifest.json 文件。 将
preconfiguredEntries属性更改为:{ // ... "preconfiguredEntries": [{ "groupId": "6737645a-4443-4210-a70e-e5e2a219133a", "group": { "default": "Content" }, "title": { "default": "Recent images" }, "description": { "default": "Shows 5 most recent images" }, "officeFabricIconFontName": "Picture", "properties": { "listName": "Images", "order": "reversed", "numberOfItems": 5, "style": "thumbnails" } }, { "groupId": "6737645a-4443-4210-a70e-e5e2a219133a", "group": { "default": "Content" }, "title": { "default": "Recent documents" }, "description": { "default": "Shows 10 most recent documents" }, "officeFabricIconFontName": "Documentation", "properties": { "listName": "Documents", "order": "reversed", "numberOfItems": 10, "style": "list" } }] }请注意,保持之前预配置的项完整不变,并使用不同的属性值在它旁边再添加一项。
若要查看结果,请运行以下命令,开始调试项目:
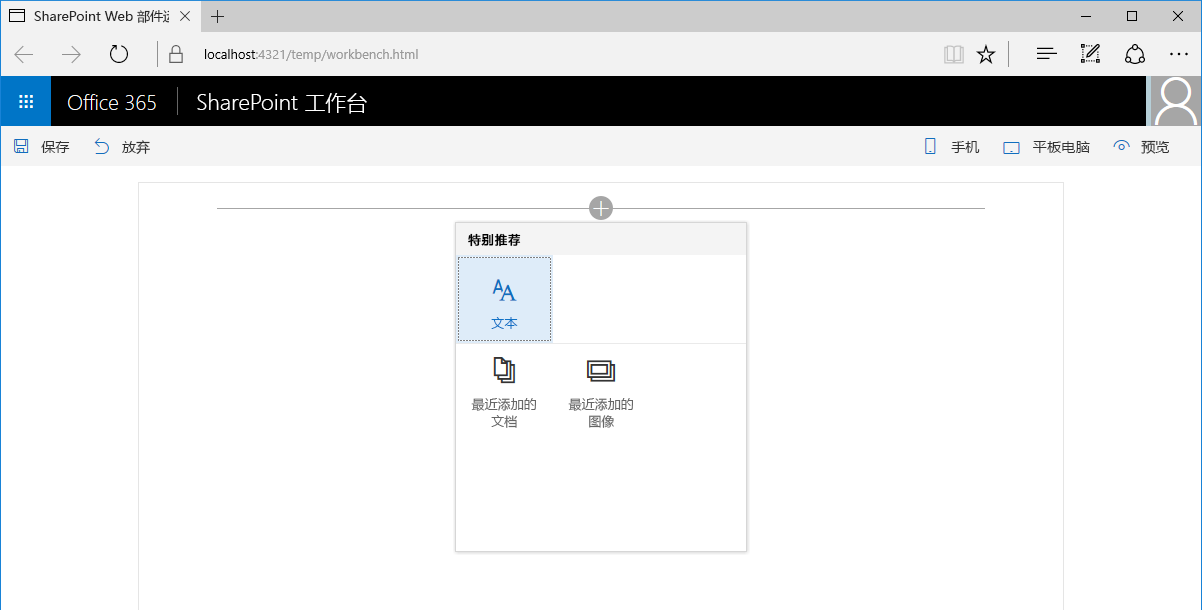
gulp serve打开 Web 部件工具箱将 Web 部件添加到画布时,可以看到有两个 Web 部件可供选择。
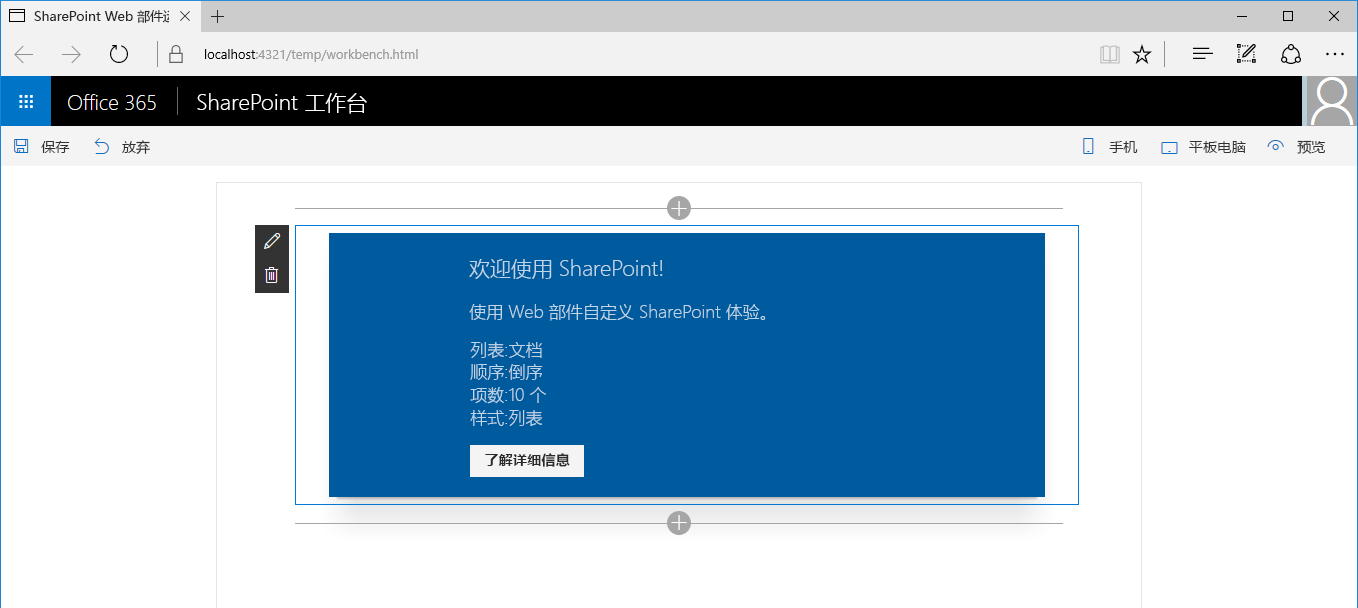
将“最近修改的多个文档”Web 部件添加到页面后,它会立即使用特定的预配置设置进行运行。
指定 Web 部件的未配置实例
生成 Web 部件时,经常会遇到 Web 部件应支持的特定方案。 提供这些方案的预配置项可方便用户更轻松地使用 Web 部件。
Web 部件还可以支持其他未预见的方案,具体视 Web 部件的生成方式而定。 如果仅提供特定预配置项,用户可能不会意识到自己可以将 Web 部件用于不同方案。 最好还提供 Web 部件的未配置通用变体。
在代码编辑器中,打开./src/webparts/gallery/GalleryWebPart.manifest.json 文件。 将
preconfiguredEntries属性更改为:{ // ... "preconfiguredEntries": [{ "groupId": "6737645a-4443-4210-a70e-e5e2a219133a", "group": { "default": "Content" }, "title": { "default": "Recent images" }, "description": { "default": "Shows 5 most recent images" }, "officeFabricIconFontName": "Picture", "properties": { "listName": "Images", "order": "reversed", "numberOfItems": 5, "style": "thumbnails" } }, { "groupId": "6737645a-4443-4210-a70e-e5e2a219133a", "group": { "default": "Content" }, "title": { "default": "Recent documents" }, "description": { "default": "Shows 10 most recent documents" }, "officeFabricIconFontName": "Documentation", "properties": { "listName": "Documents", "order": "reversed", "numberOfItems": 10, "style": "list" } }, { "groupId": "6737645a-4443-4210-a70e-e5e2a219133a", "group": { "default": "Content" }, "title": { "default": "Gallery" }, "description": { "default": "Shows items from the selected list" }, "officeFabricIconFontName": "CustomList", "properties": { "listName": "", "order": "", "numberOfItems": 5, "style": "" } }] }请注意,Web 部件的未配置通用版本添加在特定方案配置的旁边。 这样,如果没有满足用户需求的特定配置,他们始终可以使用通用版本,并根据自己的要求对其进行配置。
若要查看结果,请运行以下命令,开始调试项目:
gulp serve打开 Web 部件工具箱将 Web 部件添加到画布时,可以看到现在有三个 Web 部件可供用户选择。
