使用 Xamarin.iOS 中的 Core Graphics 和 Core Animation
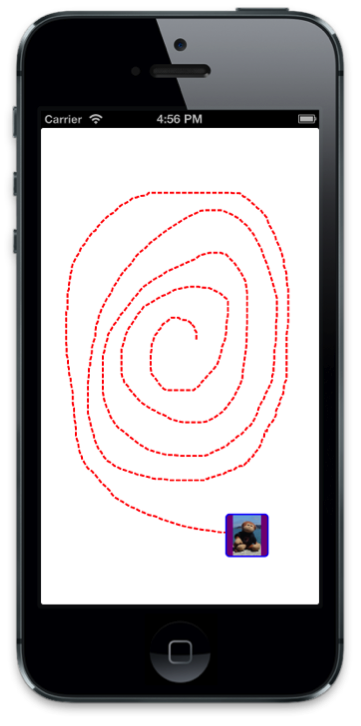
在本演练中,我们将使用 Core Graphics 绘制一条路径来响应触控输入。 然后,将添加一个 CALayer,其中包含为其制作沿路径移动动画的图像。
以下屏幕截图显示已完成的应用程序:

绘制路径
在
DemoView中,向类添加变量CGPath,并在构造函数中将其实例化。 另外声明两个CGPoint变量,initialPoint和latestPoint,我们将使用这些变量来捕获构建路径的触控点:public class DemoView : UIView { CGPath path; CGPoint initialPoint; CGPoint latestPoint; public DemoView () { BackgroundColor = UIColor.White; path = new CGPath (); } }添加以下 using 指令:
using CoreGraphics;
using CoreAnimation;
using Foundation;
接下来,重写
TouchesBegan和TouchesMoved,并添加以下实现,分别捕获初始触控点和每个后续触控点:public override void TouchesBegan (NSSet touches, UIEvent evt){ base.TouchesBegan (touches, evt); UITouch touch = touches.AnyObject as UITouch; if (touch != null) { initialPoint = touch.LocationInView (this); } } public override void TouchesMoved (NSSet touches, UIEvent evt){ base.TouchesMoved (touches, evt); UITouch touch = touches.AnyObject as UITouch; if (touch != null) { latestPoint = touch.LocationInView (this); SetNeedsDisplay (); } }每次触控移动时都会调用
SetNeedsDisplay,以便在下一个运行循环传递时调用Draw。我们将向
Draw方法中的路径添加线条,并使用红色虚线进行绘制。 使用如下代码实现Draw:public override void Draw (CGRect rect){ base.Draw (rect); if (!initialPoint.IsEmpty) { //get graphics context using(CGContext g = UIGraphics.GetCurrentContext ()){ //set up drawing attributes g.SetLineWidth (2); UIColor.Red.SetStroke (); //add lines to the touch points if (path.IsEmpty) { path.AddLines (new CGPoint[]{initialPoint, latestPoint}); } else { path.AddLineToPoint (latestPoint); } //use a dashed line g.SetLineDash (0, new nfloat[] { 5, 2 * (nfloat)Math.PI }); //add geometry to graphics context and draw it g.AddPath (path); g.DrawPath (CGPathDrawingMode.Stroke); } } }
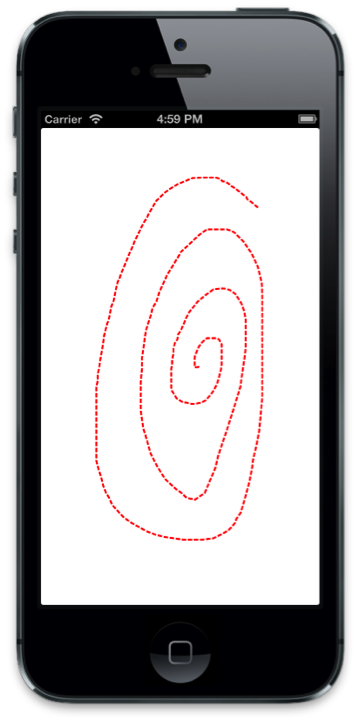
如果现在运行应用程序,可以通过触控在屏幕上绘制,如以下屏幕截图所示:

制作沿路径移动动画
现在,我们已经实现了代码以允许用户绘制路径,接下来添加代码为图层制作动画以沿着绘制的路径移动。
首先,将
CALayer变量添加到类并在构造函数中创建该变量:public class DemoView : UIView { … CALayer layer; public DemoView (){ … //create layer layer = new CALayer (); layer.Bounds = new CGRect (0, 0, 50, 50); layer.Position = new CGPoint (50, 50); layer.Contents = UIImage.FromFile ("monkey.png").CGImage; layer.ContentsGravity = CALayer.GravityResizeAspect; layer.BorderWidth = 1.5f; layer.CornerRadius = 5; layer.BorderColor = UIColor.Blue.CGColor; layer.BackgroundColor = UIColor.Purple.CGColor; }接下来,当用户从屏幕上抬起手指时,我们将添加图层作为视图图层的子图层。 然后,我们将使用路径创建关键帧动画,为图层的
Position制作动画。为此,我们需要重写
TouchesEnded并添加以下代码:public override void TouchesEnded (NSSet touches, UIEvent evt) { base.TouchesEnded (touches, evt); //add layer with image and animate along path if (layer.SuperLayer == null) Layer.AddSublayer (layer); // create a keyframe animation for the position using the path layer.Position = latestPoint; CAKeyFrameAnimation animPosition = (CAKeyFrameAnimation)CAKeyFrameAnimation.FromKeyPath ("position"); animPosition.Path = path; animPosition.Duration = 3; layer.AddAnimation (animPosition, "position"); }现在运行应用程序,绘制后,将添加一个带有图像的图层并沿着绘制的路径移动:

总结
在本文中,我们逐步完成了一个将图形和动画概念联系在一起的示例。 首先,我们演示了如何使用 Core Graphics 在 UIView 中绘制一条路径来响应用户触控。 然后,我们演示了如何使用 Core Animation 使图像沿着该路径移动。