Get started managing your project
TFS 2018
With most Azure DevOps Services, you can start using the service and configure resources as you go. No up-front work is required. Most settings define defaults.
If you created a project or you're added to the Project Administrators group, get familiar with the administrative tasks you're charged with. There are a few tasks you might want to do to ensure a smooth operational experience.
Note
This article provides an overview of tasks a member of the Project Administrators group should review and attend to. For information on tasks to be performed by members of the Project Collection Administrators group, see Manage your organization or project collection.
Add users to your project
You add users to a team or project so they can contribute to the team and project. Users can be added to multiple teams and projects.
Users that have been added to an organization, can easily be added to a project by adding them to a team or inviting them to contribute to a project.
Team administrators can add users to their team which automatically adds them to the project. By adding users to a team, you make team-specific tools aware of them, such as the team security group, Team Members widget, and sprint capacity planning tools. To learn more about teams, see About teams and Agile tools.
Members of the Project Administrators group can add users to a project. Adding users to a team or project automatically adds them to the project's Contributors group. Members of this group have permissions to most features needed to contribute to work items, code, builds, and releases. For an overview of default permissions, see Default permissions quick reference.
Once users have been added to a project or organization, you can browse for their display name or user name (email alias) from any people-picker tool. Users can connect to a project and access features available through a supported client or the web portal.
To learn more, see the following articles:
- Add users or groups to a team or project
- Manage your organization or project collection, Add users to your organization
- Connect to a project
Share your project vision, set up a project wiki
Each project has a summary page that's useful for sharing information through README files. For users who are new to your project, we recommend that you set up your project summary page. Or, you can provision a Wiki. Use these features to share established processes and procedures for your project.
Manage security and permissions
Permissions and security groups control access to select tasks. To quickly understand the defaults configured for your project, see Default permissions and access.
The following table lists the permissions assigned at the project-level. All of these permissions are granted to members of the Project Collection Administrators group. For a description of each permission, see Permissions and groups reference, Groups.
General
Delete team project
Edit project-level information
Manage project properties
Rename team project
View project-level information Boards
Create tag definition
Delete and restore work items
Permanently delete work items
Test Plans
- Create test runs
- Delete test runs
- Manage test configurations
- Manage test environments
- View test runs
For more information about security and setting permissions at the project-level, review the following articles:
Add members to the Project Administrators group
The person who creates a project is automatically added as a member to the Project Administrators group. Members of this group have permissions to manage project configuration, repositories, pipeline resources, teams, and all project-level permissions.
It's always a good idea to have more than one person who has administrative privileges. To add a user to this group, see Change permissions at the project level, Add members to the Project Administrators group.
Grant or restrict permissions
Permissions are managed at the following three levels and through role-based assignments.
- object
- project
- organization or collection
As a member of the Project Administrators group, you can grant or restrict permissions for all objects and at the project-level. To delegate specific tasks to others, we recommend that you add them to a built-in or custom security group, or add them to a specific role. For more information, see the following articles.
- Role-based permissions
- Add or remove users or groups, manage security groups
- Grant or restrict access to select features and functions
- Set object-level permissions
Review and update notifications
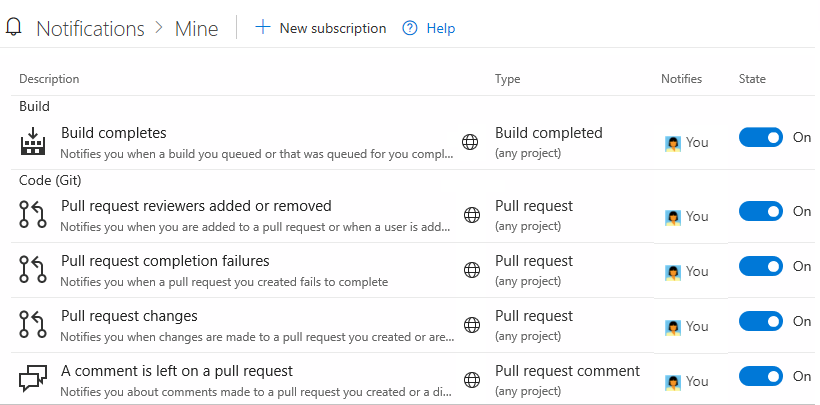
A number of notifications are predefined for each project you add. Notifications are based on subscription rules. Subscriptions arise from the following areas:
- Out-of-the-box or default subscriptions.
- Team, project, and organization or collection subscriptions defined by a team administrator or member of the Project Administrators or Project Collection Administrators groups.
If users believe they're getting too many notifications, you can direct them to opt out of a subscription.

Determine traceability requirements
If you're using most of Azure DevOps Services—Boards, Repos, Pipelines, and Test Plans— you'll want to alert your teams to those features that support end-to-end traceability. To get started, we recommend that you review the following articles:
Set DevOps policies
Set policies to support collaboration across your teams and automatically remove obsolete files. To set policies that govern Azure Repos, Azure Pipelines, and Azure Test Plans, review the following articles:
- Manage branch policies
- Add Team Foundation Version Control (TFVC) check-in policies
- Set build and release pipeline retention policies
- Set test retention policies
Configure and customize Azure Boards
You can configure and customize Azure Boards to support many business requirements for planning and tracking work. At a minimum, you should configure the following elements:
- Area paths to group work items by team, product, or feature area
- Iteration paths to group work into sprints, milestones, or other event-specific or time-related periods
If you're new to Azure Boards and want an in-depth overview of what you can configure and customize, see Configure and customize Azure Boards.
Define area and iteration paths to track work
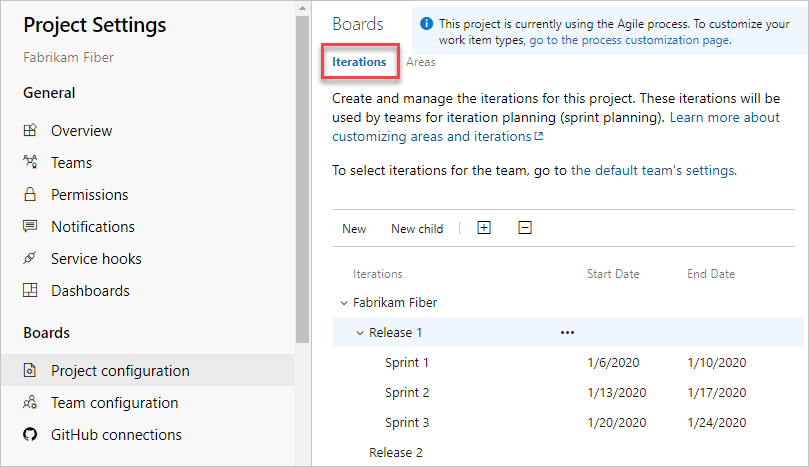
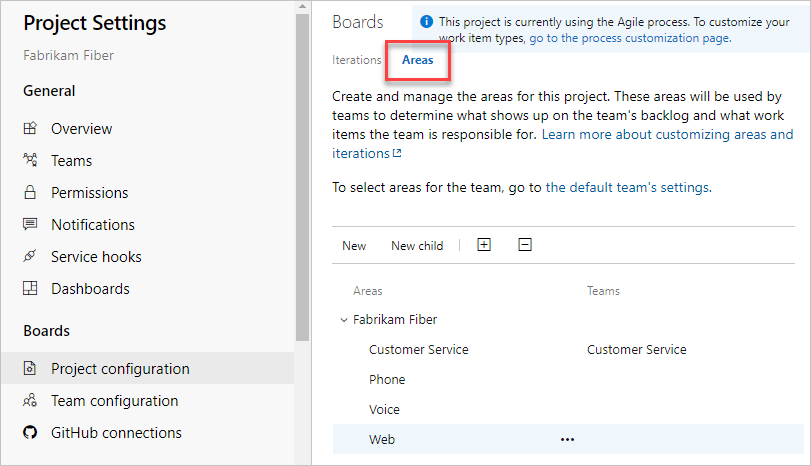
If you support several products, you can assign work items by feature area by defining area paths. To assign work items to specific time intervals, also known as sprints, you configure iteration paths. To use the Scrum tools—sprint backlogs, taskboards, and team capacity—you need to configure several sprints. For an overview, see About areas and iteration paths.
| Iterations | Areas |
|---|---|
 |
 |
Customize work-tracking processes
You and your team can start using all work-tracking tools immediately after you create a project. But often, one or more users want to customize the experience to meet one or more business needs. You can customize the process easily through the user interface. As such, you'll want to establish a methodology for who will manage the updates and evaluate requests.
Note
By default, organization owners and users added to the Project Collection Administrators security group are granted permission to create, edit, and manage processes used to customize the work-tracking experience. If you want to lock down who is able to perform these tasks, you can set permissions at the organization-level to Deny.
To learn more, see these articles:
- On-premises XML process customization
- Add or modify a field to track work
- Add or modify a work item type
Integrate with other services
Azure DevOps supports integration with Azure, GitHub, and many other services. As a member of the Project Administrators group, you can configure integration with many of these services. For more information, see the following articles.
Microsoft Teams integration:
Slack integration:
Add teams to scale your project
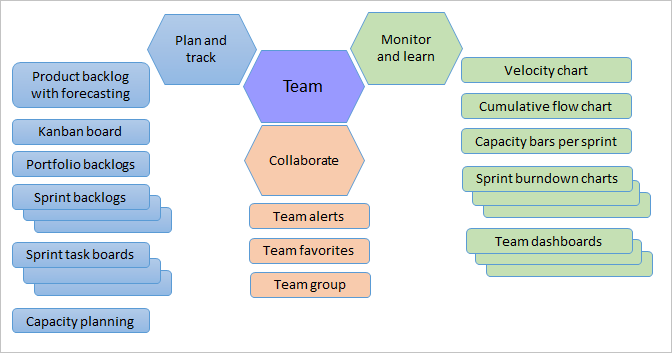
As your organization grows, we recommend that you add teams to scale your project. Each team gets access to their own set of customizable Agile tools.

To learn more, see the following articles:
- About projects and scaling your organization
- Add a team, move from one default team to several teams
- Add a team administrator