Live Share 画布概述
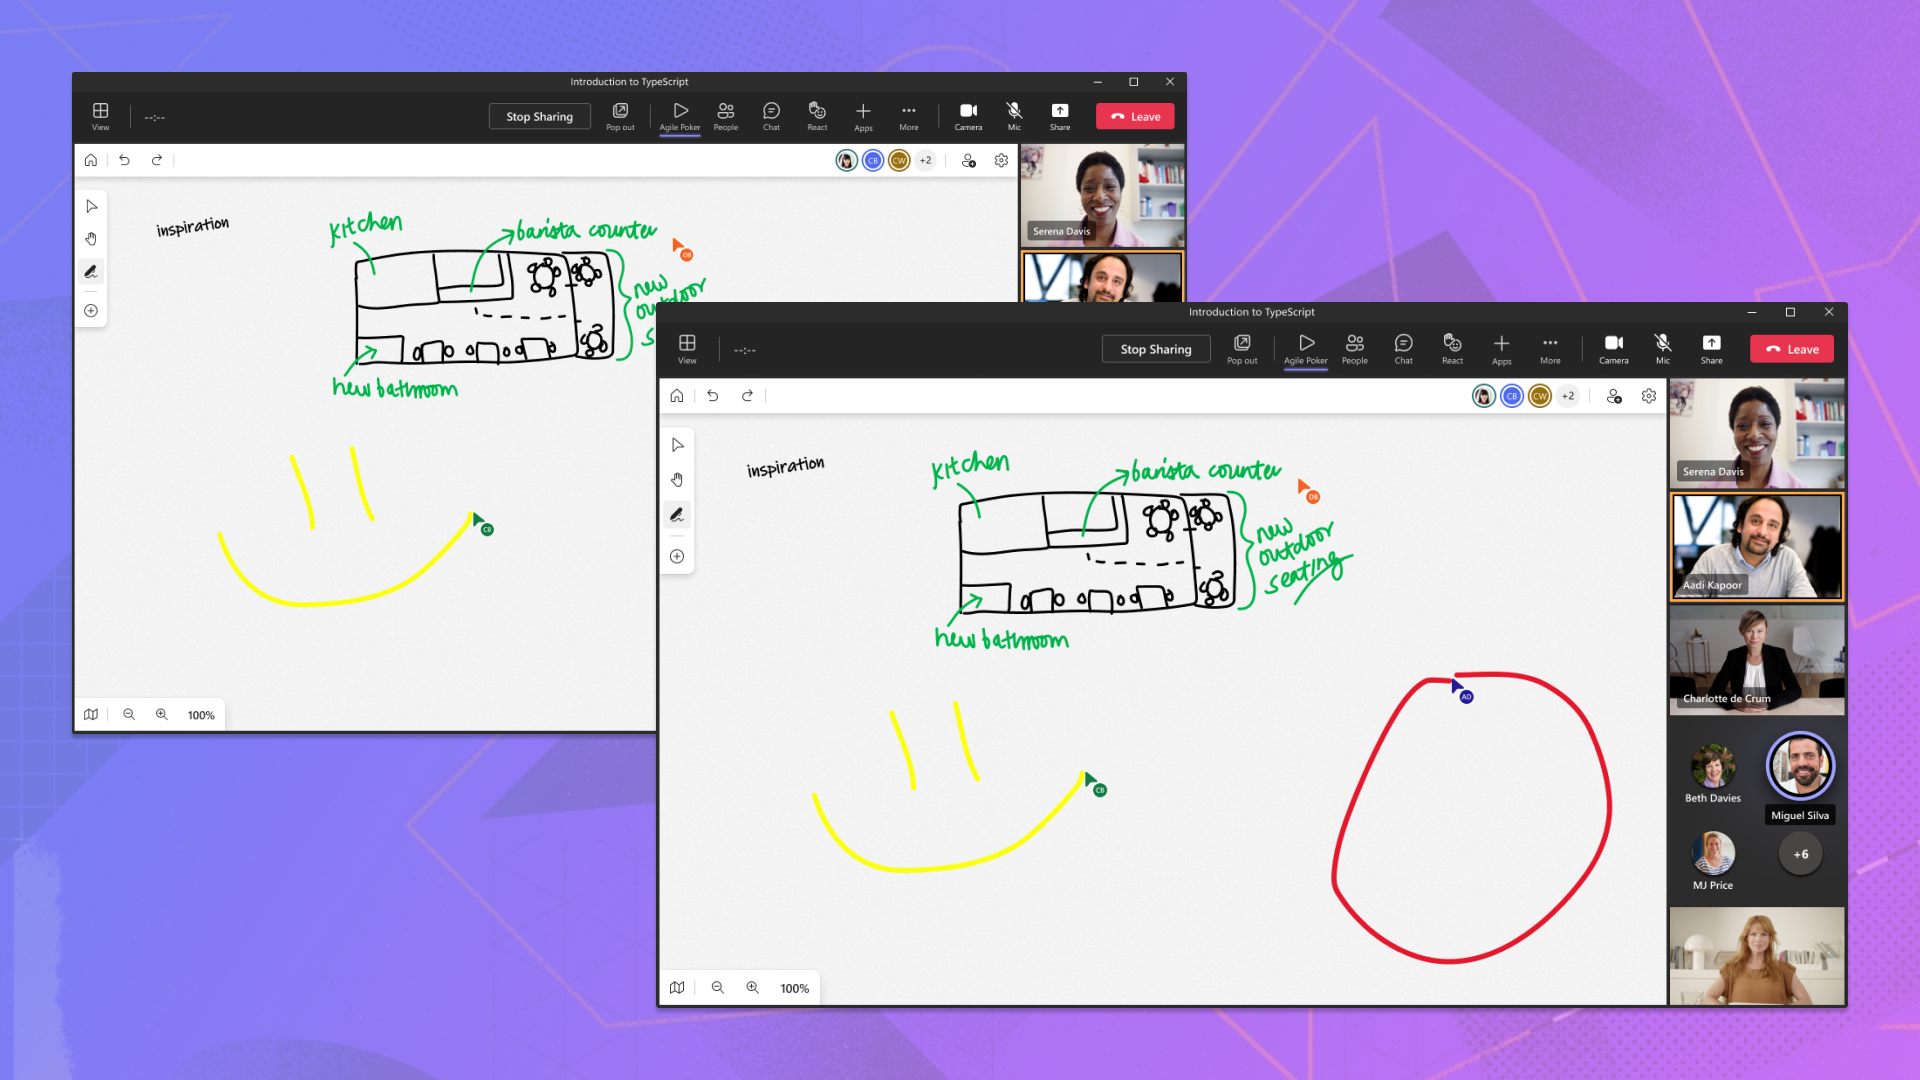
在全球会议室和教室中,白板是协作的关键部分。 然而,在现代,白板已经不够了。 由于 PowerPoint 等众多数字工具是现代协作的焦点,因此必须实现相同的创意潜力。
为了实现更无缝的协作,Microsoft创建了PowerPoint Live,这对人们在Microsoft Teams 中的工作方式至关重要。 演示者可以使用笔、荧光笔和激光笔在幻灯片上批注,让每个人都可以看到,以吸引人们对关键概念的注意。 使用 Live Share 画布,你的应用只需极少的工作量即可实现PowerPoint Live墨迹书写工具的强大功能。
安装
Live Share 画布是在 npm 上发布的 JavaScript 包,可以通过 npm 或 yarn 下载。 还必须安装其对等依赖项,其中包括 @microsoft/live-share、 fluid-framework和 @fluidframework/azure-client。 如果在选项卡应用程序中使用 Live Share,还必须安装 @microsoft/teams-js 版本 2.11.0 或更高版本。
npm install @microsoft/live-share @microsoft/live-share-canvas fluid-framework @fluidframework/azure-client --save
npm install @microsoft/teams-js --save
OR
若要使用 Yarn 将最新版本的 SDK 添加到应用程序,请执行以下操作:
yarn add @microsoft/live-share @microsoft/live-share-canvas fluid-framework @fluidframework/azure-client
yarn add @microsoft/teams-js
设置包
Live Share 画布有两个启用一次性协作的主要类: InkingManager 和 LiveCanvas。
InkingManager 负责将功能 <canvas> 齐全的元素附加到应用,同时 LiveCanvas 管理与其他已连接参与者的远程同步。 一起使用时,应用只需几行代码即可获得类似于白板的完整功能。
| 课程 | 说明 |
|---|---|
| InkingManager | 将元素附加到 <canvas> 给定 <div> 的 以自动管理笔或荧光笔笔笔划、激光笔、线条和箭头以及橡皮擦的类。 公开一组 API (,用于控制哪个工具处于活动状态) 和基本配置设置。 |
| LiveCanvas | 一个 SharedObject 类,用于同步 Live Share 会话中每个人的笔划和光标位置 InkingManager 。 |
示例:
<body>
  <div id="canvas-host"></div>
</body>
import { LiveShareClient } from "@microsoft/live-share";
import { InkingManager, LiveCanvas } from "@microsoft/live-share-canvas";
import { LiveShareHost } from "@microsoft/teams-js";

// Setup the Fluid container
const host = LiveShareHost.create(host);
const liveShare = new LiveShareClient(host);
const schema = {
  initialObjects: { liveCanvas: LiveCanvas },
};
const { container } = await liveShare.joinContainer(schema);
const { liveCanvas } = container.initialObjects;

// Get the canvas host element
const canvasHostElement = document.getElementById("canvas-host");
const inkingManager = new InkingManager(canvasHostElement);

// Begin synchronization for LiveCanvas
await liveCanvas.initialize(inkingManager);

inkingManager.activate();
画布工具和游标
设置并同步 Live Share 画布后,可以配置用于用户交互的画布,例如用于选择笔工具的按钮。 在本部分中,我们将讨论可用的工具及其使用方式。
墨迹书写工具
Live Share 画布中的每个墨迹书写工具都会在用户绘制时呈现笔划。 如果使用触摸屏或触笔,这些工具还支持压力动态,从而影响笔划宽度。 配置设置包括画笔颜色、粗细、形状和可选的结束箭头。
笔工具

笔工具绘制存储在画布中的实体笔划。 默认的笔尖形状是一个圆形。
<div>
  <button id="pen">Enable Pen</button>
  <label for="pen-color">Select a color:</label>
  <input type="color" id="color" name="color" value="#000000" />
  <button id="pen-tip-size">Increase pen size</button>
</div>
import {
  InkingManager,
  InkingTool,
  fromCssColor,
} from "@microsoft/live-share-canvas";
// ...

// Change the selected tool to pen
document.getElementById("pen").onclick = () => {
  inkingManager.tool = InkingTool.pen;
};
// Change the selected color for pen
document.getElementById("pen-color").onchange = () => {
  const colorPicker = document.getElementById("color");
  inkingManager.penBrush.color = fromCssColor(colorPicker.value);
};
// Increase the tip size for pen
document.getElementById("pen-tip-size").onclick = () => {
  inkingManager.penBrush.tipSize = inkingManager.penBrush.tipSize + 1;
};
荧光笔工具

荧光笔工具绘制存储在画布中的半透明笔划。 默认的笔尖形状为正方形。
<div>
  <button id="highlighter">Enable Highlighter</button><br />
  <label for="highlighter-color">Select a color:</label>
  <input type="color" id="highlighter-color" name="highlighter-color" value="#FFFC00" />
  <button id="highlighter-tip-size">Increase tip size</button>
</div>
import {
  InkingManager,
  InkingTool,
  fromCssColor,
} from "@microsoft/live-share-canvas";
// ...

// Change the selected tool to highlighter
document.getElementById("highlighter").onclick = () => {
  inkingManager.tool = InkingTool.highlighter;
};
// Change the selected color for highlighter
document.getElementById("highlighter-color").onchange = () => {
  const colorPicker = document.getElementById("highlighter-color");
  inkingManager.highlighterBrush.color = fromCssColor(colorPicker.value);
};
// Increase the tip size for highlighter
document.getElementById("highlighter-tip-size").onclick = () => {
  inkingManager.highlighterBrush.tipSize = inkingManager.penBrush.tipSize + 1;
};
橡皮擦工具
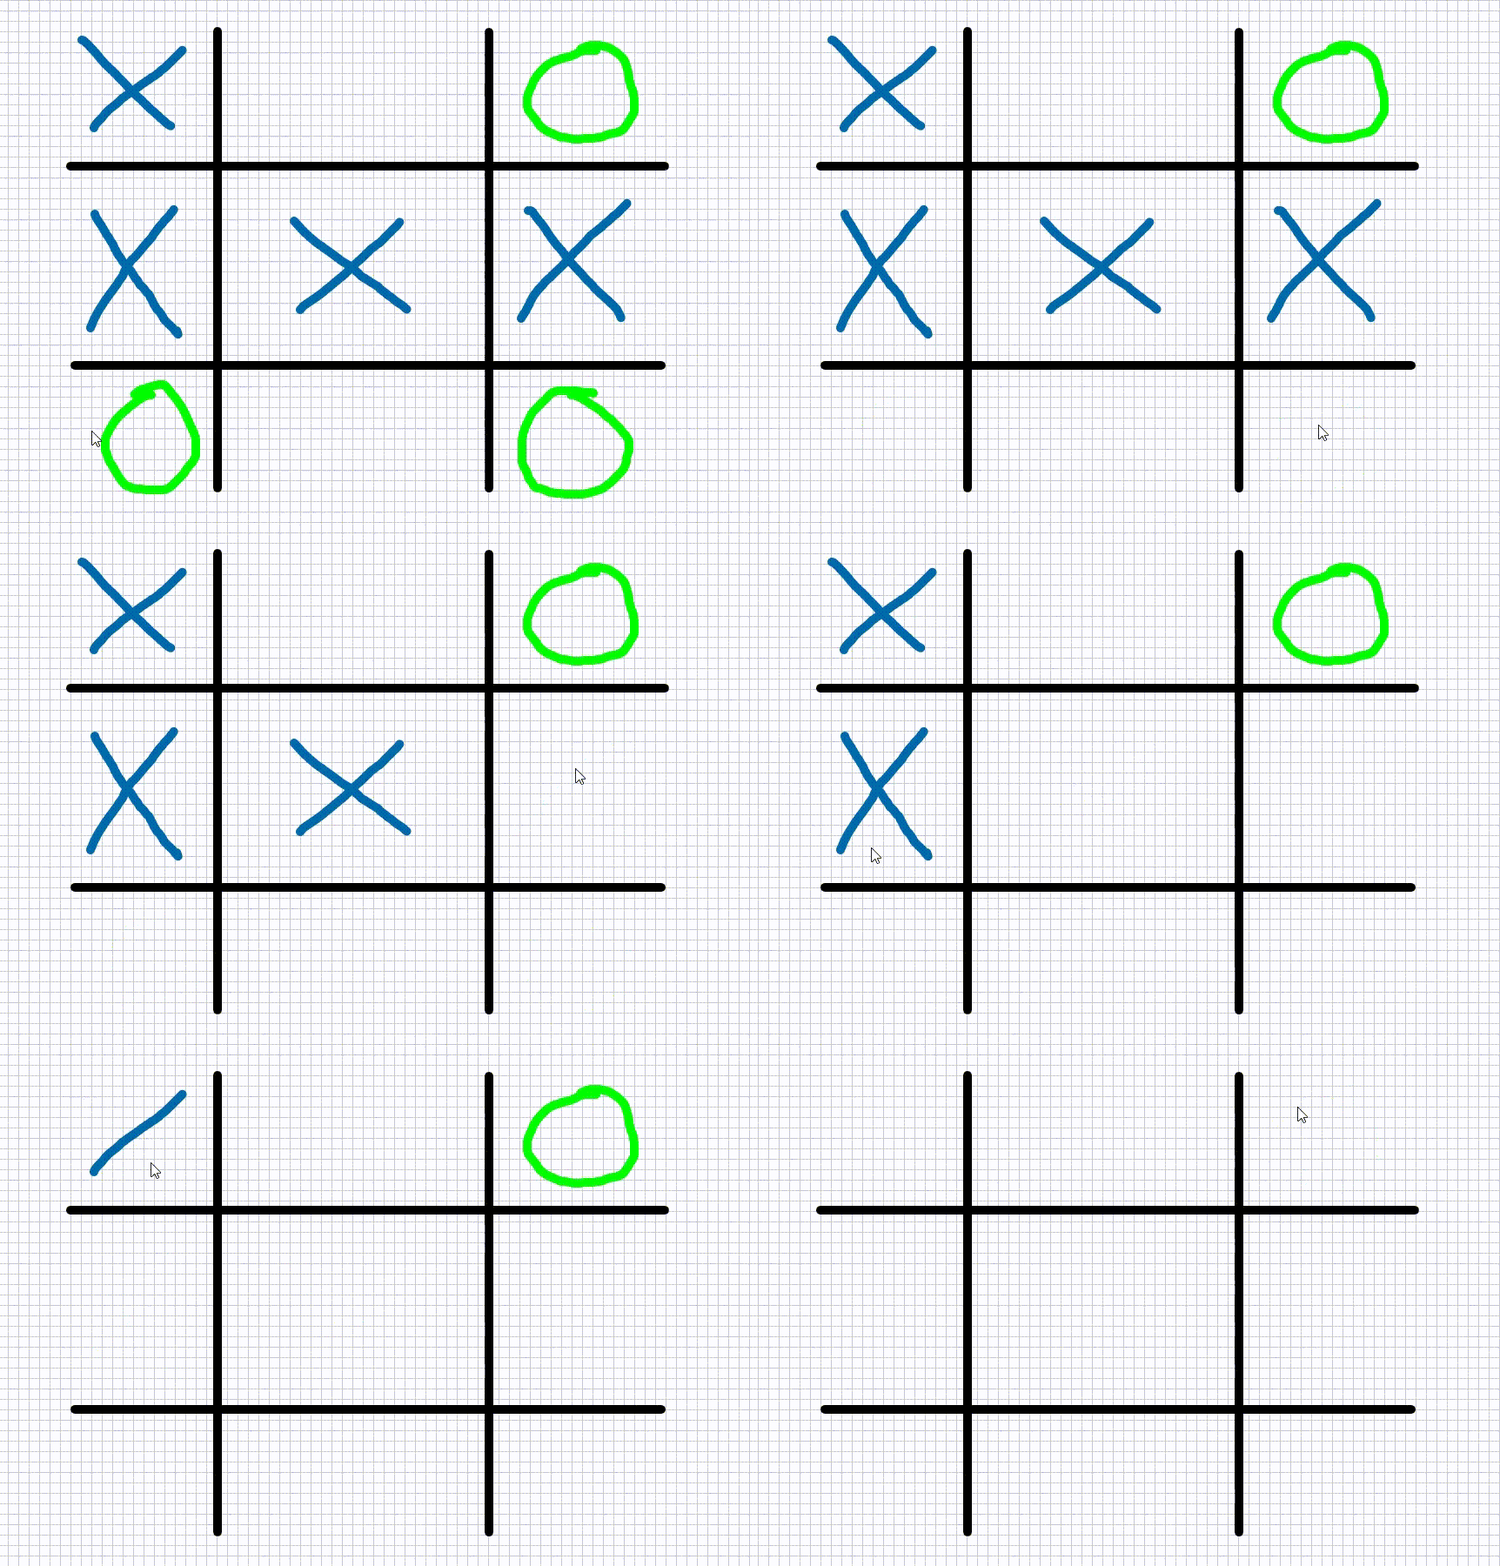
橡皮擦工具会清除穿过其路径的整个笔划。
<div>
  <button id="eraser">Enable Eraser</button><br />
  <button id="eraser-size">Increase eraser size</button>
</div>
import {
  InkingManager,
  InkingTool,
} from "@microsoft/live-share-canvas";
// ...

// Change the selected tool to eraser
document.getElementById("eraser").onclick = () => {
  inkingManager.tool = InkingTool.eraser;
};
// Increase the tip size for eraser
document.getElementById("eraser-size").onclick = () => {
  inkingManager.eraserSize = inkingManager.eraserSize + 1;
};
点橡皮擦工具
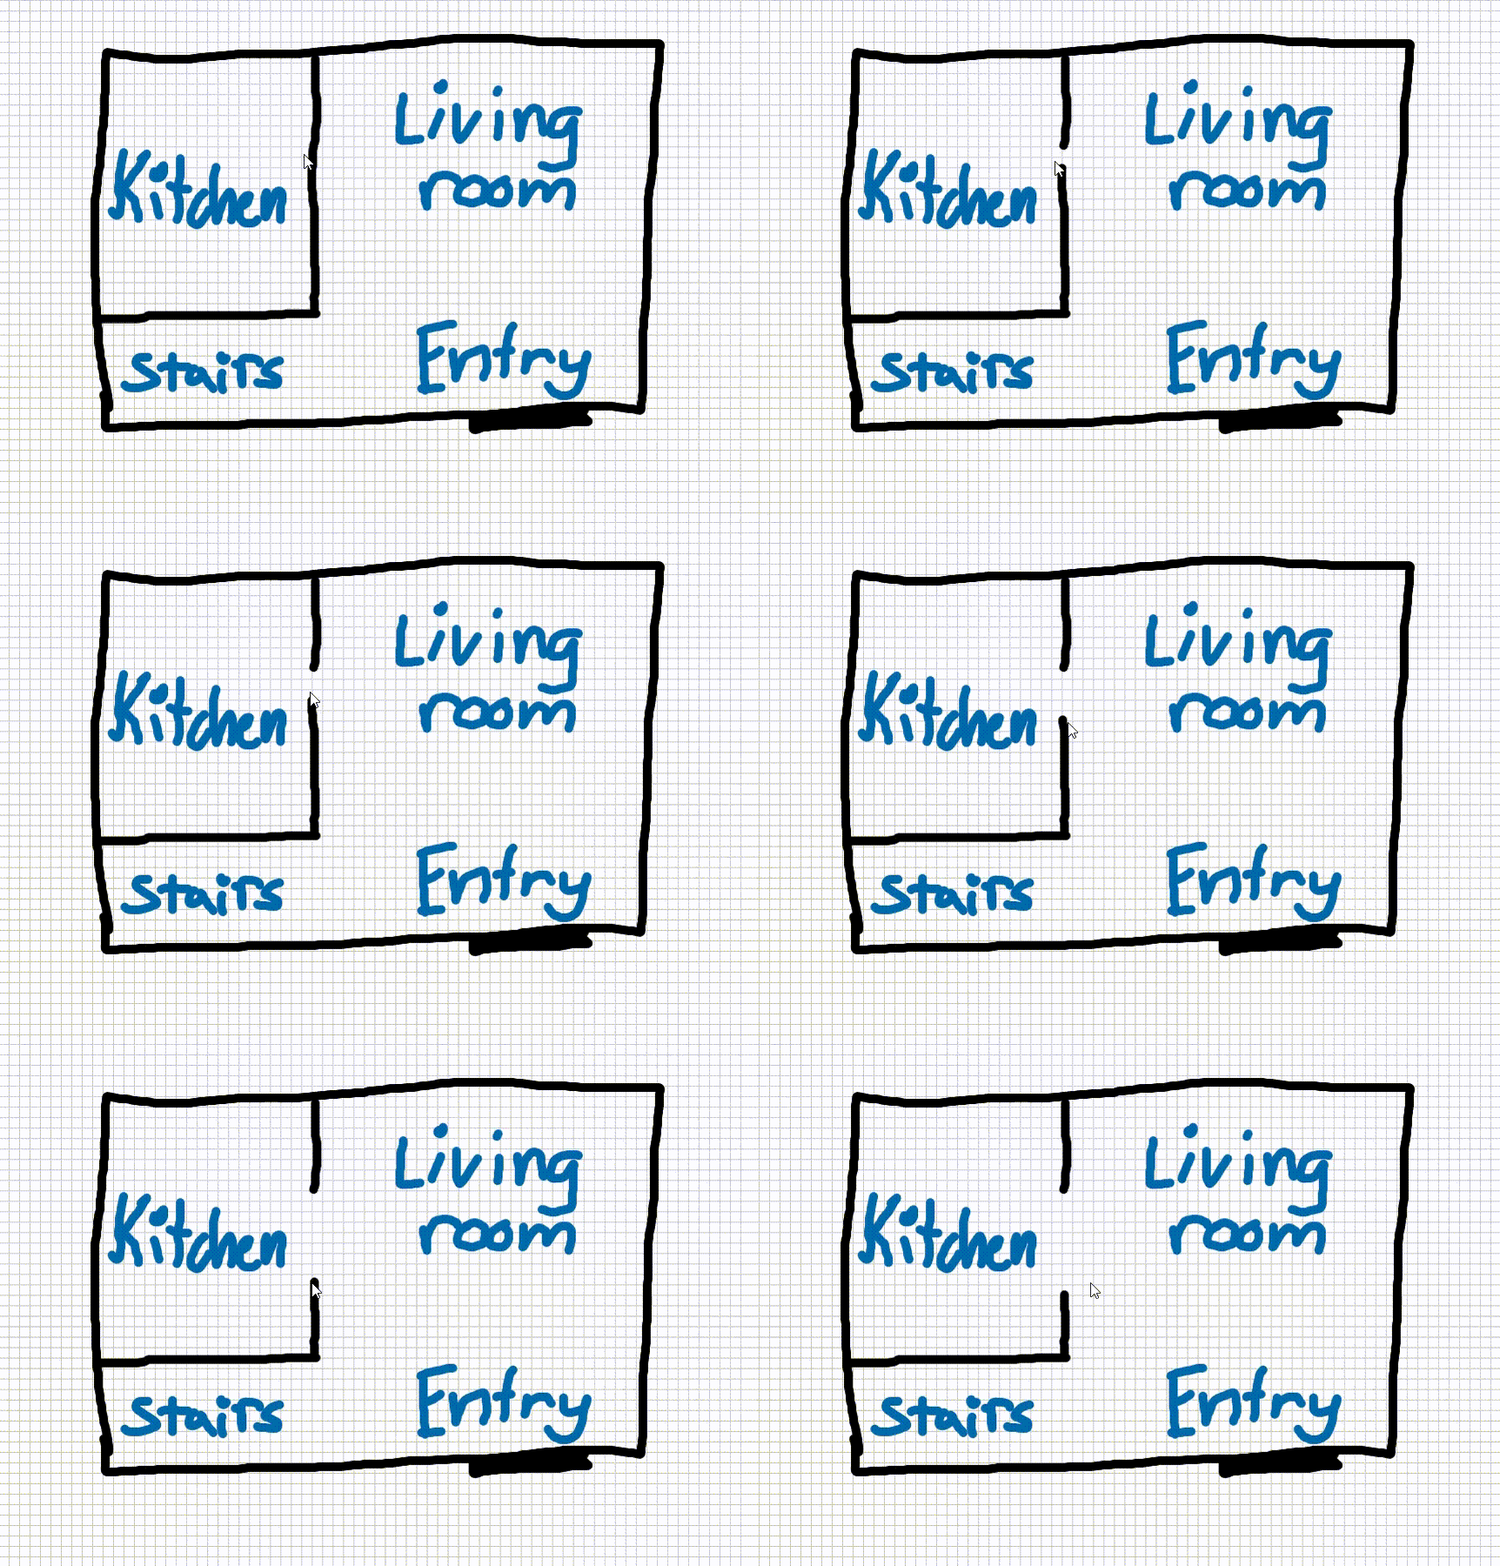
点橡皮擦工具通过将现有笔划拆分为两半,来清除笔划中跨越其路径的单个点。 此工具的计算成本高昂,可能会导致用户的帧速率变慢。
注意
点橡皮擦与常规橡皮擦工具具有相同的橡皮擦点大小。
<div>
  <button id="point-eraser">Enable Point Eraser</button><br />
</div>
import {
  InkingManager,
  InkingTool,
} from "@microsoft/live-share-canvas";
// ...

// Change the selected tool to eraser
document.getElementById("point-eraser").onclick = () => {
  inkingManager.tool = InkingTool.pointEraser;
};
激光笔
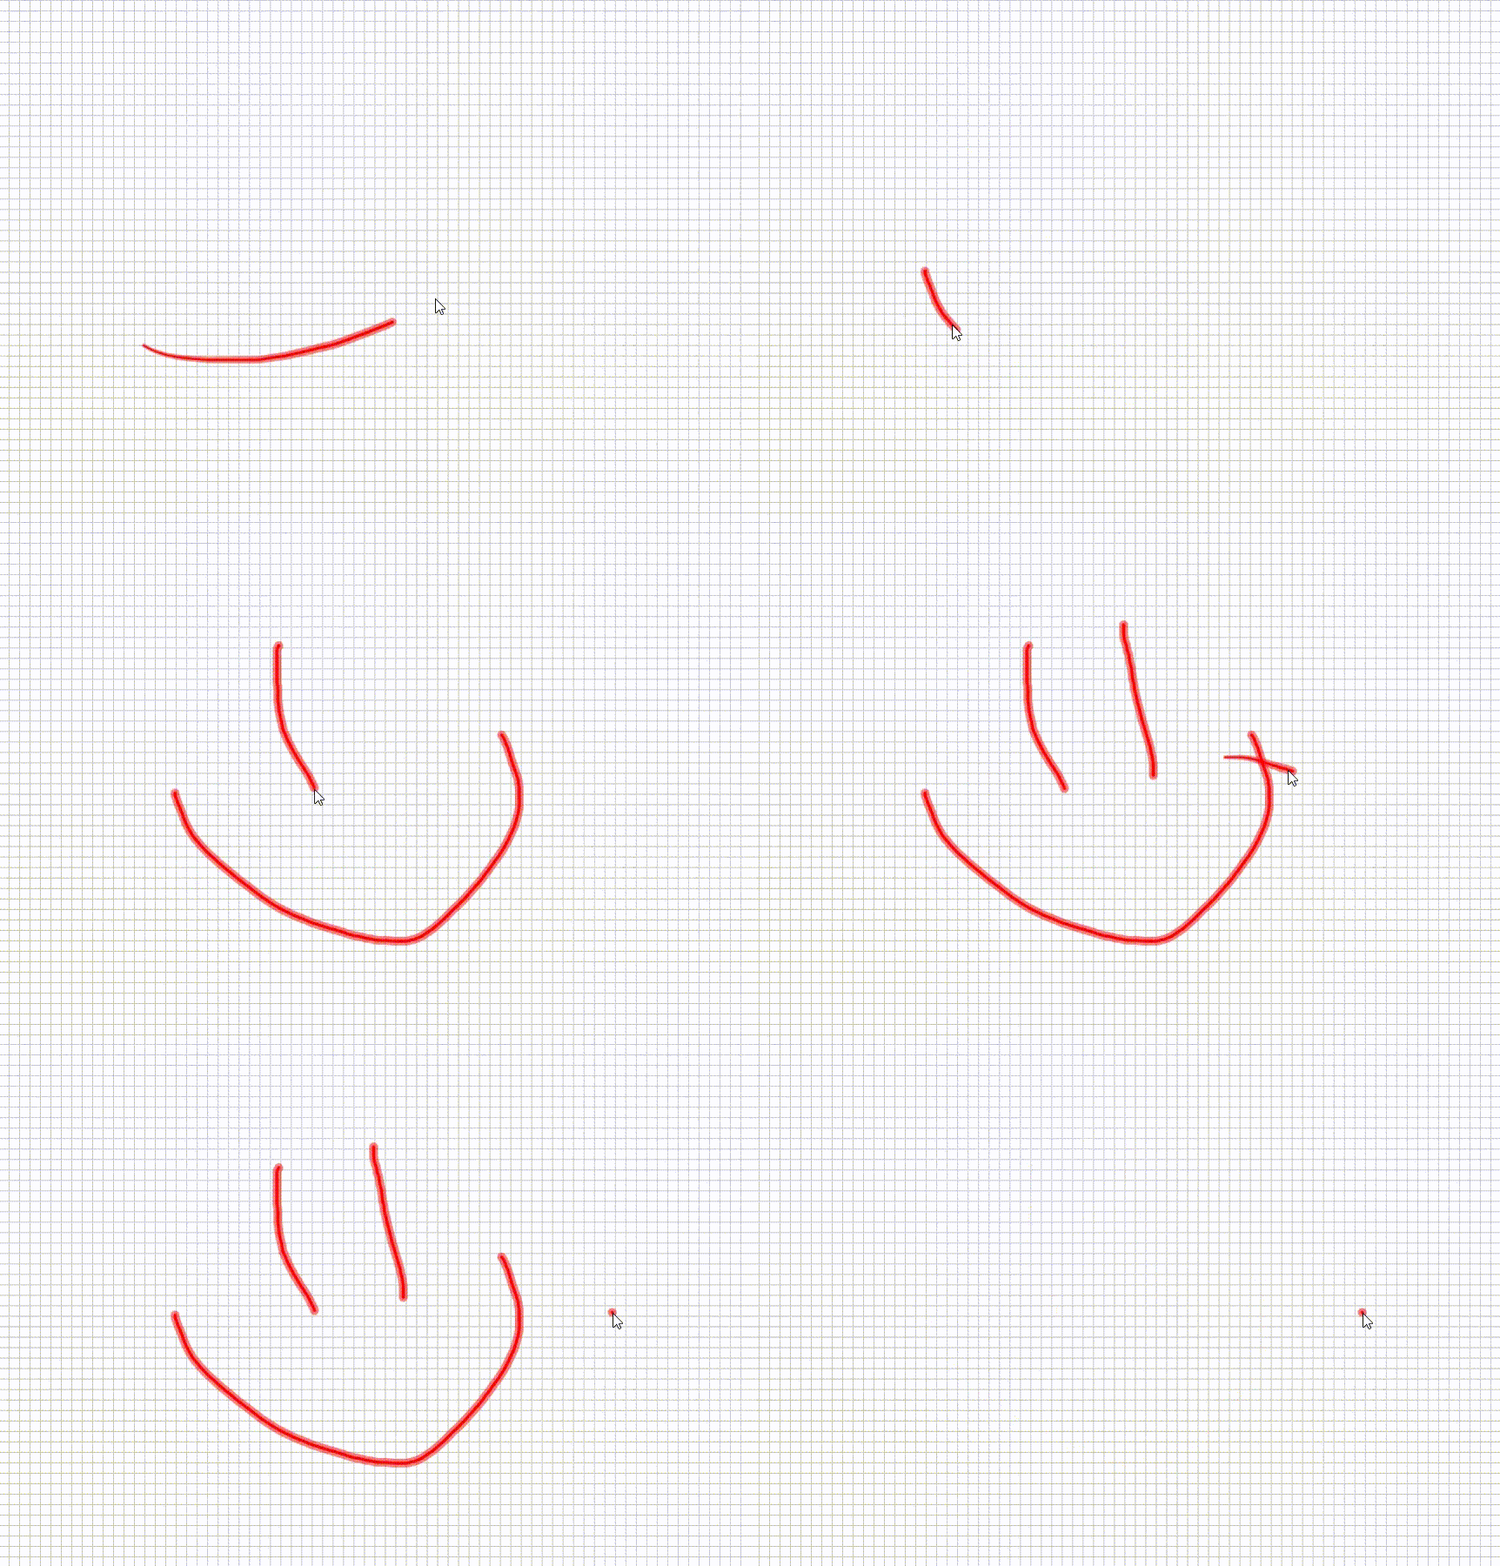
激光笔是唯一的,因为激光笔尖在移动鼠标时具有尾随效果。 绘制笔划时,尾随效果会呈现一小段时间,然后完全淡出。 此工具非常适合在协作期间指出屏幕上的信息,因为演示者无需在工具之间切换即可擦除笔划。
<div>
  <button id="laser">Enable Laser Pointer</button><br />
  <label for="laser-color">Select a color:</label>
  <input type="color" id="laser-color" name="laser-color" value="#000000" />
  <button id="laser-tip-size">Increase tip size</button>
</div>
import {
  InkingManager,
  InkingTool,
  fromCssColor,
} from "@microsoft/live-share-canvas";
// ...

// Change the selected tool to laser pointer
document.getElementById("laser").onclick = () => {
  inkingManager.tool = InkingTool.laserPointer;
};
// Change the selected color for laser pointer
document.getElementById("laser-color").onchange = () => {
  const colorPicker = document.getElementById("laser-color");
  inkingManager.laserPointerBrush.color = fromCssColor(colorPicker.value);
};
// Increase the tip size for laser pointer
document.getElementById("laser-tip-size").onclick = () => {
  inkingManager.laserPointerBrush.tipSize = inkingManager.laserPointerBrush.tipSize + 1;
};
线条和箭头工具

线条工具允许用户使用可应用于终点的可选箭头从一个点绘制到另一个点的直线。
<div>
  <button id="line">Enable Line</button><br />
  <button id="line-arrow">Enable Arrow</button><br />
  <input type="color" id="line-color" name="line-color" value="#000000" />
  <button id="line-tip-size">Increase tip size</button>
</div>
import {
  InkingManager,
  InkingTool,
  fromCssColor,
} from "@microsoft/live-share-canvas";
// ...

// Change the selected tool to line
document.getElementById("line").onclick = () => {
  inkingManager.tool = InkingTool.line;
  inkingManager.lineBrush.endArrow = "none";
};
// Change the selected tool to line
document.getElementById("line-arrow").onclick = () => {
  inkingManager.tool = InkingTool.line;
  inkingManager.lineBrush.endArrow = "open";
};
// Change the selected color for lineBrush
document.getElementById("line-color").onclick = () => {
  const colorPicker = document.getElementById("line-color");
  inkingManager.lineBrush.color = fromCssColor(colorPicker.value);
};
// Increase the tip size for lineBrush
document.getElementById("line-tip-size").onclick = () => {
  inkingManager.lineBrush.tipSize = inkingManager.lineBrush.tipSize + 1;
};
清除所有笔划
可以通过调用 inkingManager.clear()清除画布中的所有笔划。 这会从画布中删除所有笔划。
导入和导出原始笔划
Live Share Canvas 支持从 InkingManager中导入和导出原始笔划,这使你可以将它们导出到后端,以供以后在将来的会话中使用。
// Export raw strokes
const strokes = inkingManager.exportRaw();

// Optionally clear out existing strokes, and import strokes
inkingManager.clear();
inkingManager.importRaw(strokes);
将笔划导出为 SVG
可以将 中的 InkingManager 整个绘图导出为可缩放的矢量图形 (SVG) 。 SVG 内容以字符串的形式返回,然后你可以将其作为.svg文件扩展名存储在服务器中。
// Export raw strokes
const svgText = inkingManager.exportSVG();
游标

可以在应用程序中启用实时光标,以便用户跟踪对方在画布上的光标位置。 与墨迹书写工具不同,游标完全通过 LiveCanvas 类运行。 可以选择提供名称和图片来标识每个用户。 可以单独启用游标,也可以使用墨迹书写工具启用光标。
// Optional. Set user display info
liveCanvas.onGetLocalUserPictureUrl = () => "YOUR USER PICTURE URI";
// Toggle Live Canvas cursor enabled state
liveCanvas.isCursorShared = !isCursorShared;
跨设备优化
对于 Web 上的大多数应用程序,内容呈现方式因屏幕大小或应用程序状态而异。 如果未 InkingManager 针对应用进行正确优化,可能会导致每个用户的笔划和游标以不同的方式显示。 Live Share 画布支持一组简单的 API,这些 API 允许 <canvas> 调整笔划位置,以便与内容正确对齐。
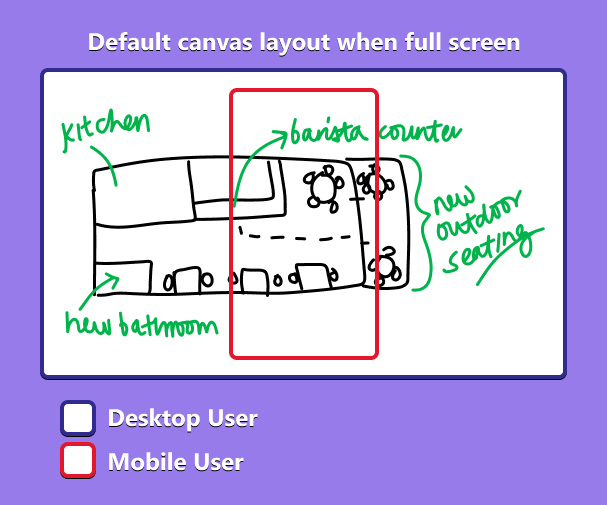
默认情况下,Live Share 画布的工作方式非常类似于白板应用,内容以 1 倍缩放级别居中对齐视区。 只有部分内容在 的可见边界 <canvas>内呈现。 从概念上讲,这就像从鸟瞰图录制视频。 虽然相机的视区正在记录其下方世界的一部分,但现实世界几乎在每一个方向上无限延伸。
下面是一个有助于可视化此概念的简单关系图:
可通过以下方式自定义此行为:
- 将起始引用点更改为画布的左上角。
- 更改视区 x 和 y 位置的像素偏移量。
- 更改视区的比例级别。
注意
引用点、偏移量和缩放级别是客户端本地的,不会跨连接的参与者同步。
示例:
<body>
  <button id="pan-left">Pan left</button>
  <button id="pan-up">Pan up</button>
  <button id="pan-right">Pan right</button>
  <button id="pan-down">Pan down</button>
  <button id="zoom-out">Zoom out</button>
  <button id="zoom-in">Zoom in</button>
  <button id="change-reference">Change reference</button>
</body>
// ...

// Pan left
document.getElementById("pan-left").onclick = () => {
  inkingManager.offset = {
    x: inkingManager.offset.x - 10,
    y: inkingManager.offset.y,
  };
};
// Pan up
document.getElementById("pan-up").onclick = () => {
  inkingManager.offset = {
    x: inkingManager.offset.x,
    y: inkingManager.offset.y - 10,
  };
};
// Pan right
document.getElementById("pan-right").onclick = () => {
  inkingManager.offset = {
    x: inkingManager.offset.x + 10,
    y: inkingManager.offset.y,
  };
};
// Pan down
document.getElementById("pan-down").onclick = () => {
  inkingManager.offset = {
    x: inkingManager.offset.x,
    y: inkingManager.offset.y + 10,
  };
};
// Zoom out
document.getElementById("zoom-out").onclick = () => {
  if (inkingManager.scale > 0.1) {
    inkingManager.scale -= 0.1;
  }
};
// Zoom in
document.getElementById("zoom-in").onclick = () => {
  inkingManager.scale += 0.1;
};
// Change reference
document.getElementById("change-reference").onclick = () => {
  if (inkingManager.referencePoint === "center") {
    inkingManager.referencePoint = "topLeft";
  } else {
    inkingManager.referencePoint = "center";
  }
};
理想方案
由于网页具有各种形状和大小,因此无法使 Live Share 画布支持每种方案。 该包非常适合所有用户同时查看相同内容的场景。 虽然并非所有内容都需要在屏幕上可见,但它必须是跨设备线性缩放的内容。
下面是 Live Share 画布是应用程序的绝佳选项的几个方案示例:
- 覆盖在所有客户端上以相同纵横比呈现的图像和视频。
- 从同一旋转角度查看地图、3D 模型或白板。
这两种方案都运行良好,因为即使用户以不同的缩放级别和偏移量查看内容,也可以在所有设备上以相同的方式查看内容。 如果应用的布局或内容因屏幕大小而异,并且无法为所有参与者生成通用视图,则 Live Share 画布可能不适合你的方案。
代码示例
| 示例名称 | Description | JavaScript |
|---|---|---|
| 实时画布演示 | 简单的白板应用程序。 | View |
| React 媒体模板 | 在同步的视频播放器上绘制。 | View |